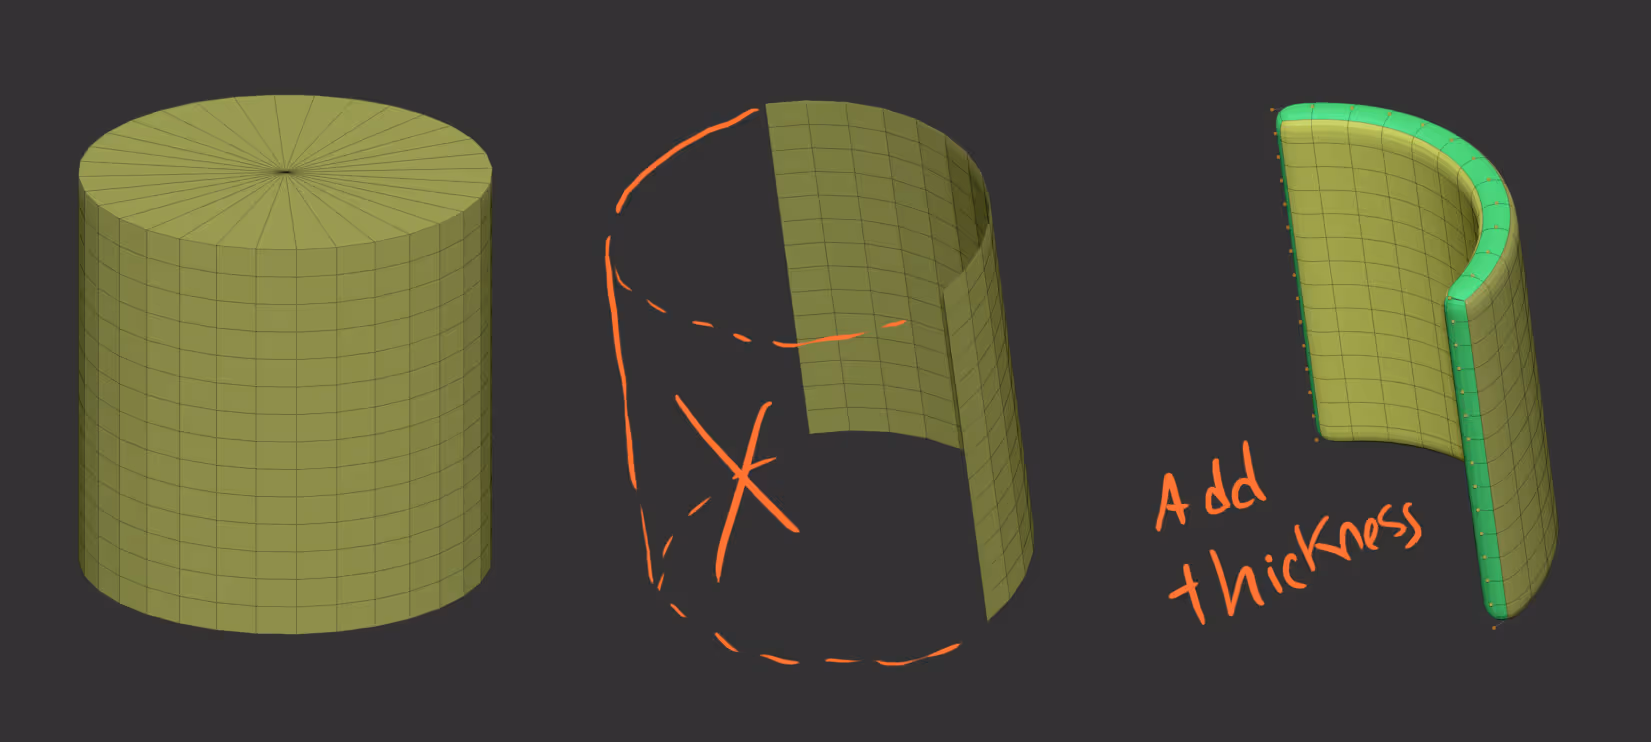
So, for this specific example, you can start with a primitive cylinder, turn it into a PolyMesh 3D, hide more than half of it and delete the hidden geometry… this would be the shape of your roof tile. Then you can add a bit of thickness with Dynamic Subdivision or use the ZModeler tool:
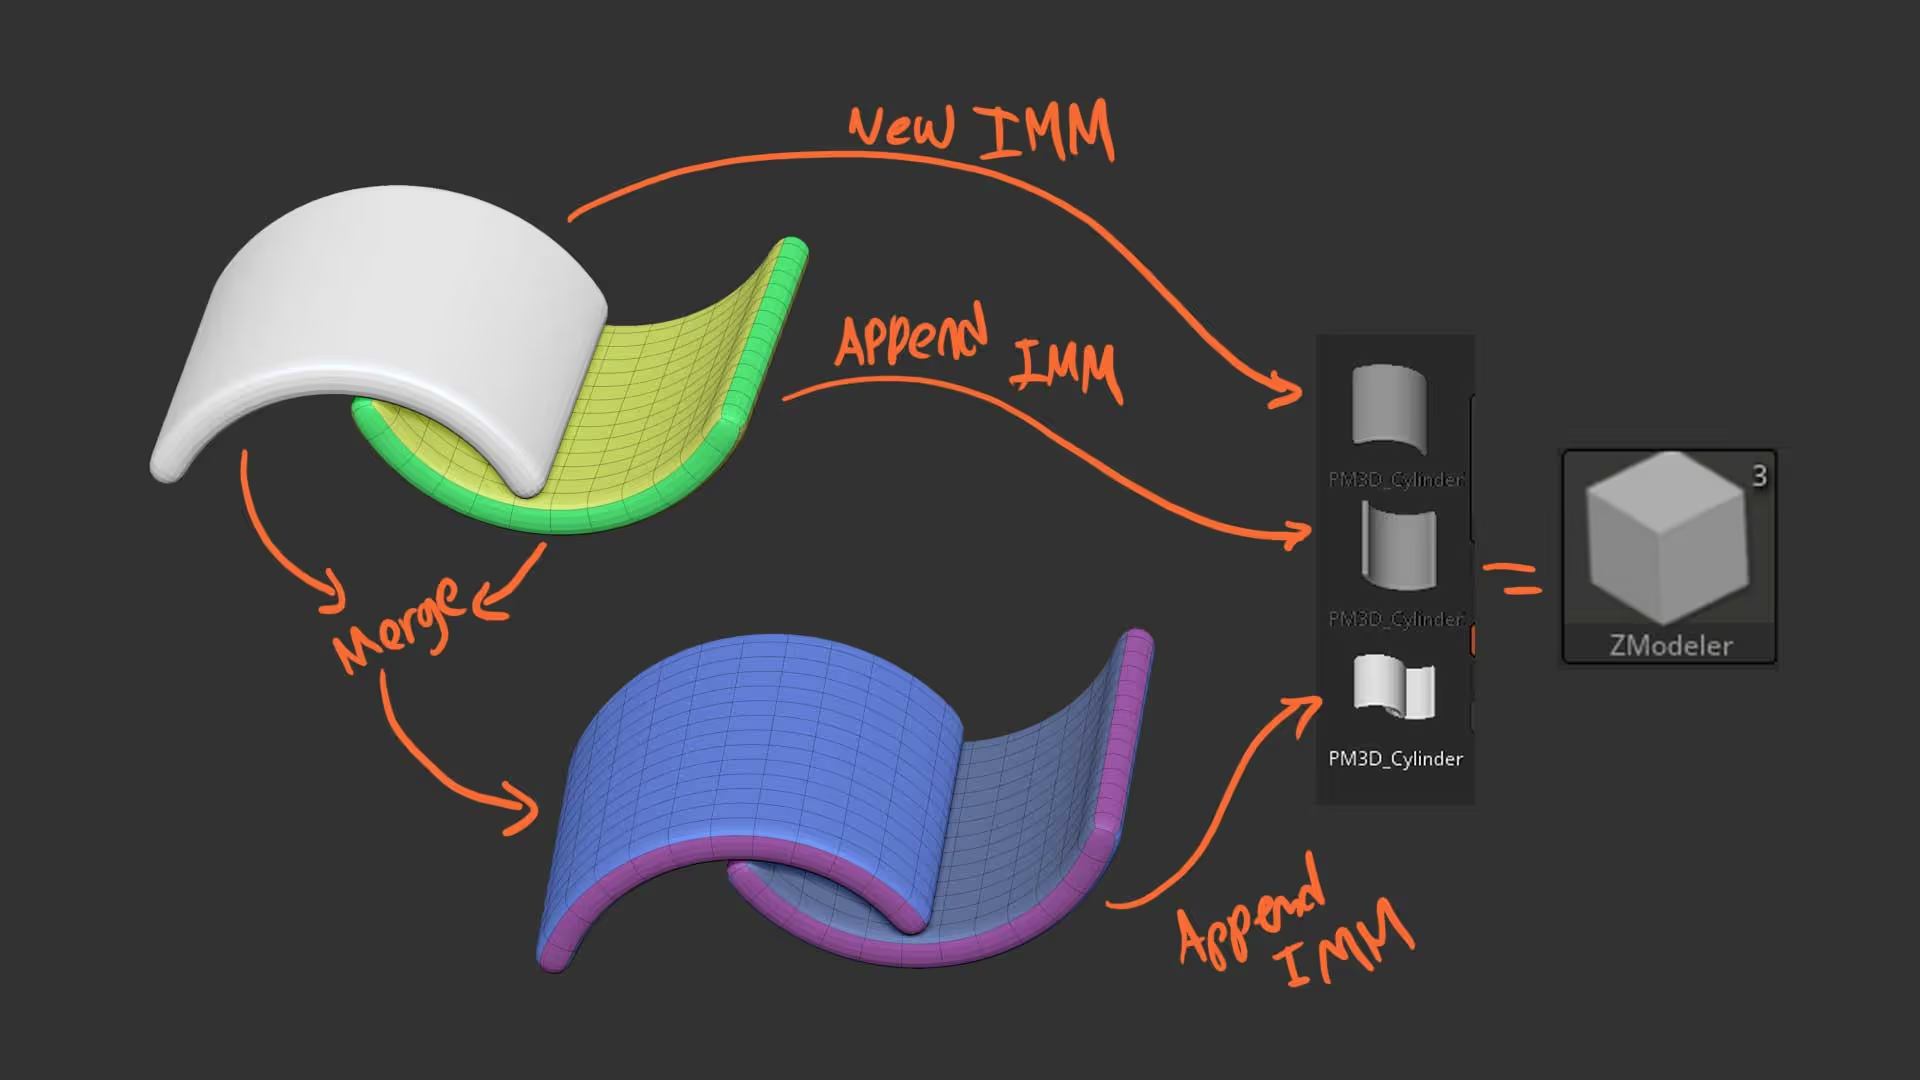
Once you have your simple base mesh (remember this could be anything), you can convert the mesh into an IMM brush before turning it into a NanoMesh brush. In my case I created 3 variations from the same object so try different patterns:
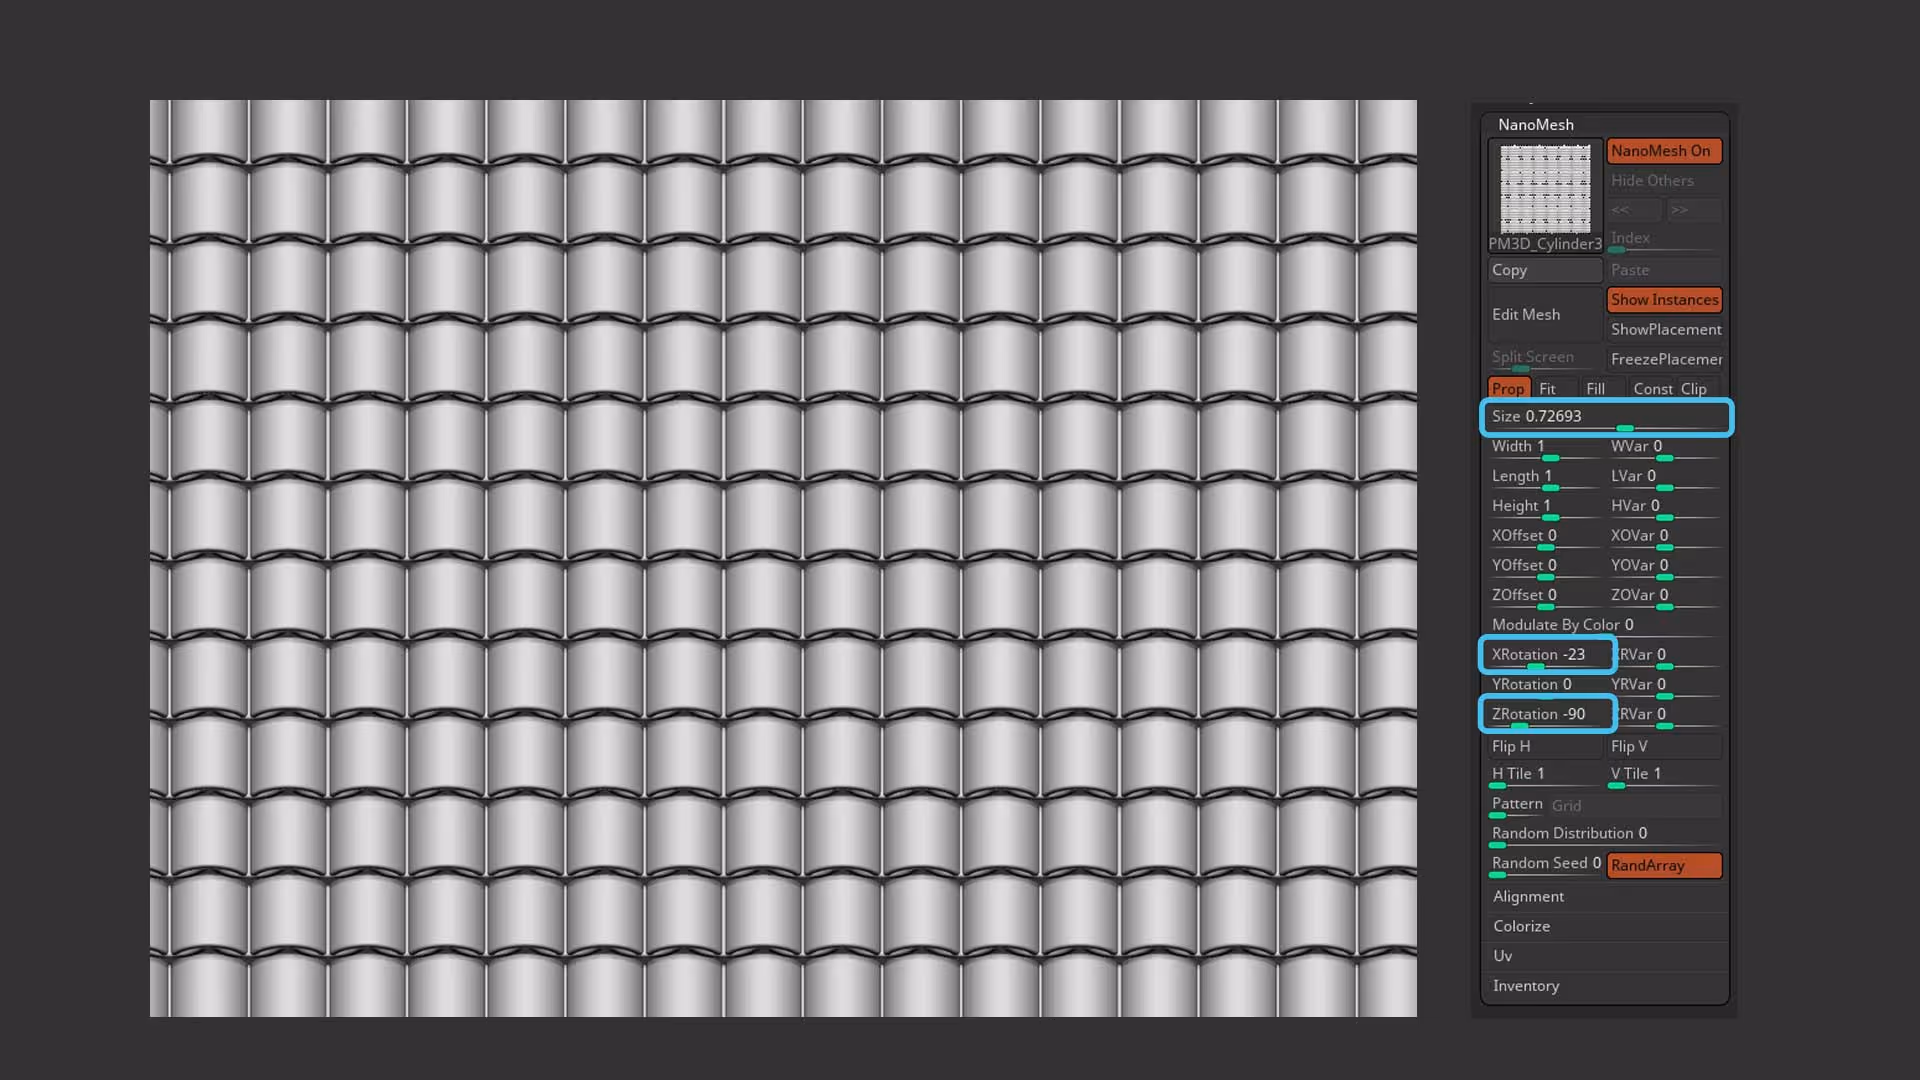
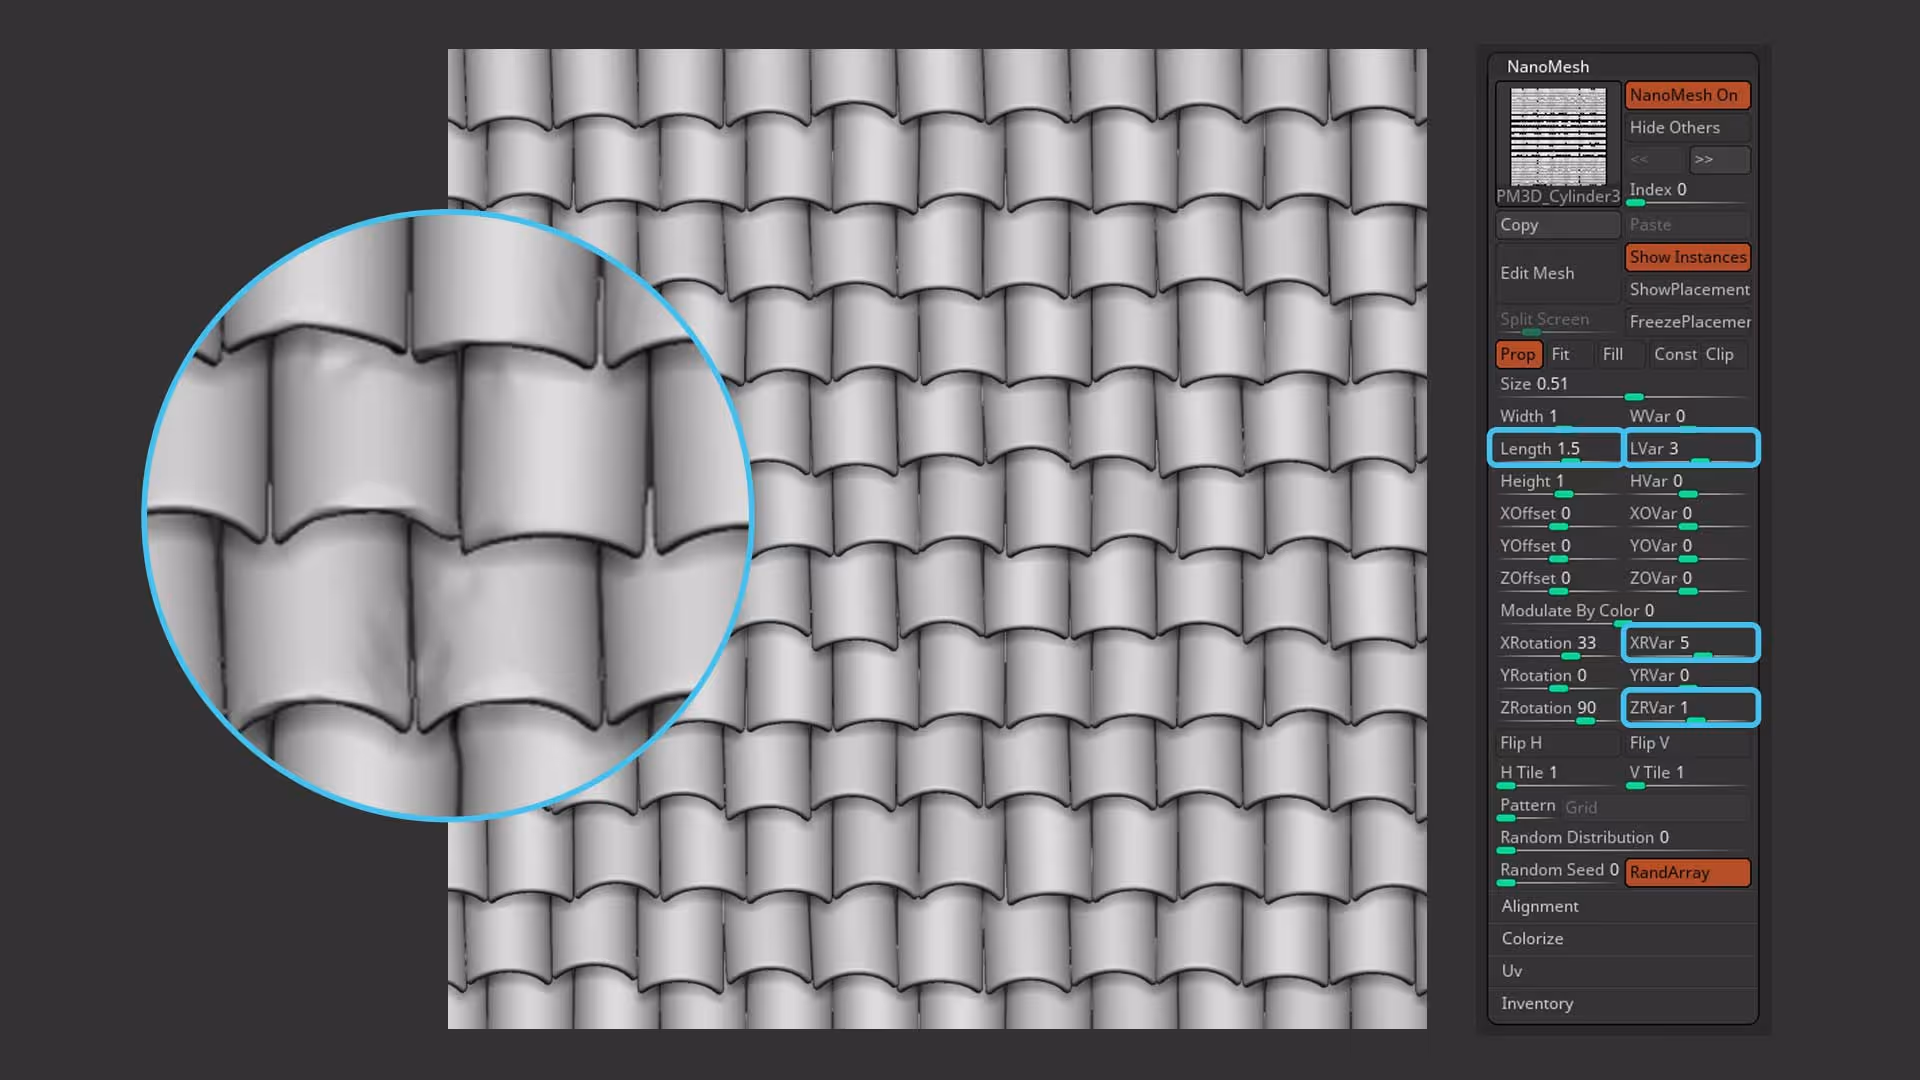
Then, in a 3D Plane, you can click an drag your new NanoMesh brush and adjust the parameters in the NanoMesh subpalette to adjust things like the size, rotation, scale, etc. Here are the settings that worked for me:
That is really the bulk of the process. Of course, you can create more interesting patterns… for instance, if you assign different polygroups to your base mesh (3D Plane) you can drag two instances of your NanoMesh brush on each polygroup… This allows you to easily create a bit of an offset:

And to make things even more interesting, you can add a little bit of randomness to certain sliders to variate the length, scale and rotation of each ‘tile’ in the patter. After you finish with the tweaking of the settings, you can click on the Inventory section (bottom of the subpalette) and click on ‘One to Mesh’ to convert the NanoMesh into geometry you can further edit.
I used the trim dynamic brush and the Clay polish tool to add some ‘damage’ to the tiles.
The rest is quite simple. You can add a some colour with masking features and Polypaint before you render the BPR passes from ZBrush. I rendered a ‘beauty pass’ with the colour, the Depth map, a flat colour (flat material) and the shadow pass.
In Photoshop I put all the passes together to create a more interesting Base colour textures (ideally you don’t want to have the ‘shadows’ baked into your colour, but in my case I used it to add some depth like an AO).

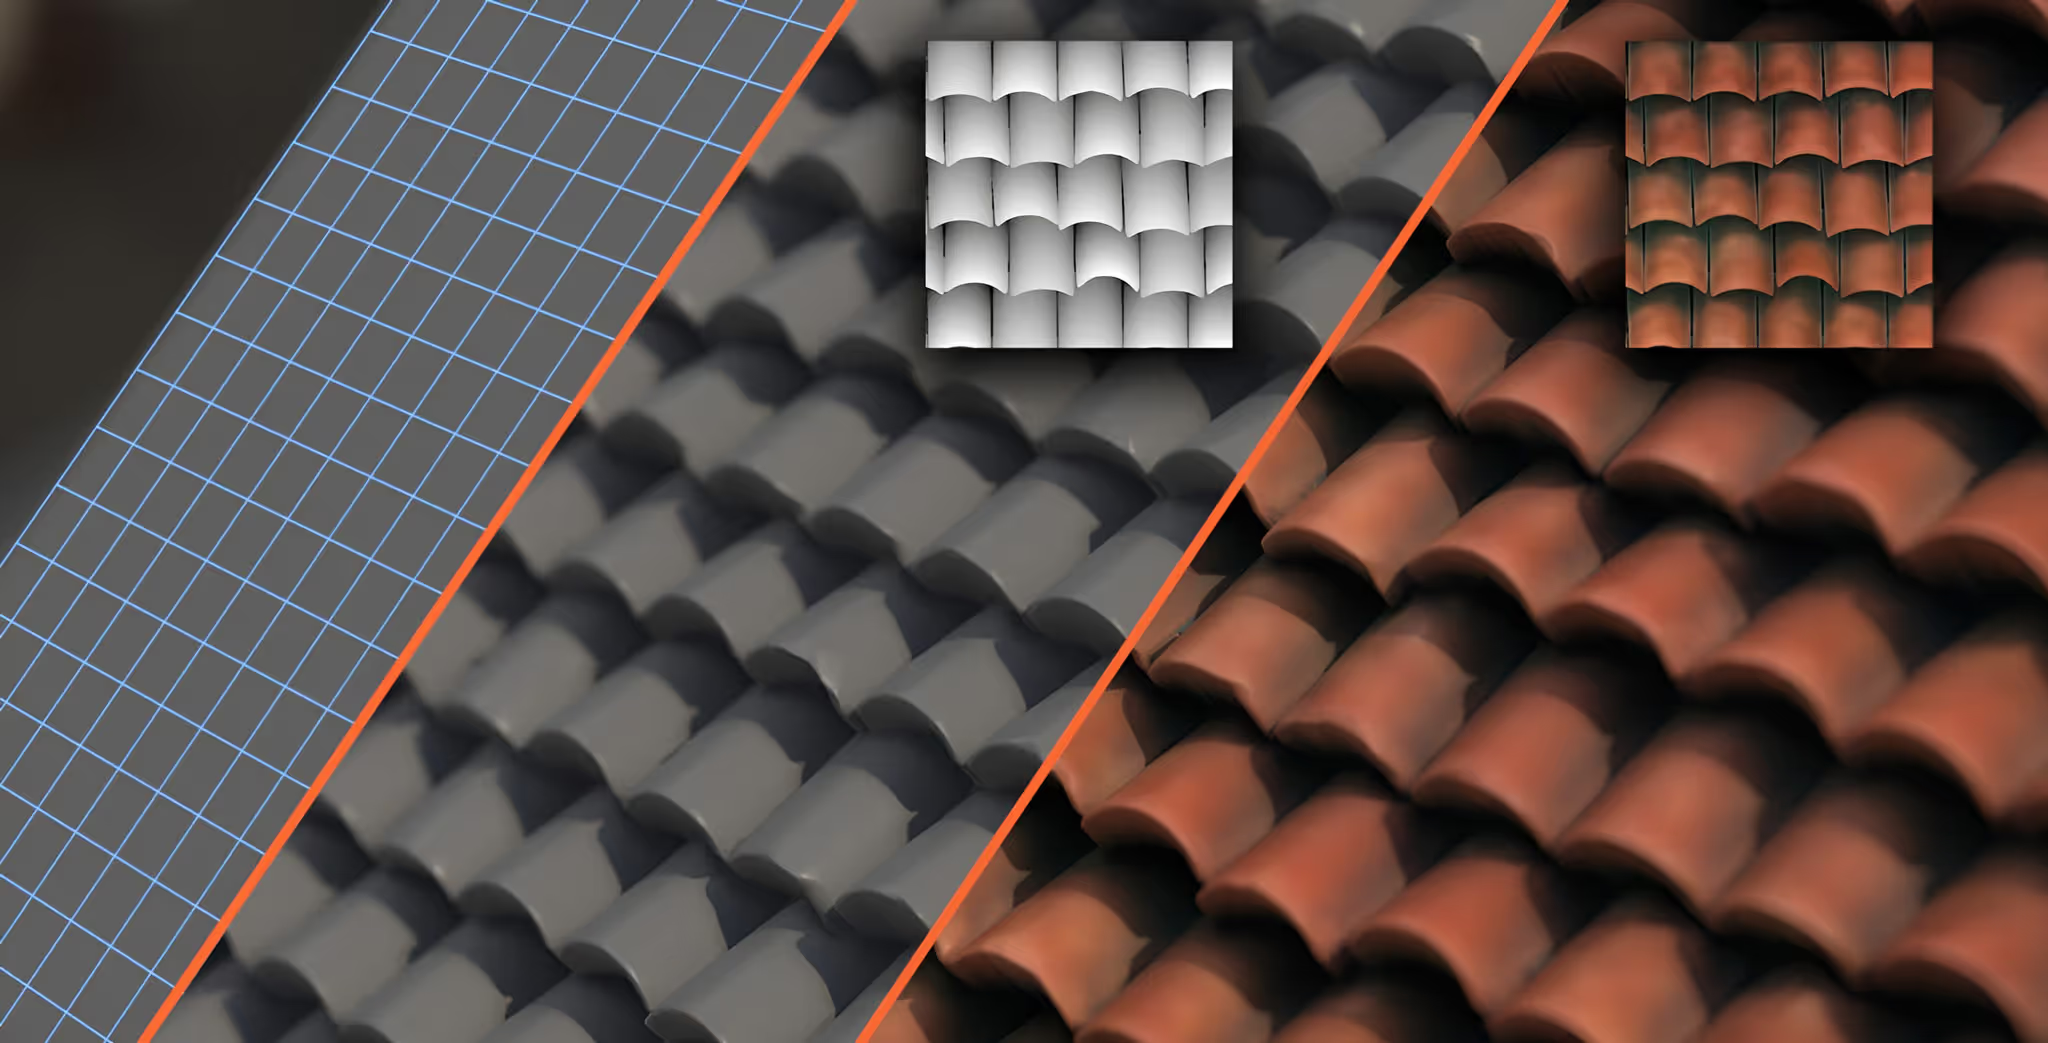
Another thing you can do in ZBrush is to choose the NormalRGBMat and export the document to create your ‘normal map pass’. Here is the result of 3 basic texture maps in a couple of planes in Marmoset Toolbag 4:
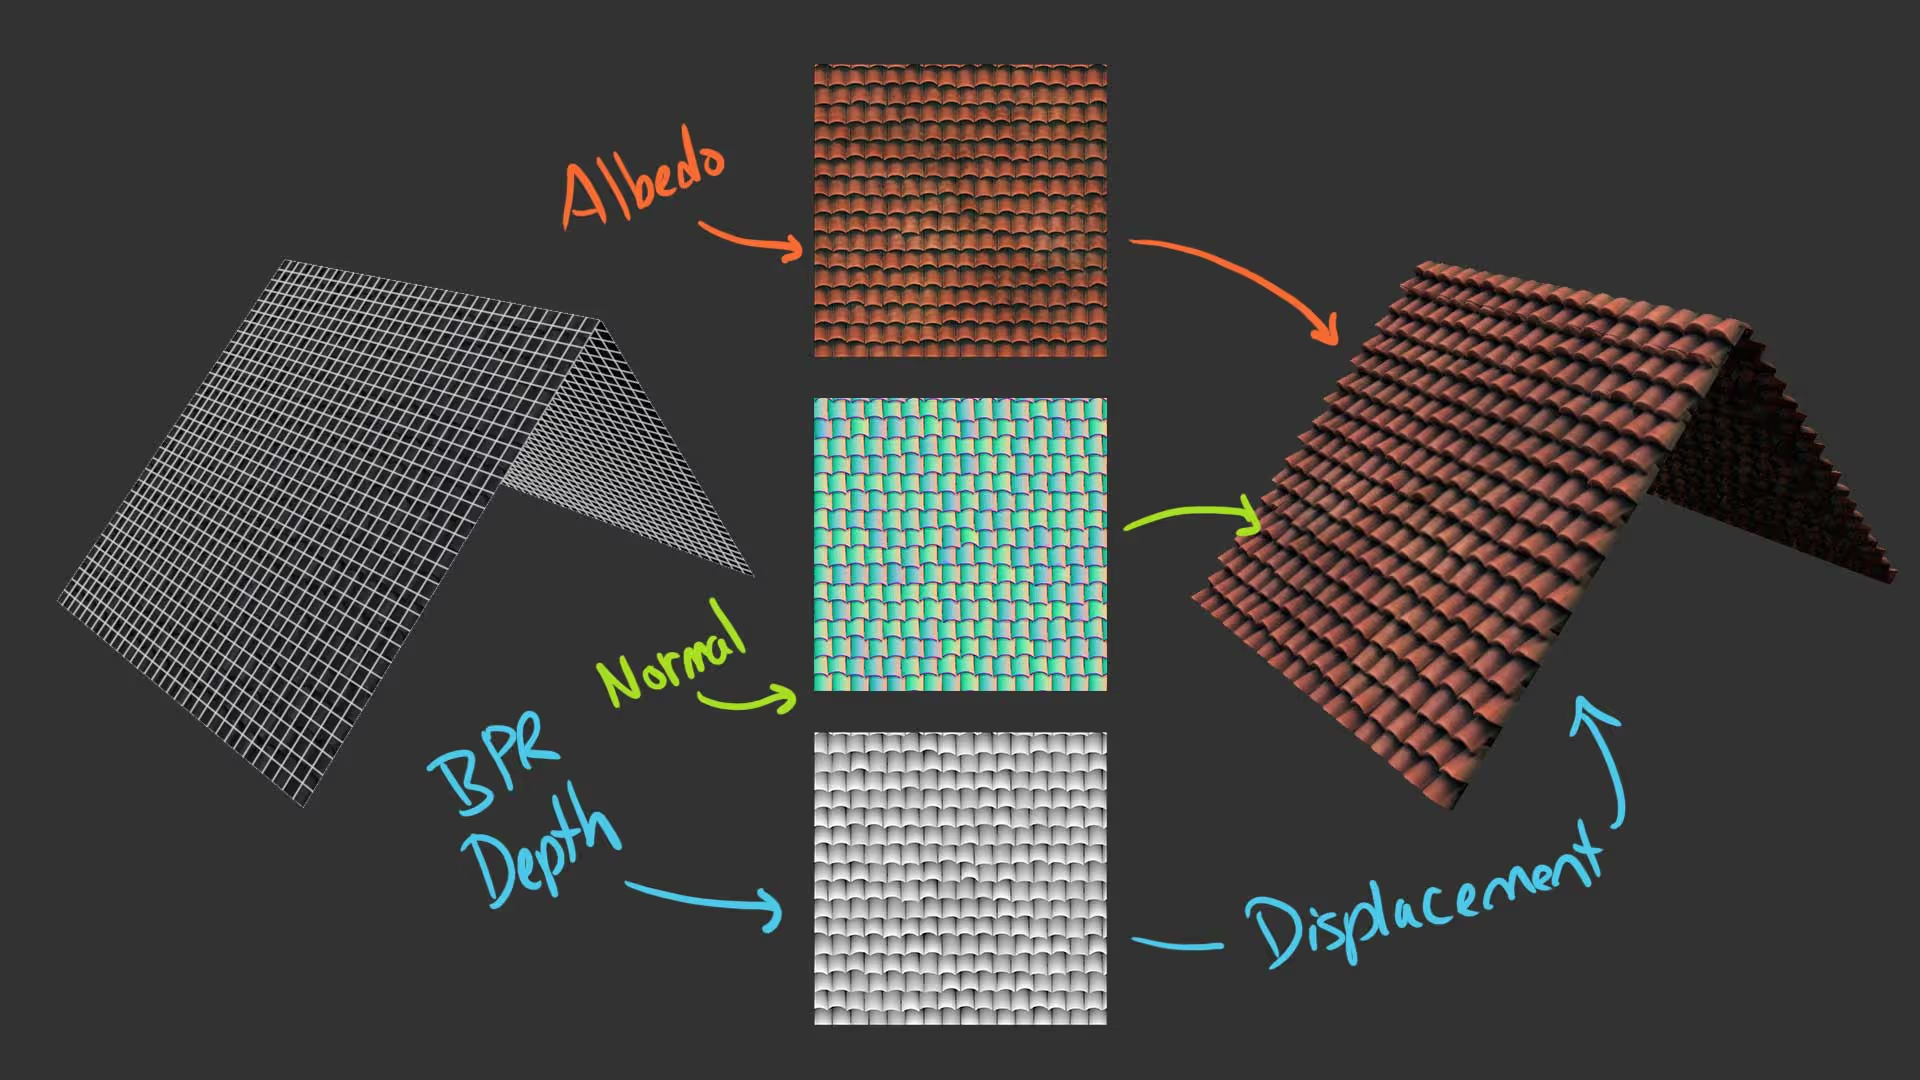
It produces a very convincing effect and it takes just a few minutes to create. Here is the simple plane with the displacement, colour and normal passes applied to it:
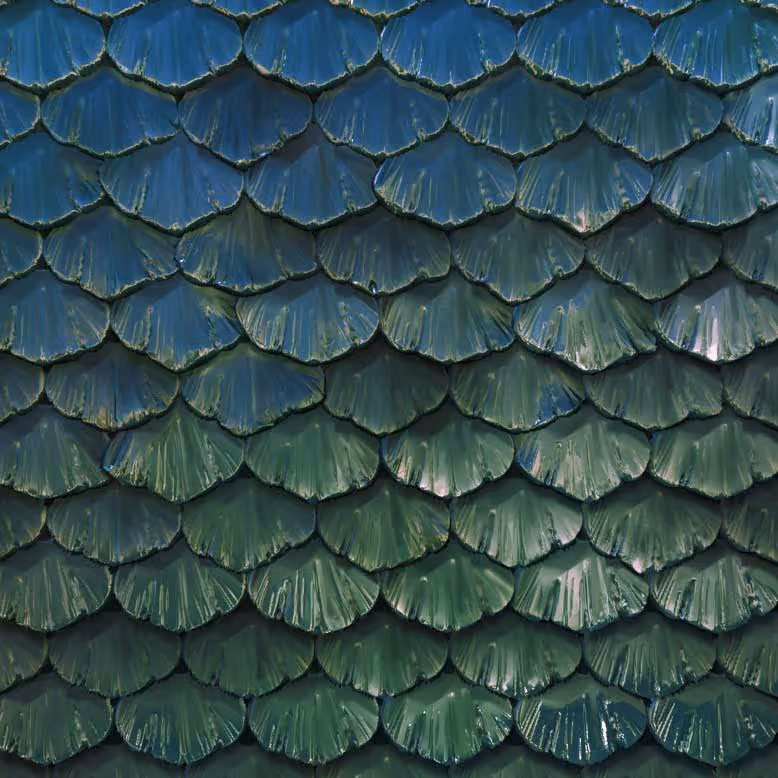
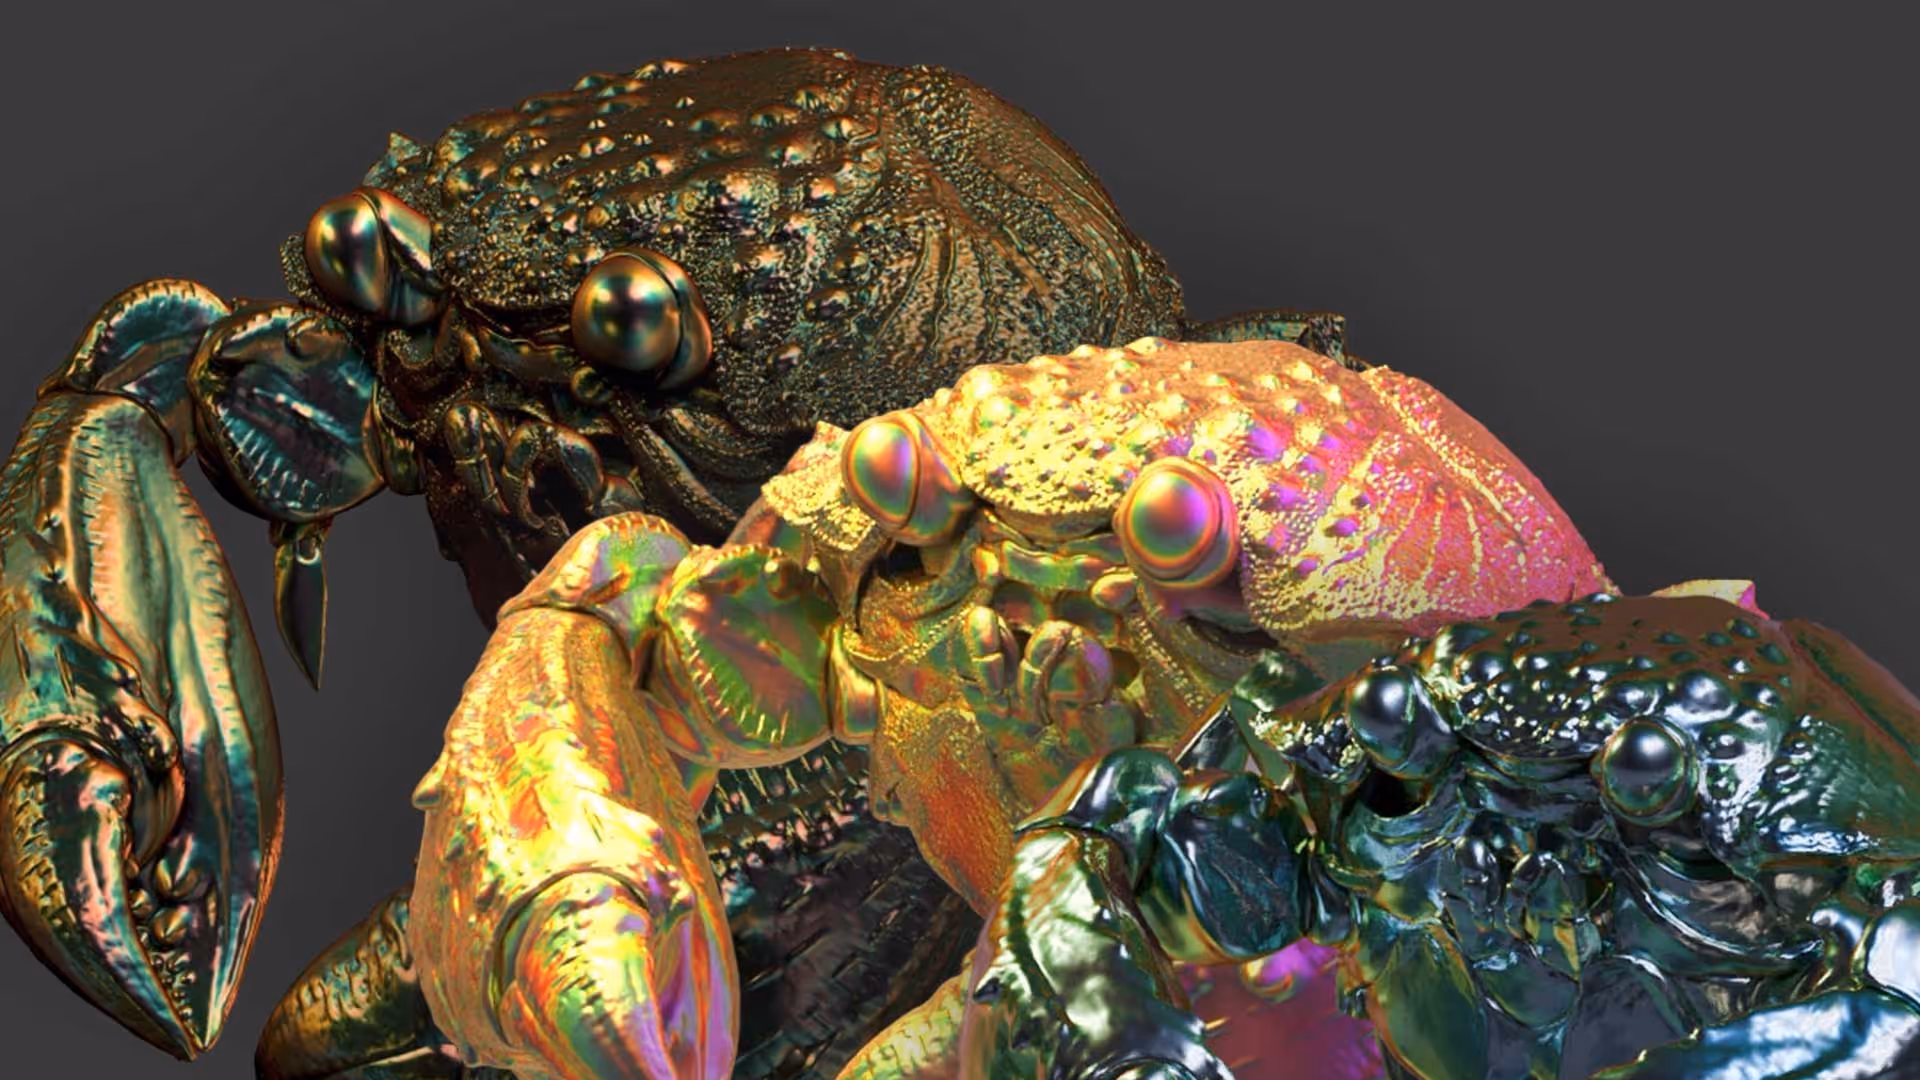
Here is the same technique applied to a completely different pattern for some cool iridescent scales:


.webp)

.webp)