
Basically, the whole trick is using the Thick Skin feature to limit the 'reach' or depth of the details in the skin... here is a step by step:
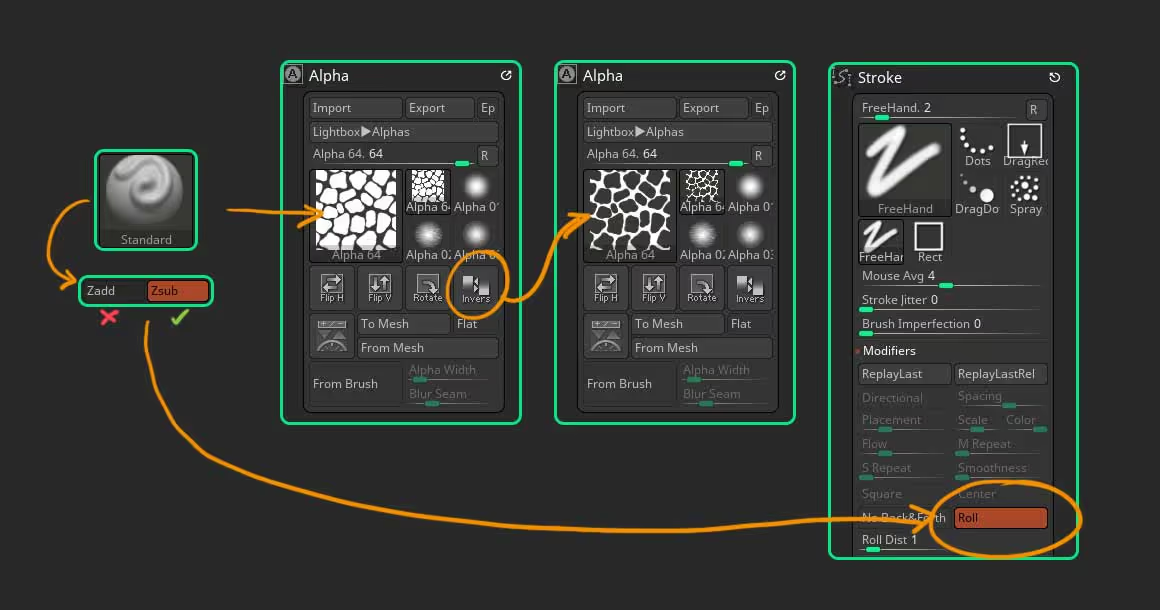
The first step is to tweak the standard brush to create the 'scales' pattern... so select the Standard brush, turn off ZAdd and enable ZSub. From the Alpha Palette, select the Alpha 64 and invert it. This alpha is tileable so we are going enable the 'Roll' switch in the Stroke palette > Modifiers.
Basically, the whole trick is using the Thick Skin feature to limit the 'reach' or depth of the details in the skin... here is a step by step:
The first step is to tweak the standard brush to create the 'scales' pattern... so select the Standard brush, turn off ZAdd and enable ZSub. From the Alpha Palette, select the Alpha 64 and invert it. This alpha is tileable so we are going enable the 'Roll' switch in the Stroke palette > Modifiers.
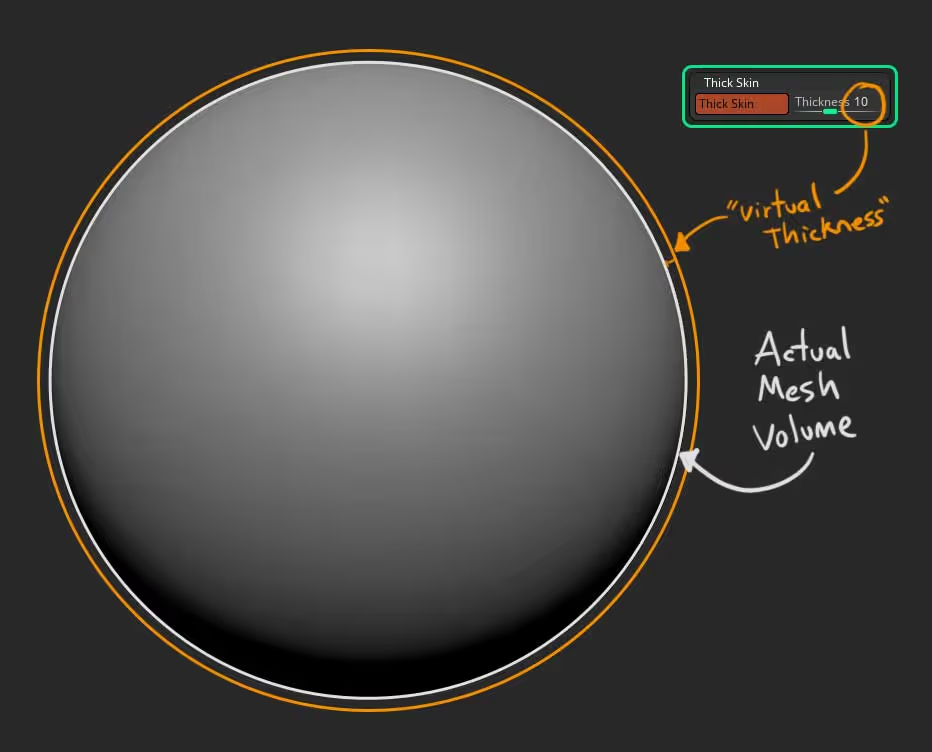
Now, the cool thing about thick skin is that it works both ways... so by setting the slider to '10', you have a virtual thickness of +10 and -10 from the actual volume of your mesh... this is why we set the brush to 'Zsub' in the first place.
And... because we also have a tileable alpha and the 'Roll' enable, then we can just start drawing some strokes into the mesh to create the pattern we want. I'd also suggest saving a Morph Target before starting with the patter so you can always 'go back to refine certain areas of the mesh.
The next step is just to tidy up the whole process... we can use the Deformation subpalette (from the tool palette), and inflate the added details to close the gap between the scales a bit. I also like to add a bit of noise to give some roughness to the surface and maybe use the 'Polish Crisp Edges' to soften things a bit (up to you).
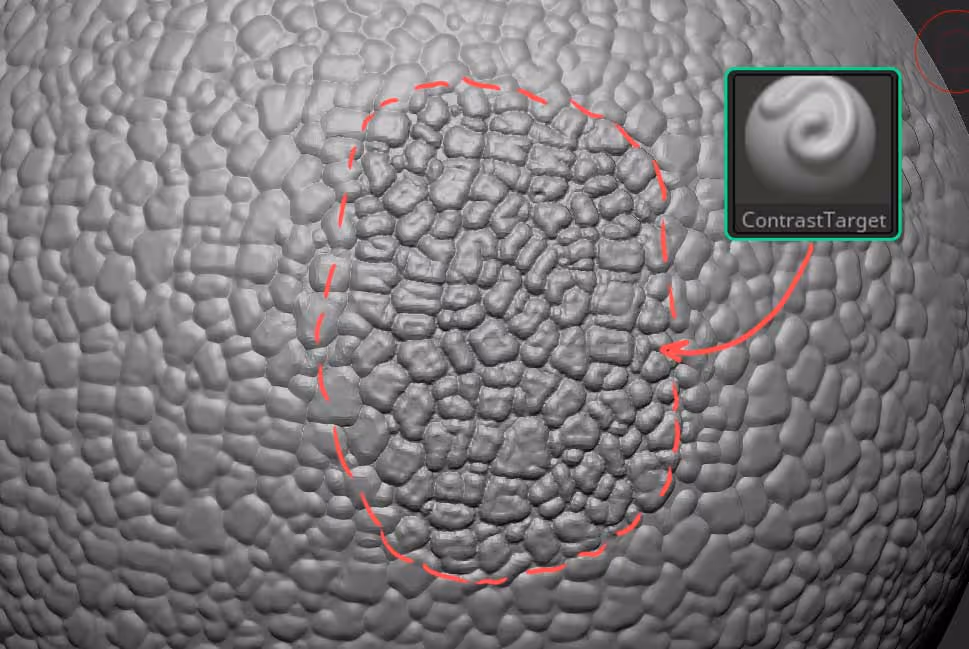
That's pretty much it. Here is a bonus tip: You can use the 'ContrastTarget' brush to manually enhance the contract of some areas in the model:


.webp)

.webp)