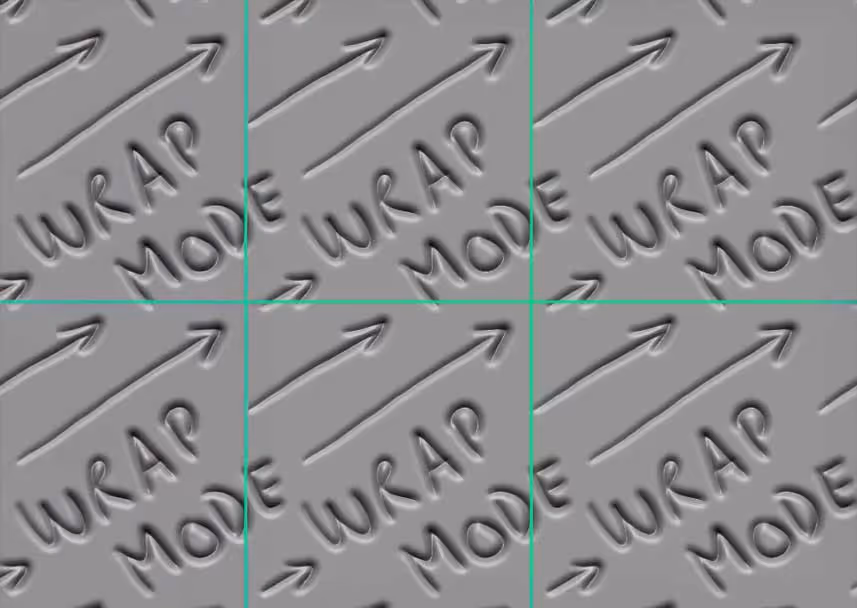
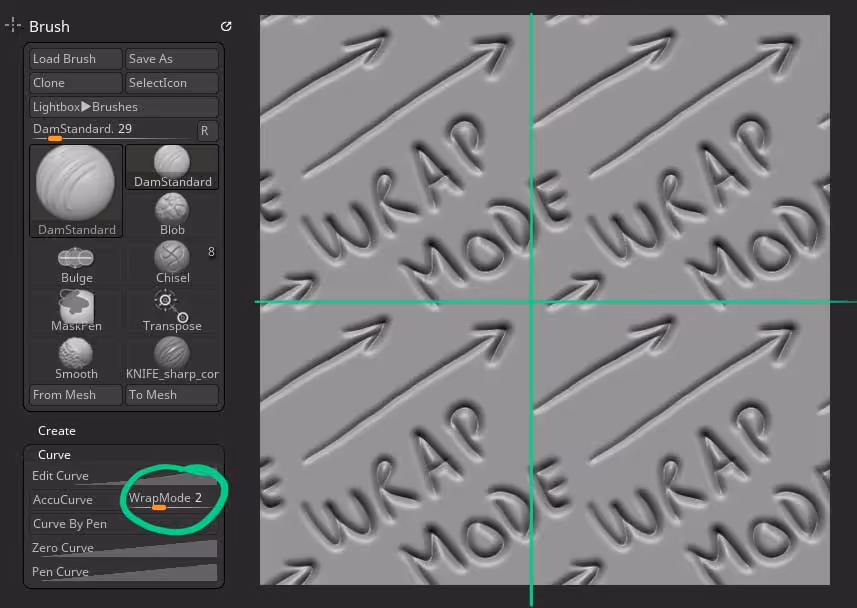
To make any brush tile in ZBrush, all you have to do is open the 'Curve' sub-palette from the Brush Palette, and change the value of the WrapMode slider to 1 (or 2, or 3, depending on how many times you want to tile the effect).
Perfect tile...
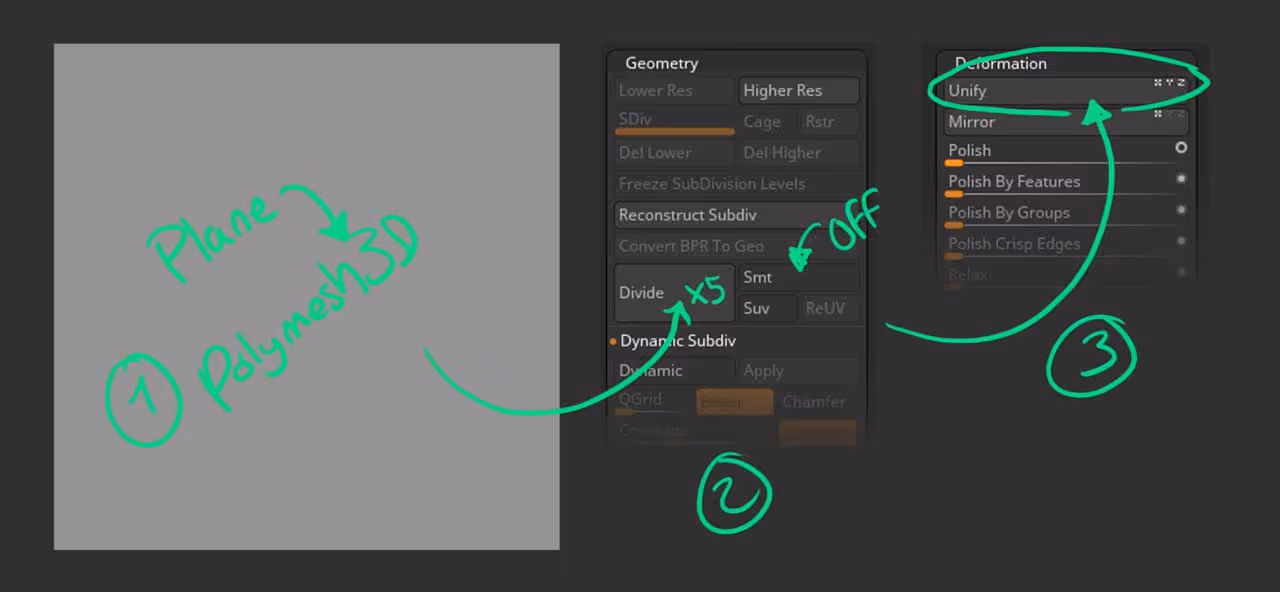
If you want to create a pattern that tiles perfectly accross a square plane, you need to make sure it fits within the 'ideal' units of ZBrush... so the easiest thing to do, is to create a plane 3D, subdivided it a bit (with the Subdivide Smooth Modifier switch off) and then click on the Unify button from the Deformation palette.
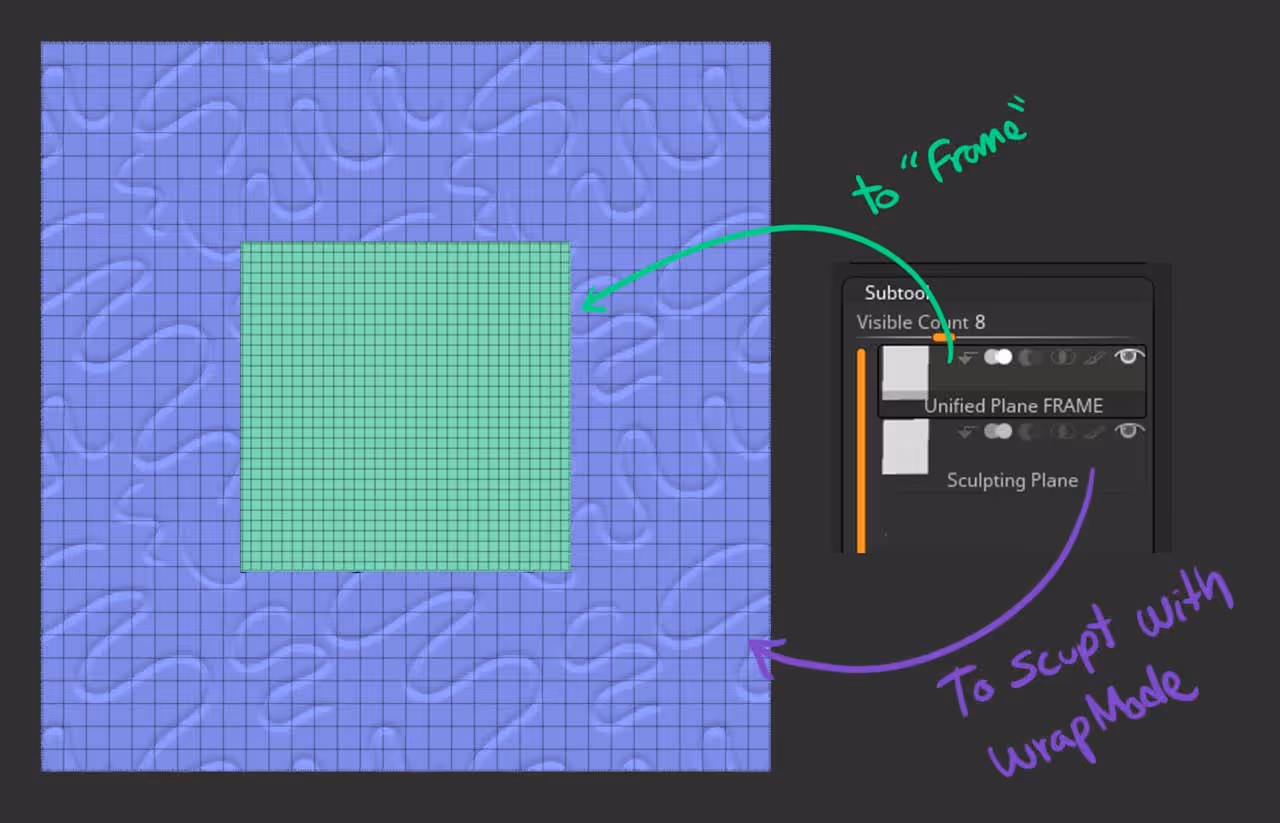
Now, make sure that your document is a square doc, then you can duplicate the plane and scale up and move it back, so you end up with two planes: 1 that tiles perfectly (the first one) and the second one that is bigger and you can use to sculpt in.
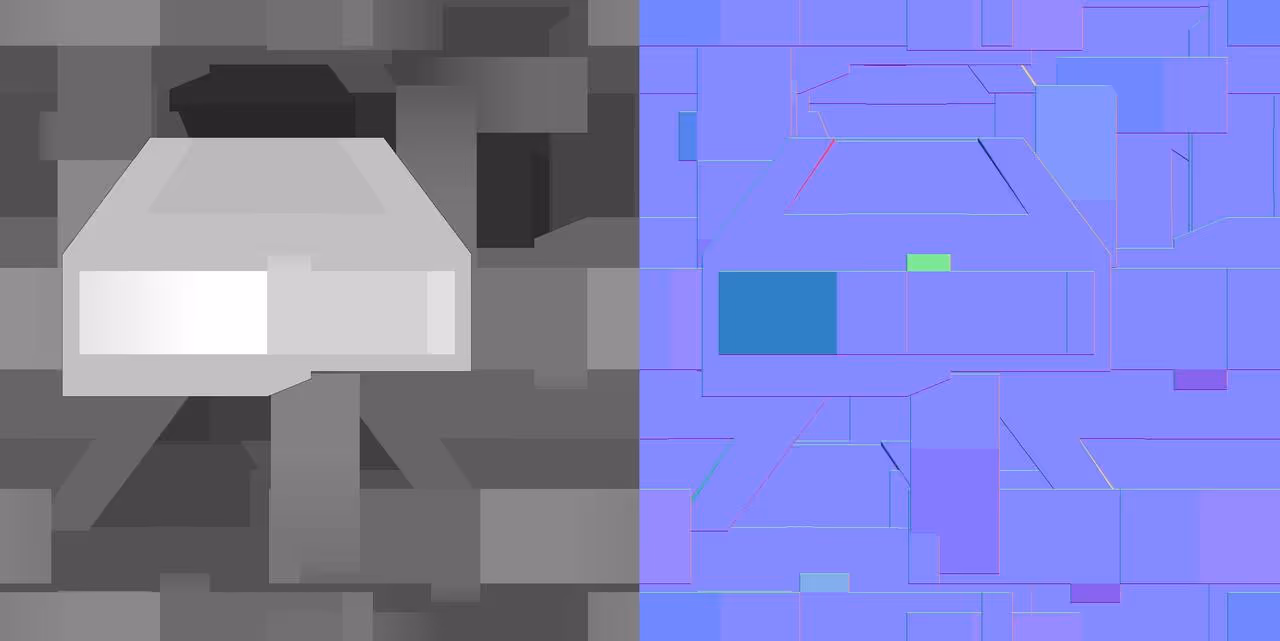
This technique basically allows you to sculpt with WrapMode on the bigger plane, and before you export the screengrab or render, you can select the first plane, go into solo mode, 'Frame' it ('F') and then switch back to the large plane with all the sculpted details.
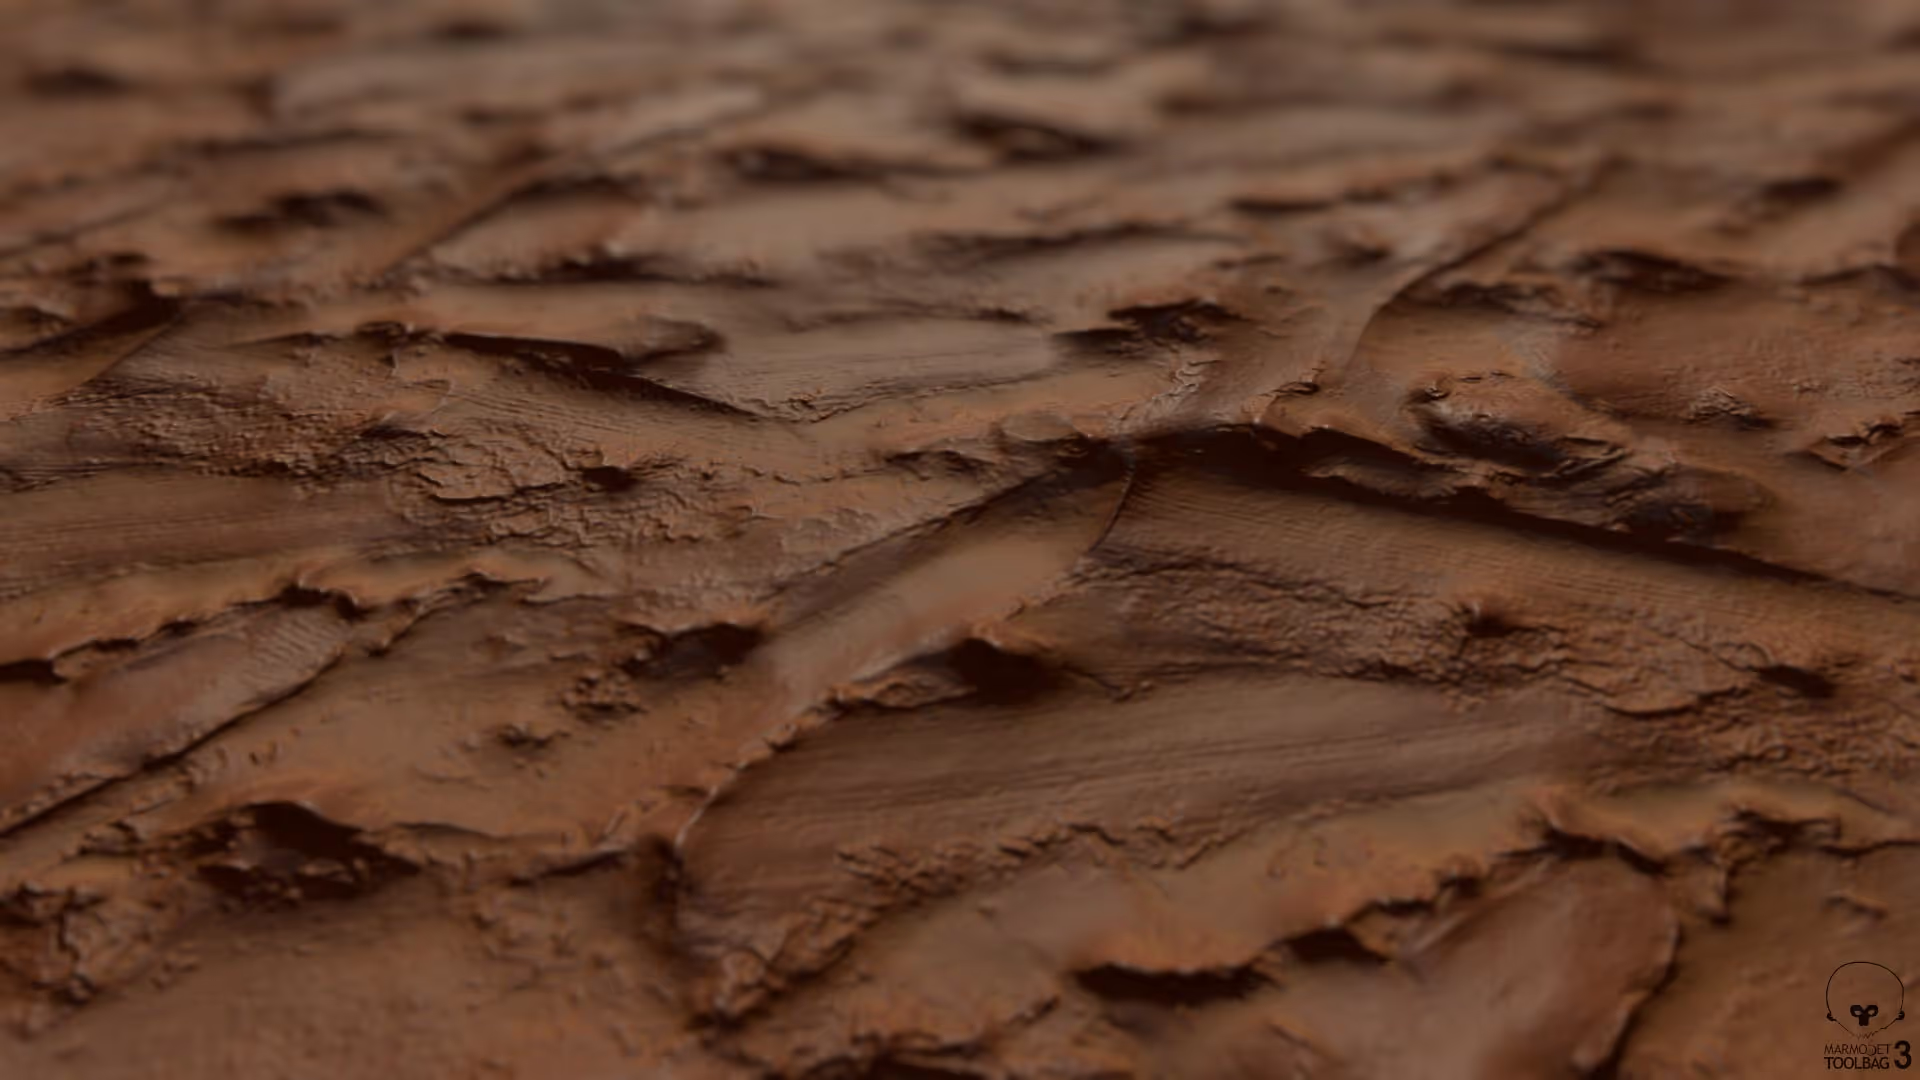
That's it really... I used this approach to manually sculpt some of the maps in the Digital Clay Pack.


.webp)

.webp)