Setting up the NanoMesh Brush!
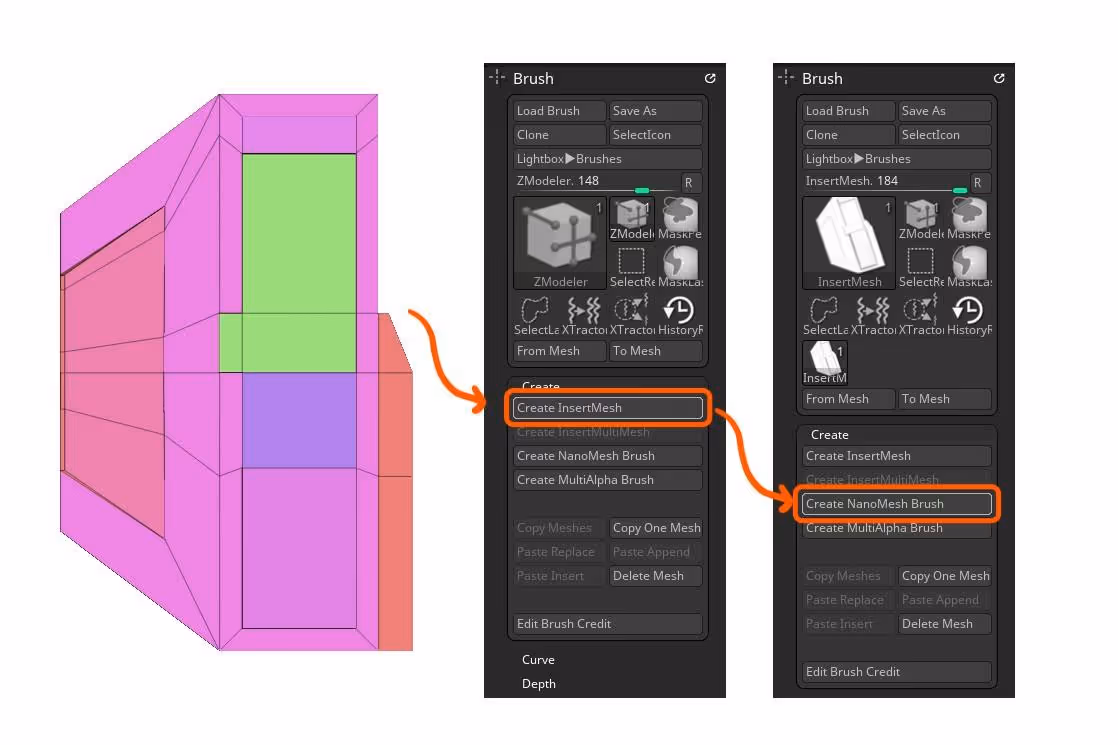
The first step in this process is to create a custom NanoMesh brush, but you can use any of the IMM brushes that come with ZBrush and turn it into one.
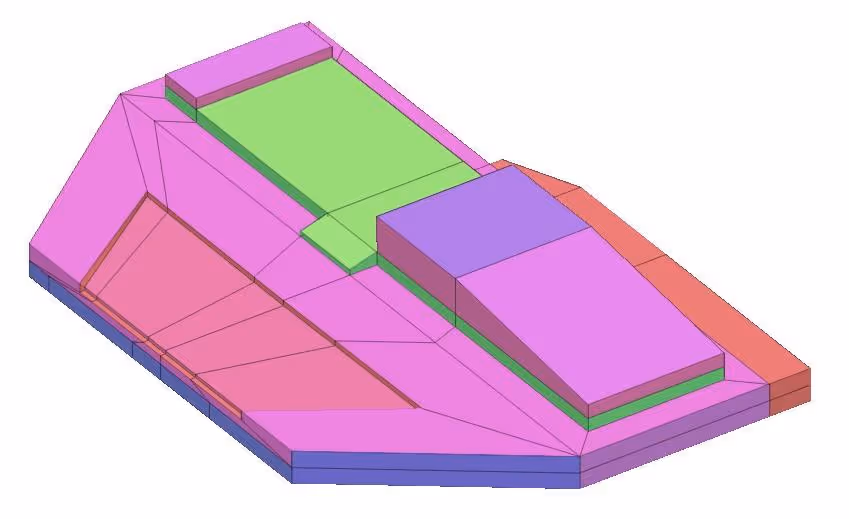
I created a very simple shape from a Qcube and ZModeler. Nothing to special, in fact... the more abstract, the better for this technique. I wanted something a bit Sci-Fi so I went with some sharp lines and a few diagonals:
Creating the NanoMesh Brush!
With the object ready, you can open up the Brush Palette and head to the 'Create' subpalette. From there you need to first convert the mesh into an IMM brush and then the 'Create NanoMesh brush' option will be available.
Keep in mind that the angle at which you create the IMM brush, does matter and it will be the same angle for the inserted mesh, so make sure is from the top or a side view with perspective off.
Creating the NanoTile tool
The NanoTile plugin is not an official Pixologic plugin so you need to download it as it won't come with the ZBrush installer. Here is the link to it: NanoTile Plugin it comes with very clear instructions on how to install it.
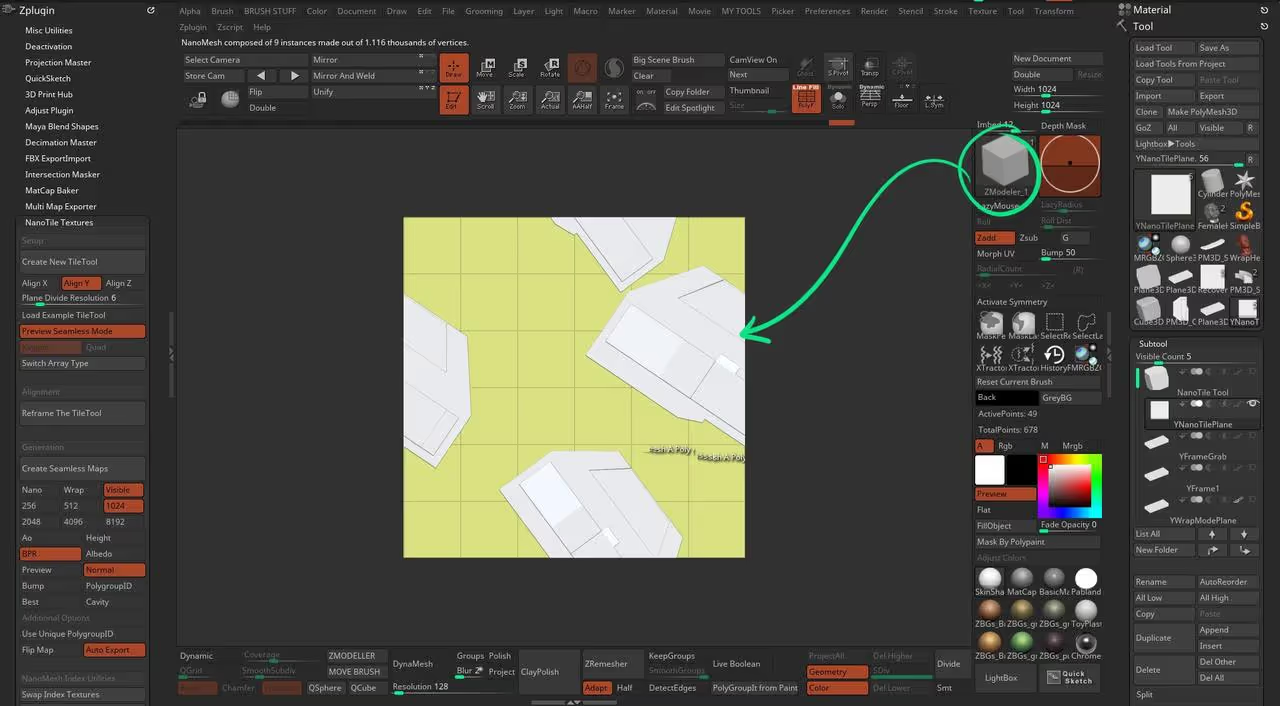
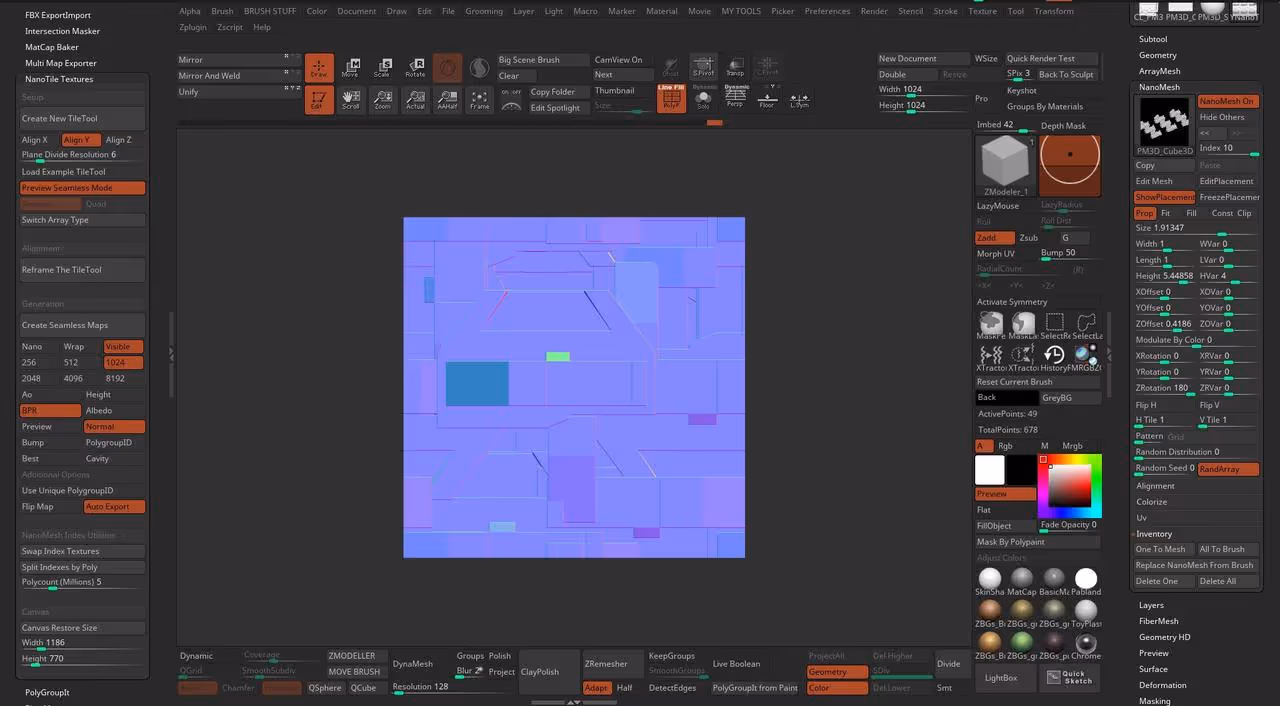
Now that we have a simple NanoMesh brush, we need to create a new Nano Tile tool using the NanoTile plugin. The process is very simple... from the ZPlugin palette, find the NanoTile plugin and click on the first big button: 'Create new TileTool' (leave other settings as defaults).
The result will be a perfectly squared document with a simple plane framed to the entire canvas. Now you can start clicking on the faces to add your new NanoMesh brush.
Make sure you variate the size and the angle to make the pattern more interesting.
tweaking placement and material
After you insert a few of the same objects in the tile. you can fine-tune the settings of each inserted NanoMesh instance, from the NanoMesh subpalette under the Tool palette.
For instacente I wanted all my pieces to be rotated at angles of 0, 90 or 180 degrees to keep the lines straight.
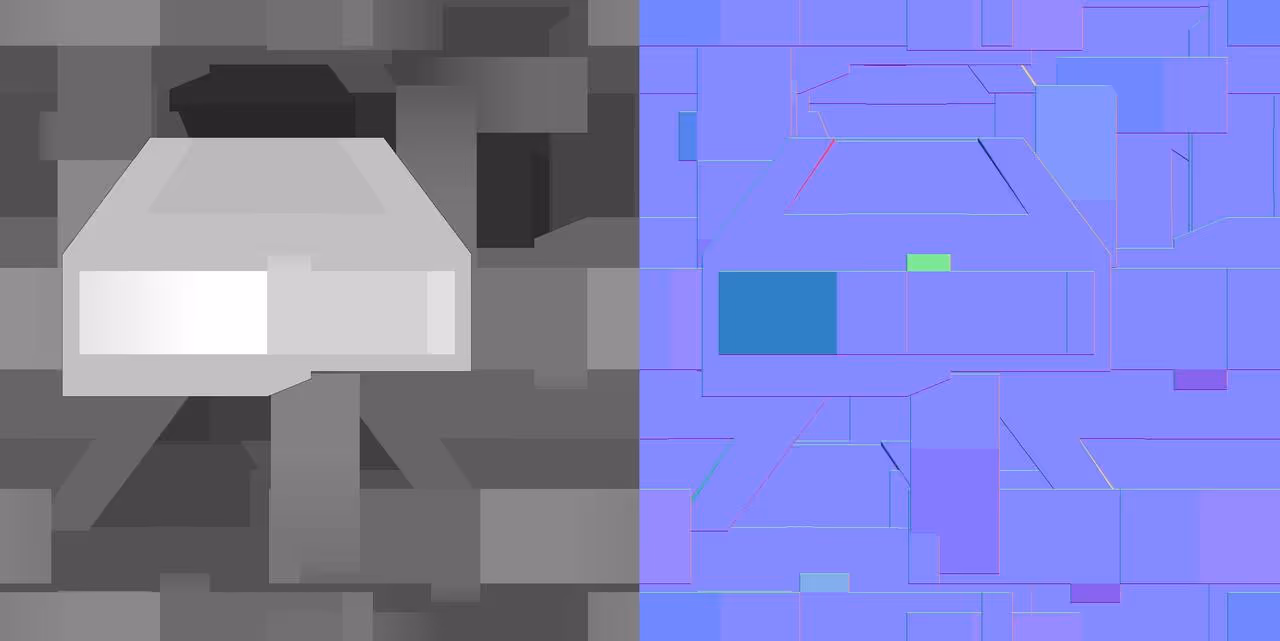
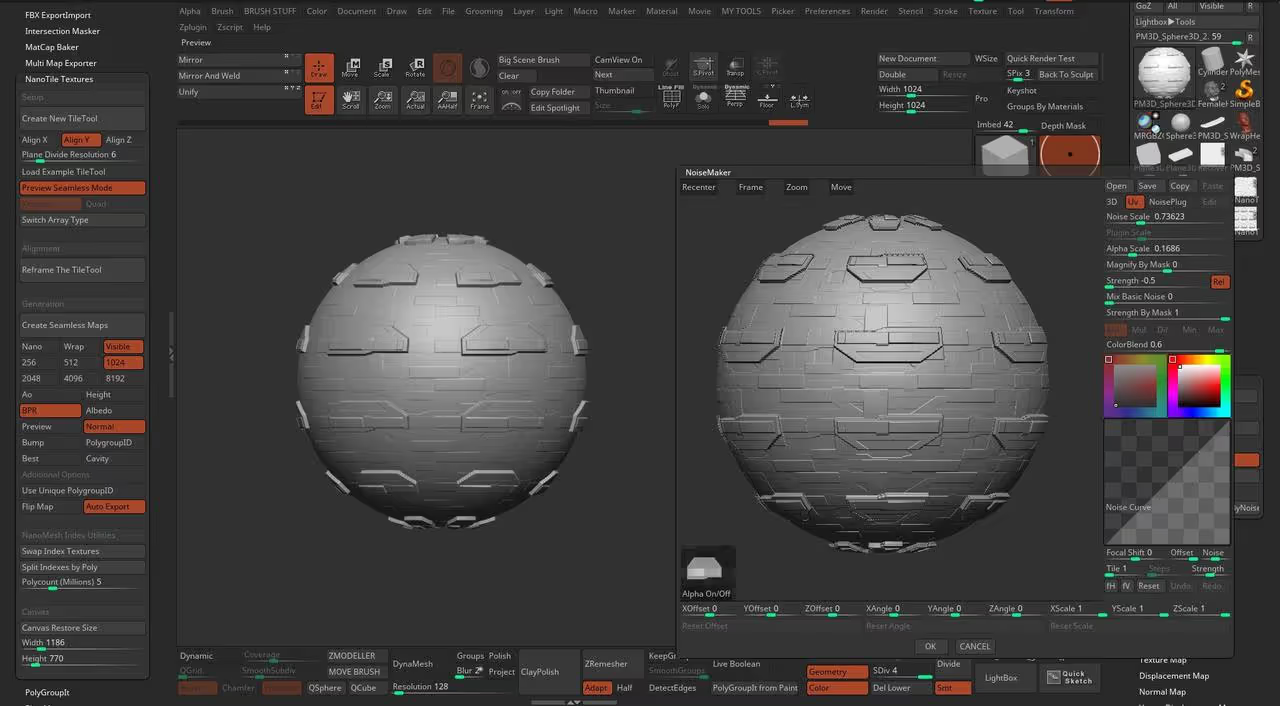
Also to visualise the depth, I chose the NormalRGBMaterial from the materials palette and this will be the same material we'll use to export the normal map.
At this point we have all we need to create our maps. Make sure you click on the 'Actual' button to see the real size of the document (shortcut = 0).
Now select the NormalRGBmaterial if you havent, and go to the Document Palette and hit the 'Export' button to save your image (PNG format should be good).
For the Displacement or height map, you just need to go to the Alpha palette, expand the 'Transfer' sub-palette, and click on the 'GrabDoc' button.
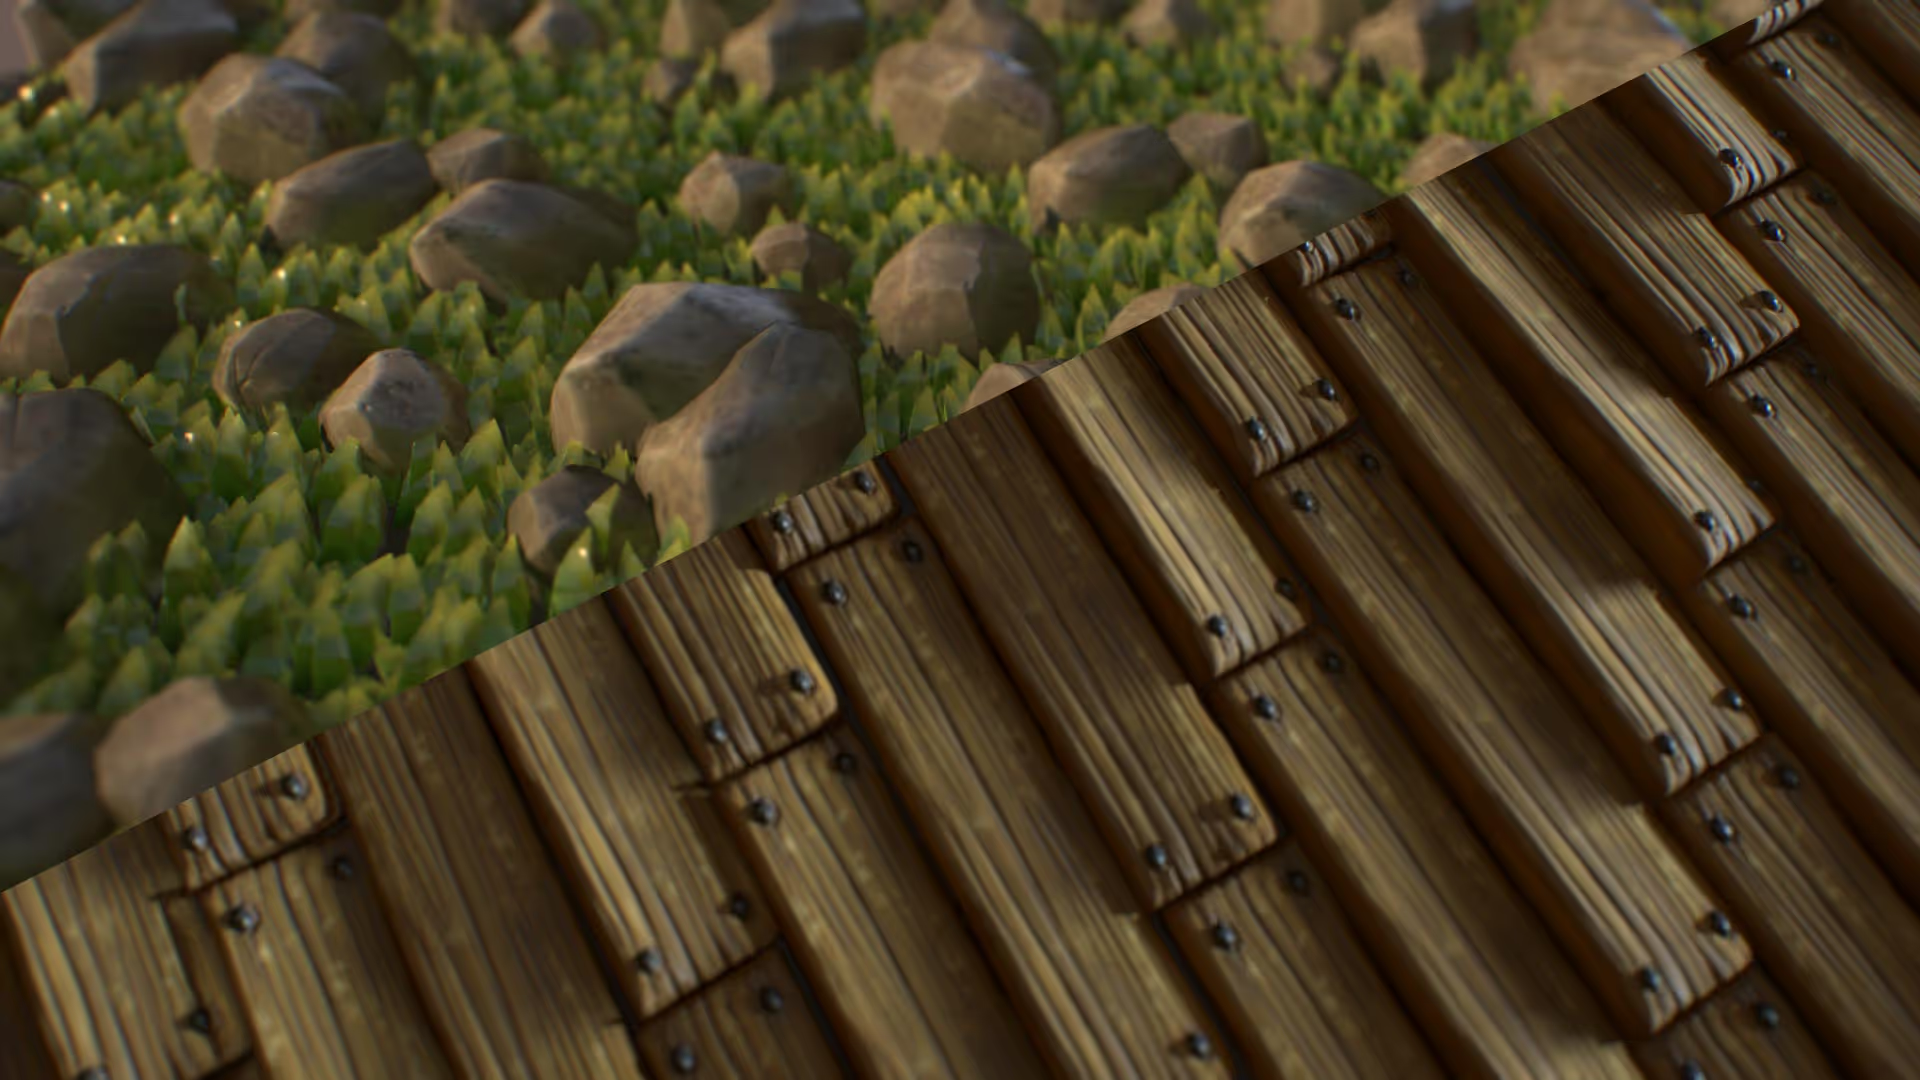
That's it... you can load the alpha from the Surface Noise sub-palette to test it and also apply it to meshes that have UVs to create intricate details very quickly:


.webp)

.webp)