


In this tutorial series, I’ll walk you through the process of creating a series of simple and stylised assets to use in the construction of tileable textures. To test the maps and complete the effect, we’ll set up a test object inside Marmoset Toolbag 3 to test the textures maps exported from ZBrush.
Setting up the NanoTile Plugin…
The NanoTile plugin that we use in this mini series, is one of the most useful plugins you can get to work with textures (specially tileable textures). The plugin is FREE and you can download it directly from the Pixologic download centre.

Click the download button and you’ll get a Zip file that you need to extraxt into the ZPlugin folder.
Here are the instructions to install the plugin (there will be a .txt file with the Zip file with exactly these steps):
Install Instructions:
- Close ZBrush 2019
- Extract the Zip file
- Copy the contents of the folder NanoTileTextures_Install (‘NanoTileTextures_2019.zsc’ and the ‘NanoTileTexturesData_2019’ folder) to Pixologic/ZBrush 2019/ZStartup/ZPlugs64/
- Launch ZBrush
- NanoTile Textures will be located in the ZPlugins Tab at the top [ZPlugin:NanoTile Textures]
- This plugin has had limited testing and could contain potential bugs; please save your work before using it!
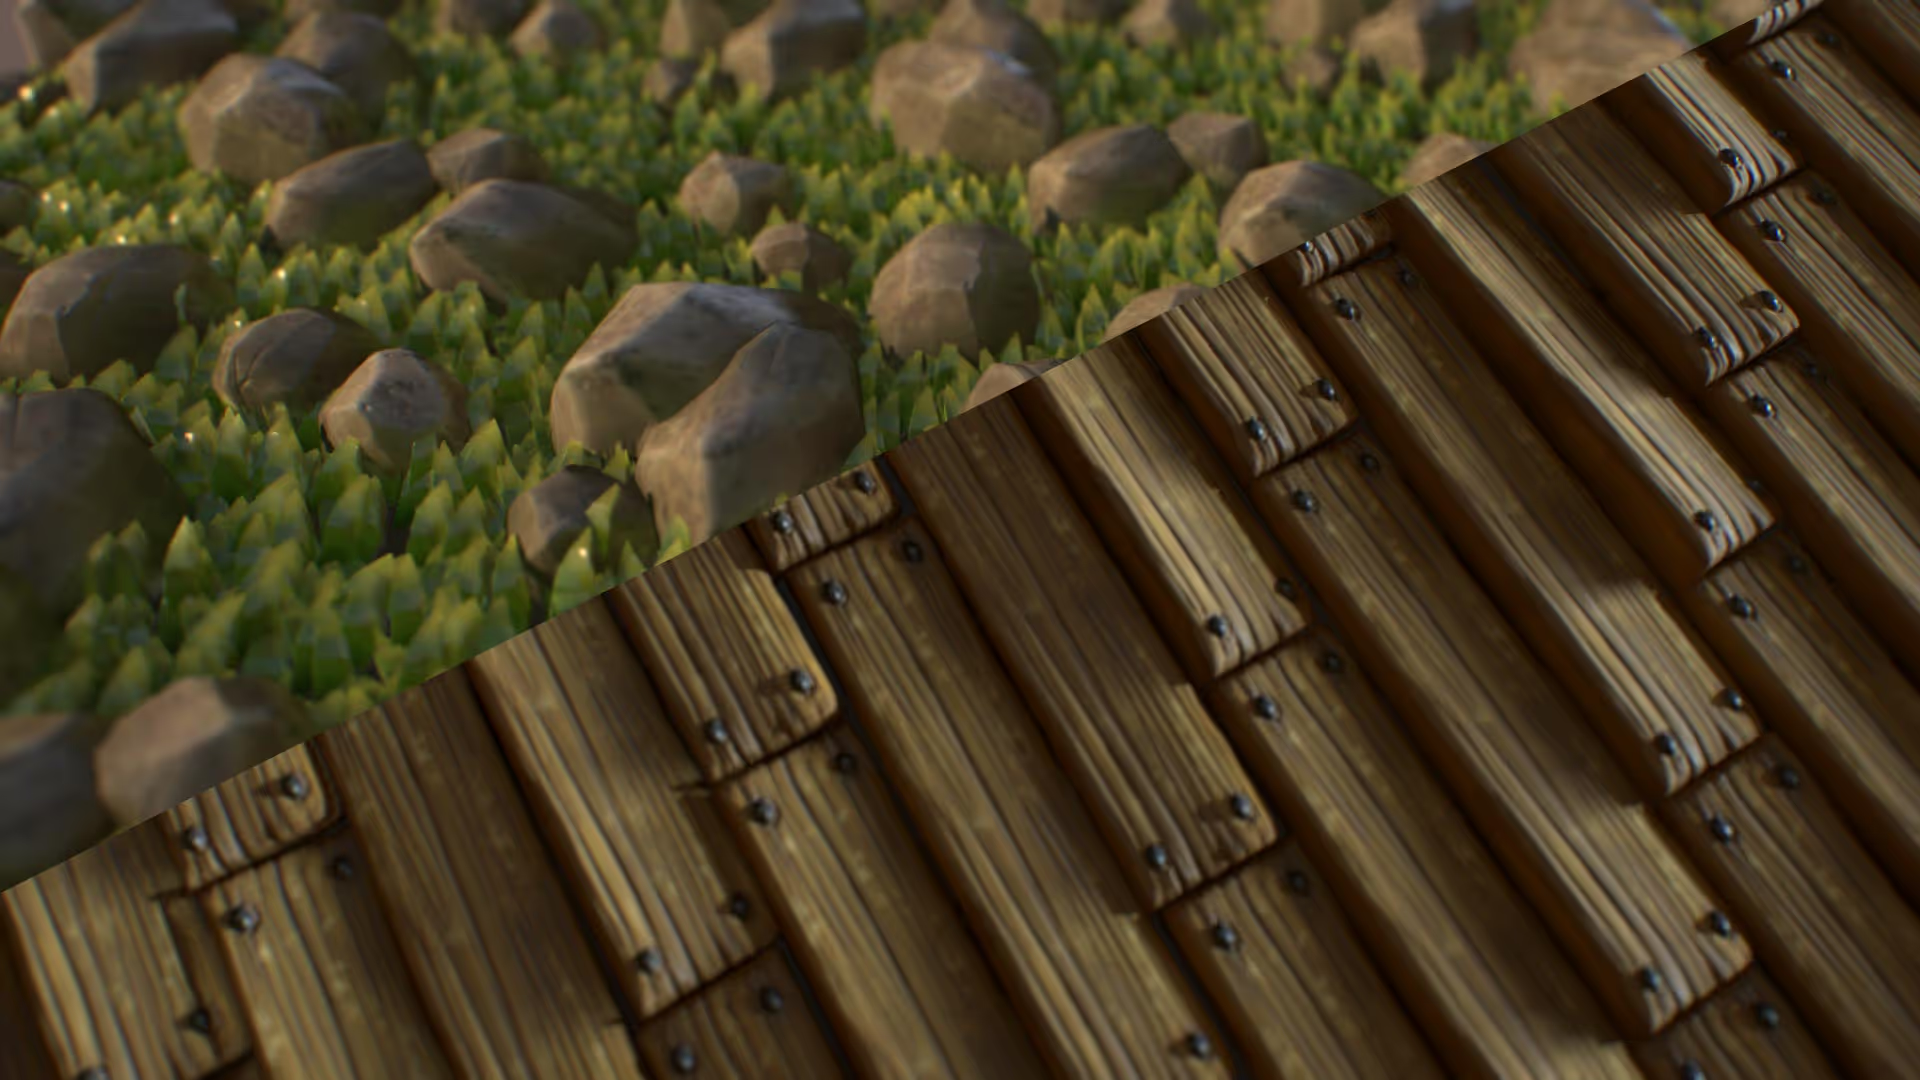
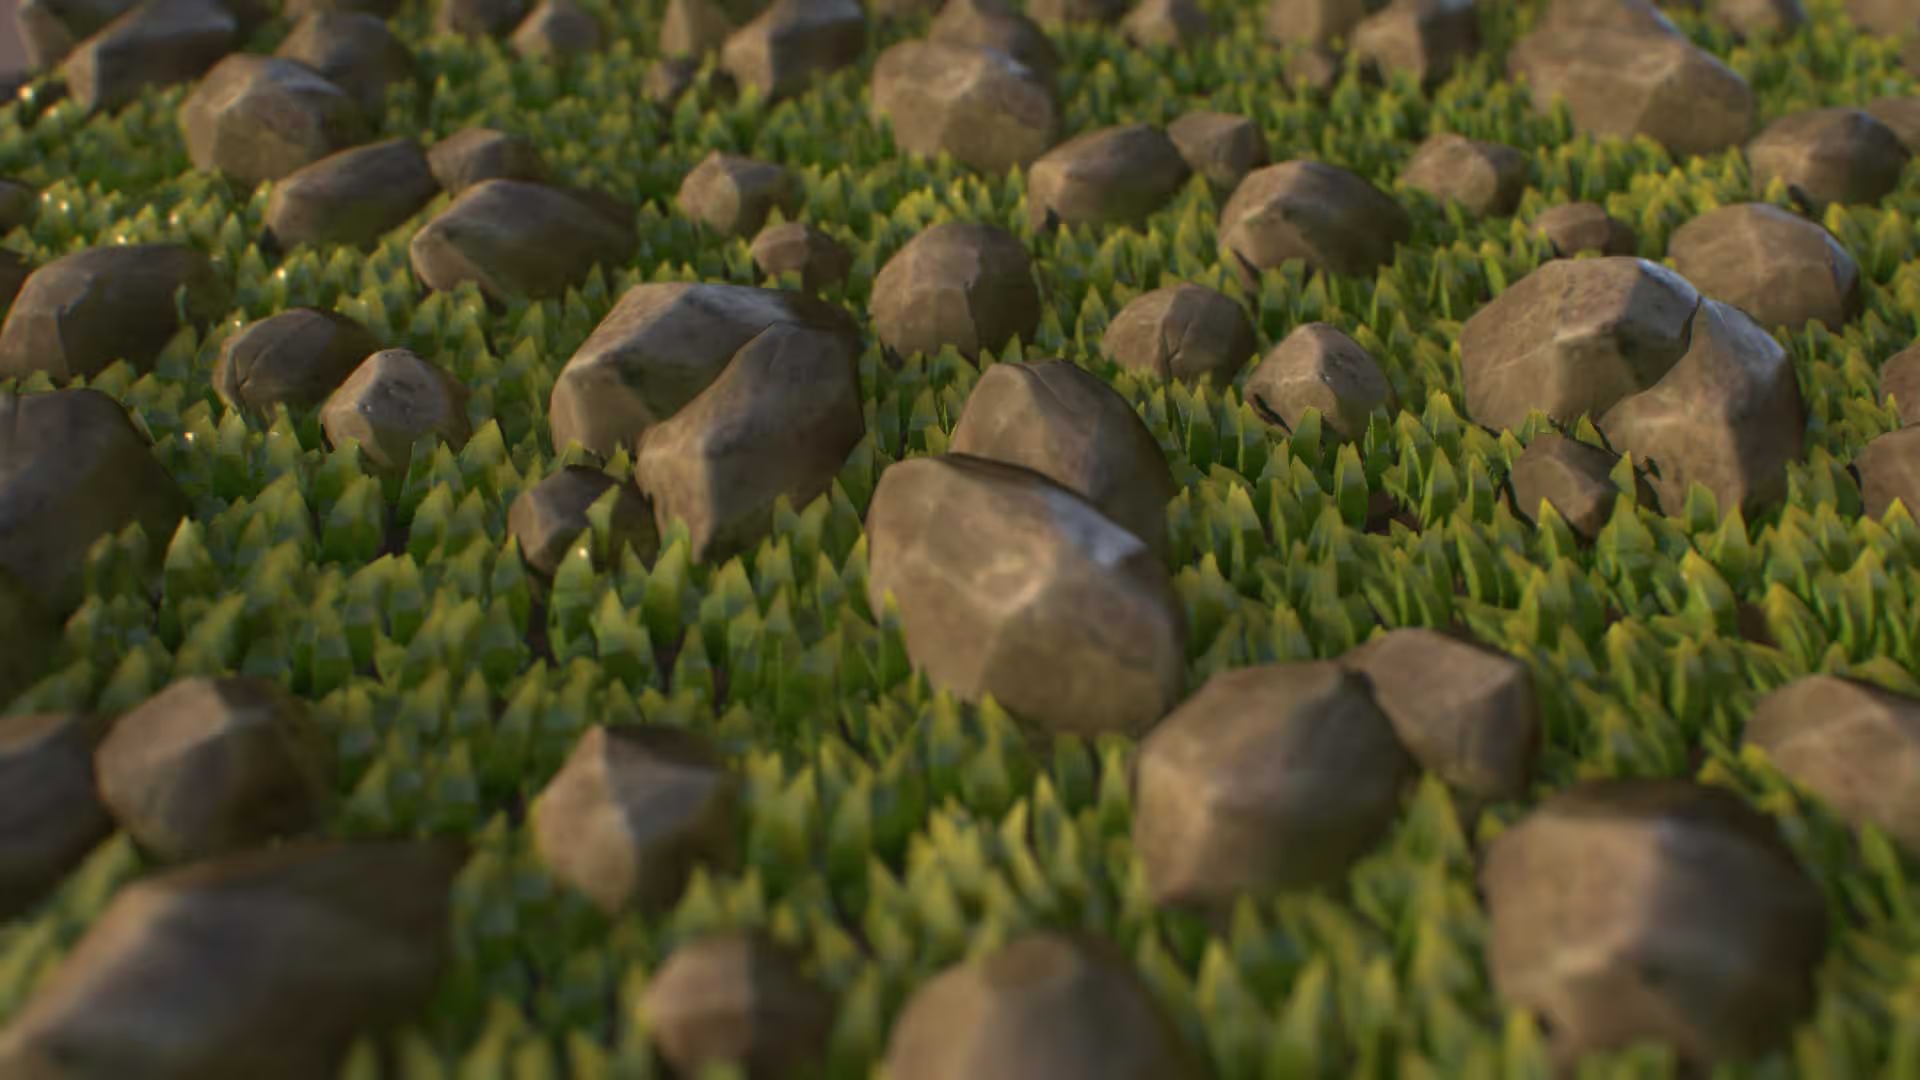
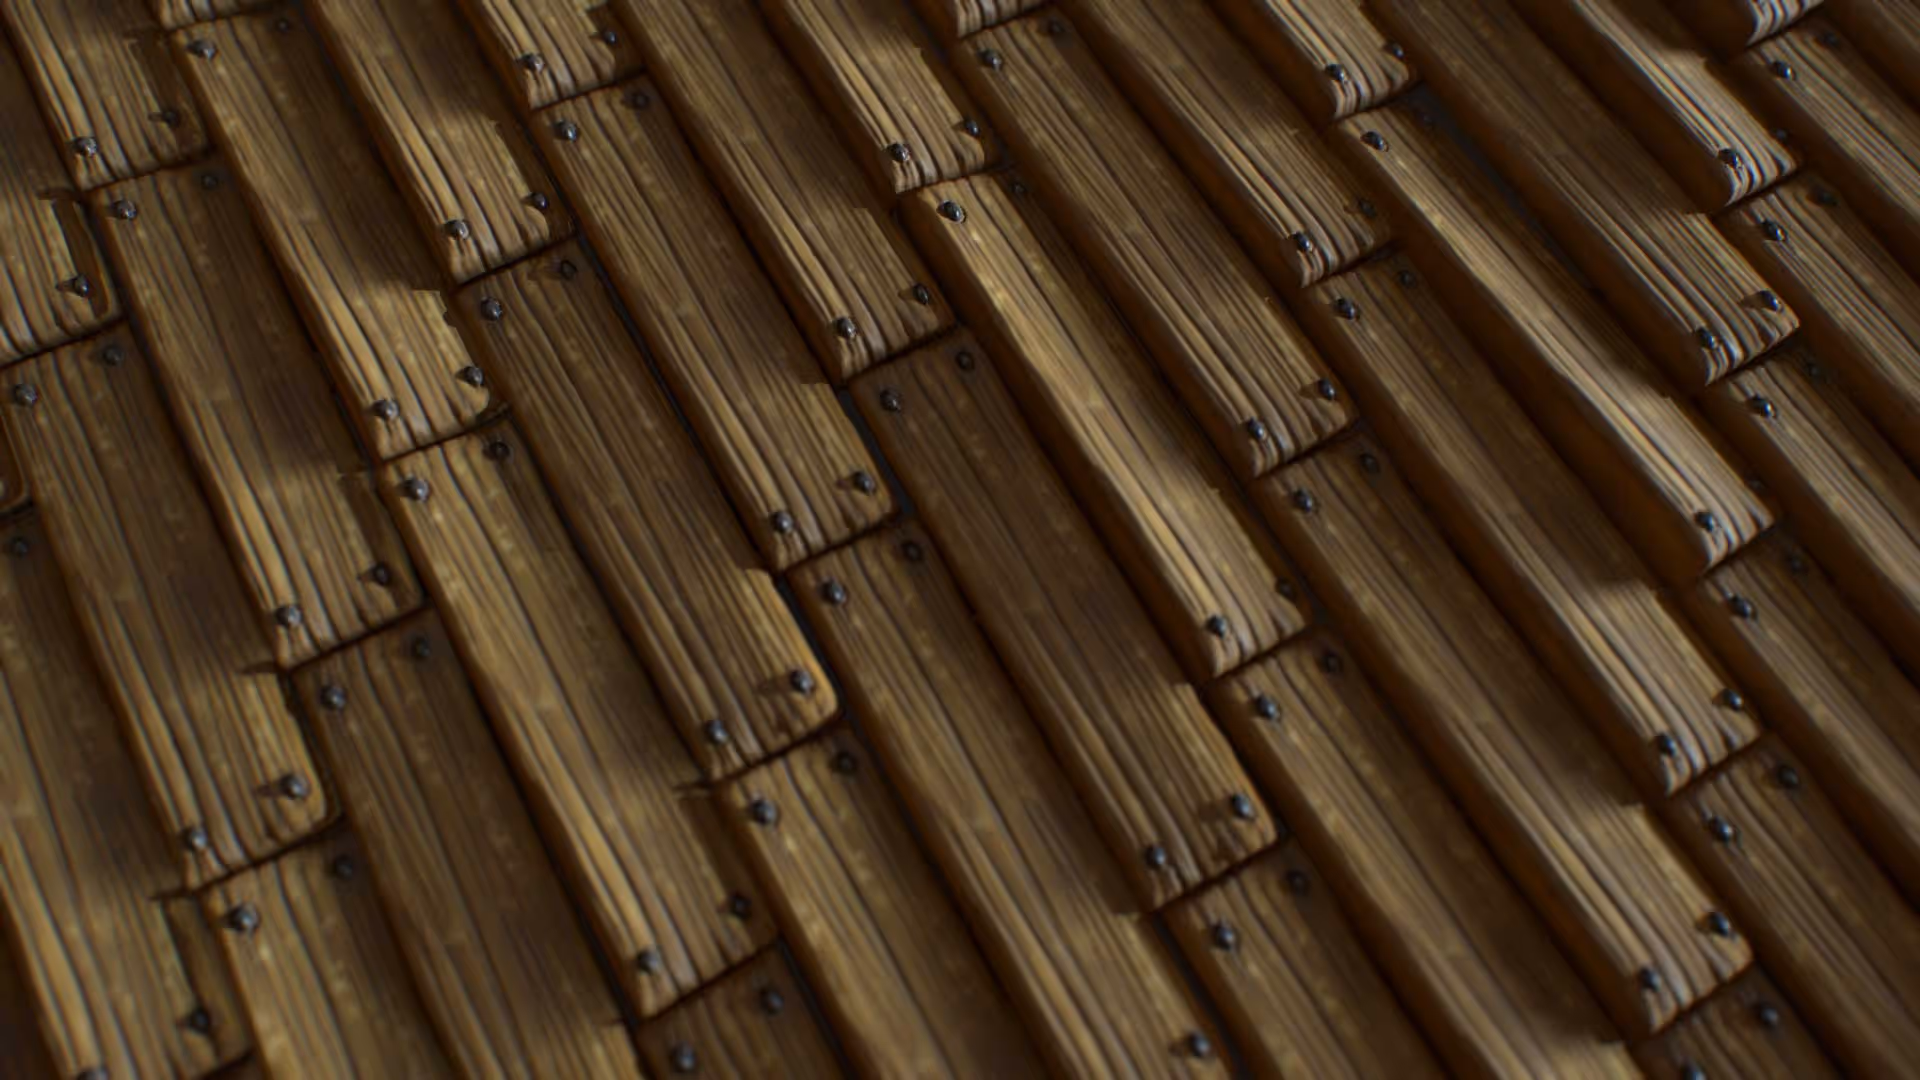
Textures rendered in Marmoset
These renders are the result of the textures maps exported from ZBrush and applied to a material in Marmoset Toolbag 3:

ZTool files for the two textures in this tutorial
In the resources, for this mini-series, I’m including the original ZTool files for the two textures and the NanoBrush with the 3 assets.You can load the ZTools and edit the NanoMesh settings to produce lots of different variations to the textures or create new ones using the brush that contains the rock, grass and wood plank.
Check it out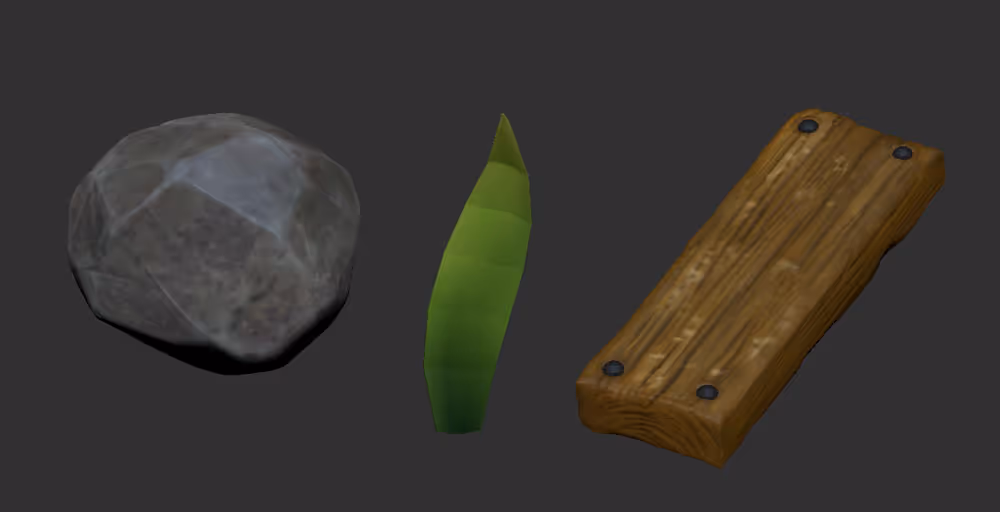


.webp)

