1. Choose your mesh
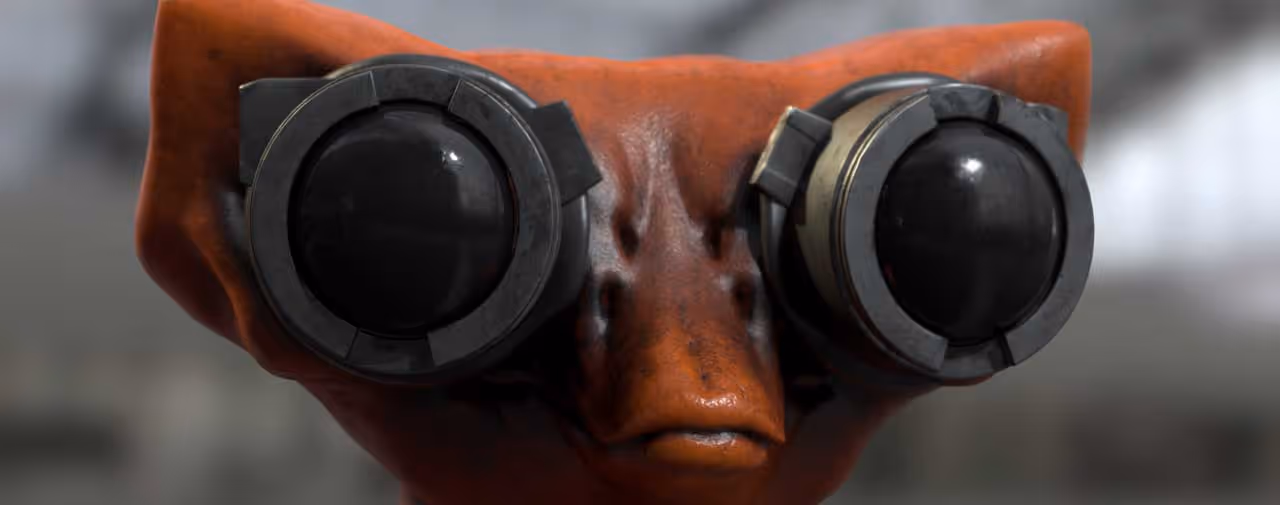
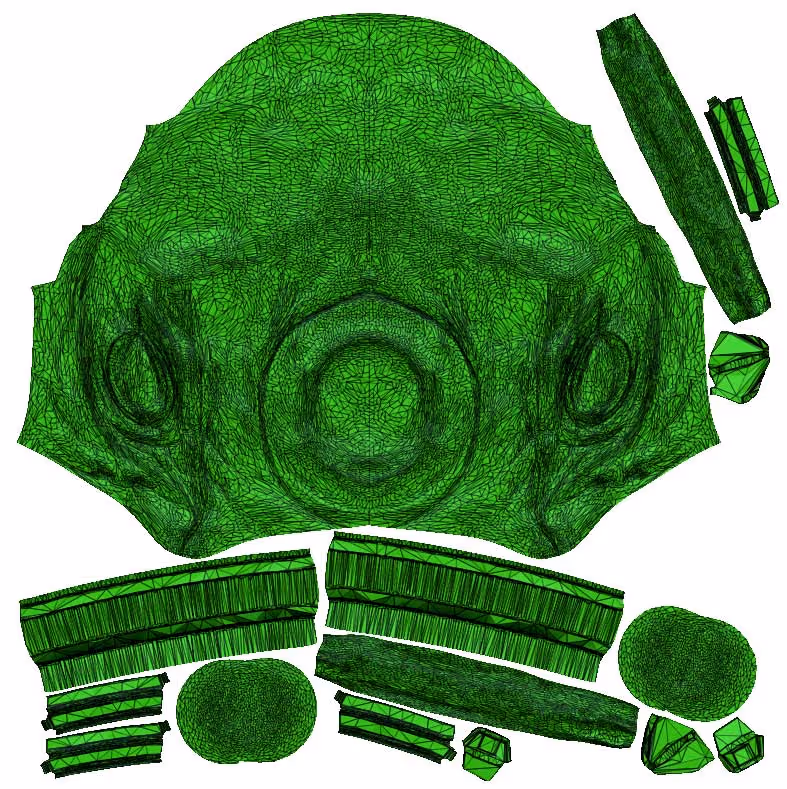
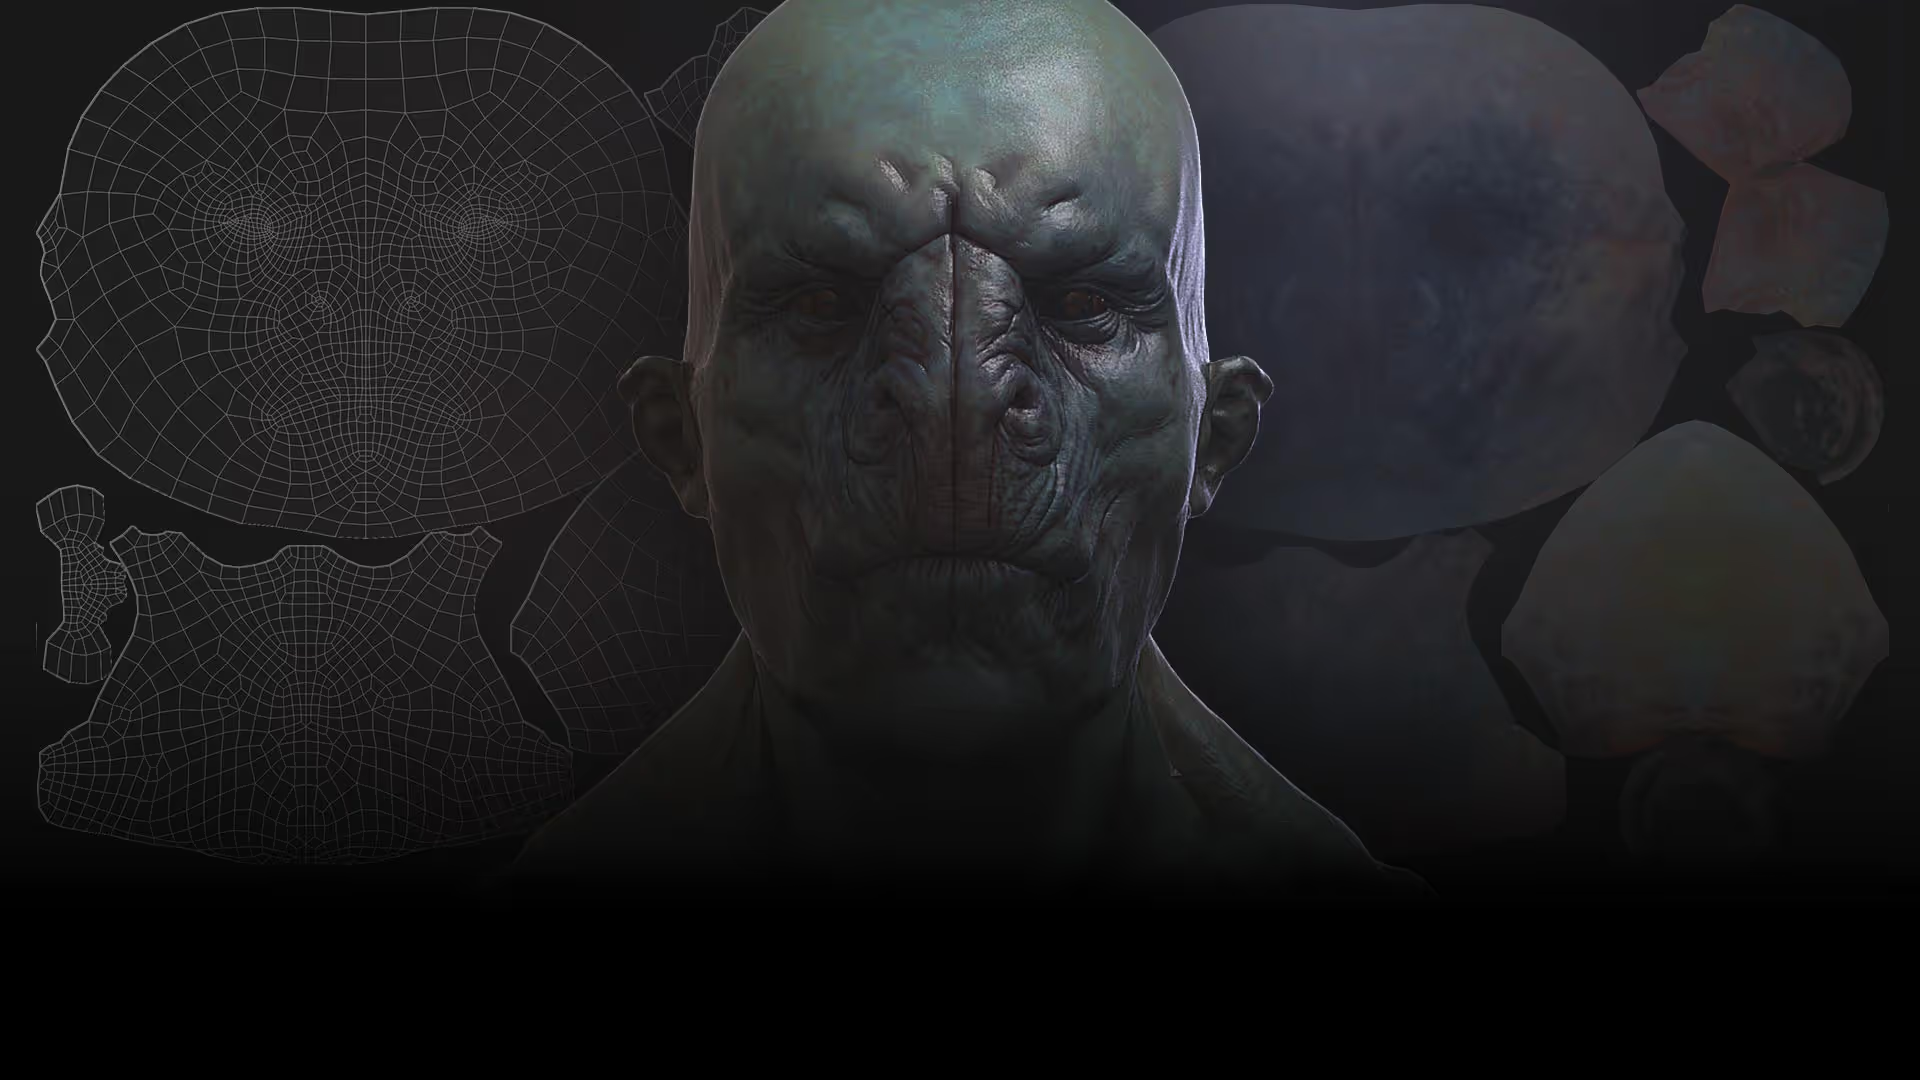
To start, we obviously need an object to work with. I'm going to use the head of one of the characters we worked on during the #ZBrushLive sessions.
This has a relatively clean topology but is still pretty sketchy and just to further prove the point that this could be a Dynamesh sketch or similar, I have deleted all subdivision levels and this is what I have:
2. Generating UVs with UV MASTER
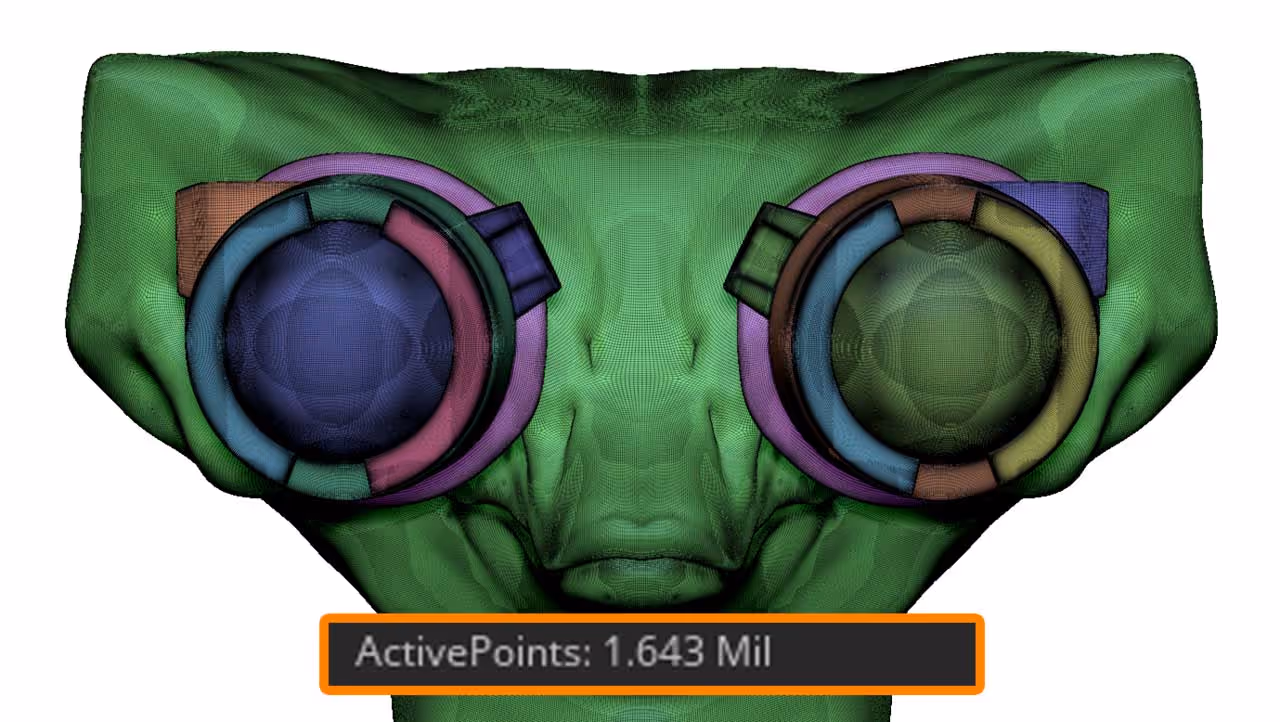
The next step is to produce some quick UVs using the aweomse UV Master plugin in ZBrush. What's great about this plugin is that you can through at it a very dense mesh and it will handle it pretty well. In this case the UV master gave me some nice UVs for a 1,6 Million polygons sketch in under 6 min (the higher the amount of polygons the longer it'll take to process, so you could do step 3 first and come back to this one).
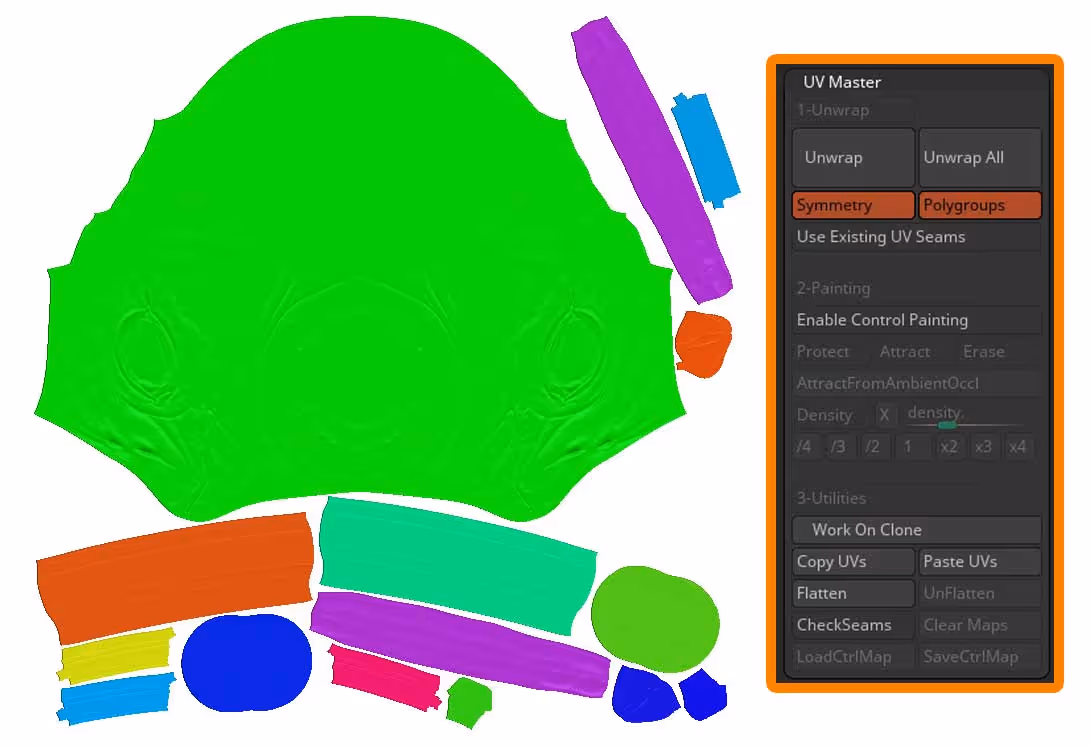
I worked on the goggles on separate subtools and with insert meshes so I had different polygroups I could use... If you have different meshes you can 'auto group' them and use the 'Polygroup' switch from the UV Master:
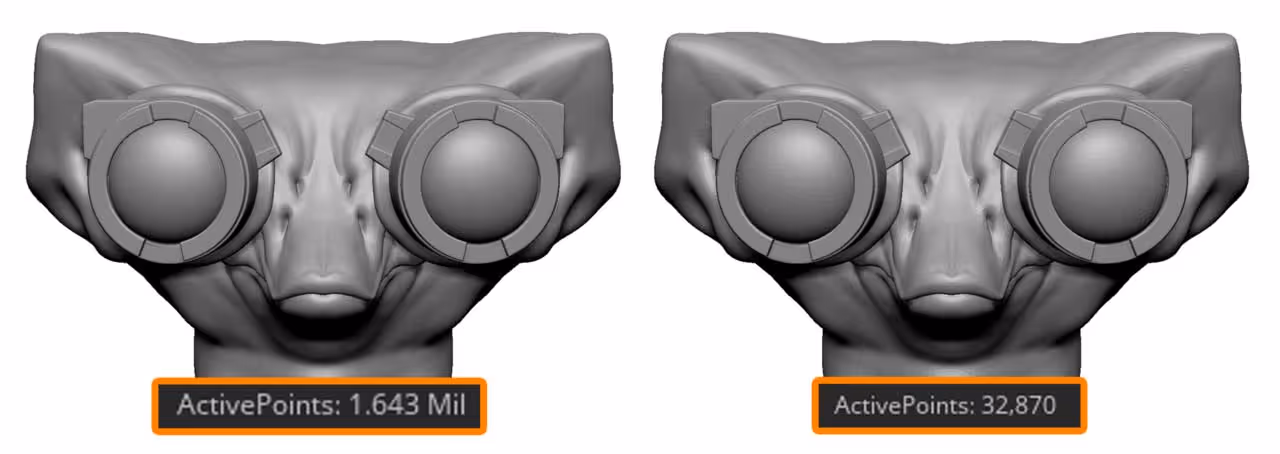
3. Decimation
Once you have UVs for your mesh, even if it is a high-res mesh, you could export it as FBX or OBJ and work with a dense mesh in Substance Painter. However, to optimise the geometry a bit more and work faster, we could optimise the polygon count of the mesh.
The good thing, is that this is another quick and automatic operation using the Decimation Master... And here is the trick:
With the Decimation Master, you can enable the switch called: 'Keep Uvs' and then pre-process the mesh. Once you have pre-processed the mesh, you can decimate it with a lower percentage (I set the slider to 2%)
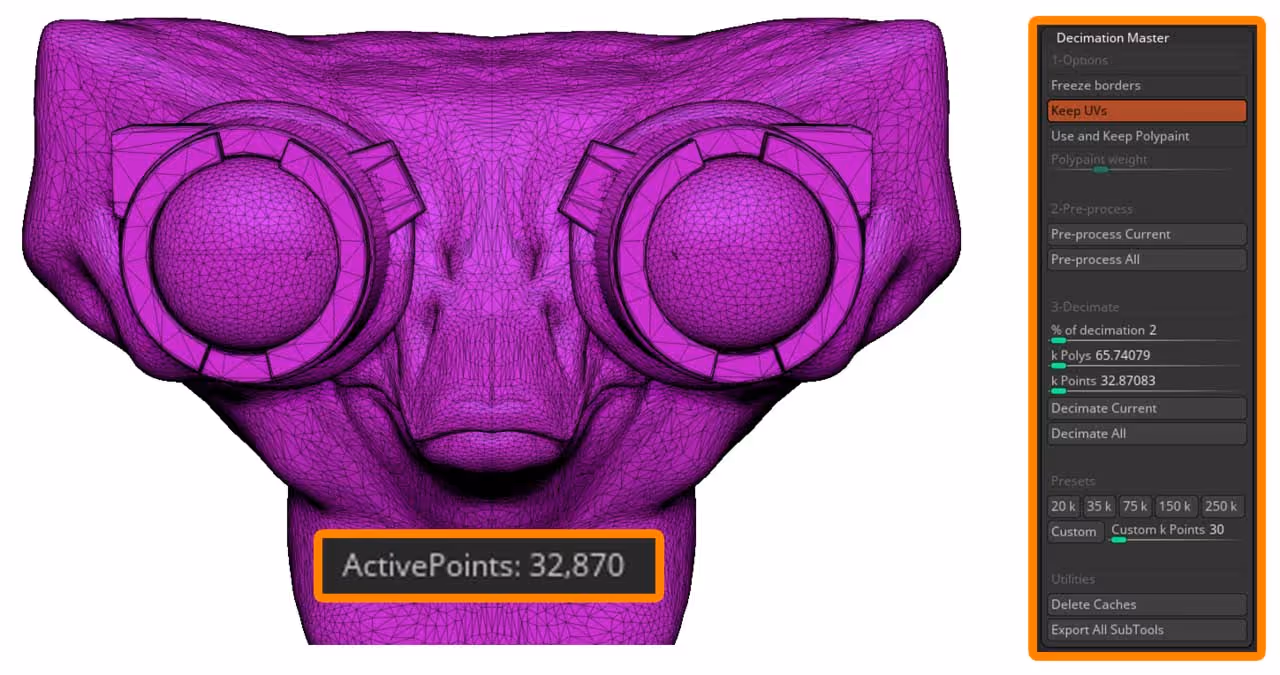
And because of the 'Keep Uvs' switch, we retain the nice set of UVs we had before. Keep in mind that you can actually do this process after decimating the object, I just wanted to show you that you can retain UVs if you already have them
Decimation side by side
The decimation process will produce a topology that is not ideal for a smooth deformation or further detailing in ZBrush, but it will retain the volumes and, for the most part, it will look exactly the same as the original mesh (slightly more faceted depending on the decimation percentage)
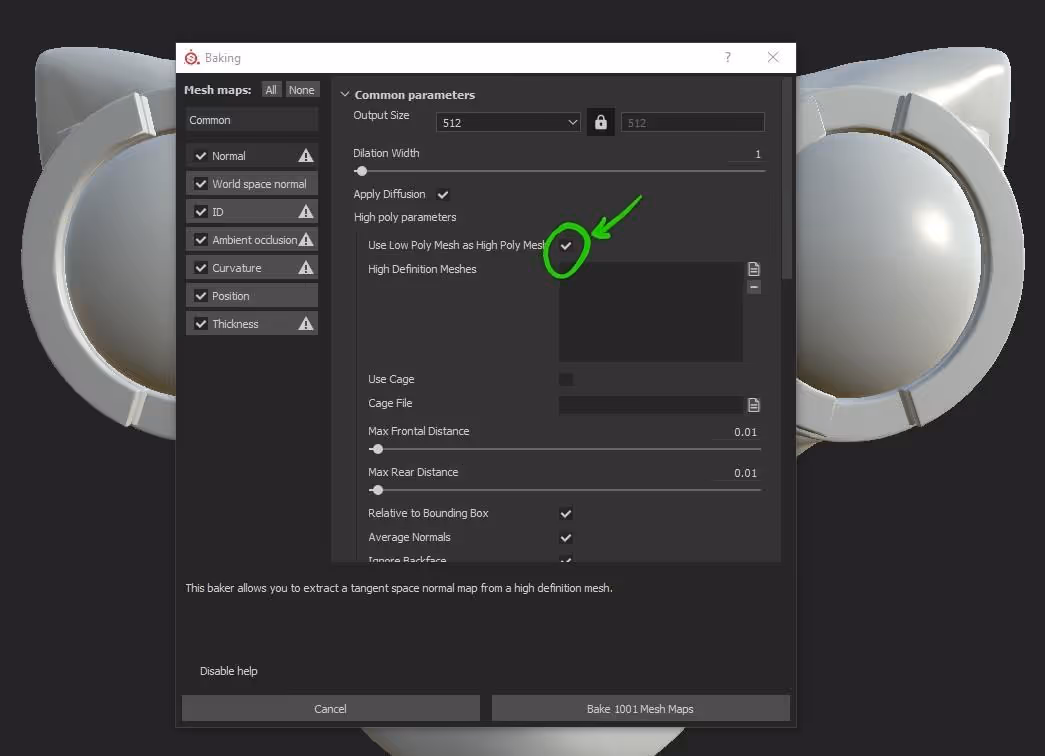
Send it to Substance Painter!
Once you have your decimated sketch (don't worry about the topology... you already have UVs and the mesh looks good), you can export the mesh and send it into Substance Painter.
In substance painter you can bake the maps that some generators and smart materials need by simply checking the 'Use Low Poly Mesh as High Poly Mesh' tickbox
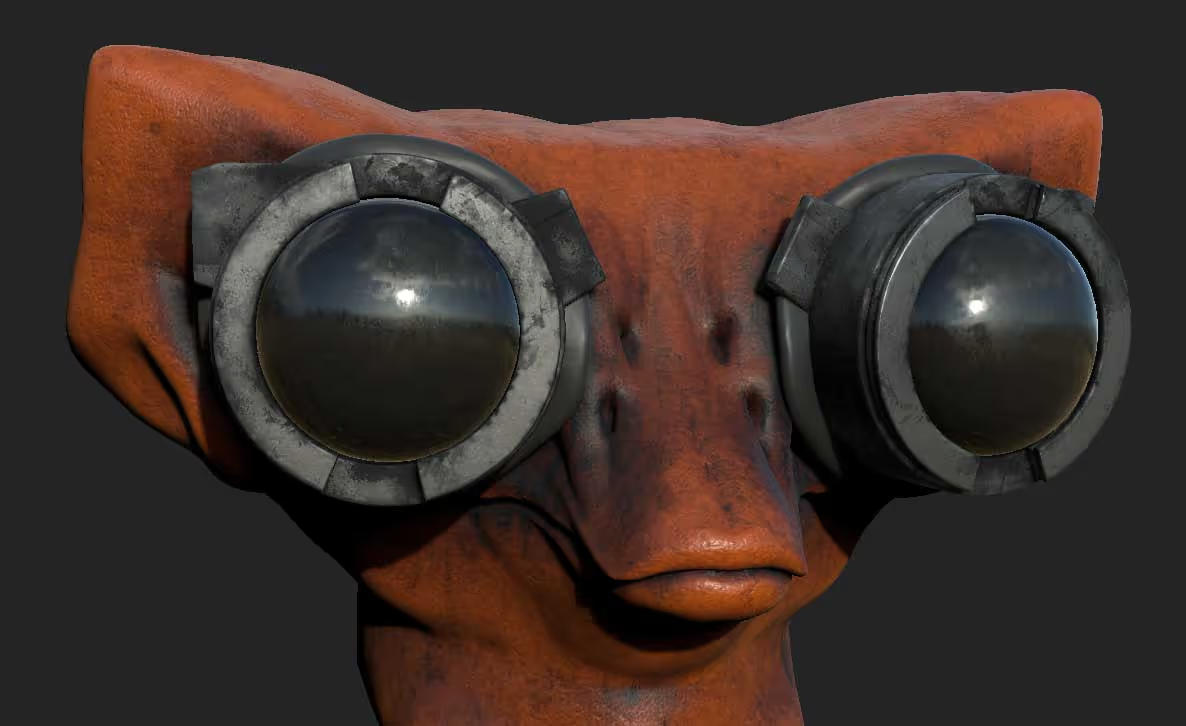
And that is pretty much it... you can now work in Substance Painter with your 'sketchy mesh' but everything will look just fine... obviously don't expect it to be a game ready asset haha but as a concept it, this method works great!


.webp)

.webp)