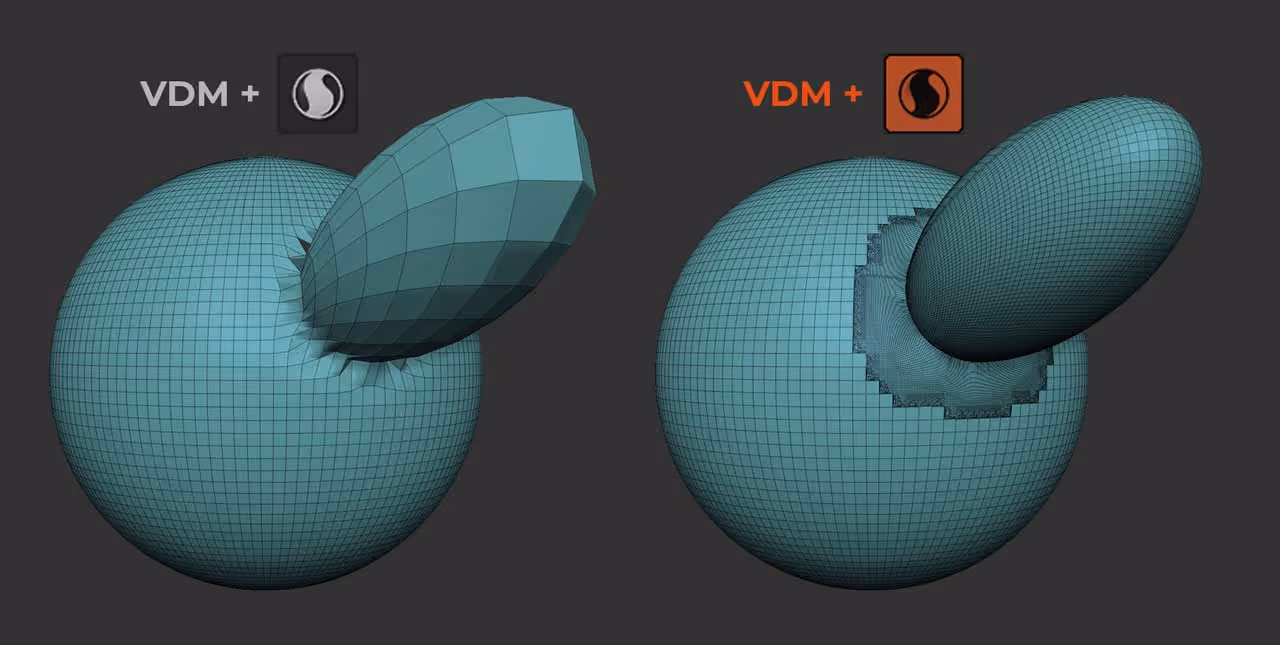
First, a VDM is a Vector Displacement Map and it allows you to store the vertex information in all the axis, so you can sculpt things in a plane, and then displace another mesh based on what you sculpted on the plane. This is not new, but the cool thing about the update, is that now you are not restricted to the topology of the mesh you are projecting into... Sculptris Pro takes care of it:
So let's make some stuff... Go ahead and bring in the LightBox, go to Projects > Misc folder and choose the 'Brush3DTemplate102.ZPR, Once loaded, you can start sculpting whatever you want on the plane, just make sure you don't alter the edges. What I do is duplicate the plane so that I can create multiple VDMs within the same tool (you can keep duplicating the clean plane before doing a new VDM)

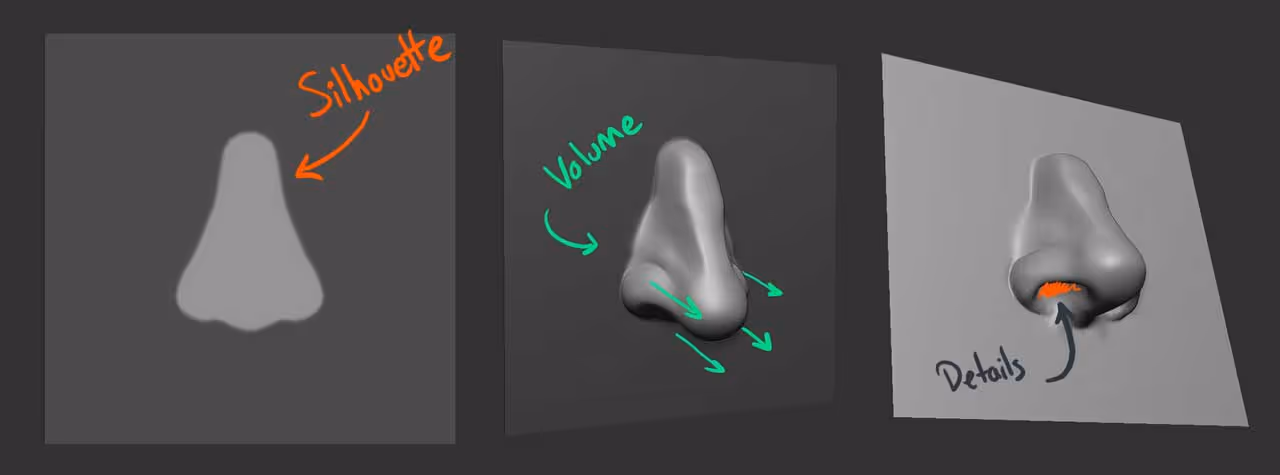
I suggest you mask out the areas you want to affect... kind of like the silhouette of what you are planning to sculpt. For instance, for a nose, you would mask out the shape of the nose, do the sculpting using any brush you want, and masking again to push the wholes of the nostrils inwards
The catch is that whatever you create has to be sculpted using the geometry from the plane, you cannot use sculptris pro or IMM brushes here... we are just 'Displacing' the vertex of the plane... sculptris Pro comes in after when we are applying the VDM to something else.
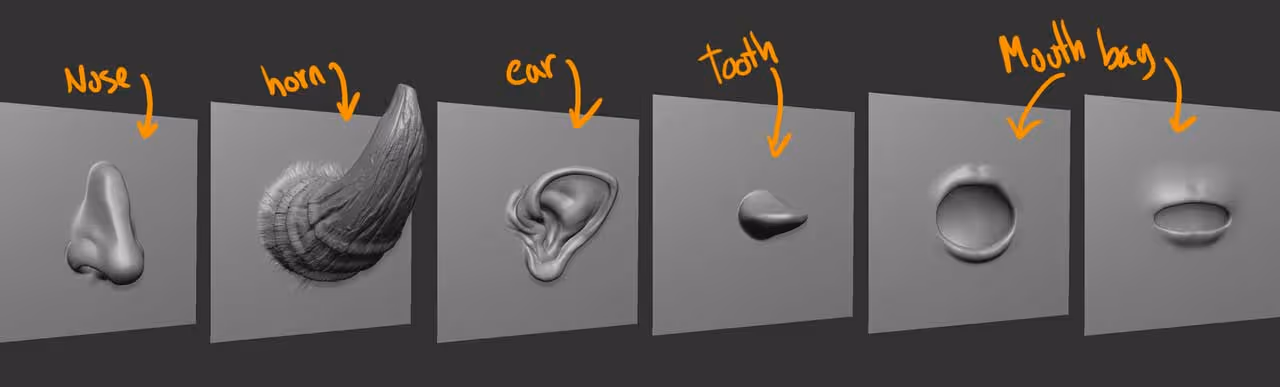
Go ahead and sculpt a few pieces that you might want to use in your creature, like eyes, horns, ears, etc. (by the way, you don't have to... there are actually new brushes with creature pieces, I just much prefer to do my own haha plus it's a good exercise too).
Alright, once you have a bunch of planes with bits and pieces. To convert them into a VDM brush, select the first plane with the nose, select the Chisel brush and Clone it to start fresh (Brush palette > Clone). Change the stroke type to DragRect, change Zsub to Zadd and make sure you have perspective Off (and the camera is facing the plane... hold shift while rotating to be sure).
From the Brush palette, click on the 'From Mesh' button and that's it! you now have a VDM that you can click and drag to displace any other mesh.
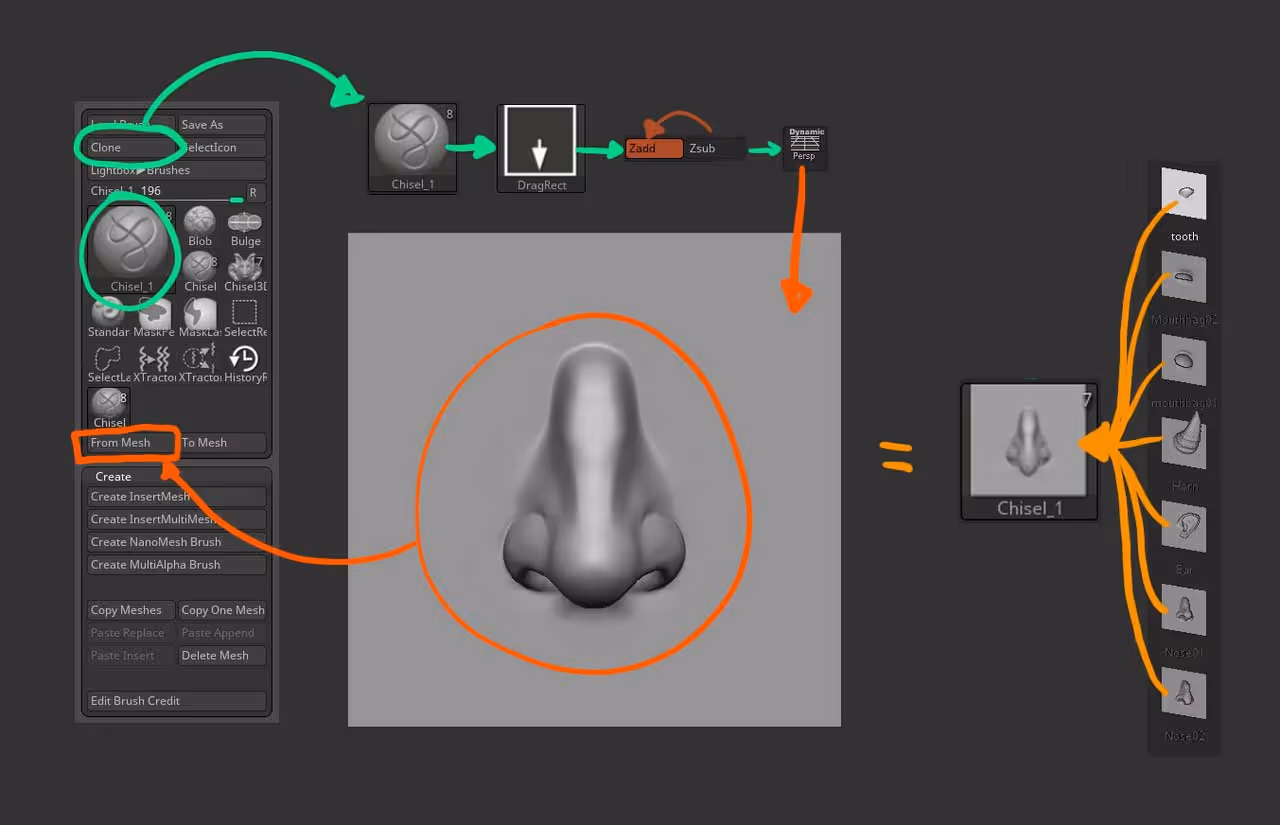
Repeat the process to create the rest of the planes/shapes. If you want to clean up the brush and remove the other stuff, you can go to Brush palette > Create > and click on 'delete mesh' to remove any VDM from your brush.
Now, here comes the fun part... with the VDM brush selected, enable the Sculptris Pro feature and now when you drag a new piece, ZBrush will automatically update the topology as you drag the VDM. This is particularly useful if you want to drag VDMs on top of other VDMs... For example, a VDM to create the mouth bag of you creature, and another VDM to create some teeth from the area that the 'Mouth bag' VDM pushed in:
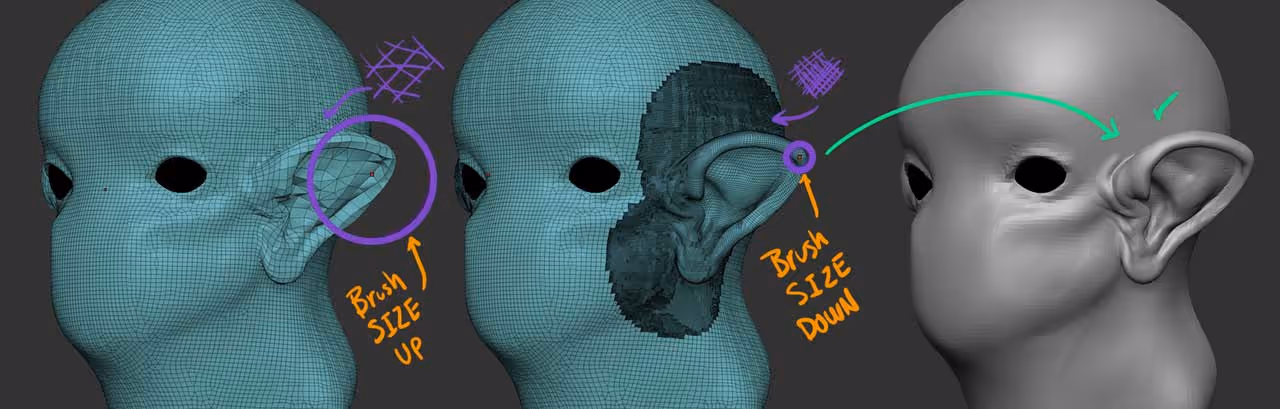
Another great advantage of this new sculptris pro addition to the VDMs, is that you can control the resolution of the VDM that you are dragging in, simply by changing the brush size (smaller brush size will give you more resolution and larger brushes will reduce the polygon count).
That's it! have some fun creating VDMs. You can have multiple VDMs stored in the same brush so you can build one brush just for noses, one just for ears, etc. (keep in mind that lots of VDMs from a high-res plane will increase the brush file size quite a bit).


.webp)

.webp)