
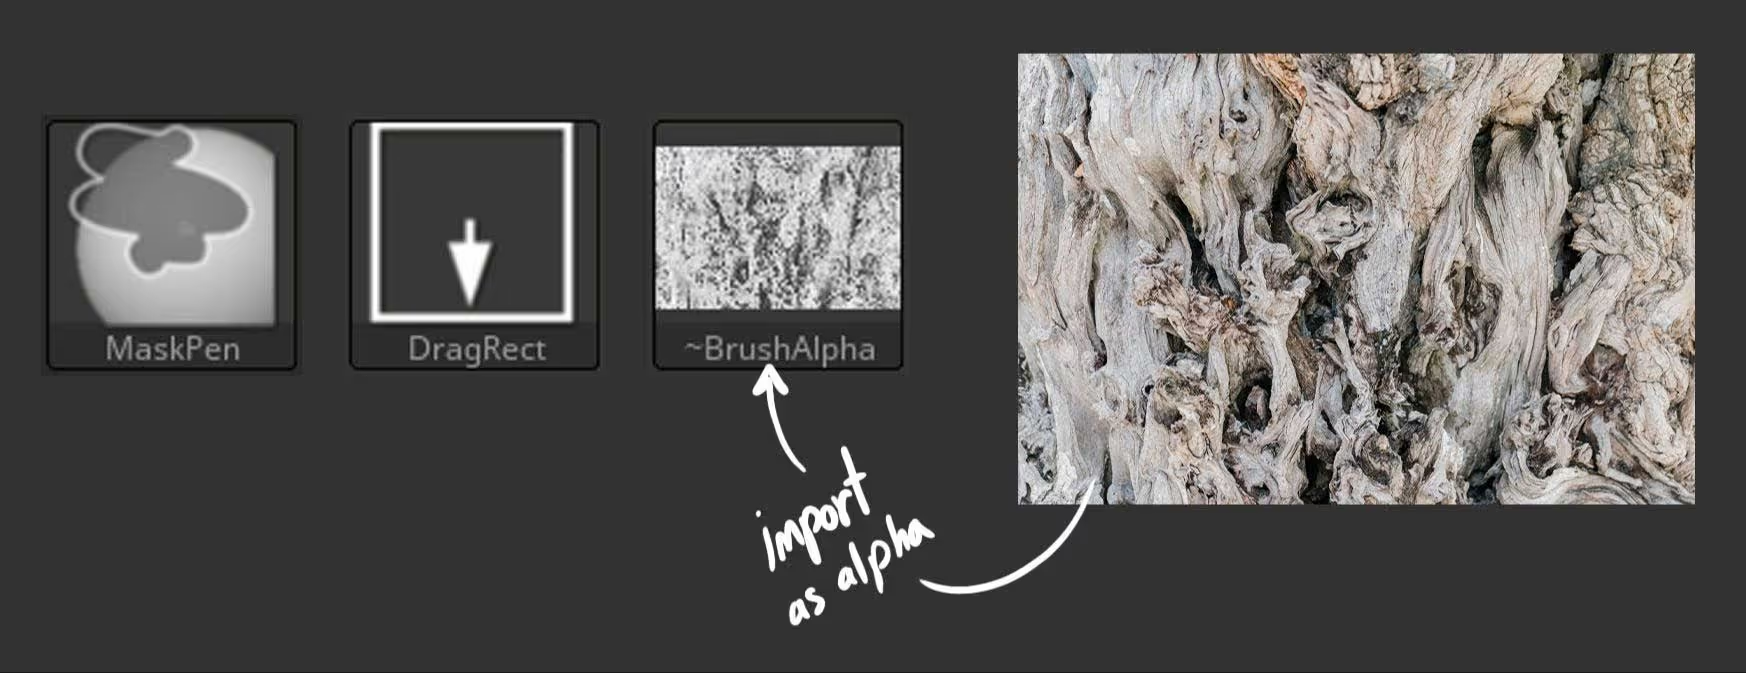
Step 1
Find a cool-looking texture or a photo and import it to ZBrush from the Alpha palette (here is a link to the one I used)
Step 2
Hold CTRL to select your masking brushes and make sure you have the MaskPen selected, then while holding CTRL change the stroke to DragRect and finally from the Alpha palette select the imported texture:
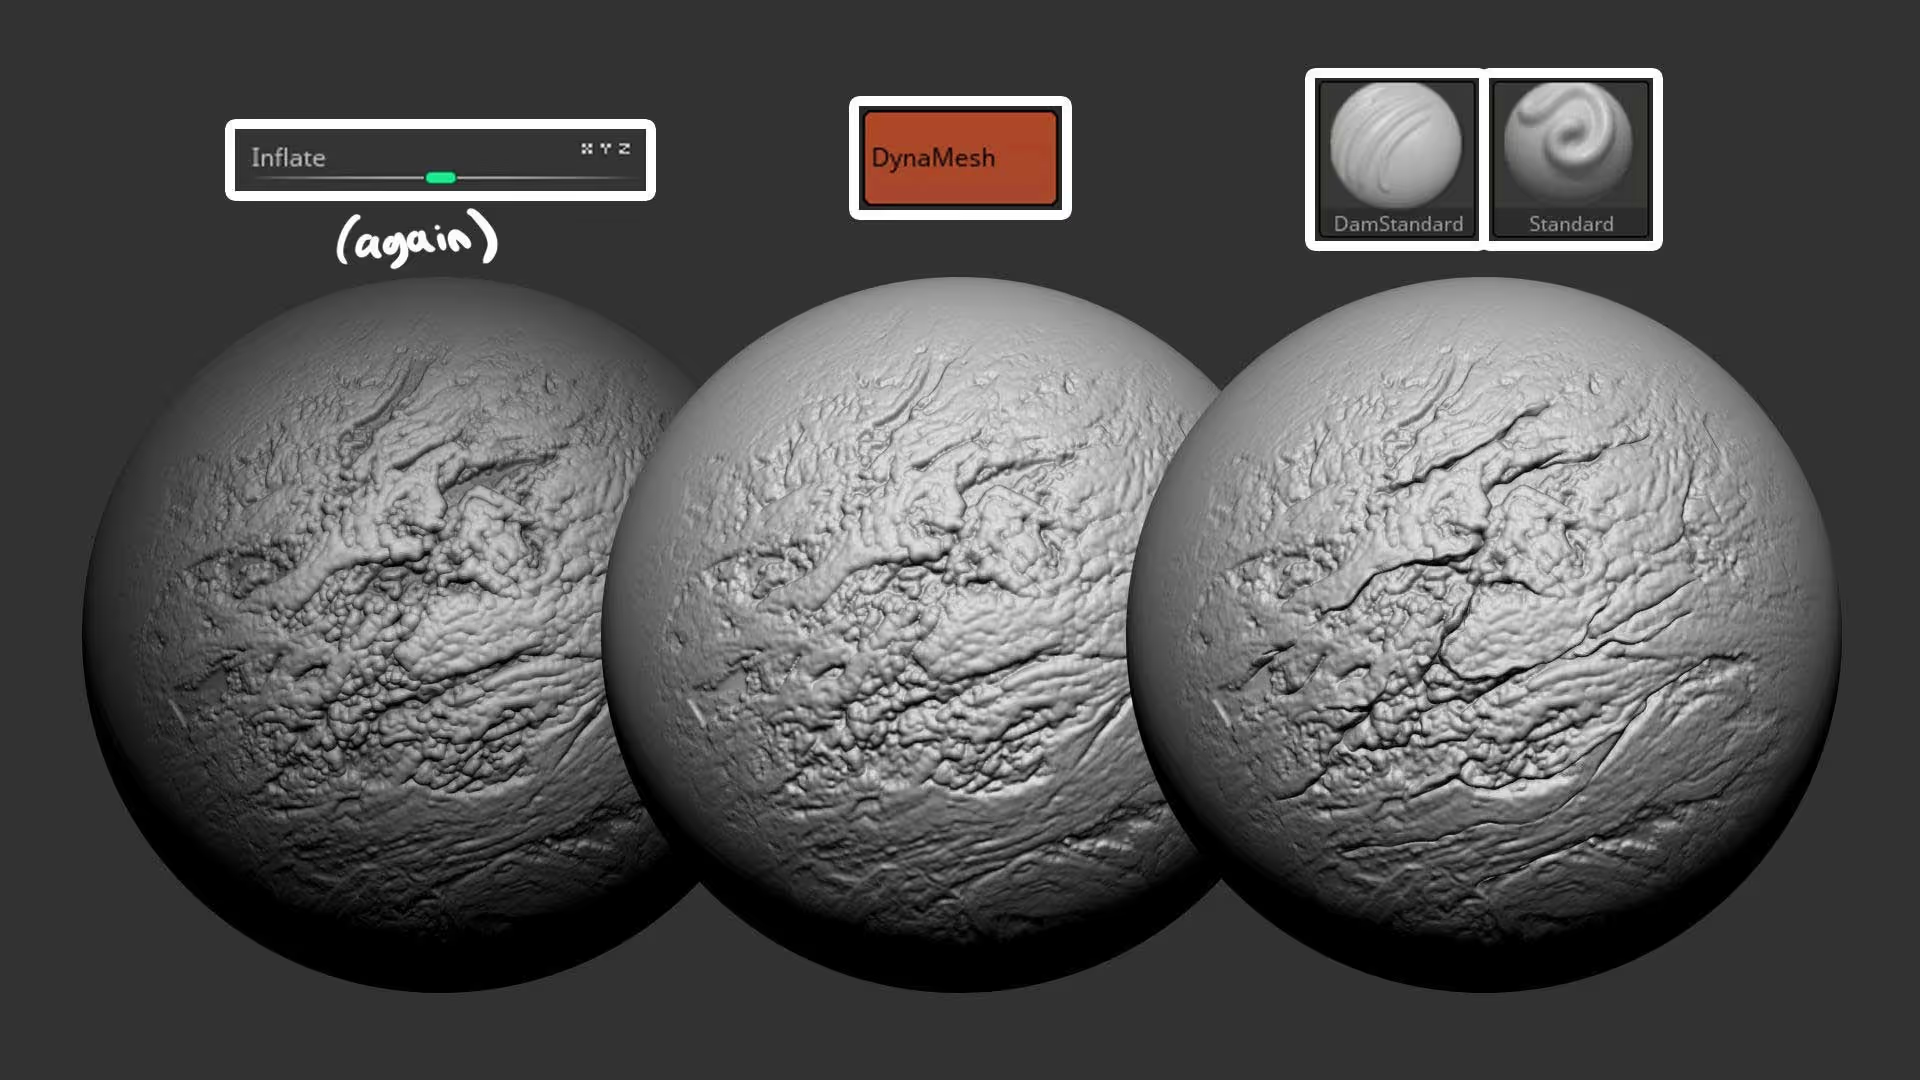
Step 3
Holding CTRL to mask, click an area of your model and drag the texture as a mask. Then invert the mask and blur it a bit (you can click on the mask while holding Ctrl to blur the mask).
Step 4
From the Deformation Palette, use the 'inflate' slider to push the surface and create the cool intricate pattern of the texture over the surface of your model:

Step 5
I like to repeat the inflating step to create a 'lumpy' effect with rounded softer details. This 'double inflation' will likely produce multiple intersections so the next step is to Dynames your object at a high resolution.
Step 6
The final step of this tiny trick is to go over some areas and increase the controls of the crevices and high points using the Standard and the Dam_Standard brush.
I like to leverage the patterns created by the alpha and inflate effect, so I simply polish and enhance the lines and crevices that are already there.
That's about it!
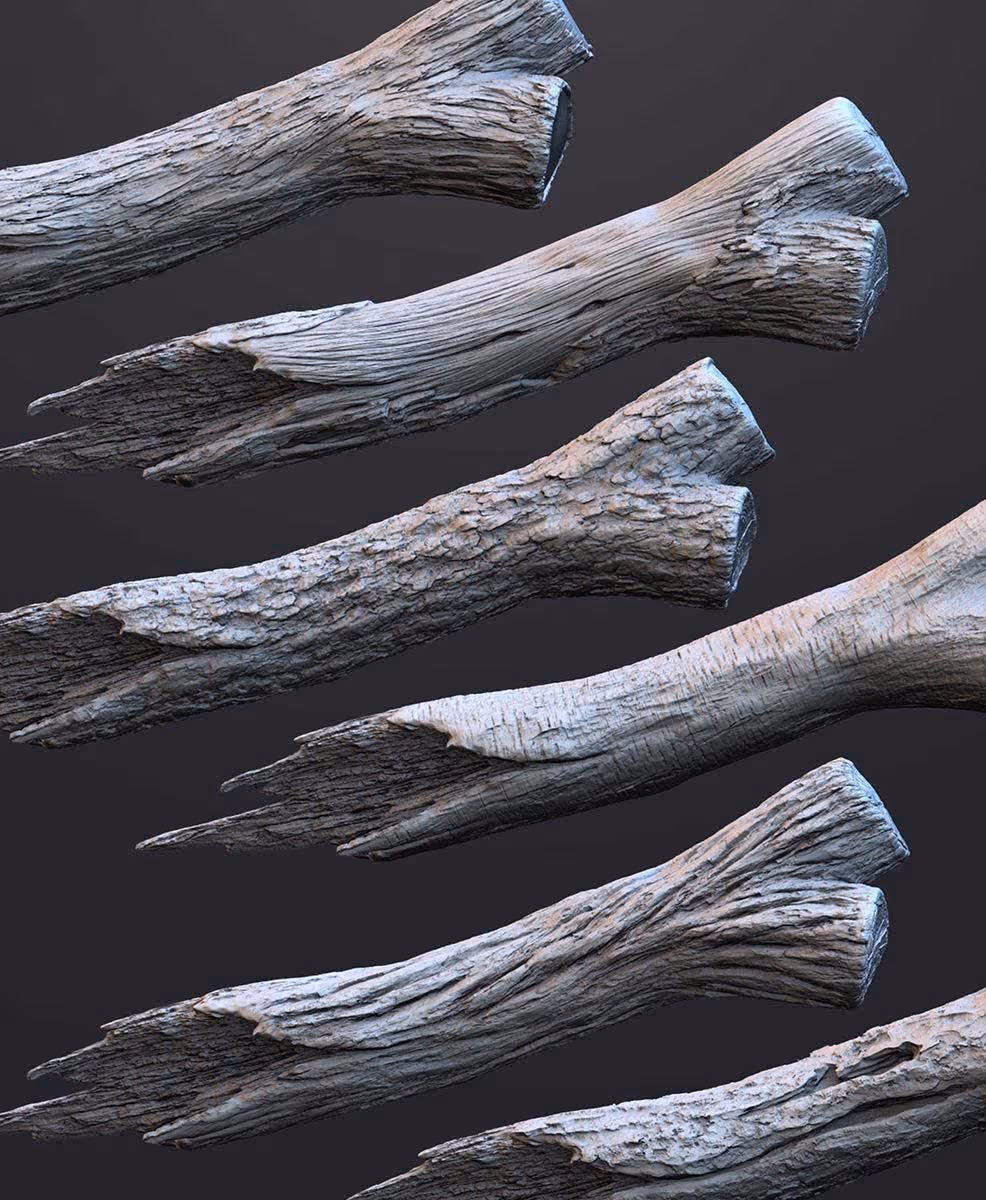
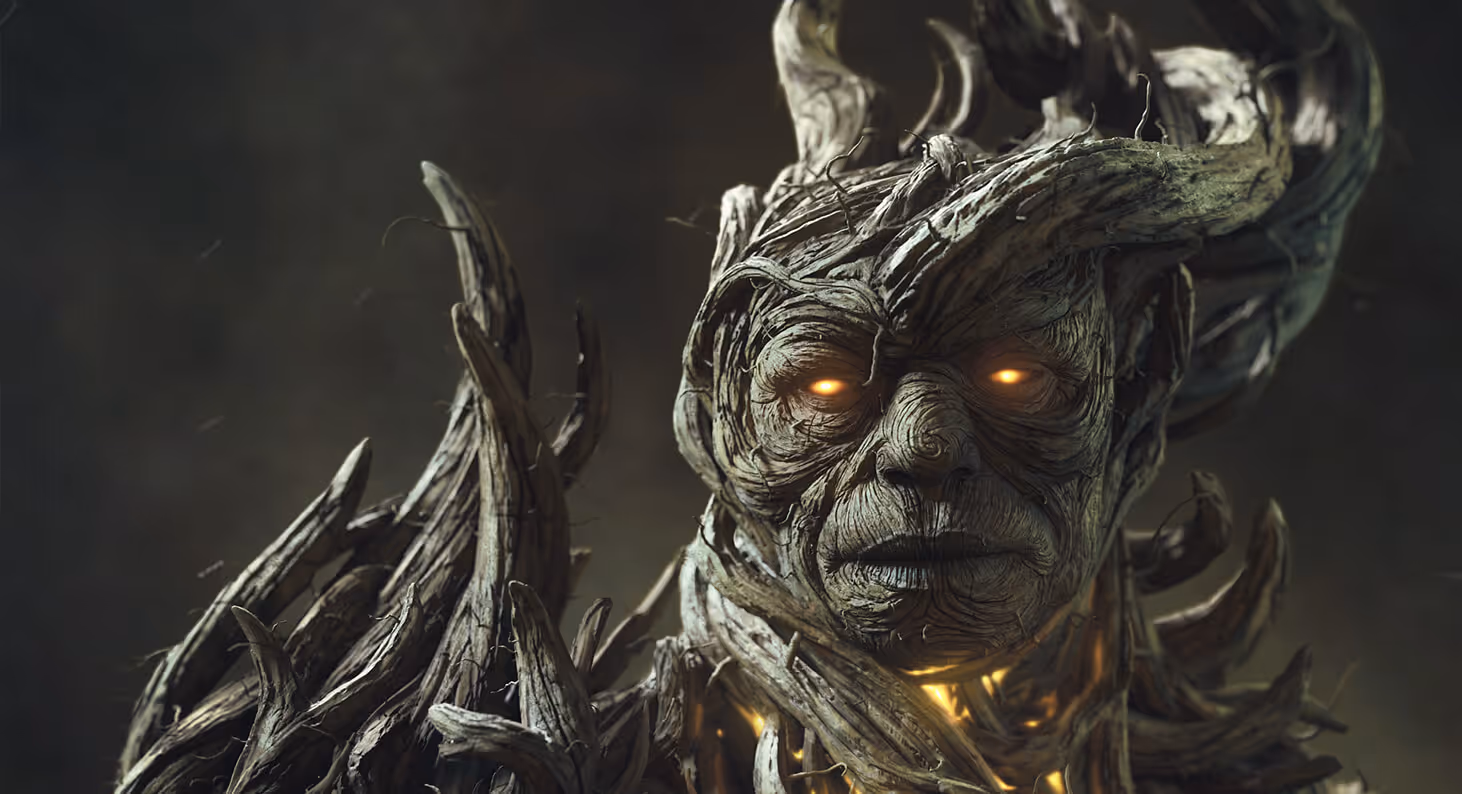
The reason I wanted to share this quick tip is that it is actually a very nice way of producing custom alphas that you can then use on your own brushes (just apply the same technique on a plane instead of a sphere).
I actually used this method for some of the manually painted alphas I create for my brush packs, including the Bark and Wood brushes pack. Here are some assets I was testing the brushes on:


.webp)

.webp)