


An extra simple technique
A 5th method which is probably the most common process, consists of creating a basic ZSphere chain… nothing too complex, just a nice curve (this is intentional) and then creating an Adaptive Skin with subdivision levels at 1 and the Dynamesh resolution to 0:

The next step is also kind of obvious… you can take the Adaptive skin, give it a single polygroup and use the move and smooth brushes to simplify the shape quite a bit. Once the shape is a lot cleaner and follows a smoother curve, you can turn the mesh into an IMM brush.
The IMM brush can then in turn be used to add a bunch of the same shapes around with different sizes and orientations:

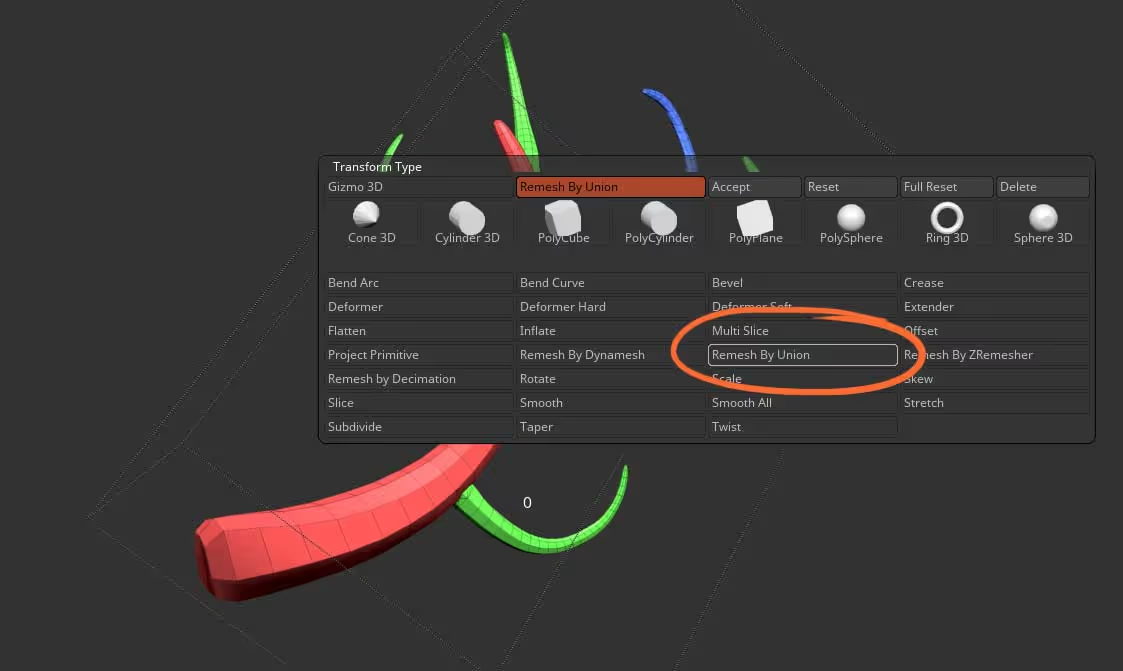
After placing all the simple horns with the IMM brush, you can use the deformers from the Gizmo 3D to ‘Remesh by Uninon’ and make a watertight mesh.
Now, here is the ‘twist’ I mentioned… you can run the ZRmesher with the ‘keep groups’ switch enable to recreate the topology of this new horn… the trick is to keep the target polygon count relatively high so that ZBrush tries to maintain those sharp edges of the very low mesh from the Adaptive skin. Once you have the new topology you can just use the Clay Polish to re-enforce those sharper lines and get a nice stylised horn:

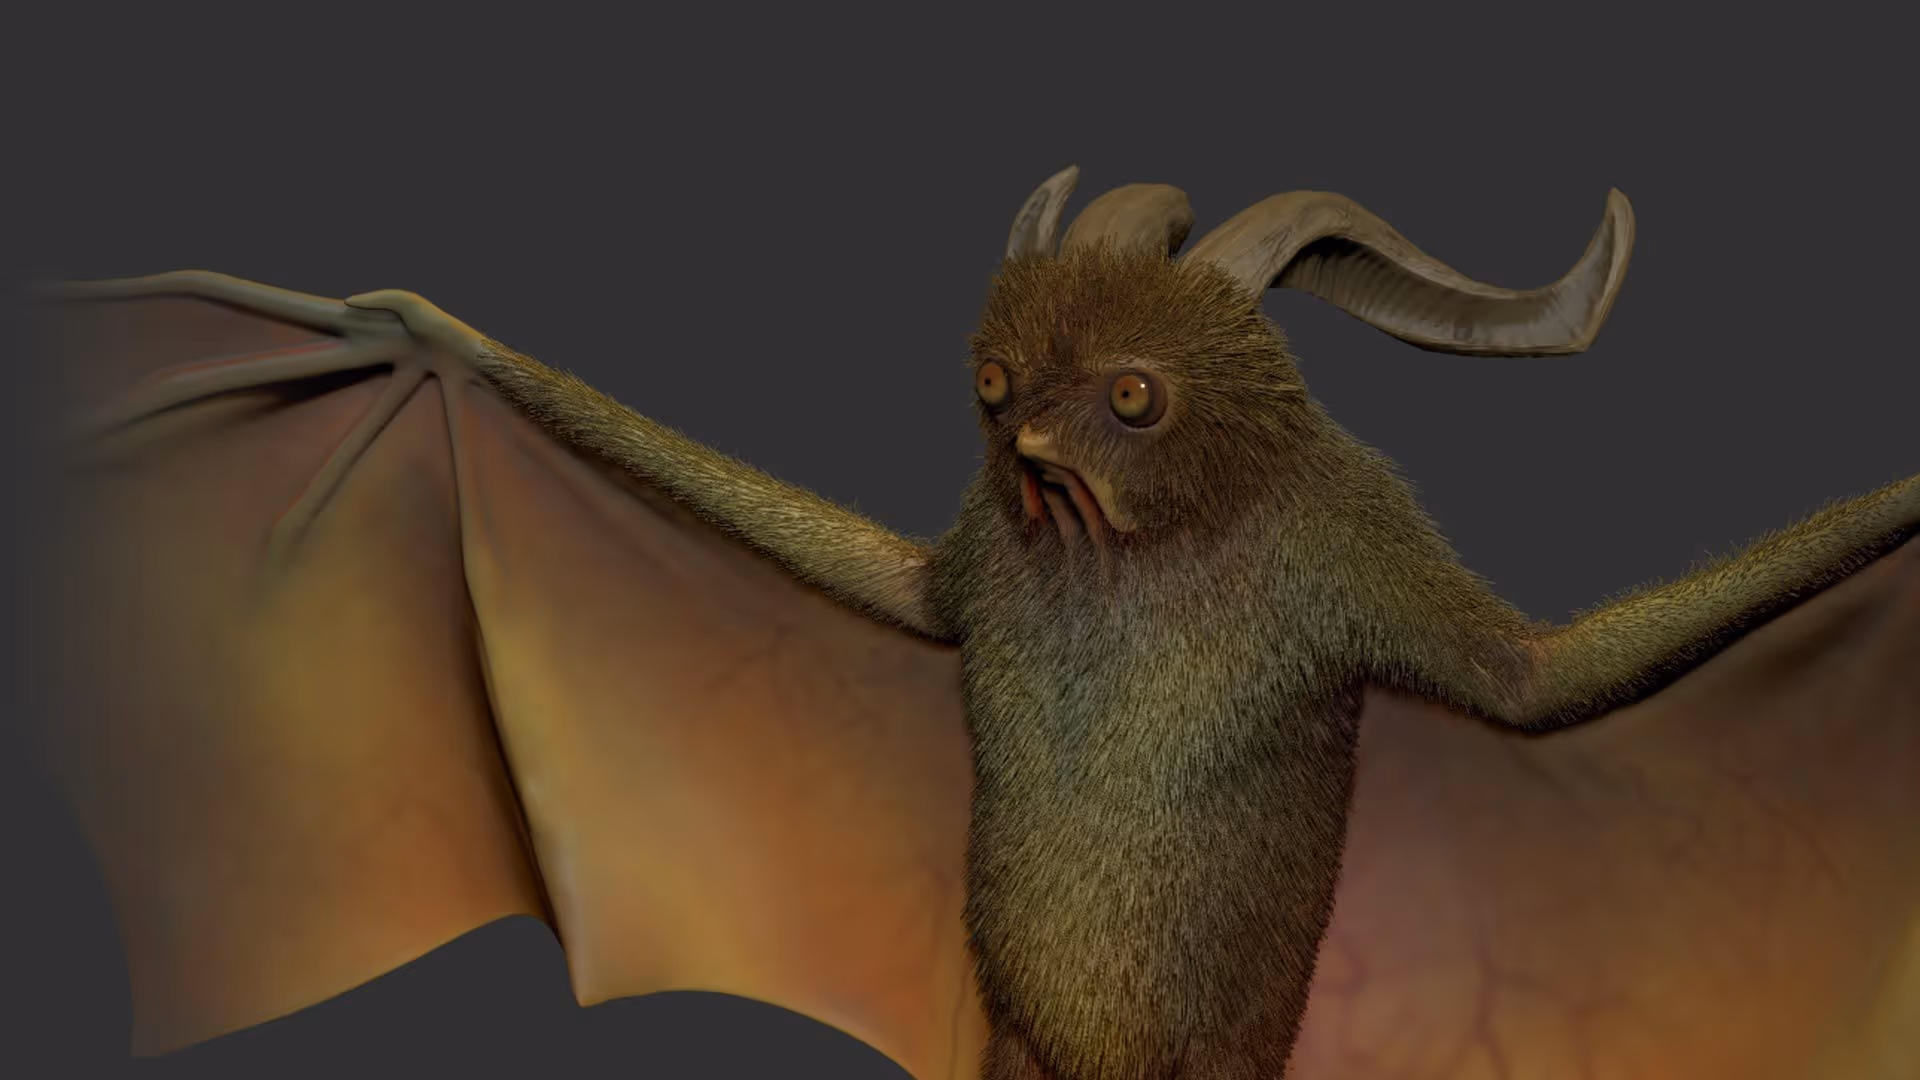
After you have the clean mesh you can ‘rinse and repeat’ to add even more complexity to the horn but convert it into another IMM brush and insert more pieces into it… so here is something quite complex done from a simple curve shape horn:
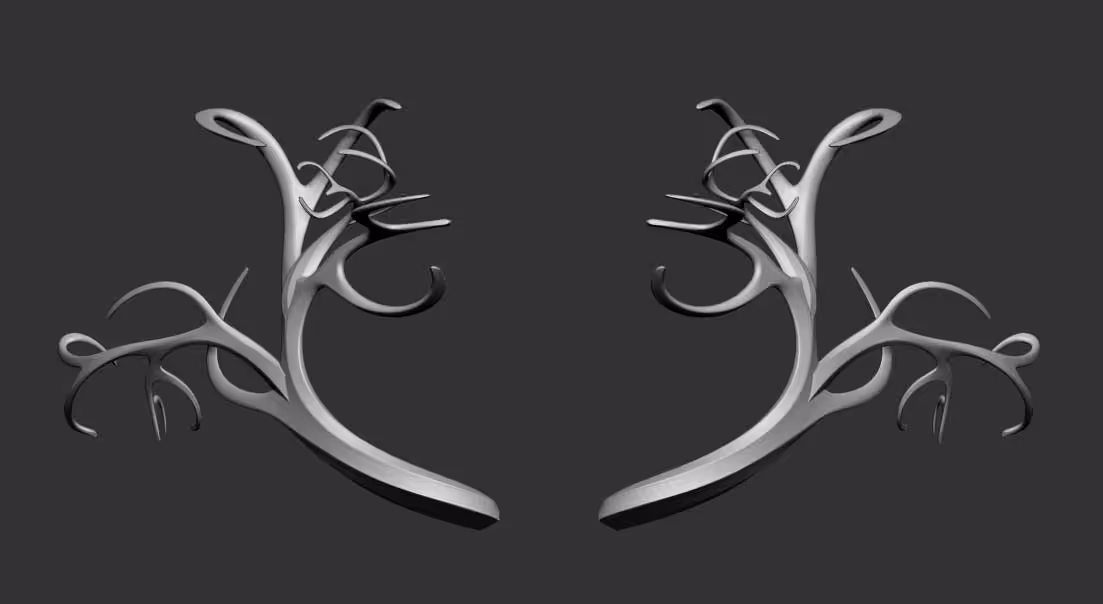

Primitive horn and Horn Curve brush


.webp)

