.jpg)

.jpg)

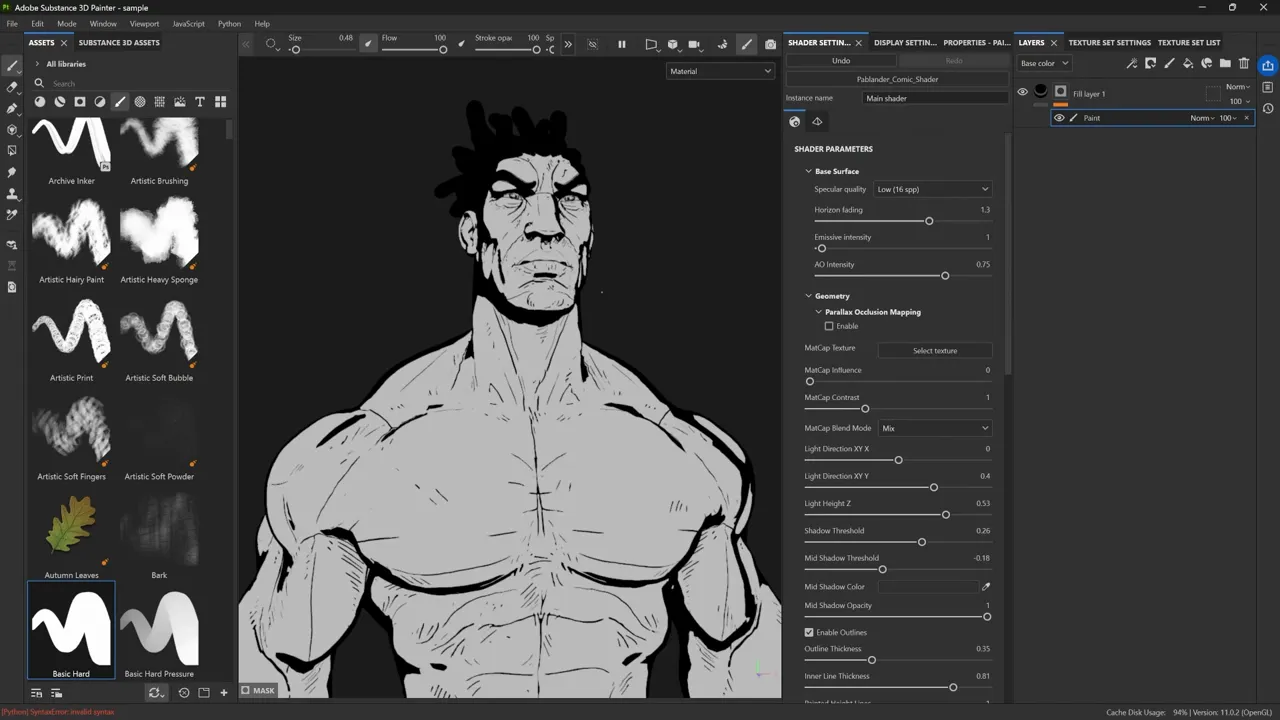
I'm passionate about stylized renders, featuring thick outlines, simple cell shading, and a 2D comic aesthetic. I created a custom shader for Substance 3D Painter that instantly gives you that comic look with adjustable outlines, inner hatching, matcap blending control, shadow thresholds, and even height-based hatching that responds to displacement.
What this shader is and why I made it?
It’s a shader called the Pablander Comic Shader that I’m sharing on the Pablander Academy resource page. The goal is not to bake the shader itself into textures, but to visualize a comic style in 3D, paint hatching, outlines, and crevice-based lines, and then bake those painted textures or use screenshots for illustrations.
I created it because I enjoy this aesthetic and wanted the convenience of being able to tweak it real-time in Painter. You can use it to compose screenshots, paint hatching that reads well on the model, and then bake that hatching into your texture maps for use in other renderers or as an illustration asset.
Download and installation
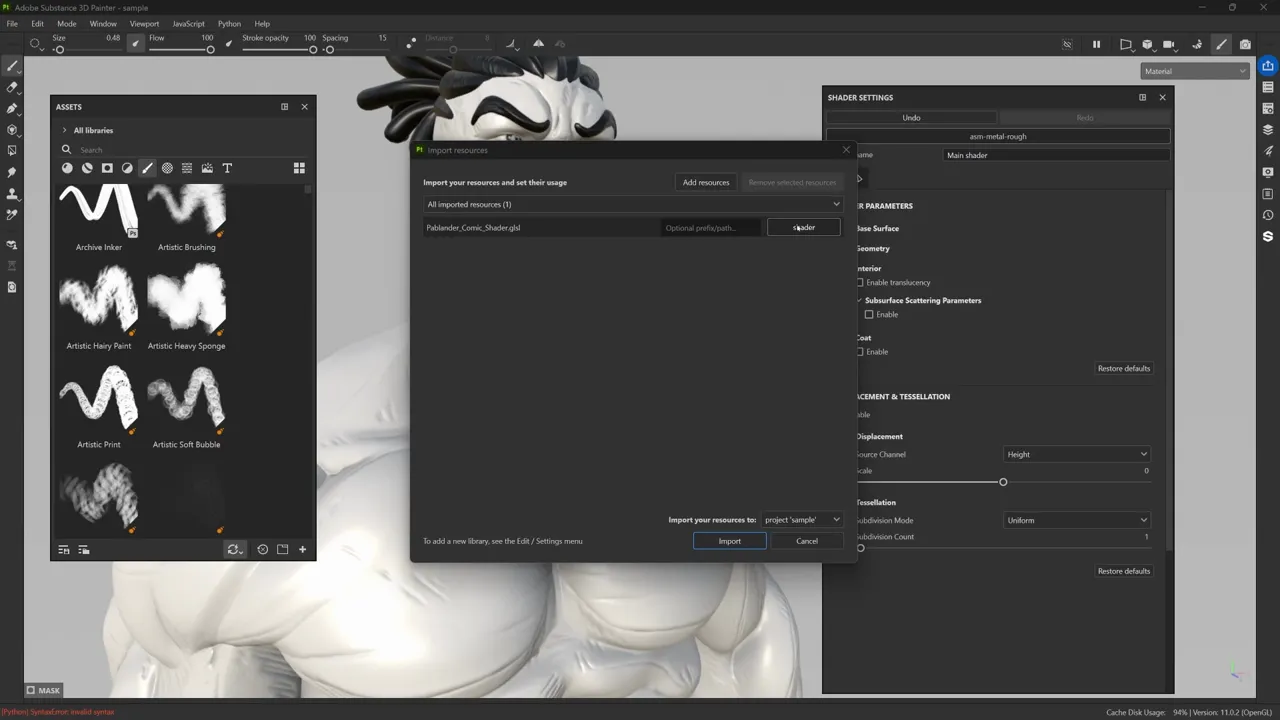
Download the file named Pablander_comic_shader.glsl from the Pablander Academy resource page. Once you have the file, importing is simple:
- Open Substance Painter and click the asset import icon in the Asset Library.
- Drag & drop the GLSL file into the library area.
- Painter recognizes it as a shader; click Import.
- Open the Shader Settings palette and select your new “Pablander” shader from the dropdown.
Once loaded, you’ll immediately see the comic styling. From there you can open the shader UI and start tweaking sliders; I built a compact control set so you can get to a wide range of looks fast.
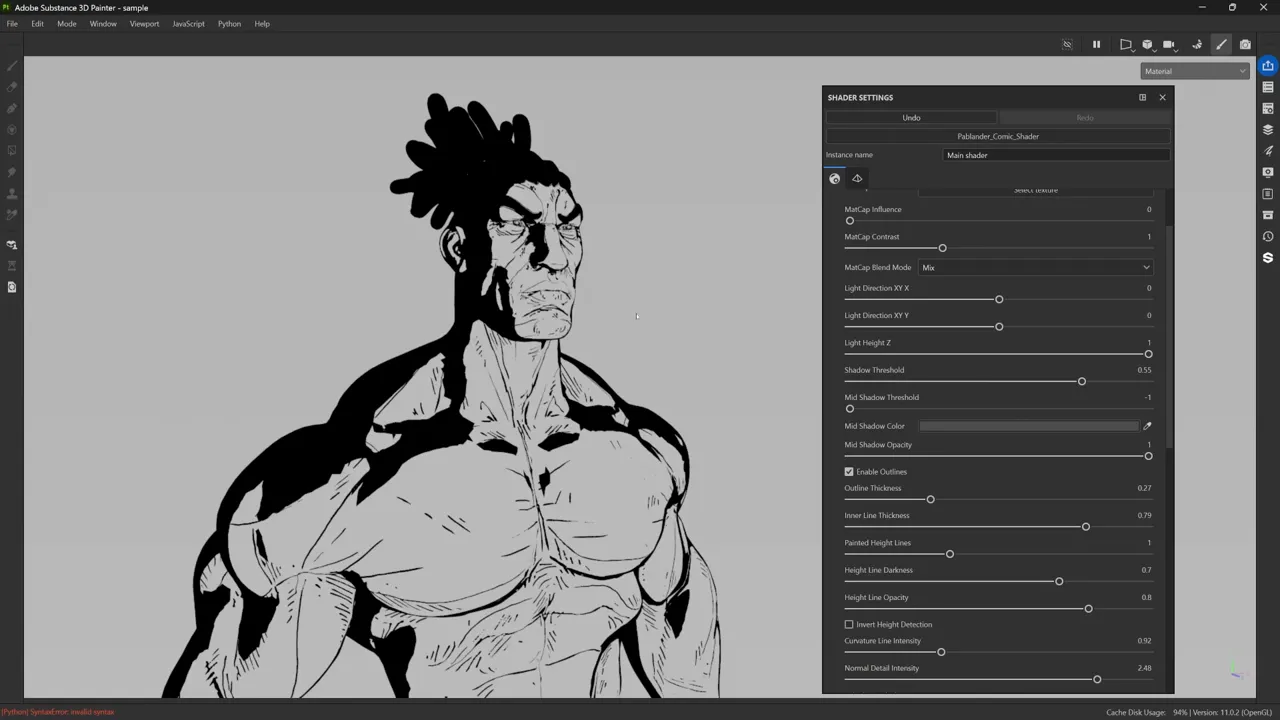
Basic shader controls: Outlines and Inner Lines
Let’s start with the most obvious elements: the outer outline and the inner crevice lines.
- Enable Outlines: toggles a silhouette outline around the model. This frames the model like a comic drawing and gives you that bold edge. You can toggle it on or off depending on whether you want that framed look.
- Outline Thickness: controls how fat the silhouette stroke is. Use this to match your illustration’s thickness; thicker for bold stylization, thinner for subtler framing.
- Inner Line Thickness: controls the strength of the internal crevice lines. Pushed high, you’ll see all the little cuts and baked crevices pop as inked lines.
The inner lines are driven by geometry cues (normals and curvature) and the explicit maps you baked from ZBrush. This makes them look purposeful rather than like procedural noise. Start by adjusting the inner line thickness until you see the crevices you want, then refine using the curvature and normal sliders below.
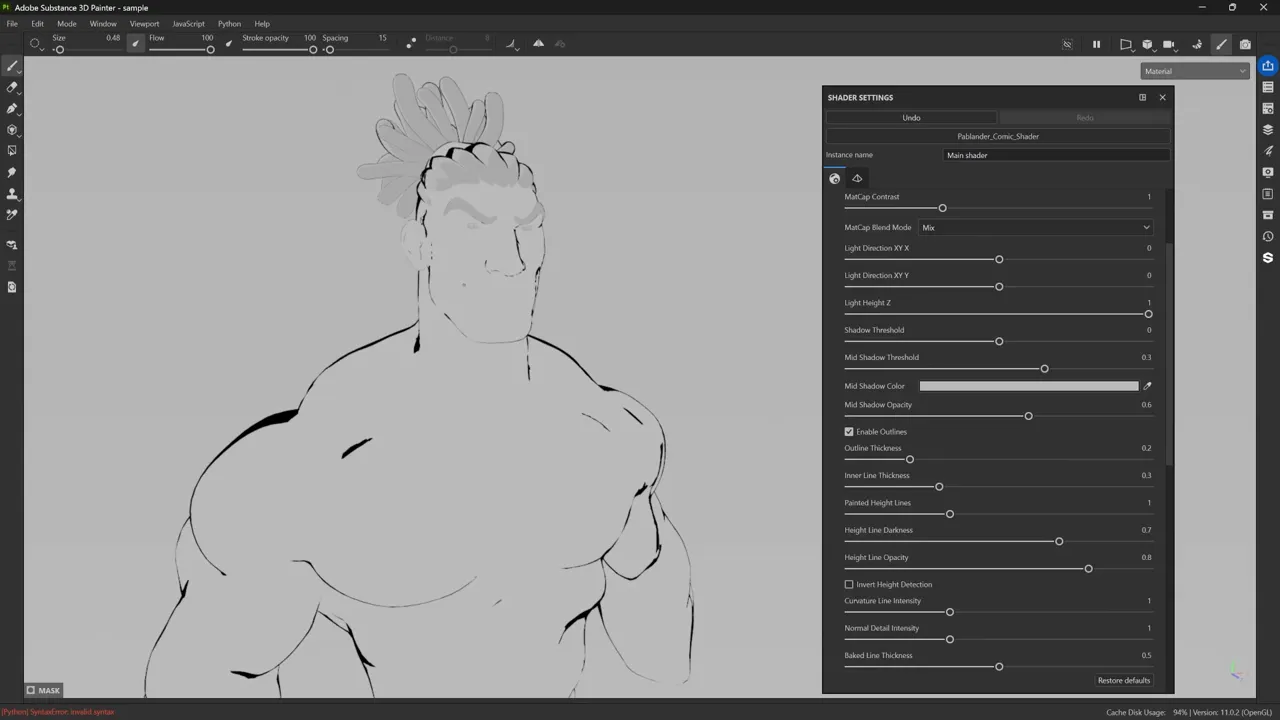
Curvature, normal, and baked-line controls: Fine-tuning the Ink
Here are a few sliders that might look similar at first, but each one controls a different aspect of your lines. I’ve separated them so you can fine-tune how they react to your input maps and baked data:
Curvature Line Intensity — uses your curvature map to spread inner lines based on surface curvature. You can make lines reach further into flatter areas or keep them tight within crevices.
Normal Intensity — sharpens lines using your normal map, emphasizing crisp edges and subtle surface breaks like seams or sculpted ridges.
Baked Line Thickness — relies on your baked crevice data from ZBrush or other sculpting tools. If your bake already defines those small cavities well, this is the one to dial in.

Start with Inner Line Thickness to define your overall line area, then adjust Curvature Line Intensity to shape the reach and Normal Intensity to tighten the details. The balance between these three sliders lets you control both the thickness and taper of every crease line.
Matcap support: fast stylized shading
I added a matcap texture input so you can stylize the fill tone of the model very quickly. Matcaps wrap a 2D image onto the model to fake lighting, perfect for stylized or illustrative rendering.
You can create a simple matcap in Photoshop, then import it into Painter as a texture:
- Drag the matcap JPEG into the Asset Library and mark it as a texture on import.
- Select it in the shader’s Matcap Texture field.
- Use Matcap Influence and Matcap Contrast to dial in the intensity and tonal separation.
- You can also blend the matcap with your albedo (Painter’s polypaint) using blend modes (screen overlay is handy).

Matcaps are optional; I often set the influence to zero for pure linework. However, they’re useful when you want bright, non-photorealistic shading that reads like an illustration.
Color layers and mid-shadows
Next, I demonstrate how color layers interact with two shadow systems: a reversible mid-shadow that’s independent of light position, and a main shadow threshold that responds to the shader’s light direction.
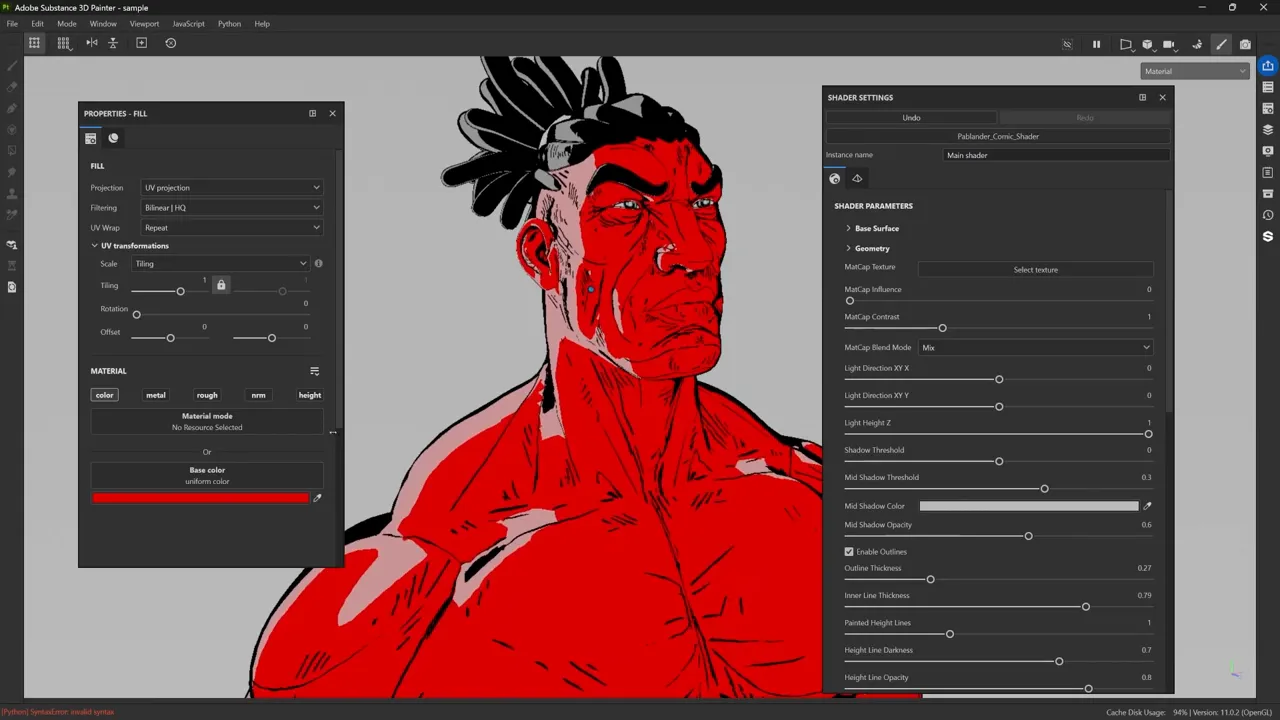
Set a fill layer color and then explore:
- Mid Shadow Threshold / Color / Opacity — this is a manual band that sits between the lit area and full shadow. Use it to create cell-shaded bands or secondary tones (sunset oranges, rim colors, etc.). The threshold parameter pushes the band in or out.
- Shadow Threshold — reacts to the shader light direction and creates the dramatic flat shadow areas typical of comic panels.
- Light Direction X/Y and Intensity Z — control the light axis and how the threshold maps to world space. Rotate the X/Y to place the shadow, and use Z for front/back influence.
By combining a strong shadow threshold with a mid-shadow band, you can get very graphic “cell shading” that feels like ink and flat color rather than photorealism. It’s fast and visually effective for concept renders or stylized turnarounds.
Painting outlines and hatch lines
Now for my favorite part: painting lines directly in Painter so the shader reacts to your strokes.
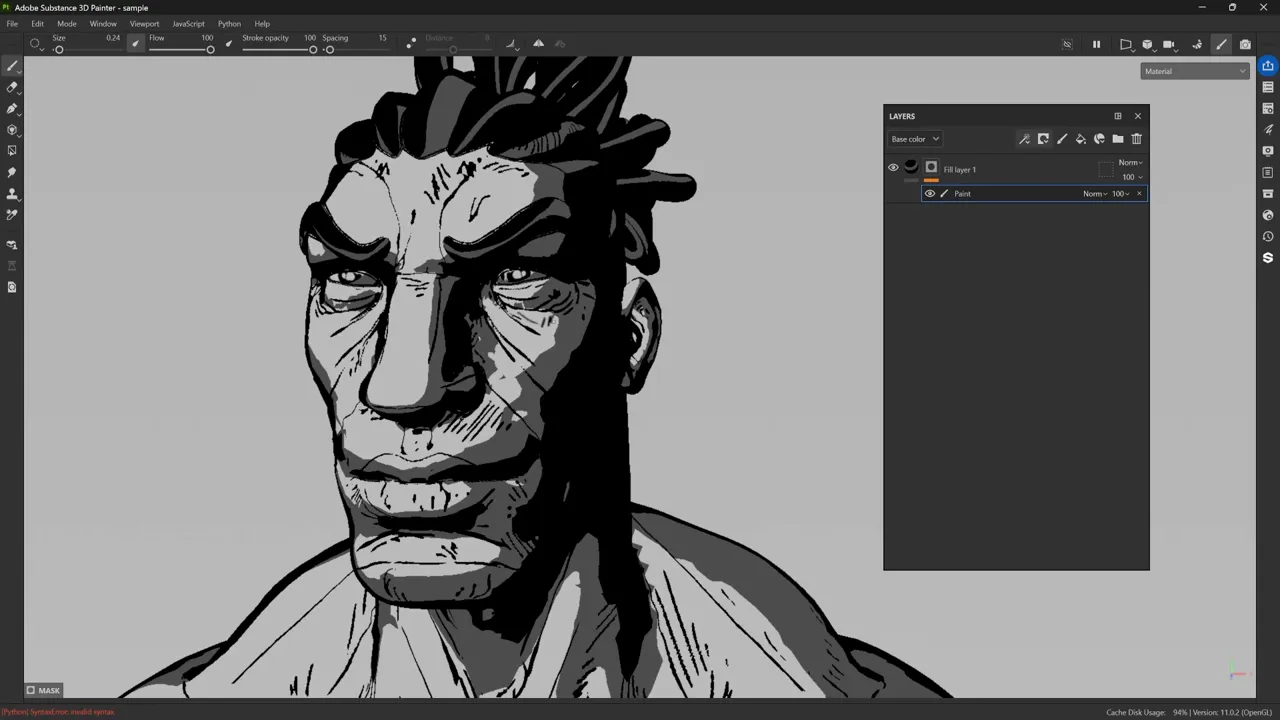
Workflow steps I use:
- Create a fill layer with your outline color (usually black), and turn off all other channels.
- Add a black mask, then add a paint layer so only painted strokes reveal the black ink.
- Paint the exact ink lines, scars, or hatching you want. This is non-destructive: toggle the layer on/off anytime.
Painting directly lets you refine hand-drawn-looking marks and maintain a clean, non-destructive workflow. If the lines look fuzzy, increase the texture resolution (document size) or paint at higher map resolutions.
Height-driven hatch lines: displacement + inversion for stylistic control
Here’s where it gets powerful: you can paint using the height channel and have the shader interpret those height values as hatch outlines. The shader reads painted height data and converts it into inked outlines around the painted geometry.

Important steps:
- On your paint layer turn off color and enable height. Push the height value to a moderate amount (I often start around 0.4).
- Create a black mask and paint height strokes where you want the hatch or carved lines to be detected.
- In the shader settings enable displacement and set Displacement Scale (I use ~0.05 to start).
- Increase Subdivision Count / Tessellation so the shader can visualize geometry changes, try values like 8–16 depending on your GPU tolerance.
After that, bump the shader's Painted Height Lines intensity and set darkness/opacity to make the hatch lines black. You’ll see the shader paint ink outlines around the raised or lowered height areas. This gives a carved/hatching effect that’s visually consistent with hand-inked lines.

Two additional options to know:
- Invert Height Detection — toggles whether the shader creates outlines around the highest painted areas or the lowest (inset) areas. Switch this to get either raised ink or carved ink effects.
- Height Offset / Inward Push — inside the layer’s properties you can nudge how far the shader considers the height region, so lines can hug the paint or sit slightly away from it.
With displacement + tessellation + painted height you can produce stylized engraved, tribal, or hatching patterns that the shader outlines automatically. It’s a huge time-saver for consistent comic hatching across a model.
Final thoughts
Before wrapping up, here are a few final tips to get the best results:
If your lines look soft or fuzzy, try increasing your texture resolution or render size, Painter’s map resolution directly affects brush fidelity.
Keep your workflow non-destructive: paint outlines and height details on separate layers so you can easily toggle, adjust, and iterate.
For automatic crevice lines, use curvature and baked normal maps from ZBrush or your sculpting tool, they’ll drive the shader’s reactive detail.
Watch your tessellation budget; higher subdivisions sharpen the effect but impact performance. Find a balance that keeps editing smooth.
And remember, this shader doesn’t respond to the scene environment; adjust light direction directly from the shader’s UI instead of rotating the HDRI.
The shader itself is designed to be simple yet flexible. With just a few tweaks, you can shift from subtle line accents to bold, inked, cel-shaded looks. My typical workflow goes like this:
- Import the shader and assign it in Painter.
- Set a background color to frame the illustration.
- Bake normals and curvature from ZBrush for crevice-based lines.
- Paint custom ink strokes and height hatches on separate layers.
- Tune displacement, tessellation, and line parameters to taste.
- Finally, take screenshots or bake your maps for rendering in your preferred engine.
That’s it! Experiment with these settings and make the look your own. This shader is meant to be a creative playground as much as a technical tool.
2D Sketches from 3D Meshes - ZBrush BPR filters pack
The pack for your ‘2D Sketching rendering needs’. This is a pack of ZBrush render and filter settings to render any 3D mesh as a 2D rough sketch. The collection comes with 24 ready-to-use BPR settings to recreate the look and feel of Blue pencil sketches, graphite, pen, charcoal and more. There are also 4 special filters and 3 custom MatCaps for a more advanced effect.
Get resource
Comic Style Materials
These MatCaps are specifically a Comic Style render in ZBrush. They work great on their own so you can assign different comic materials to different meshes without needing additional polypaint or color.
Check it out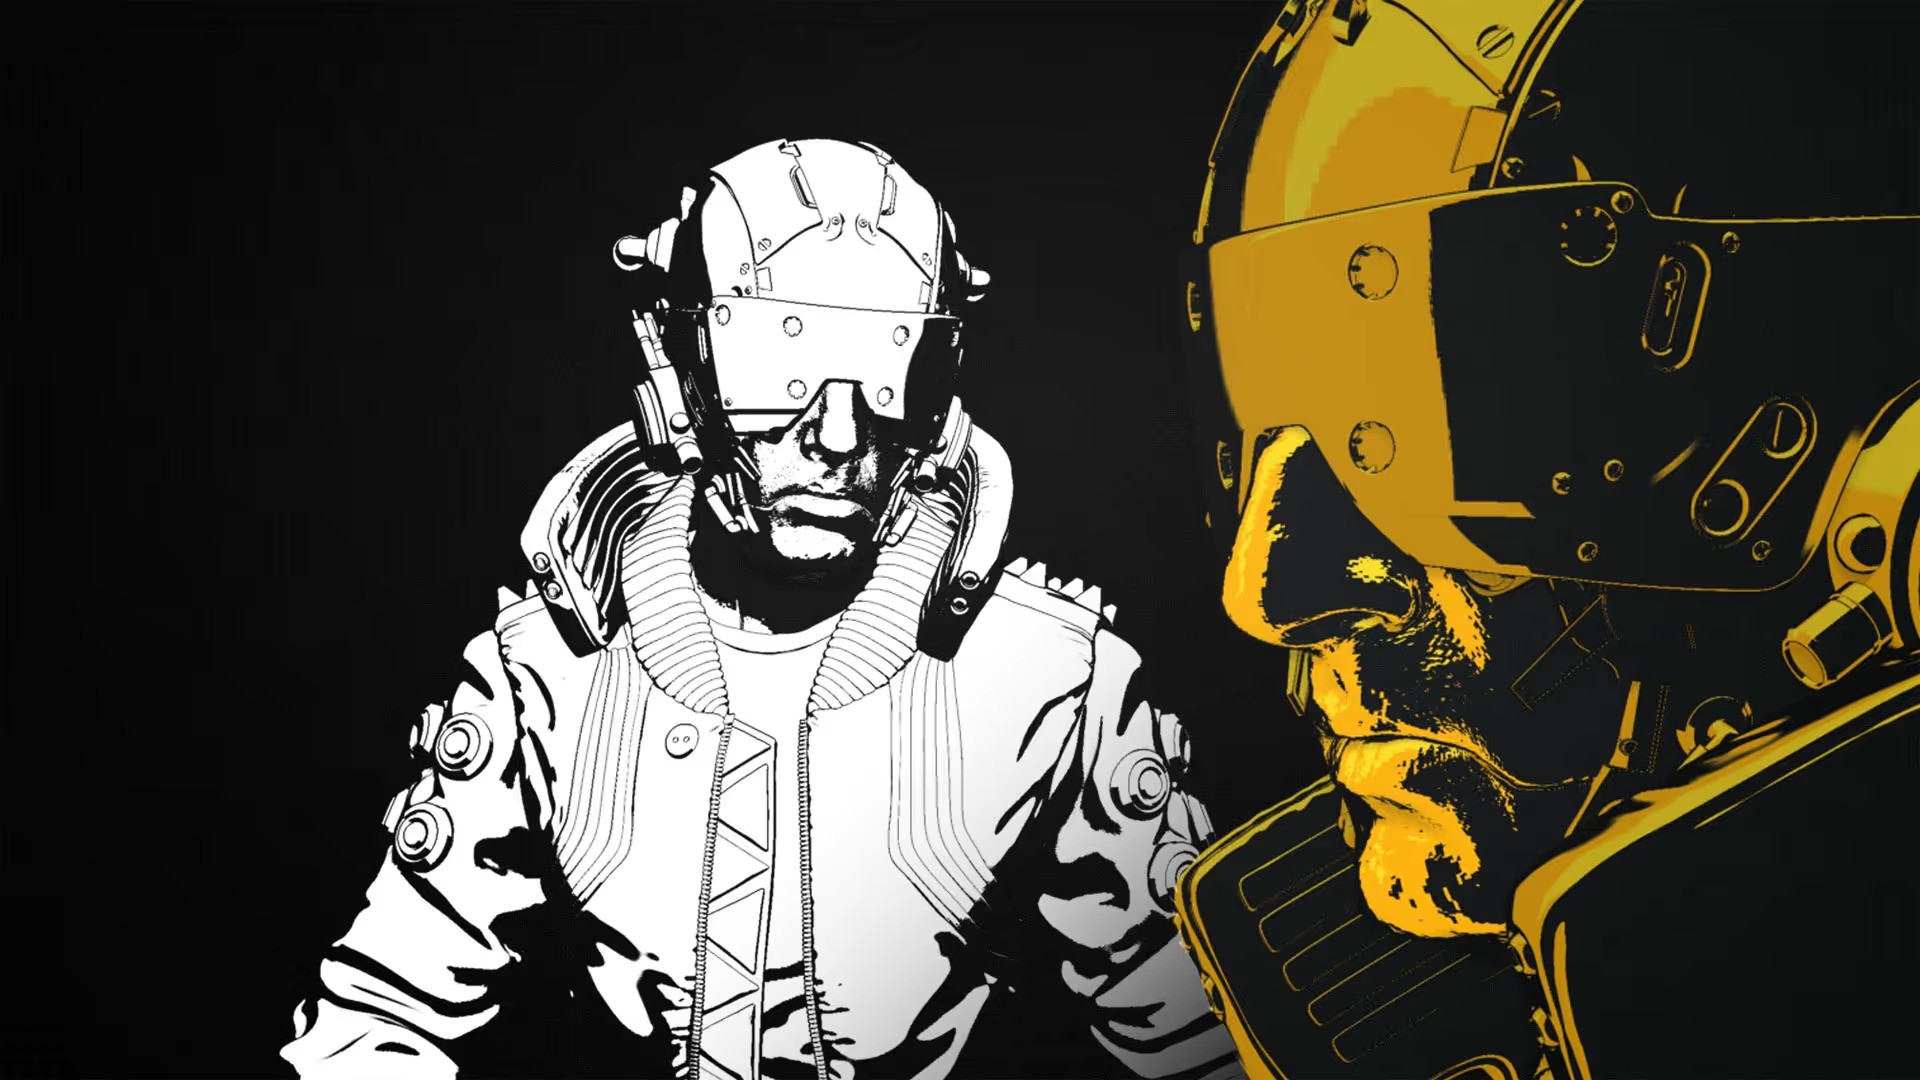


.webp)

