.jpg)

.jpg)

This is hands-on, practical, and casual tutorial, so I suggest that you watch the video entirely. I explain what I do and why I do it, then show tips to speed up your pipeline. The tutorial itself is a condensed reference of the features used in it, you can use it as a set of notes or reminders about the tools and techniques shown. If you stick through it, you’ll be able to create your own assets that require you to use ZModeler with less frustration and more enjoyment.
What we’re building and why ZModeler
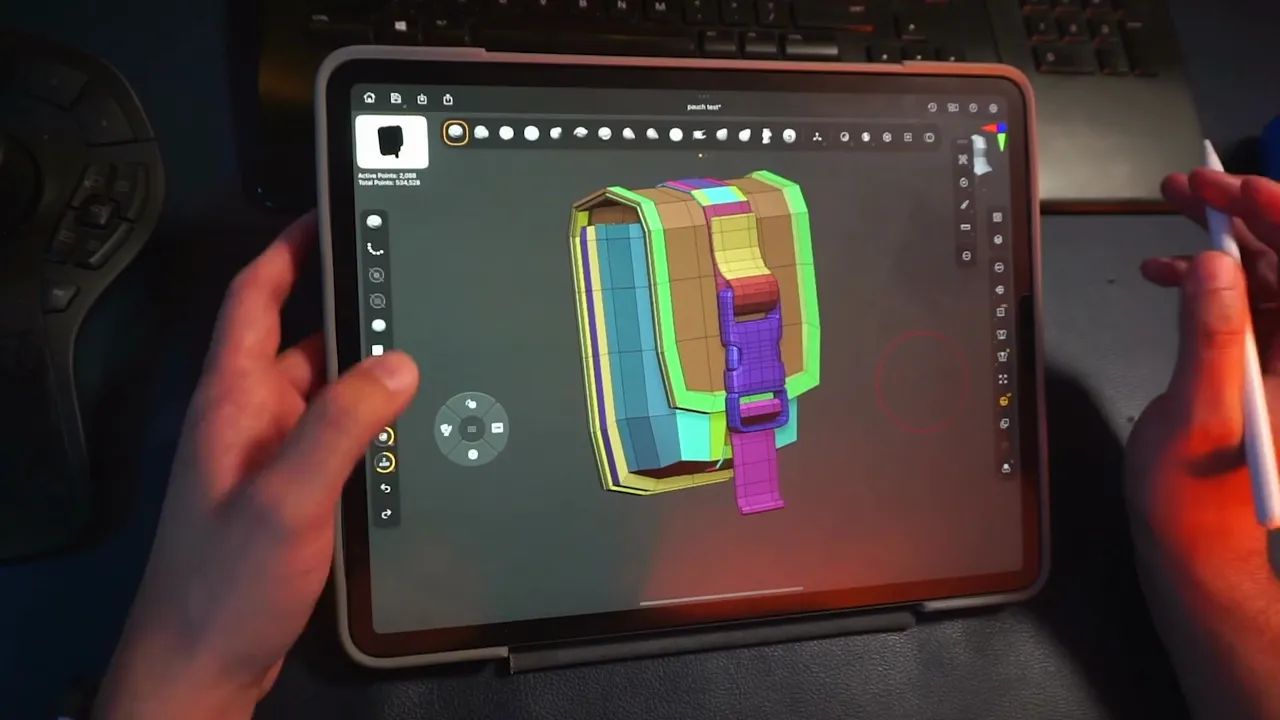
The goal is a hard-surface soft-body hybrid: a small tactical pouch with a lid, sewn lip, strap and buckle. I use the ZModeler to do the low-poly blocking and to precisely control topology (edges, faces, points), then rely on dynamic subdivision for the final smoothness. The same techniques apply whether you’re on the desktop or the iPad; the interface differs slightly, but the principles are identical.

Quick UI setup on the iPad
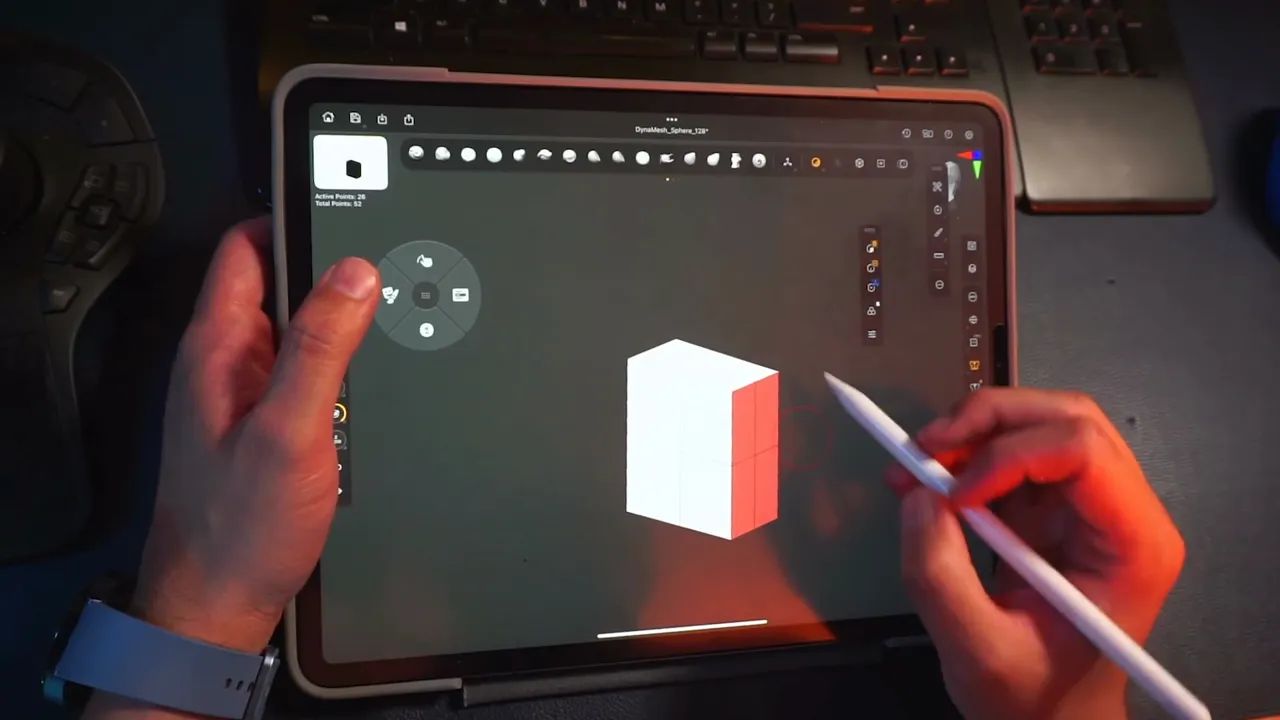
Before modeling, I customize my iPad UI so the tools I use most are at the top and my manipulator is comfortable. You can drag the quick bar to the top and resize/rotate the gizmo by tapping its center and dragging with another finger. I also create quick-menu shortcuts for things I toggle often (double-sided display, dynamic subdivision), which saves a lot of time.
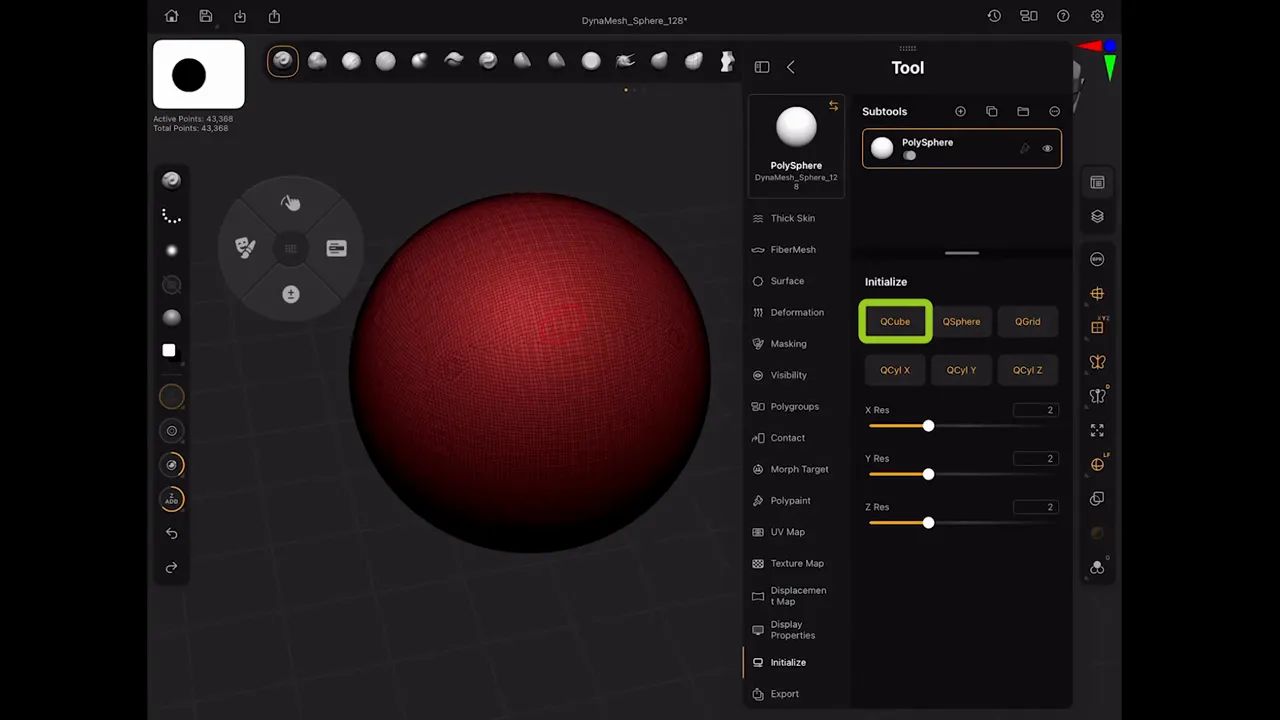
Initialize a Polymesh Cube
I start a new sculpt with a PolySphere3D primitive and go to Initialize > Q-Cube to create a clean cube-based block. Primitives behave differently (they’re mathematical), so if you have chose a primitive you would get a slightly different Initialize menu. I prefer a polymesh when using ZModeler.
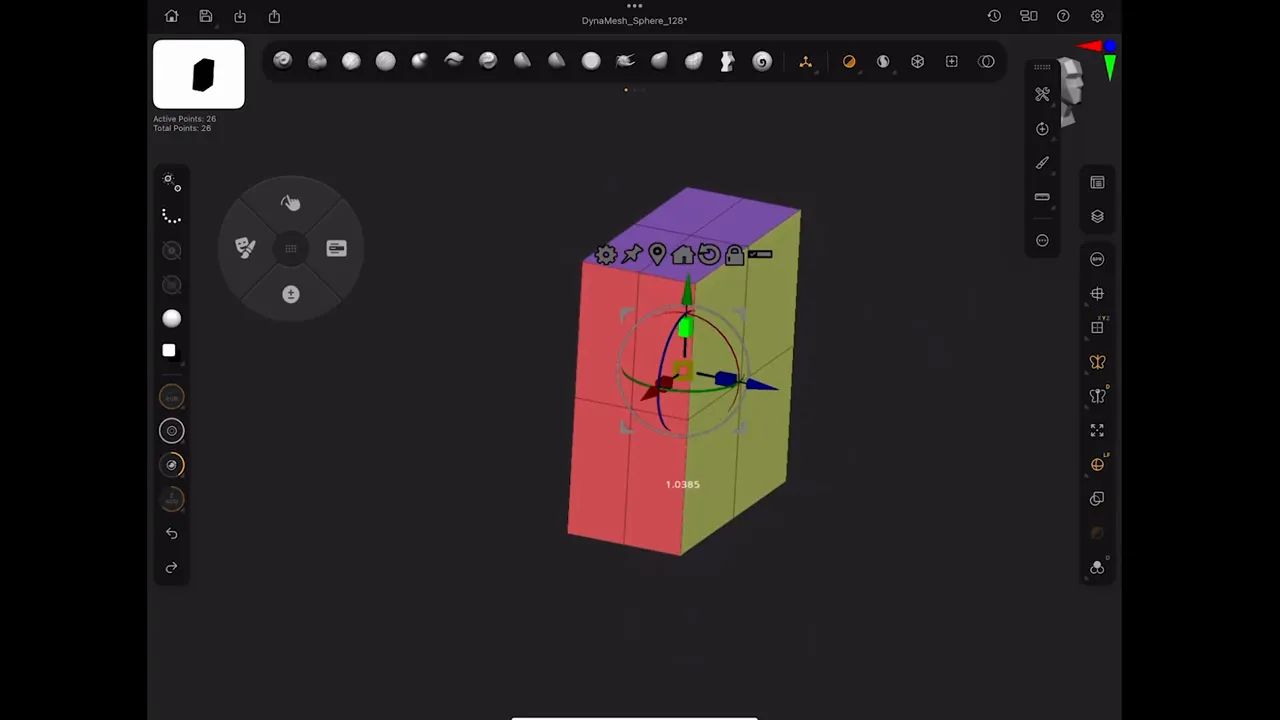
Turn off perspective and the floor for an orthographic, less-distracting view. Change material to SkinShade4 for clarity, and enable symmetry on the right-hand side if you want mirrored edits. Use the Gizmo to push the cube taller or wider to get pouch proportions.
Duplicate & prepare for ZModeler
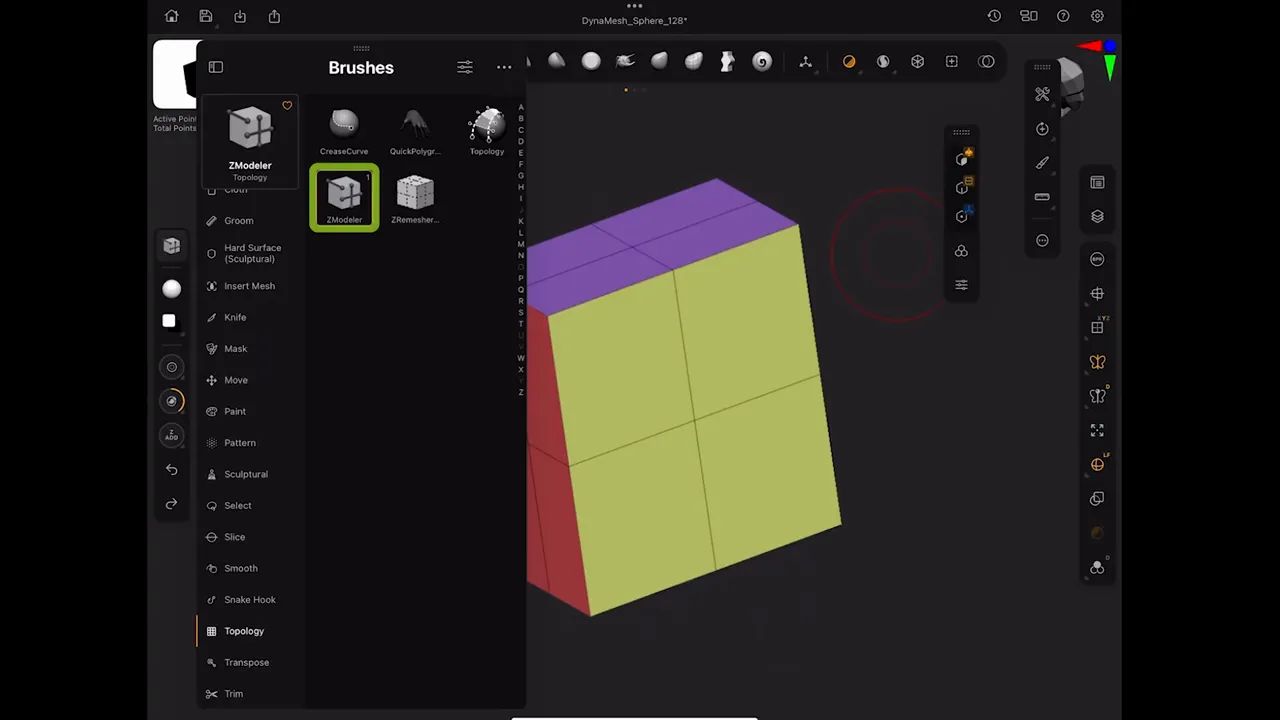
Duplicate the cube (Tool > three dots > Duplicate) and hide the original, one copy will become the pouch lid, the other the main body. Now, I switch to the ZModeler brush. The ZModeler menu contains actions for three element types: faces (polygons), edges, and points. Understanding which element you’re targeting is the key to fast modeling.
Faces: Deleting polygons and tagging selection
To carve the lid and opening, I delete specific faces. ZModeler uses an action and a target. For faces: Polygon Action = Delete; Target = Single Poly or All Polys. I typically hold the Alt key to tag multiple polygons and then click once to perform the action across that selection. This tagging creates a temporary selection count at the cursor so you know how many polygons are queued.
When you delete faces, you often create a single-sided mesh. Use Tool > Display Properties > Double to see both sides of the surface so you can work inside the hole without surprises.

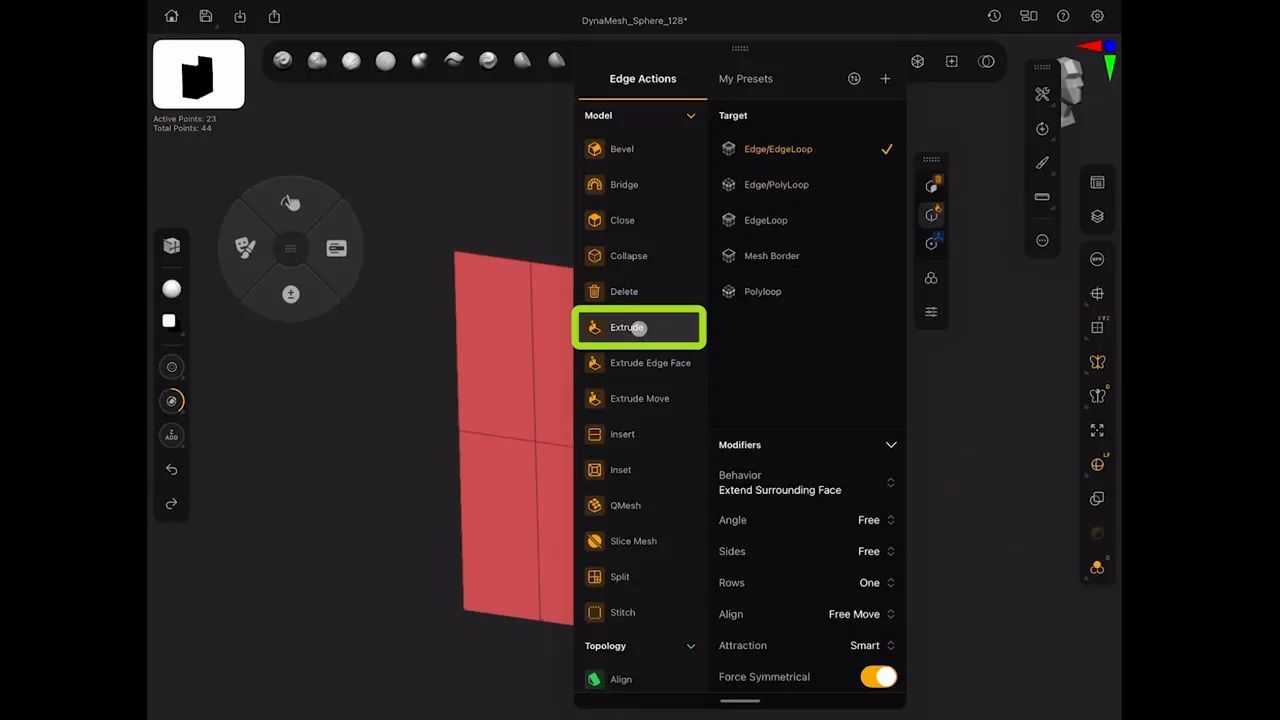
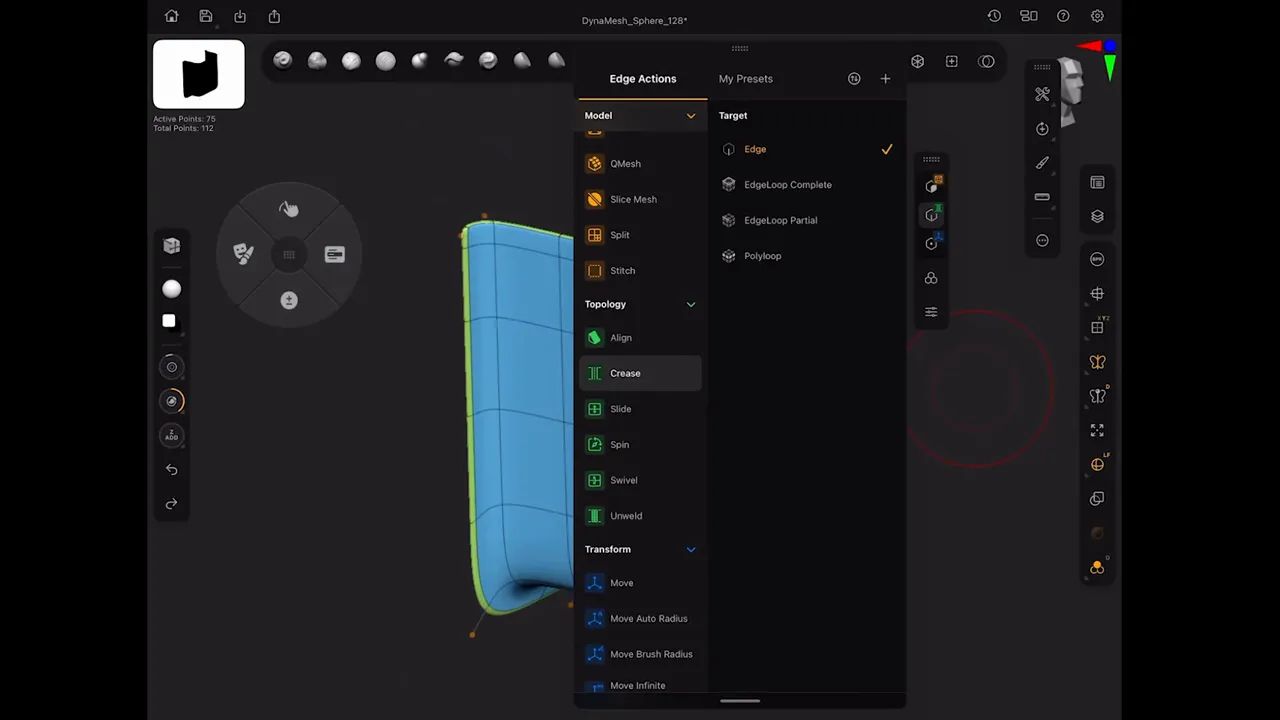
Edges: Extruding, inserting loops, and creasing
With edges selected in ZModeler, Edge Action = Extrude (Edge / Edge Loop) gives you the ability to pull edges out as a lip for stitching or a sewn seam. Hold Shift while extruding to snap to axis ; hold Alt to apply to entire edge loop. This is how the back lip of the pouch is made.
To support subdivision, add supporting edge loops: Edge Action = Insert Single Edge Loop or Multi Edge Loop. Placing these near edges controls how the model is affected when it is subdivided.
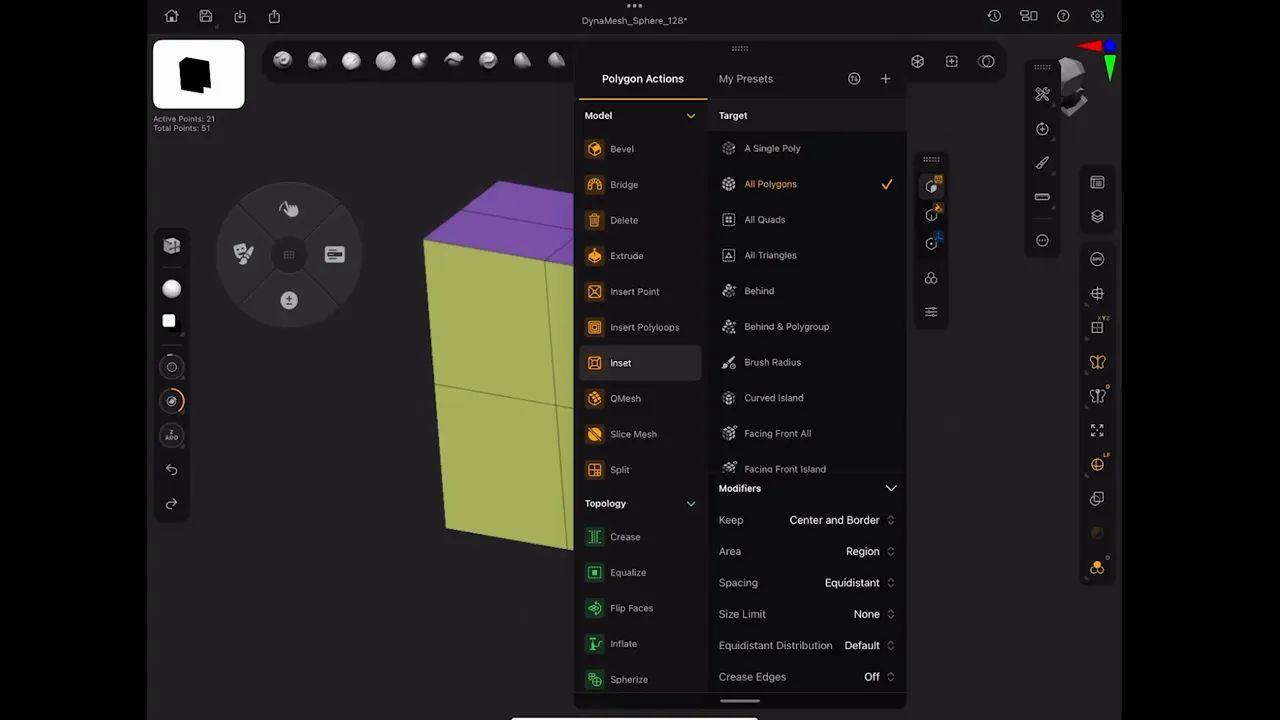
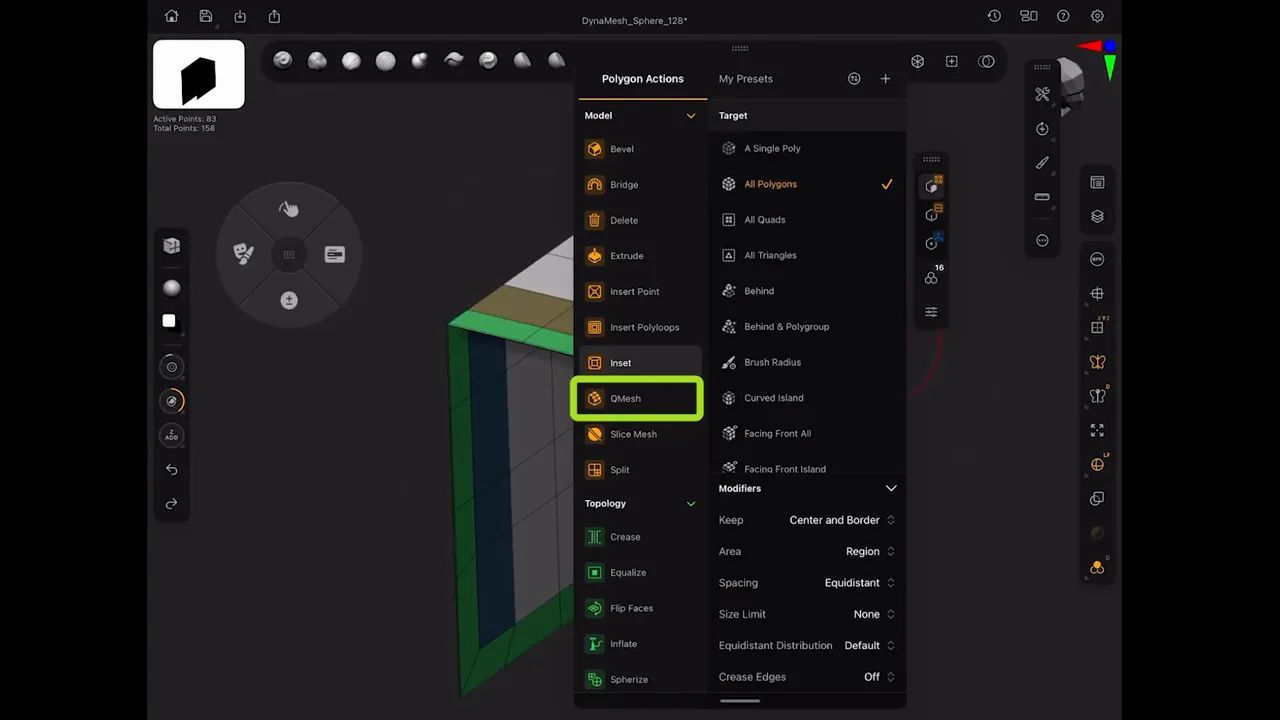
Polygons: Inset and thickness using Dynamic Subdivision
I use Polygon Action = Inset with Target = All Polygons to create the inner lip (inset the whole top face in one go). This is a great trick when you want to inset multiple faces at once and maintain a clean contour.
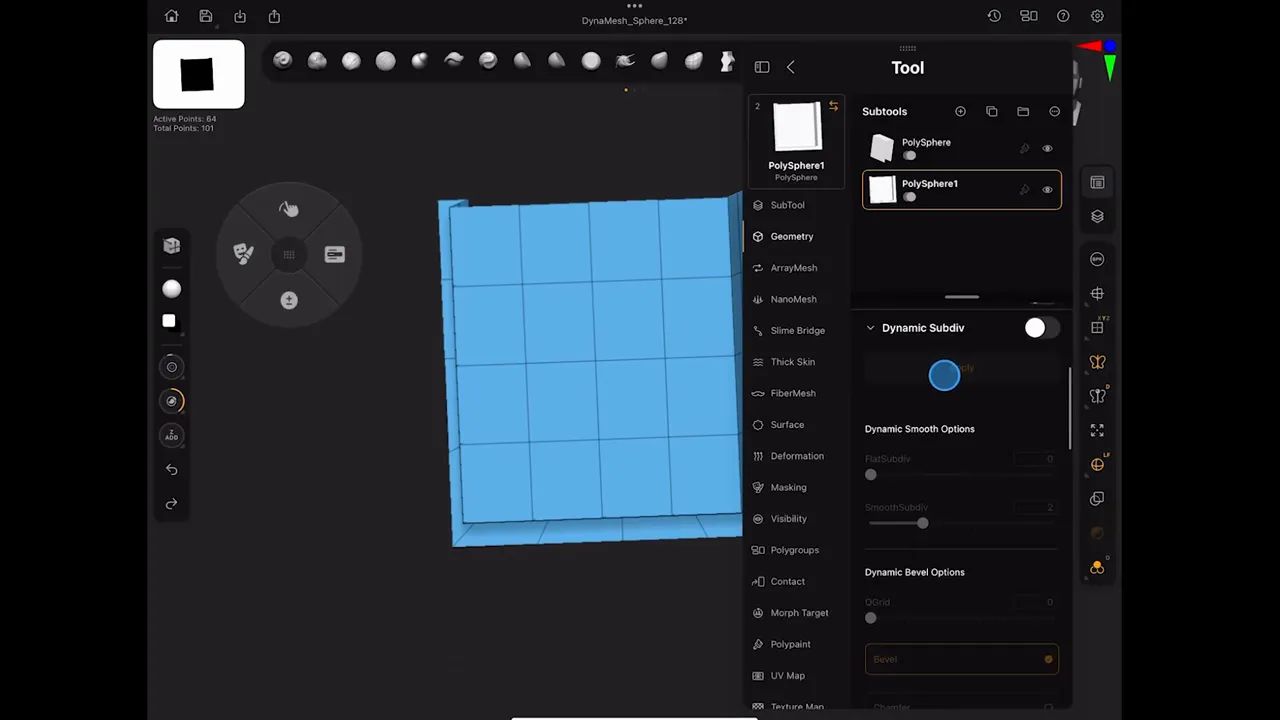
Next, enable Tool > Geometry > Dynamic Subdiv and turn on Dynamic Thickness. Dynamic subdivision lets you preview a high-res, subdivided mesh using a low-poly base. Set Subdiv to 4 for previewing and tweak the thickness to dynamically generate a real thickness around your single-sided geometry. Use offset to move that thickness center inward or outward (0 is center, 100 pushes outward).
Sharpening edges: Insert loops vs creasing
To achieve crisp edges with Dynamic Subdivision, you can either insert support loops close to the edge or use ZModeler’s Crease Edge Loop Complete option. The Crease method is particularly useful as it avoids adding extra geometry; it creates a dotted line indicator that the dynamic preview respects, effectively locking in sharp channels.
Making the strap with QMesh
I extract the strap directly out of existing polygons using the QMesh action. QMesh quite is powerful: click-and-drag extrudes by default; drag + Shift moves polygons along their normals; drag + Control extracts a new piece. After extracting, mask the region with Selection > Mask > Polygroup All, and then use SubTool > Split > Split Masked Points to create a separate subtool for the strap.
Because the extracted subtool inherits the dynamic subdivision settings, it matches proportions and thickness if you kept consistent dynamic thickness values. I prefer to keep dynamic for iterative tweaks, then apply thickness later. If dynamic thickness causes gaps or intersects with the pouch and you can’t fix this using the Dynamic Offset, use QMesh (drag + Shift) to nudge the geometry until it fits snugly.
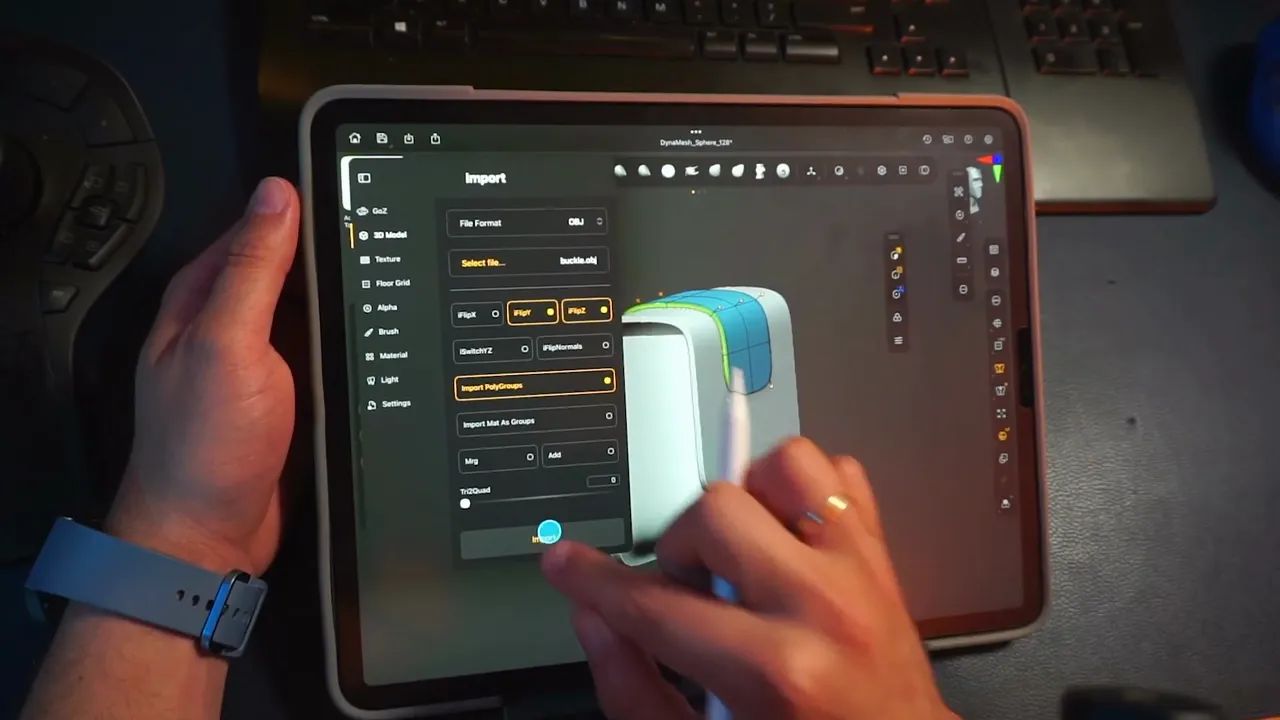
Importing the buckle and aligning geometry
I built the buckle on the desktop and imported it into the iPad as an OBJ (Tool > Import > 3D Model). After importing, copy the tool from the buckle and paste it into the working file so it appears as a subtool in the same project. Position, rotate, and scale it with the Gizmo to match pouch proportions.
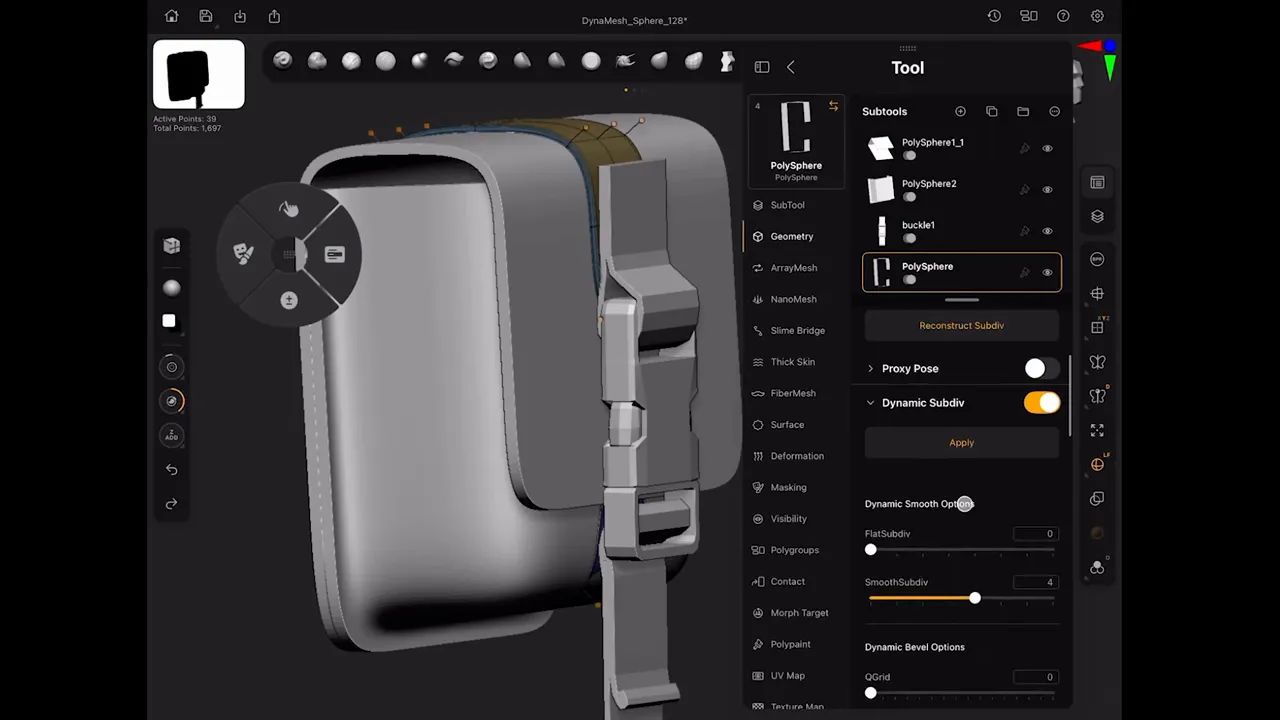
Merge the two strap pieces that you created from the pouch (top and bottom) into a single subtool (SubTool > Merge Down), then use the gizmo, center the pivot and scale to match the buckle’s straps.
When I’m happy with placement, I apply dynamic thickness selectively: set Subdiv level to 0 if I only want to bake thickness. For final hard edges, insert supporting loops or use Edge > Bevel to round internal corners.Use the selection brushes to hide and delete any unnecessary geometry and also create space for bridging the strap with the buckle in the next step.Also make sure you have matching geometry (add or remove edge loops if needed) so that the bridging process creates good topology that you can control easily.
Bridging holes to connect strap and buckle
To bridge two separate holes, use the ZModeler Edge > Bridge > Two Holes action. Click an edge on the first hole, then click the corresponding edge on the second hole to create the connection. This action requires both holes to have an identical number of edges. If the counts differ, you must first adjust them. Use Edge > Insert > Edge Loop to add geometry or Edge > Delete > EdgeLoop Complete to remove it until the two holes match.
After clicking the second edge, you can drag to interactively adjust the bridge's curvature and set the number of subdivisions.

Refinements: Creasing, masks, and gizmo edits
To ensure clean edge extrusions, it's essential to first clean up your PolyGroups. Use PolyGroup actions to tag or untag specific polygons and creating well-defined PolyGroups to work from. This enables you to target specific faces/polygons on which you can use the QMesh>Polygroup All and add in our case thickness around the edge of the pouch’s lid.
For more granular control, especially over separate geometry SubTools, you can mask the points, invert the mask, and then use the Gizmo to move the unmasked portions. A practical example of this is making the lid curve more naturally and making the strap follow a lid's curve: mask the top points on the lid, invert the mask and then use the Gizmo to push the top of the lid up to create a more natural curve. Now you have to to the same with the strap so it follows the lid’s cuvature.

Final steps: Apply thickness, consolidate, and polish
For final steps, insert supporting loops or use Edge > Bevel to round internal corners. When the look is correct, set a reasonable subdivision level (I like level 2) and Apply subdivision for the strap, lid, and pouch.
Merge visible to create a single tool for final sculpting, or save the working tool with dynamic still intact so you can come back and tweak the low-poly base. After merging visible, run Geometry > Crease > Uncrease All, then re-enable Dynamic Subdiv at level 2 to get a clean, slightly softened result across the asset.
Optional detailing: fabric tension, stitches, and export strategy
If you want soft wrinkles or tension points, subdivide more and use a drapery/folds brush to add subtle creases. I caution against overdoing it, soft materials look better with subtle reads. You can also use curve-based stitching brushes to add seams around the lip and strap anchor points.

Export strategy: keep a low-res mesh (lowest subdivision level) for baking to texture tools like Substance Painter, and export a high-res subdivided mesh for normal/height maps. The advantage of ZBrush dynamic workflow is you can easily switch between low and high to generate both base geometry and detailed sculpts for baking.
Closing tips and workflow recap
Here are the key ZModeler concepts and workflow tips to remember. First, understand the core "Action + Target" combo; every change involves selecting an Action (like Extrude or Inset) and a Target (Single Poly, Edge Loop, etc.), and mastering this pair is the fastest path to proficiency.
Second, use Dynamic Subdivision to get a non-destructive preview of your final smoothed mesh, allowing you to keep editing the low-poly base while seeing the high-poly result.
Third, leverage QMesh as your primary tool for fast extrusions, extractions, and surface-normal-based movements, which is perfect for creating straps and seams.To isolate parts, the simplest method is to mask a PolyGroup island (Ctrl+Click) and then use the Split Masked Points command to create a new SubTool.
Finally, always save a copy of your working tool before you permanently applying Dynamic Subdivision, so you can always return to the low-resolution base.
Cloth and Drapery Brushes Pack
This is a pack of 54 custom brushes that will simplify and speed up the process of setting up folds, sculpt wrinkles and detail various types of fabrics in ZBrush!
Get resource
ZBrush for iPad is out!
In this video, I’m sharing my thoughts on the ZBrush app for iPad Pro. I got to try it out during the beta testing, and I’ve been exploring how well it brings ZBrush’s features to a more portable device. If you’re interested in sculpting on the go or just want to see how it works on a smaller screen, stick around—I hope this gives you a good idea of what to expect!
Check it out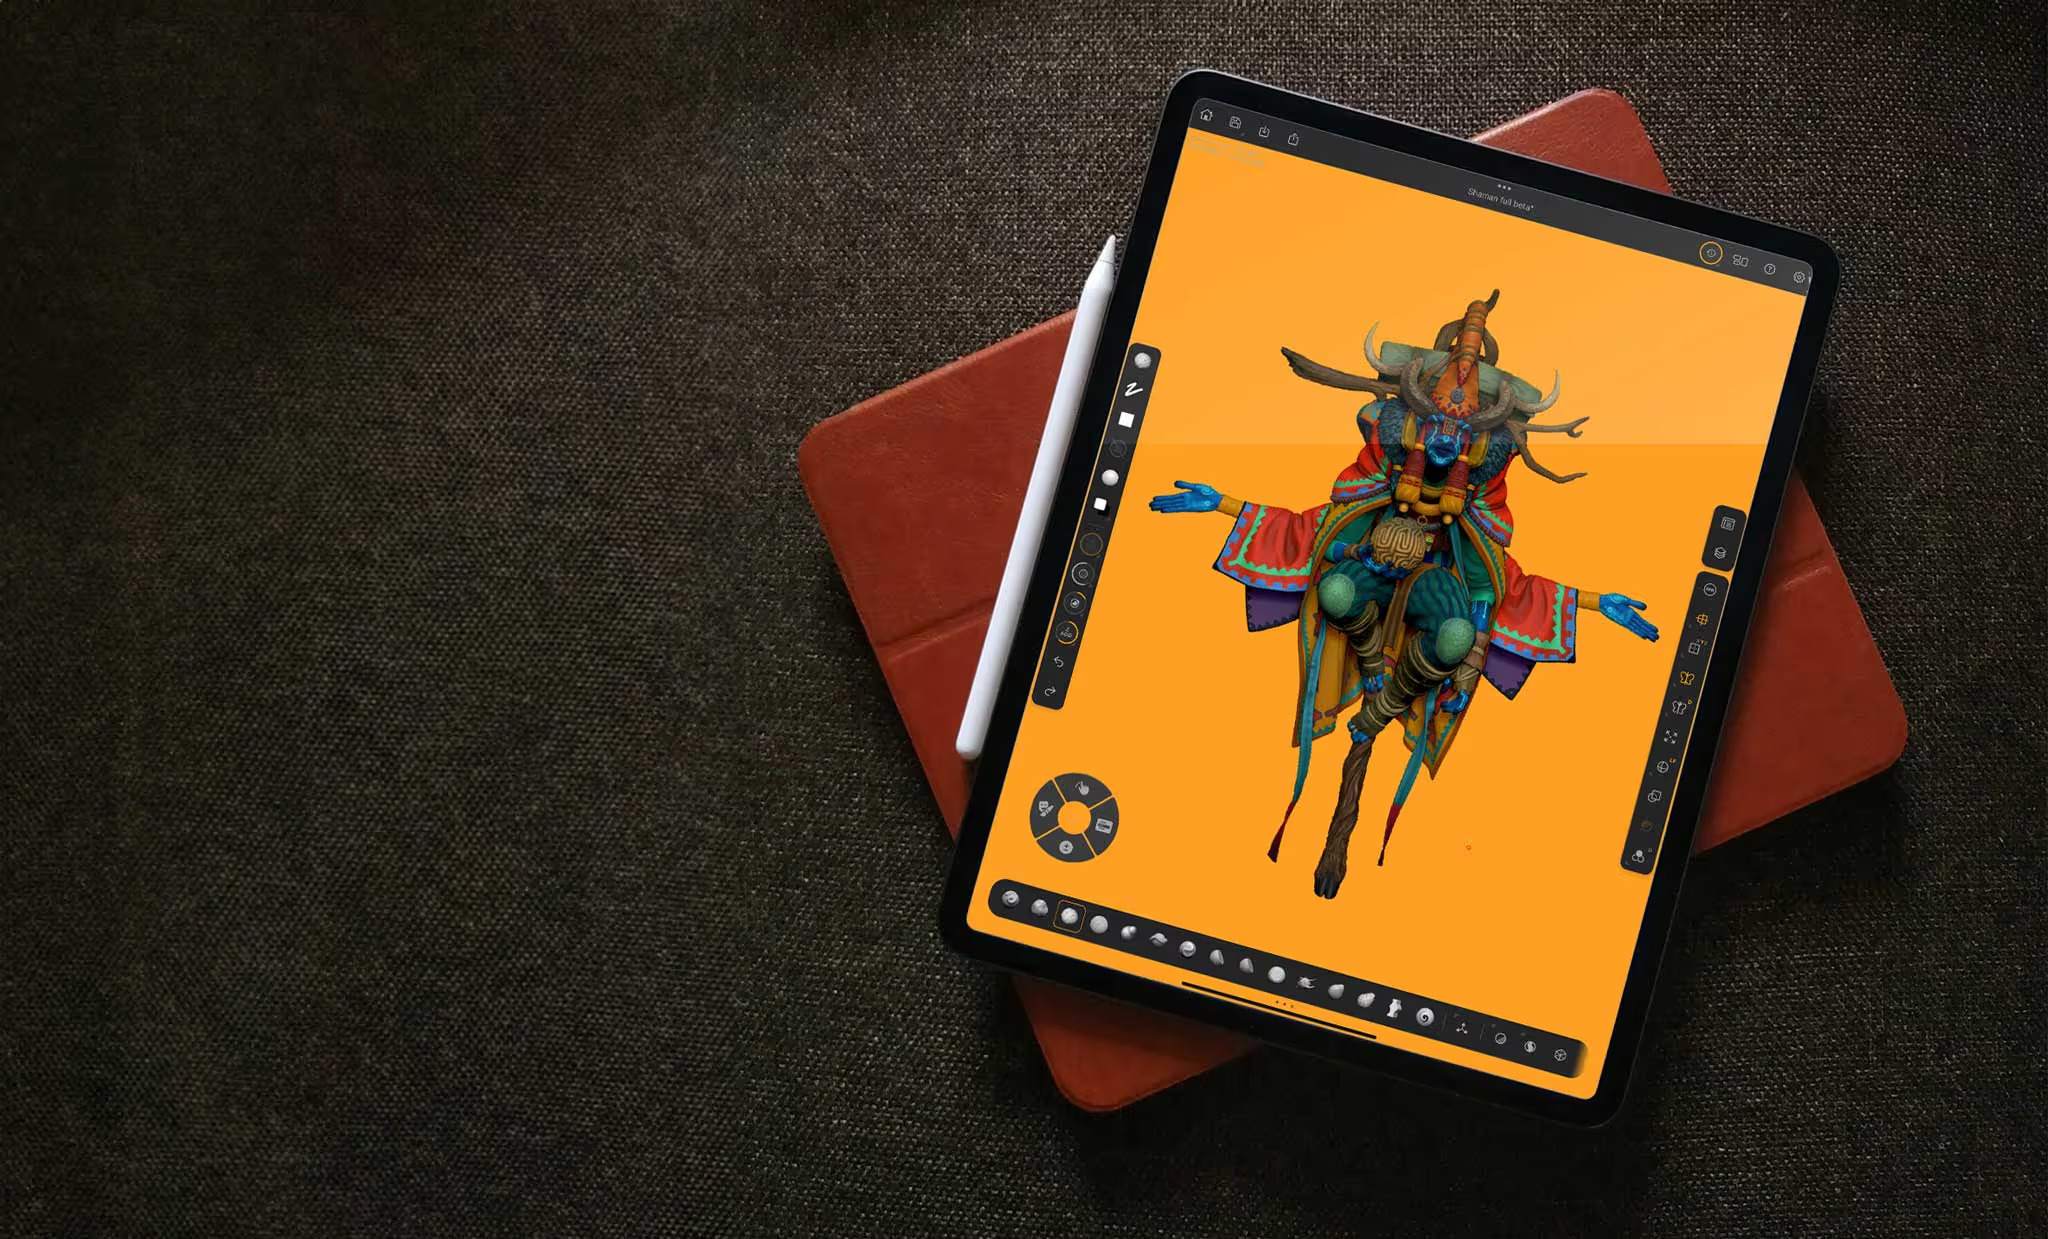


.webp)

