
.jpg)

From teaching hundreds of students and working on my own projects, I notice the same pattern repeatedly. Projects often fail because momentum fades. In this context, momentum is the force that propels you through the work once the initial excitement wears off. It’s not magic; it has identifiable causes and systems you can develop around them.
There are three common reasons momentum dies:
- Novelty wears off. The dopamine spike you get when a new idea appears fades quickly. Without novelty, consistency becomes hard.
- No visual clarity. If you cannot see what you are aiming for, your brain has nothing to latch onto. It feels like walking into fog and making small decisions slowly.
- No emotional connection. If you do not have a clear why, your motivation disappears when things get technical or boring. Tasks like retopology, UVs, baking, and cleanup remove a lot of the glamour and can derail the whole project.
.png)
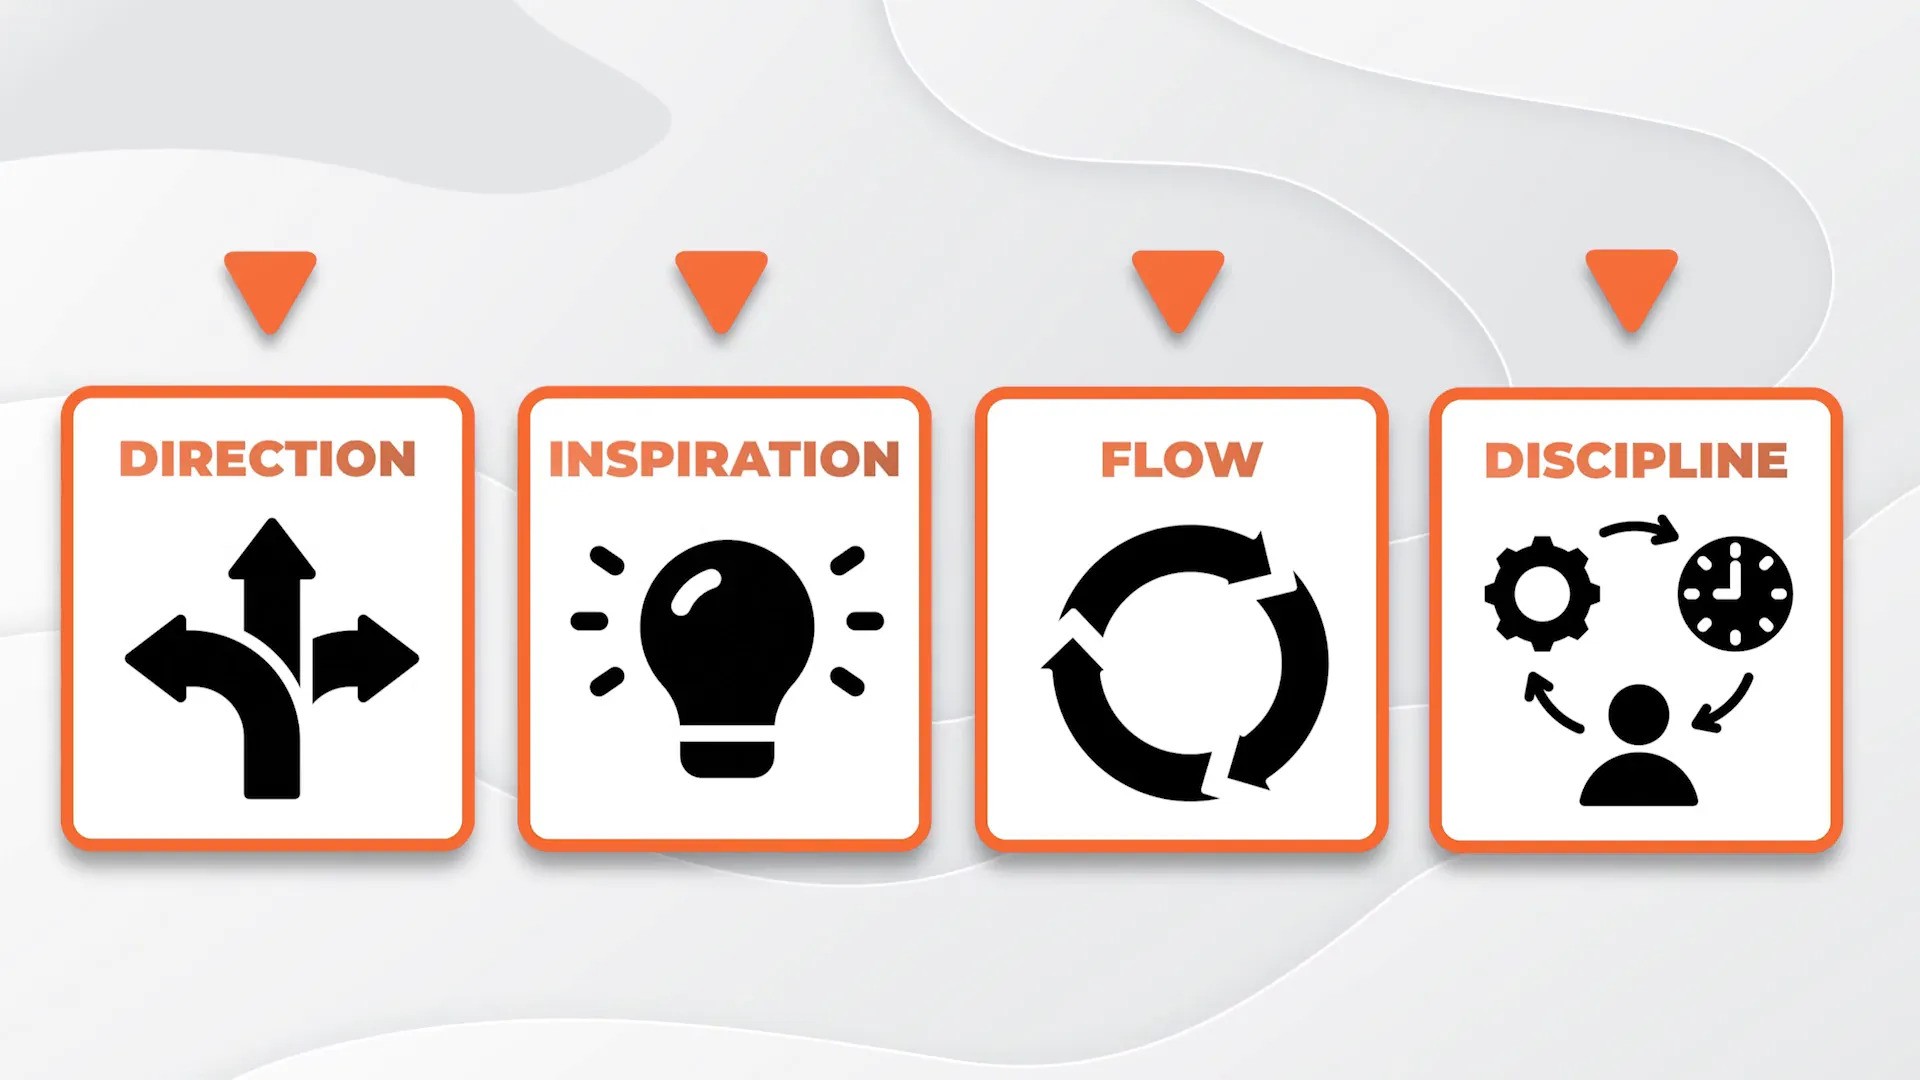
The good news is that these three problems are solvable with a little planning. Not a rigid planning session that kills creativity, but a lightweight approach that gives clarity, structure, and self-awareness about how you work best. I call this the Creative Momentum Framework. It has four principles you can apply to any project: direction, inspiration, flow, and discipline.
1st Principle: Direction
Direction means having clear goals. Know where your finish line is. Vague goals kill momentum. "I want to sculpt a creature" is too broad. That file will drift forever and end up half-finished in a forgotten folder.
Instead, be specific. Define what "finished" looks like in one sentence. For example:
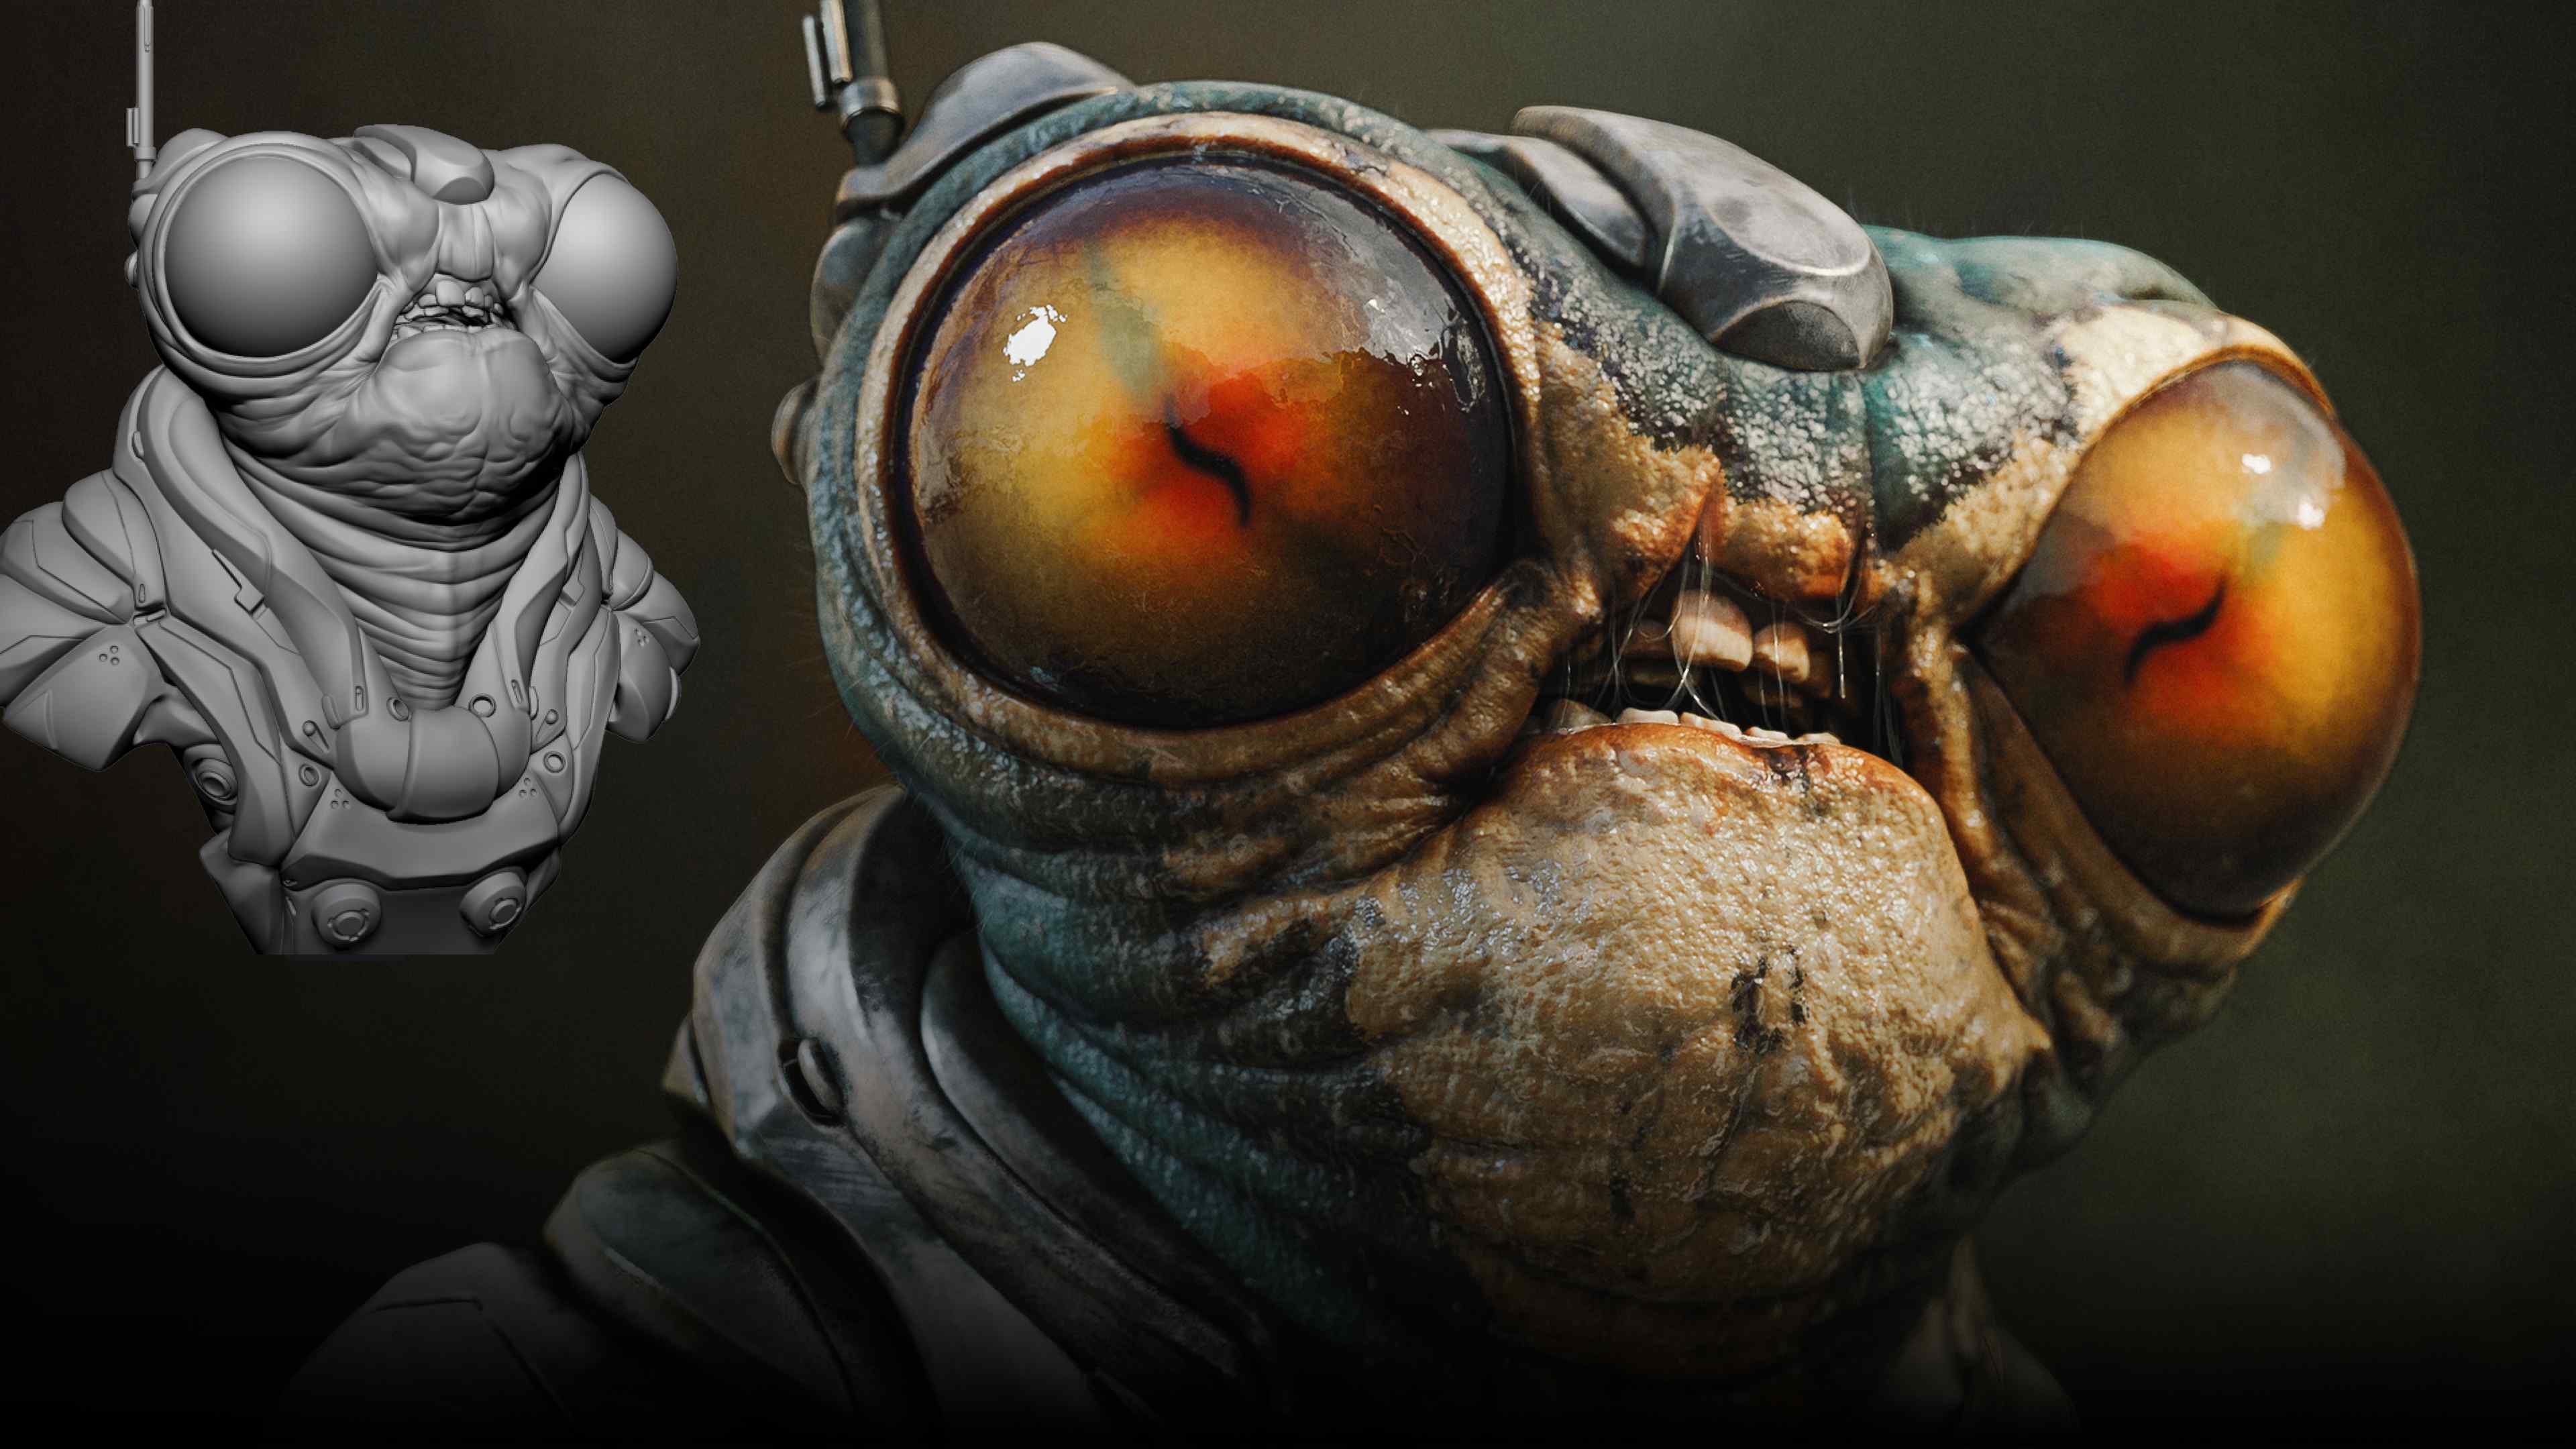
- I want to make a sci-fi creature bust with an organic head, a hard-surface suit, textured in Substance Painter and rendered for my portfolio.
That sentence gives me direction and helps me make production decisions. If the goal is a 3D-printable collectible, I need to model the back of the character and solve topology differently than for a render, where the back might be hidden. If the goal is to test a new workflow, the focus changes again.
Write the finish line down. I use Notion to keep it simple, but a piece of paper works too. Include a short line about the project's focus or style so your attention stays sharp. The clearer the direction, the easier it is to keep moving when the initial excitement fades.
.png)
2nd Principle: Inspiration and references
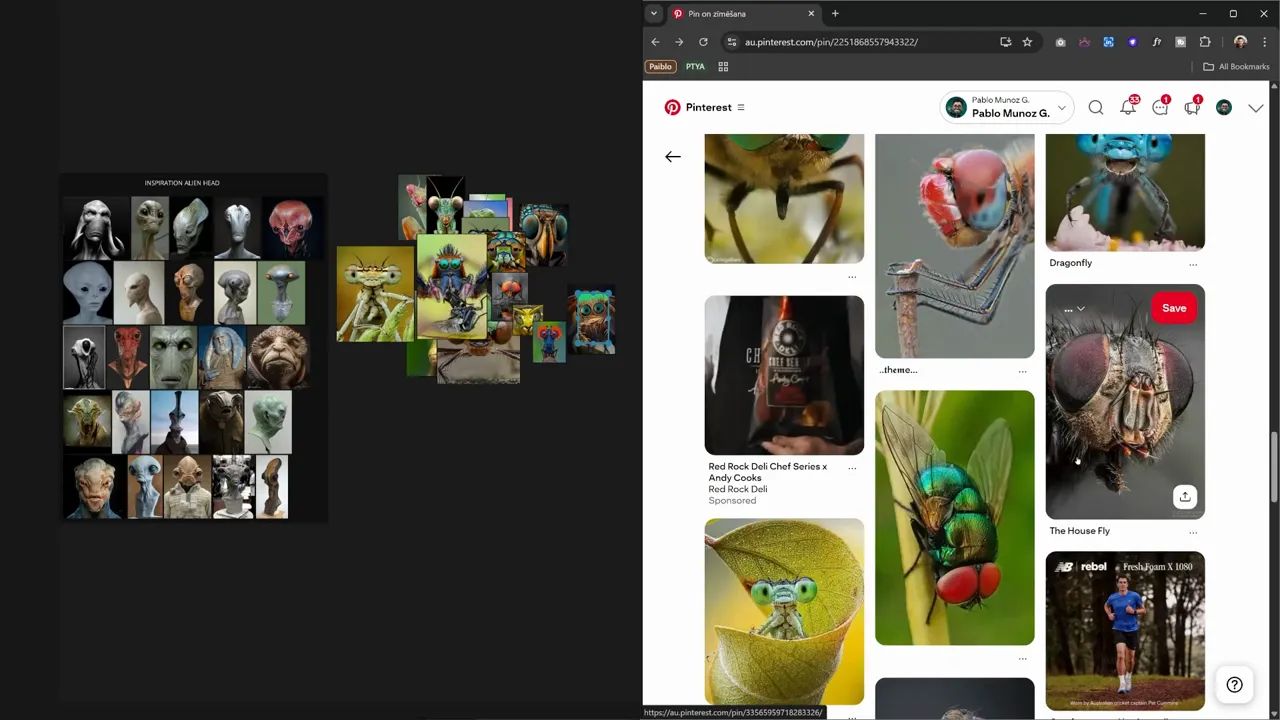
Inspiration is your creative fuel. Once you have a clear finish line, collect visual material that speaks to you. This stage is wide open. Gather color palettes, textures, shapes, lighting examples, poses, and compositions. Anything that sparks curiosity is valid at this point.
.png)
Psychologically, this activates the associative network in your brain. That network links unrelated ideas and is the place where originality emerges. Give your brain a playground of visual possibilities and then step back into a more directed process.
I break this process into two distinct steps.
- Free collection. Fill a board or folder with anything that moves you. No rules. This is playful and broad.
- Intentional referencing. After you sketch or create quick variations, gather references with production in mind. These images ground your concept and support practical choices during modeling, texturing, and lighting.
In-between the free collection and intentional referencing I sketch or block out quick variations. These are loose, fast, and judgment free. The goal is to trigger the default mode network in your brain that supports daydreaming and creative recombination.
After I finish the sketches I often wait a bit. Sometimes that is a couple of days, or a few hours if I am on a tight schedule. The delay lets the initial dopamine rush fade so I can see which sketches still excite me. That is my creative filter at work. It helps me pick a direction that actually matters to me and that’s when I start gathering references with production in mind to reinforce that direction.
I organize references into groups. Typical categories that work for me are:
- Inspiration mood and tone
- Design direction like shape language, patterns, or fashion references
- Technical guides including anatomy, materials, and lighting direction
- Quality benchmarks that set a visible target for final polish
By the end of this stage you have a reference ecosystem that reduces cognitive load. Instead of vague feelings, you have anchors to guide decisions. No more random Pinterest board that you never look at again. Your references become the visual ruleset for the project.
3rd Principle: Flow
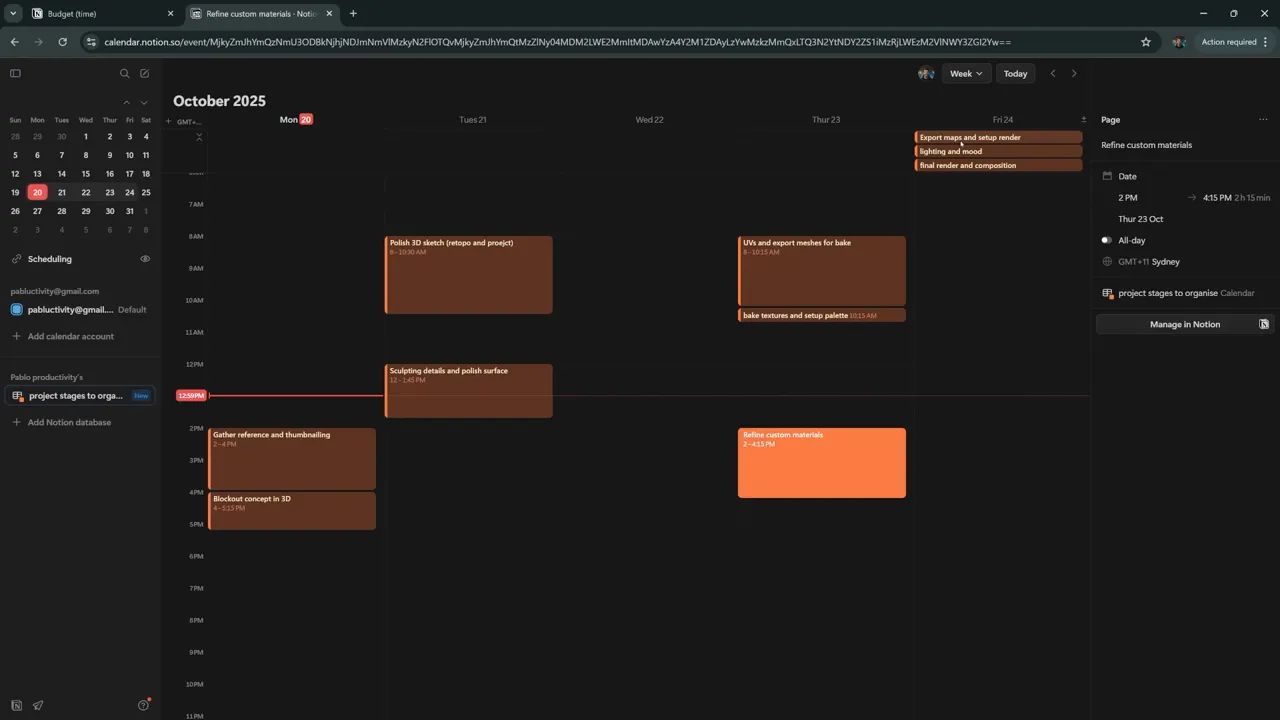
Flow is about boundaries and feedback. With direction and references in place, it is time to set the rhythm of the project. I define realistic time budgets and checkpoints. For a small piece I might plan two evenings for blockout, a week for refining, and a few days for texturing and rendering. For bigger work I block calendar time and schedule specific sessions.
These are guidelines, not shackles. Sometimes I need more time. Sometimes I finish earlier. But planning the rhythm prevents endless tweaking and the trap of rotating around a model for ten minutes without progress.
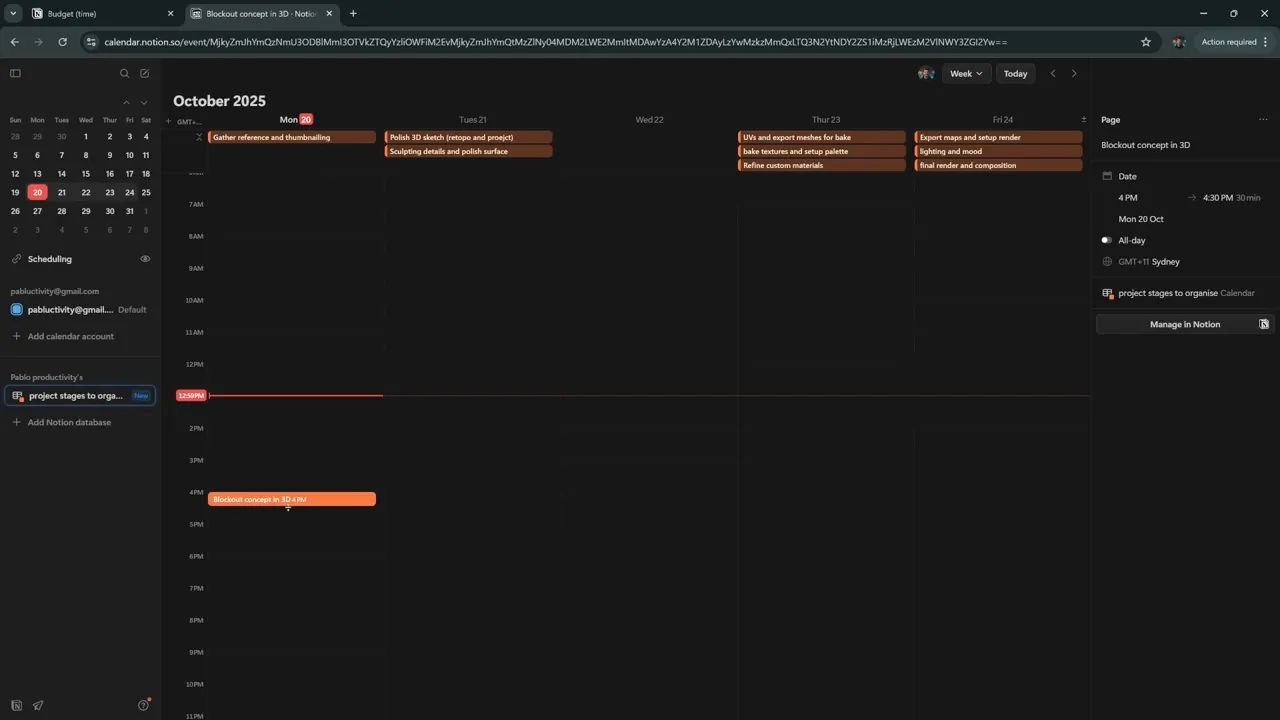
Breaking a large project into smaller, feasible chunks leverages a psychological effect I call the goal gradience effect. The closer we feel to finishing something, the faster and more motivated we become. That is why I split work into small wins that the brain rewards with a sense of progress. Reflection is just as important. Build checkpoints into your calendar: once or twice a week, share work in progress with a community, ask a friend for critique, or step away and return with fresh eyes. Honest feedback helps you spot things you cannot see because you are too invested. Those checkpoints serve as guardrails that keep you aligned with the original finish line while leaving room to adapt when feedback is useful.
4th Principle: Discipline
Discipline is planning for the boring bits and being consistent. Projects do not usually die during fun creative sessions. They die quietly in the tedious parts like UVs, retopology, mesh cleanup, and file organization. These steps are essential but unglamorous.
Our brains chase novelty. That initial spark is a dopamine rush that motivates us to start. When novelty fades, the brain looks for new stimuli and urges you to jump to the next idea. The practical response is simple: anticipate the dip and plan for it.
Schedule tedious tasks. If you hate UVs or retopology, block them in the calendar as short focused sessions. For example, I schedule two retopology sessions of 35 to 45 minutes and promise myself a small reward when I finish them. For me that reward is a coffee break. Your reward could be a fun sculpting session, a walk, or a small treat. Tiny reward triggers do not have to be extravagant. They are just a bit of dopamine that reinforces the loop: finishing things feels good.

Lower the barrier to start. If UVs feel overwhelming, open the file and do one UV island. That tiny action is often all it takes to get momentum back. Another small tactic is to create an empty folder structure for the project with names like final, work in progress, exports, and references. That small act primes the project and makes the organization feel achievable.
Discipline is not a personality trait you are born with. It is a set of tools and systems you build around your work. When you plan the boring parts, break them into small sessions, and reward progress, you create consistency rather than rely on fleeting motivation.
Putting it all together: the habit loop of momentum
When you apply direction, inspiration, flow, and discipline, you build a habit loop that produces momentum. Each small win releases dopamine. Each finished stage reinforces confidence. Over time, this becomes a creative rhythm you can rely on. Motivation doesn't appear out of nowhere, it grows from structure, feedback, and visible progress.
Here's the sequence I follow for every project. I start by defining a clear finish line and purpose, then write it down so I don't lose focus later. Next, I gather broad inspiration from different sources, then narrow it into a tight, purposeful reference board. From there, I do a sketch buffer. After taking a short break, I return with fresh eyes to choose the strongest direction.
Once I know what I'm making, I plan the project rhythm with realistic time budgets and calendar blocks, breaking everything into small, feasible chunks. I schedule regular checkpoints to pause, reflect, and get feedback on my work in progress that step always helps me spot issues early. For the less exciting parts, I keep boring tasks short and focused, then reward myself once they're done. Finally, I repeat the process on the next project, tweaking and refining the system each time to make it smoother and more effective.
When this cycle becomes routine it almost happens automatically. You plan, you create, you reflect, and you finish. The habit is what saves most of my projects. It is not bulletproof, but it helps me finish far more than relying on inspiration alone.
Small checklist to start your next project
- Write a one-sentence finish line.
- Create a free inspiration board of 20 images.
- Make 3 quick sketches or blockouts and wait a few hours or a day.
- Organize references into at least three groups: mood, design, and technical.
- Block time on your calendar for each major stage and set two checkpoints.
- Schedule tedious tasks as short sessions and add a small reward afterwards.
- Create a simple folder structure for assets and exports.
Start small and iterate on the system. You do not need to follow every rule perfectly. The point is to reduce friction and make finishing more likely.
Final thoughts
I use this Creative Momentum Framework on everything I make. Direction keeps me focused on the goal. Inspiration keeps me excited. Flow sets a workable rhythm. Discipline gets the job done when things get dull. Over time these habits produce a steady creative rhythm that makes finishing projects feel natural rather than rare.
If you want, try one element from this framework on your current project: write a clearer finish line or set one short session for a tedious task and reward yourself when you finish it. Small experiments are how you build a system that fits the way you work.
Momentum is not luck. It is practice. When you practice these four principles you build a habit that carries you from idea to completion.

Do's and Don'ts when Sculpting
In this tutorial, I walk you through a sculpting workflow that keeps your sculpts clean, modular, and deliberate. Everything I describe comes from experience and long hours in ZBrush, tips that help you build strong foundations first, so detailing later becomes fast and satisfying. This is a process-driven guide: from blocking and foundations to the moment you start adding surface details
Check it out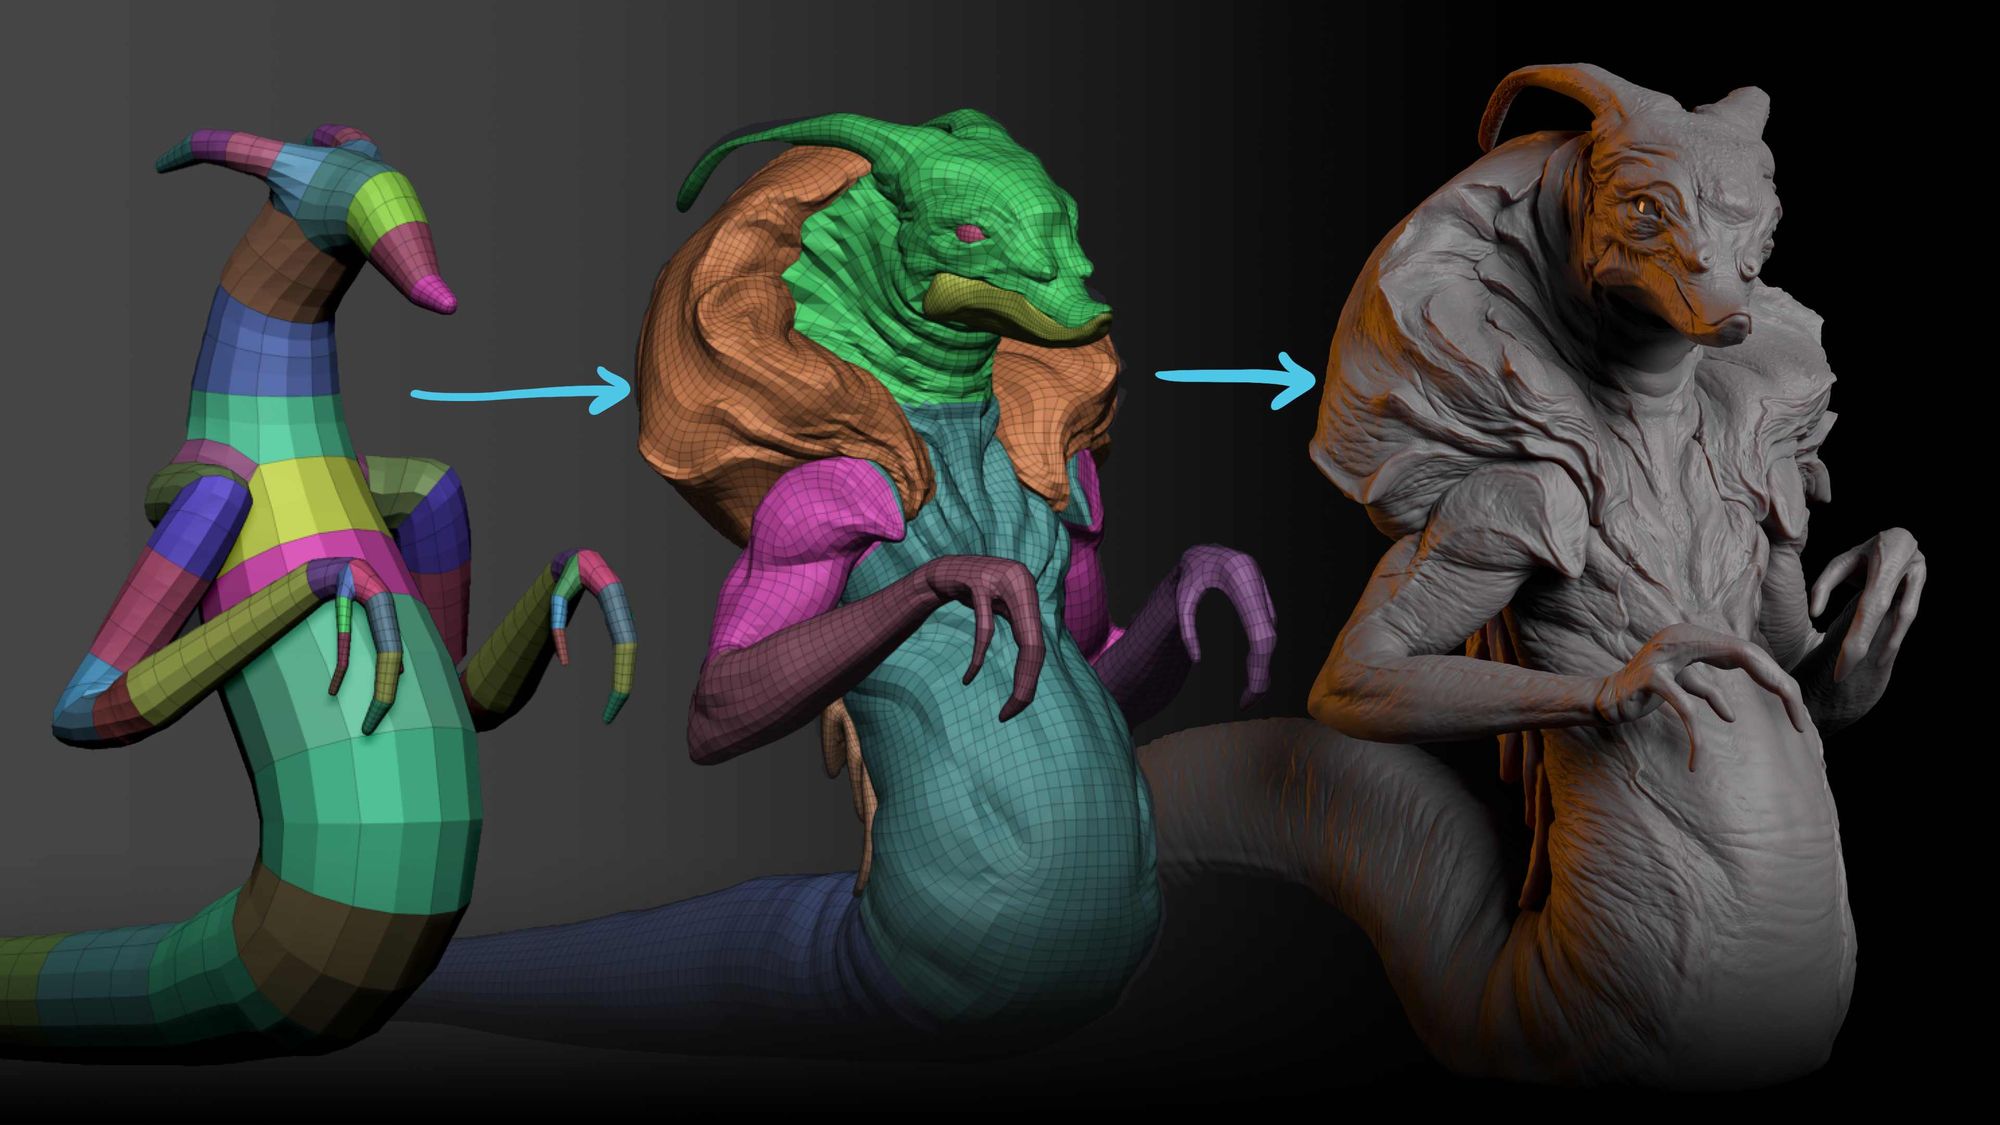


.webp)

