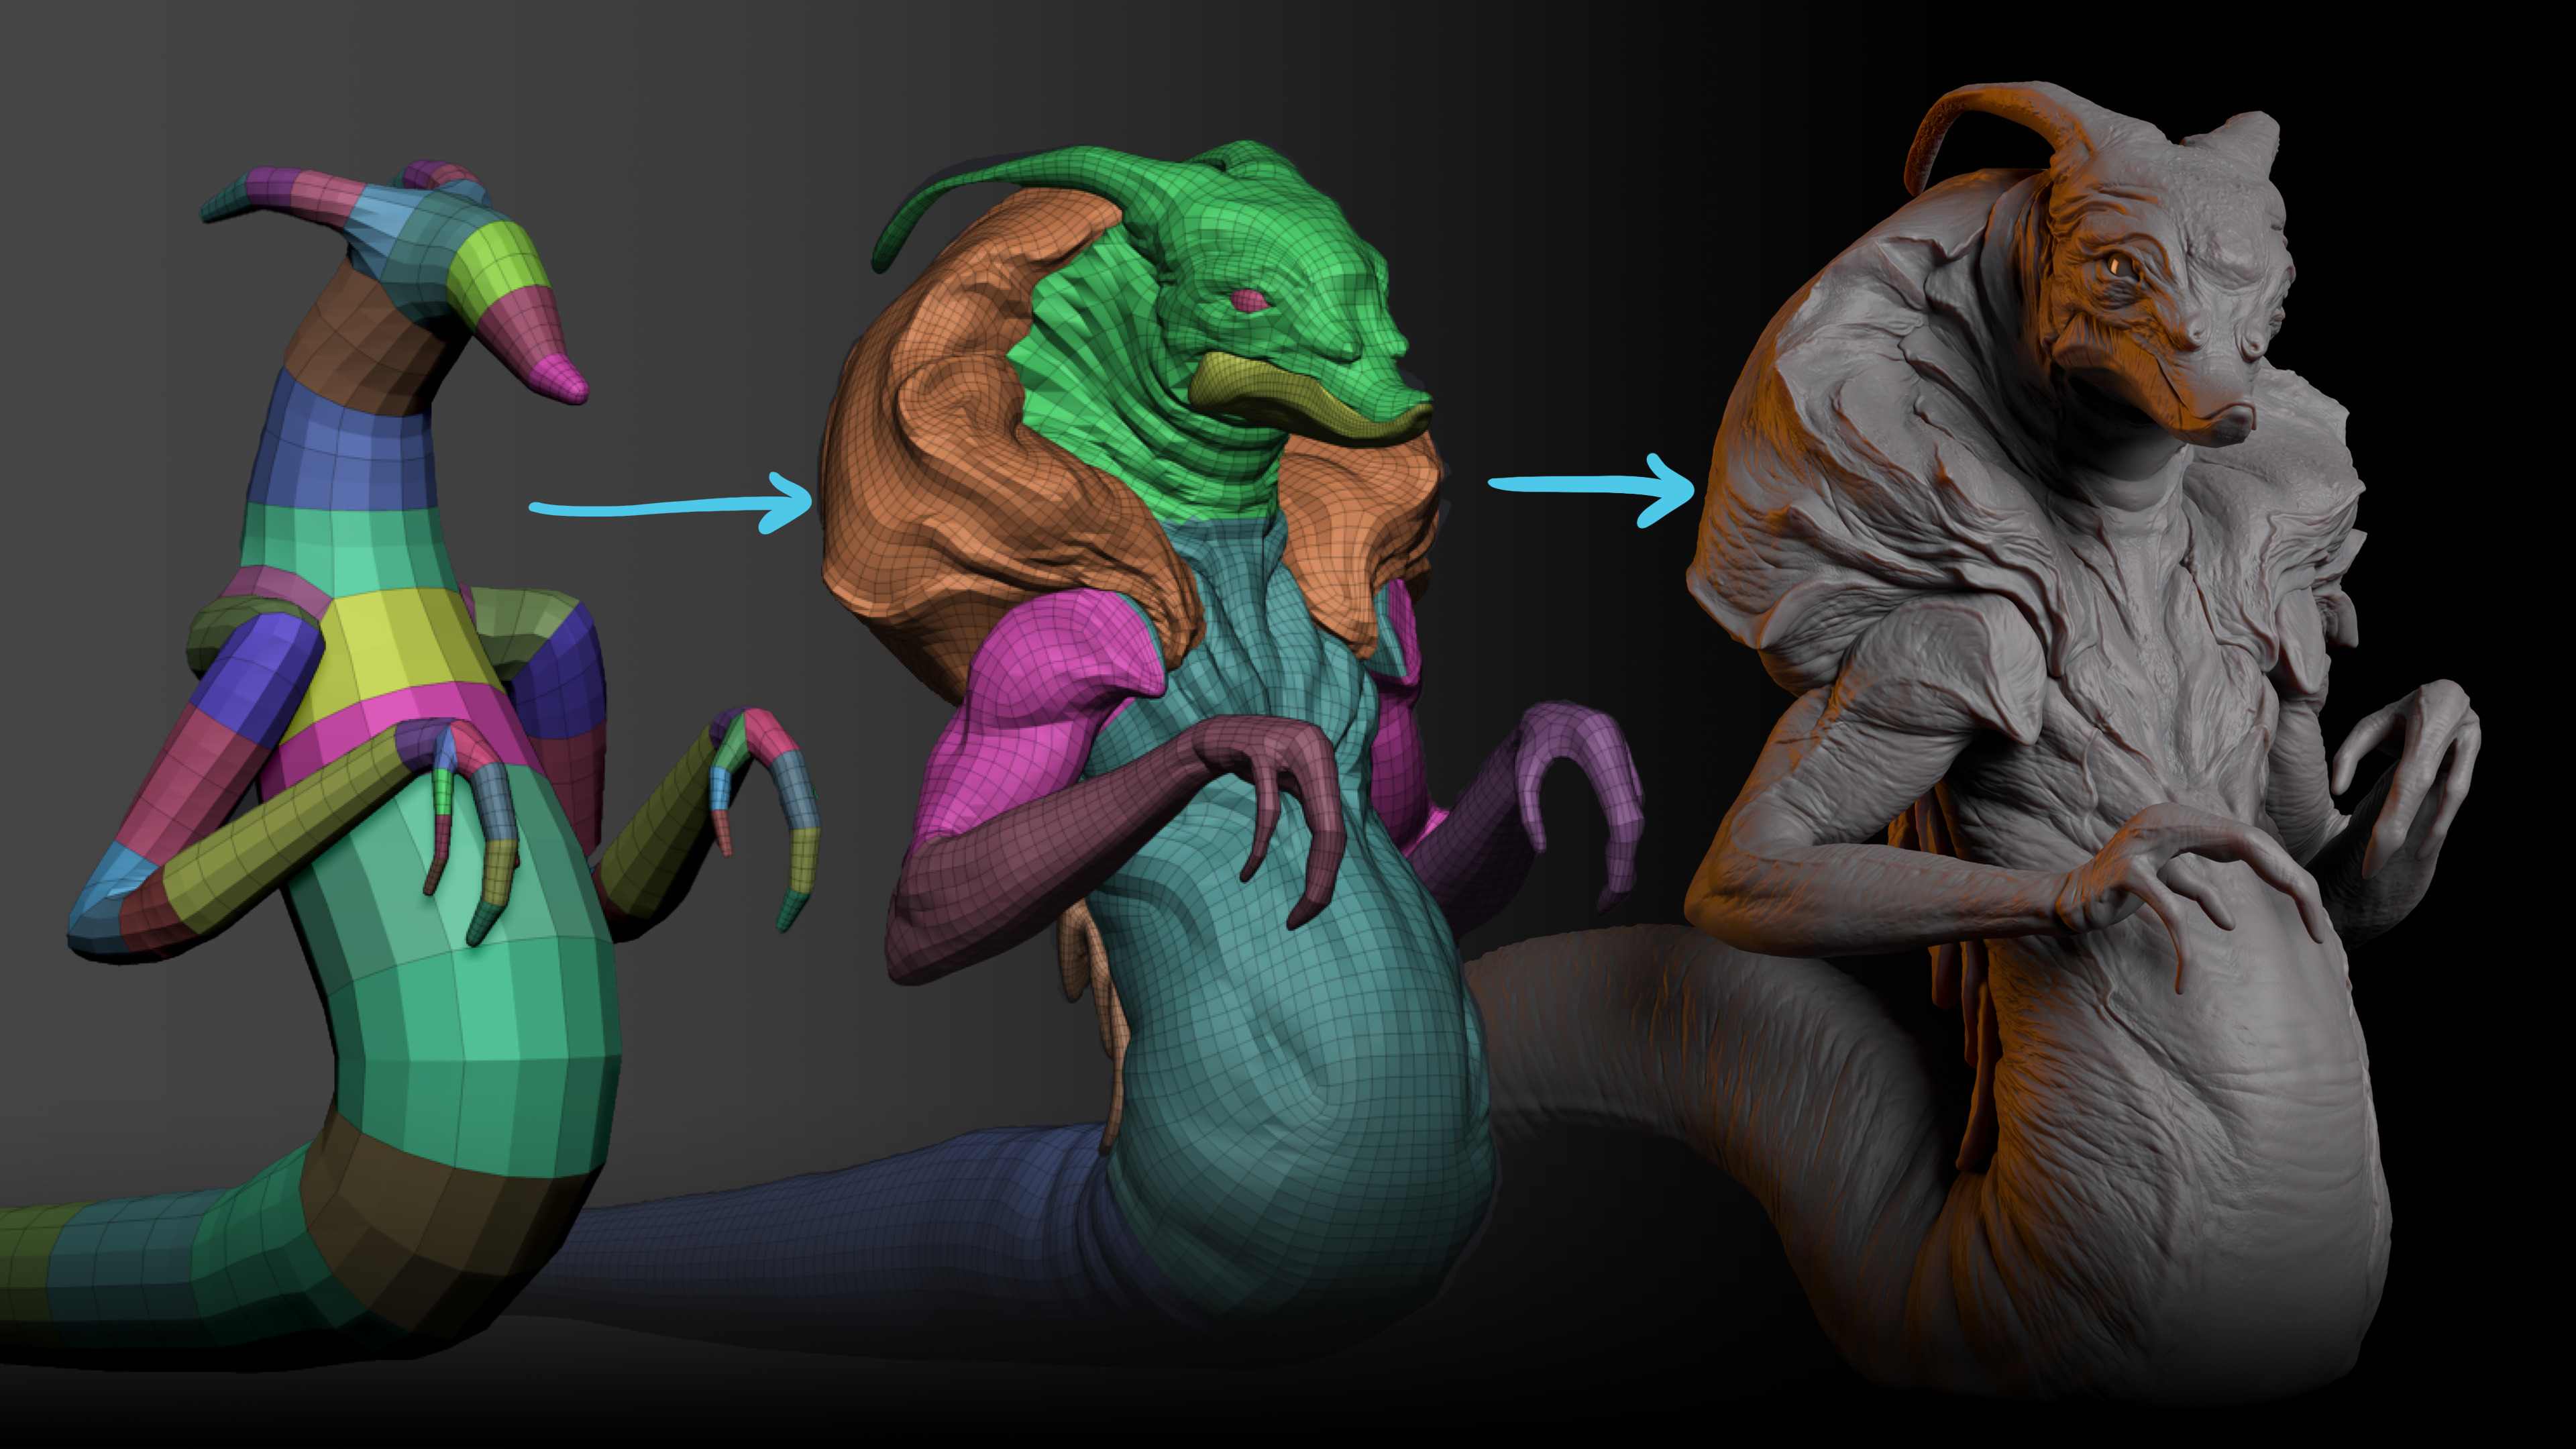


Why the early stages matter?
When sculpting, most of the meaningful progress happens in the early stages. This is where you establish the forms that will guide every detail that follows. The big decisions, such as the silhouette, primary volumes, and proportions, are made during blockout. If you rush into details before those are resolved, you end up polishing something that structurally doesn't read well. In short, details don't fix bad shapes. They only highlight them.
.jpg)
Start simple: Z-Spheres and basic primitives
I use Z-Spheres to quickly block a rough base. They're perfect for setting proportions, lengths, and silhouettes. The aim here is fast experimentation, add or remove spheres to test limb lengths and basic mass.
.jpg)
Do use Z-Spheres as main building blocks. Don't try to carve secondary forms or details at this stage. Those are distractions. If you need extra mass or non-organic parts, bring in simple IMM primitives (insert mesh brushes) and adapt them with move and smooth so everything feels cohesive.
Keep meshes light: subdivision before DynaMesh
Once the Z-Sphere blockout feels right, I prefer the subdivision workflow over jumping into DynaMesh at high resolution. Set DynaMesh resolution to zero and keep things low-poly while you refine shapes. Pure polygons at lower resolution are easier to push and pull for proportional changes.
.jpg)
Don't crank up DynaMesh early. DynaMesh is excellent for exploration, but using it too soon locks you into a heavy, lumpy geometry that's harder to manage. Use DynaMesh later for cleaning transitions and secondary forms.
Refine volumes: move, smooth, and large strokes
When I adjust primary and secondary forms, I use a large Move brush. Big proportional changes need big brush sizes. After making a shift, I immediately follow up with Smooth so the surface stays readable.
.jpg)
Don't grab a small Clay brush and scribble at this stage. Small, detailed strokes are for later when the form is solid. Keep your moves broad and deliberate.
Use soft tools and gizmo deformers for modular blockout
I often append simple primitives and use the Gizmo 3D deformers, such as bend, taper, and twist to quickly shape interesting base volumes. That keeps things modular and makes adjustments non-destructive.
.jpg)
Do keep parts split across SubTools while you refine large forms. This modular approach speeds iteration. Don't try to keep everything in one mesh too early; separate pieces let you tweak proportions without wrecking the rest.
When to bring in DynaMesh and ZRemesher?
After the silhouette and main shapes are locked, it's time to DynaMesh. I use DynaMesh at a low resolution to refine transitions and begin establishing secondary forms. Work big-to-small and keep the surface clean.
.jpg)
Avoid increasing DynaMesh resolution prematurely, as this can create noise and make polishing more challenging. ZRemesher (or ZRemesher with Project History to preserve details) is not intended for perfect animation topology; it's an excellent sketching tool that provides cleaner quads to subdivide later.
Build volumes gradually with ClayBuildup
My ClayBuildup settings are conservative: low opacity, short strokes, and increased roll distance in the Stroke palette to avoid harsh alpha lines. I layer strokes gradually, multiple passes in one direction, then perpendicular passes to create clean volumes.
.jpg)
Avoid sculpting big muscles or forms in a single heavy stroke. If you do multiple lighter passes, they smooth and polish more naturally when you try to smooth the surfaces afterwards.
Keep the surface clean & smooth constantly
Smoothing is not a final polish step; it's part of sculpting. I smooth messy areas often and override problem spots. That keeps shapes readable and allows later subdivision to behave predictably.
.jpg)
Don't get precious about early cuts or little incisions; they're provisional. If you create a cut to map a muscle, be ready to blend or remove it when you refine the volume.
Limit your brush set
Less is more. I keep a small palette: Clay brushes, Smooth, Move, Standard Brush, and a sharper incision brush like DamStandard or the custom Gio Brush. Restricting tools forces you to learn each tool's strengths and prevents the overwhelm of switching brushes every minute.
.jpg)
Don't overdo marks and incisions; use them as guides rather than final detail. They help direct volume refinement but rarely survive untouched into the final pass.
Masking for precision
I rely on sharp masks to isolate areas before I push them with Move. A sharp mask makes your intent clear: the change you make is more exact and therefore easier to smooth and integrate with the surrounding geometry.
.jpg)
After a major masked change, I often re-DynaMesh and smooth to blend transitions. Masking helps refine edges or add wrinkles without disturbing the rest of the sculpt.
Standard brush for contrast and edges
Sometimes the simplest brush is the best. I use the Standard brush to establish crisp contrast or strong fold edges. Increase stroke intensity for prominent ridges, then blend them back with Clay brushes and Smooth.
.jpg)
Retopology mindset: ZRemesher and plain topology
When primary and secondary forms feel locked, I use ZRemesher to get clean quads for subdivision and detailing. ZRemesher is not about perfect animation-ready edge loops at this stage, it's about useful, even quad distribution, so subdividing behaves predictably.
.jpg)
Don't obsess over perfect edge flow unless you're building a mesh for animation or game engines. For concept sculpts and 3D printing, even quad distribution is usually enough.
Work with subdivision levels
Subdivision levels are one of ZBrush's strongest features. I use lower levels for big proportion changes and higher levels for fine polishing. Moving up and down lets me maintain control and avoid baking myself into a corner.
.jpg)
Don't stay locked at the highest subdivision level to do everything; you'll lose flexibility and make proportion fixes painful.
Details: manual intentionality first, then custom brushes
Details are surface enhancement, not structural fixes. My process for details is twofold:
- Establish feature details first, such as the scars, deep creases, and story-driven elements. These are manual and anchor the sculpt's visual hierarchy.
- Use custom brushes to support and enrich the surrounding surface, for example, the skin breakup, fabric grain, and small irregularities. But apply them intentionally and edit them afterwards so they fit the form.
.jpg)
Don't simply stamp a brush across the mesh and call it done. If you drag and stamp without intention, the result looks random. Instead, either sculpt a feature manually and use custom alphas to support it, or apply a custom pattern and then sculpt around it to make it feel integrated.
Don't scatter details, Create Hierarchy
One of the biggest mistakes I see is scattering texture everywhere. Instead, check the sculpt as a whole and place details where they support the silhouette and story. Some areas should read sharp and prominent; others should be soft and quiet. That contrast creates visual hierarchy and believability.
.jpg)
If a detail interrupts a larger fall of form, soften it. If a feature needs emphasis, extend lines or deepen forms to make it read from a distance. The goal is a balanced surface that complements the primary forms.
Wrap up: mindset and next steps
This tutorial centers on one mindset: be deliberate. Work from big to small, keep geometry manageable early, and use manual intent to direct automated tools. Custom brushes and DynaMesh are incredible helpers; they speed up the process, but they never replace thoughtful sculpting choices.
To wrap it up, remember that a clean, intentional sculpt comes from patience and restraint. Block with simple primitives and stay in a low-res subdivision workflow early on, refining only the big forms with large Move strokes and plenty of smoothing. Add primitives and use Gizmo deformers to keep your blockout modular, and hold off on DynaMesh or ZRemesher until the core shapes are locked in. From there, build volumes slowly with ClayBuildup, smoothing often to keep the surface clean and readable. Stick to a small, well-mastered brush set, use sharp masking for precise transformations, and always establish key features by hand first before bringing in custom brushes. Most importantly, create a clear hierarchy of details and place them deliberately so every mark supports the overall design rather than distracting from it.
Keep sculpting deliberately. Cheers.

Making The Thing: From Blockout to Render
Welcome to a breakdown of my sculpting process for The Thing! In this tutorial, I’ll walk you through my approach to building a fan-art version of Ben Grimm in ZBrush, from the first blockout to the final polish. In this tutorial, you can keep your workflow clear, structured, and fun, perfect for practice, portfolio pieces, or just sharpening your sculpting skills.
Check it out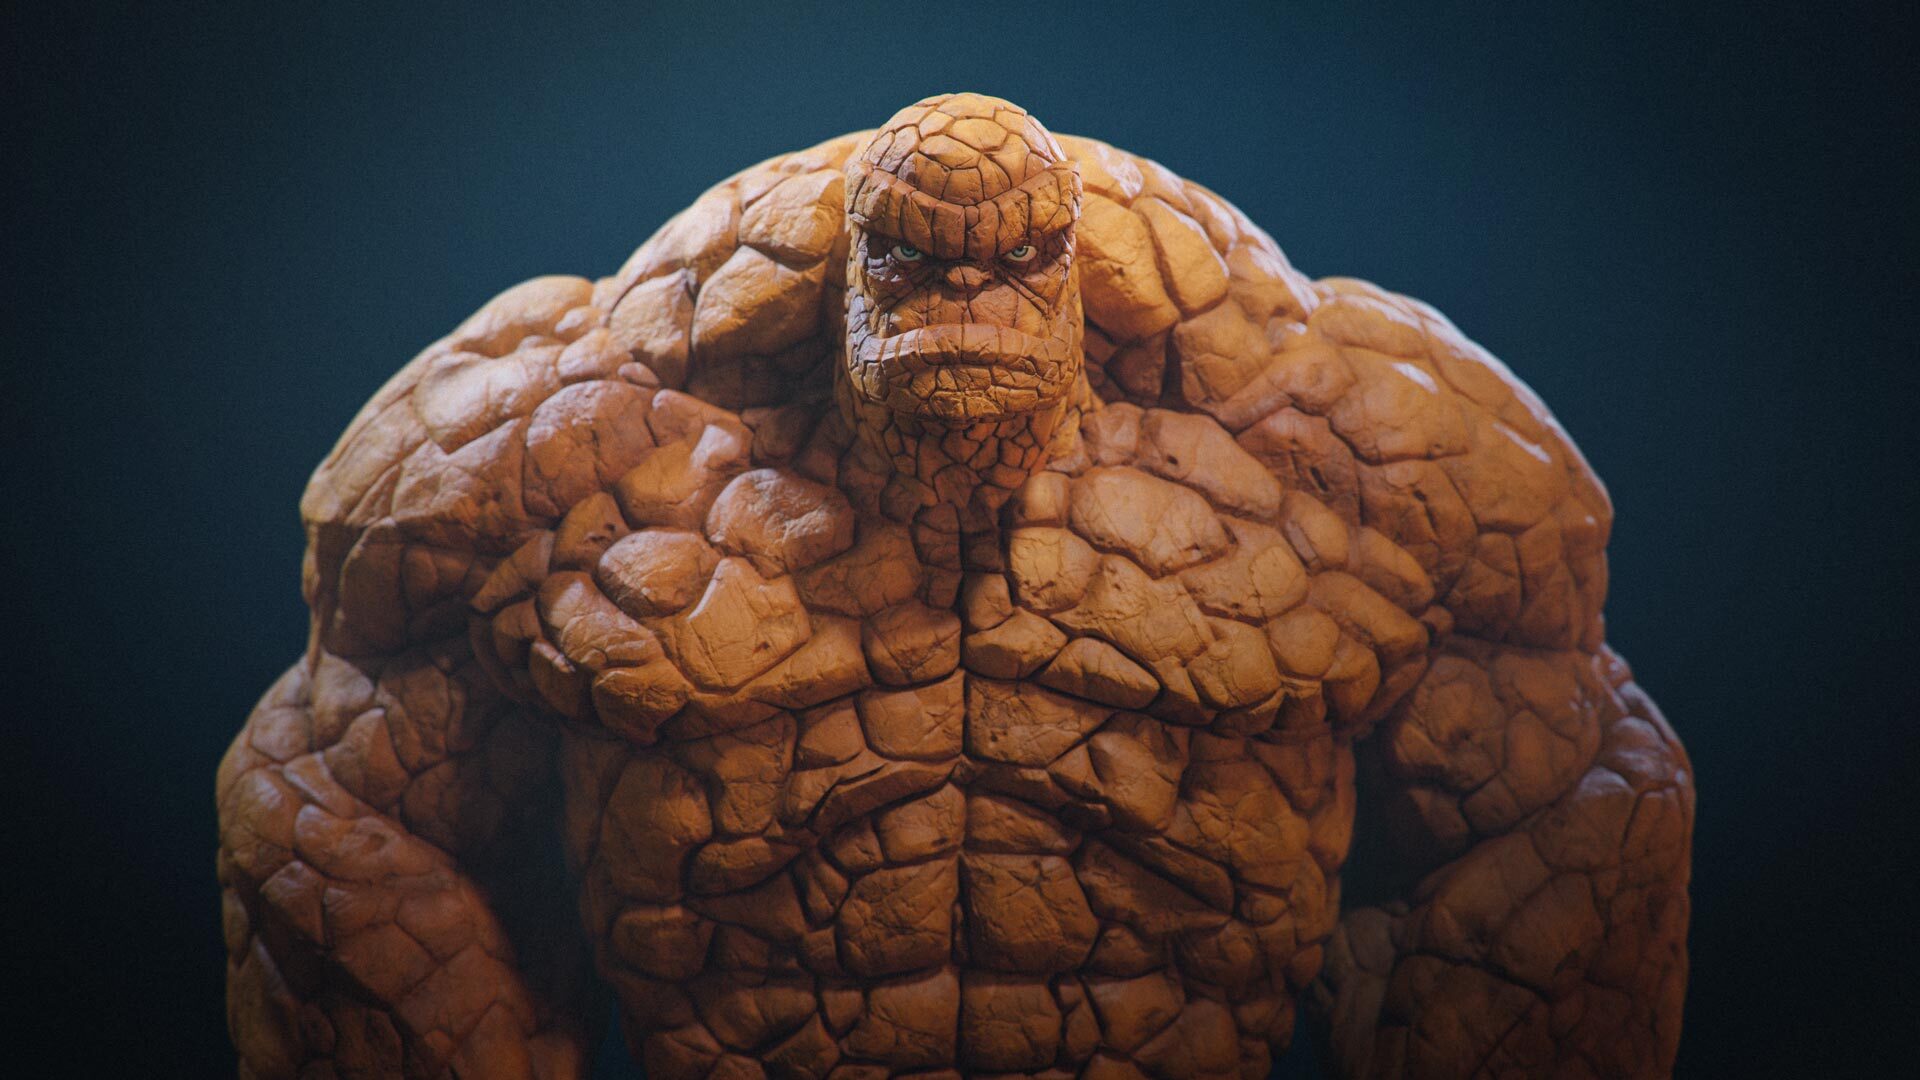


.webp)

