.jpg)

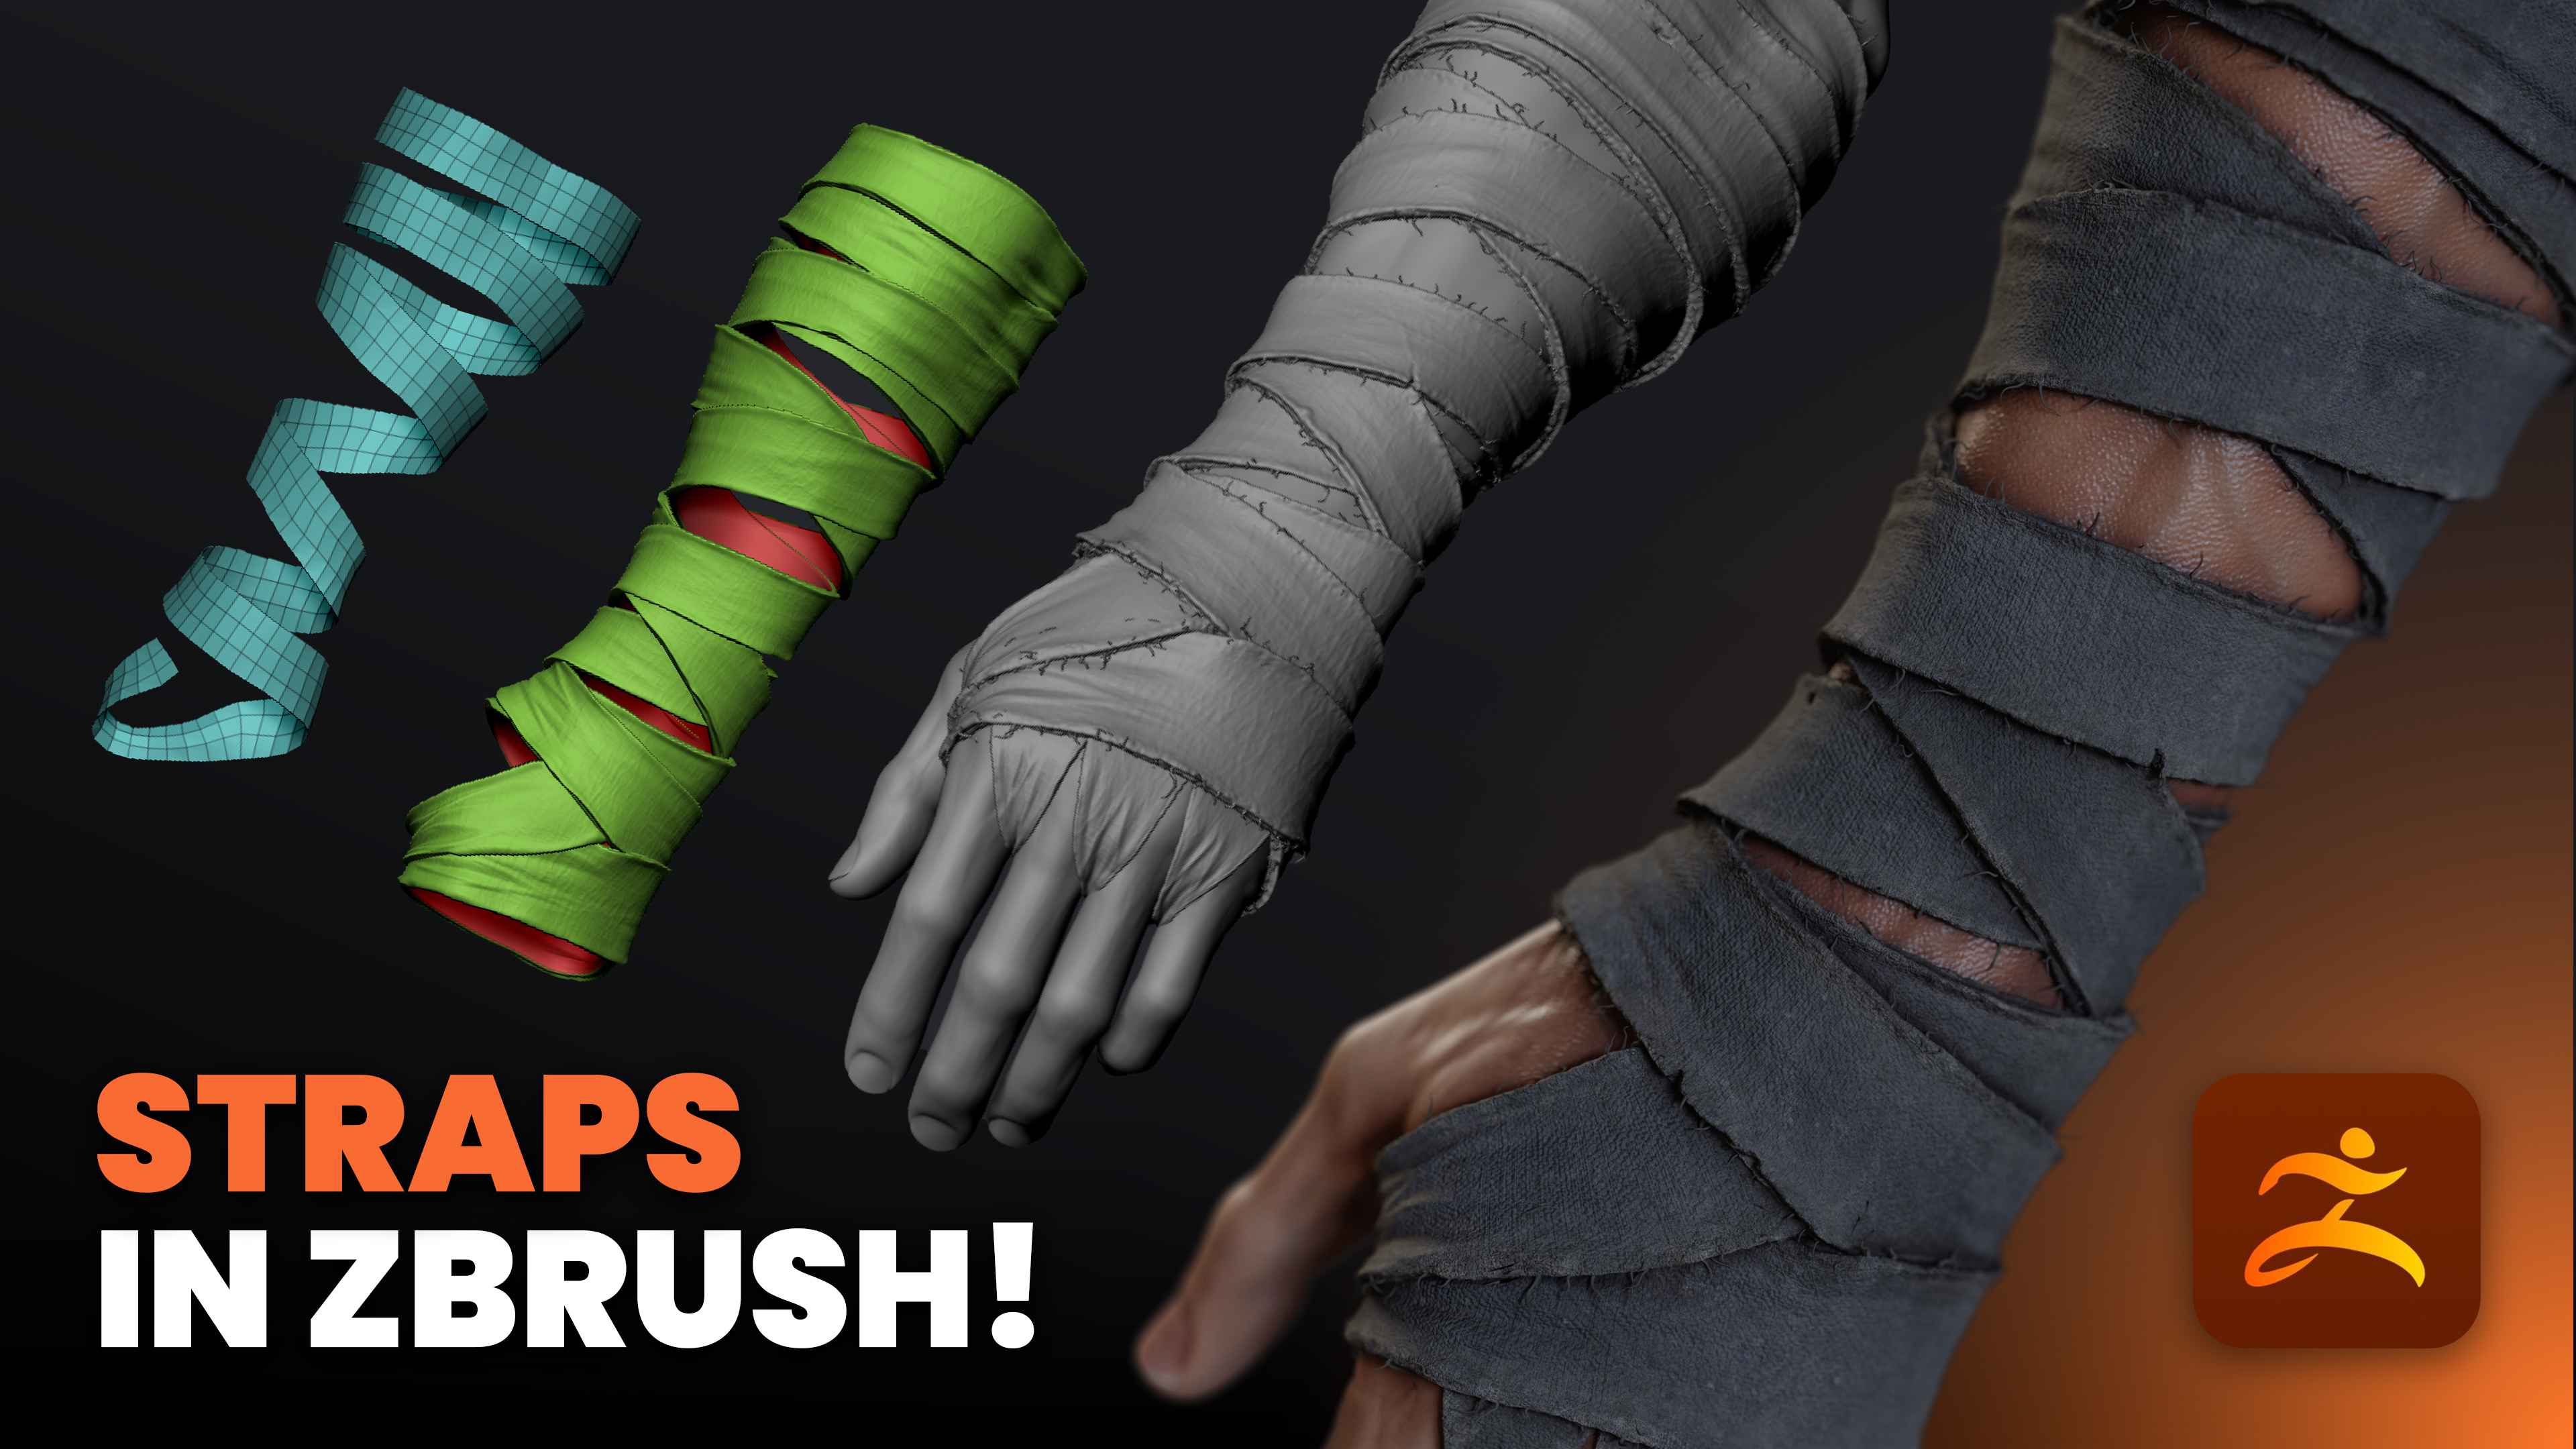

The idea is simple, but the results are more realistic and open up many creative possibilities in ZBrush. I’m working in ZBrush 2026, but everything here also works in earlier versions.
.jpg)
Get your base mesh ready
Let's start with a separated arm subtool so you have a clean slate. I use a mesh with subdivision levels in my file; the arm has five subdivision levels and a low-resolution base. You can work from a lower-res mesh if that’s easier, but keep subdivision levels handy because you’ll be projecting and adding detail later.
.jpg)
Before wrapping the straps, isolate the arm subtool you’ll be working with. Ensure the model has at least one low-resolution subdivision level available, and enable Polyframe whenever you need to inspect the topology.
The common approach: Slice curve and panel loops
Before I show you my preferred technique, I will briefly outline the common approach so you can compare. People often use Slice Curve to create many polygroups (irregular stripes), then use ZRemesher and Panel Loops to give them thickness. It works and gives you separate pieces you can shape.
.jpg)
In this method, start by duplicating the arm and using Delete Lower to delete the lower subdivisions so you’re working on a single subdivision level. Next, use the Slice Curve tool (Ctrl+Shift+drag) to carve out strips and create distinct polygroups. Hide the unwanted areas and Delete Hidden geometry, then run ZRemesher with Keep Groups enabled to generate clean topology for each strip. Finally, apply Edge Loop → Panel Loops to give the pieces thickness, and refine their shape using the Move Topological or Move brushes.
This method is solid, but you end up with individual separated loops. That’s fine if you want bands that were applied separately. I want straps that read as a single continuous wrap, so I use a slightly different workflow that keeps continuity and gives better control when shaping layers over and under each other.
The common but slightly different approach: Split panels
If you do prefer separated bits from the Slice Curve, ZModeler offers a fast way to split each polygroup into separate pieces: right-click an edge → Bevel → click repeatedly to split loops. Delete Hidden, then use Dynamic Subdiv to preview thickness and Project to conform back to the arm. This is a useful shortcut if you want lots of isolated loops to manipulate quickly.
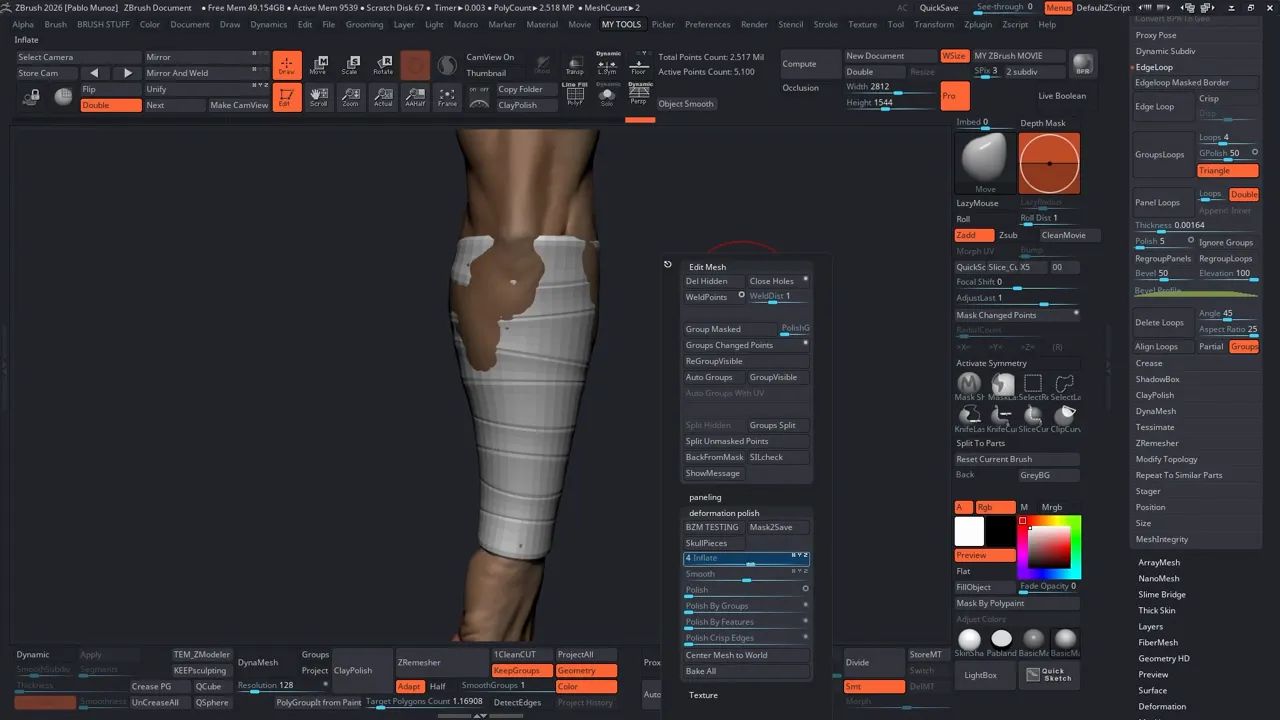
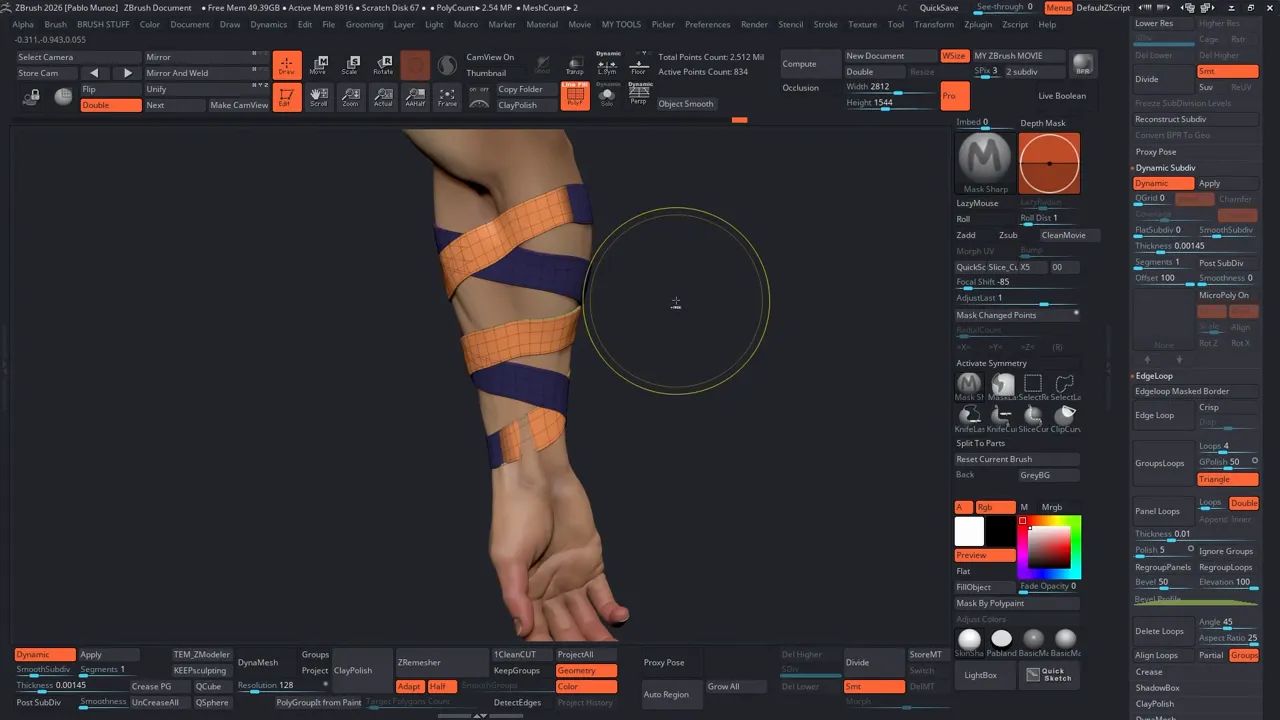
The proper technique: Sharp masking and extracting single-sided strips
This is the core of my approach. Rather than slicing multiple disconnected polygroups, I paint sharp spiral masks and extract single-sided geometry that follows those masks. To keep the edges crisp, I use a sharp masking brush, either Mask Brush with a Focal Shift of -100 or a custom masking brush like the MaskSharp. The strap thickness depends on the brush size; a larger brush creates thicker straps. I then paint a spiral mask from the wrist to the forearm by holding Ctrl and painting, applying firm pressure for consistent thickness. Leaving small gaps between each mask stroke allows the straps to overlap naturally for a more realistic result.
.png)
Now go to Tool → Subtool → Extract. Set Thickness to 0 (we only want a single-sided shell). Click Extract → Accept. You’ll get a new subtool that’s a single-sided strip matching your mask.

Repeat in the opposite direction and prepare two interleaving straps
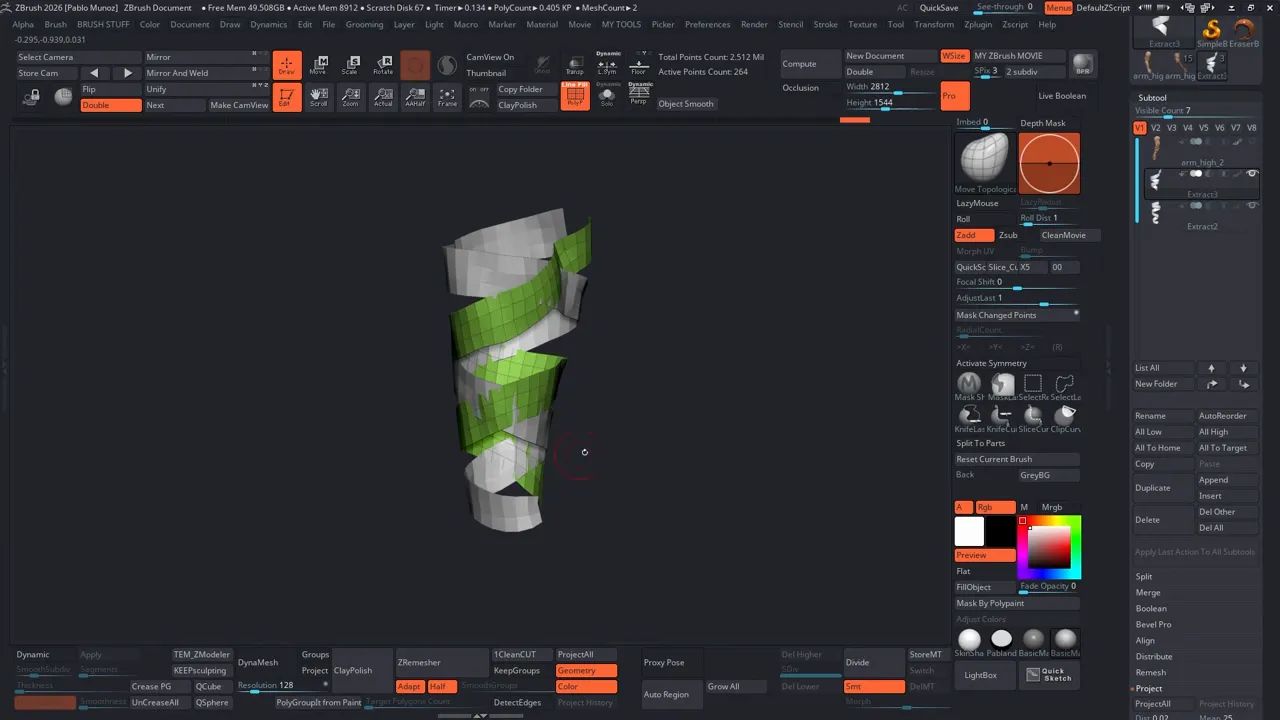
Clear the mask on the arm, then paint the spiral in the opposite direction (this helps the straps alternate and cover different areas). Extract again at thickness 0 and Accept. You now have two single-sided strap subtools that roughly interact but are separate objects — perfect for connecting into a continuous wrap.
Use Auto Group or Group Visible so each strap is properly polygroupped, then turn off Dynamic Subdiv if you used it for previewing.
Retopology to get a clean topology for bridging
Each extracted strap usually comes out with messy topology, so I like to clean it up quickly using ZRemesher. I start by going to Deformation → Polish (or Polish by Groups) to smooth out any noisy contours along the edges. Then, I run ZRemesher with Keep Groups turned on and set the target polygon count somewhere around 900–1100, depending on the strap’s length. After that, I use Polish by Crisp Edges to refine the form and clean up the end caps. Just hide the ends and Delete Hidden to tidy them up. If the mesh still feels uneven, I’ll simply run ZRemesher again until I get a clean, even strip with a few well-spaced edge loops.
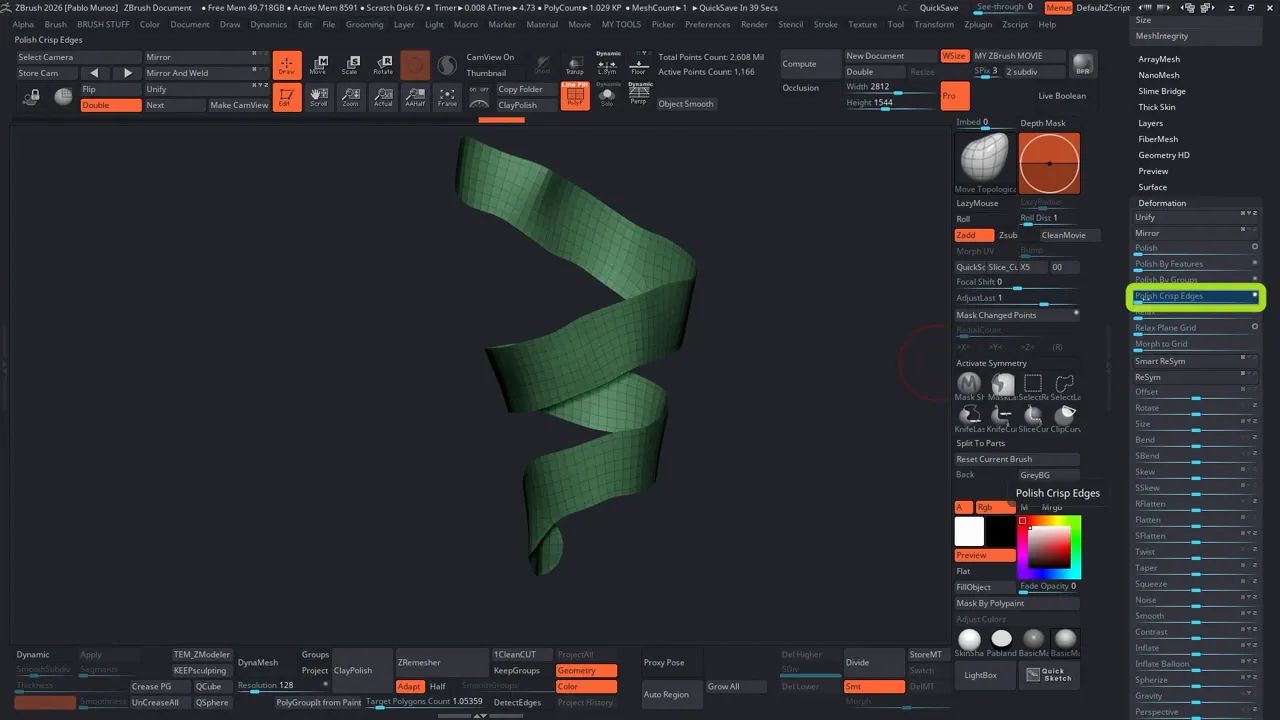
Good topology here makes bridging and adding loops later much easier.
Project the straps back onto the arm
With the low-res arm visible, project the simplified straps back onto it so they conform perfectly to the surface curvature. Go to SubTool → Project, turn off Color, and click Project All to transfer the shape details accurately. Once that’s done, repeat the same process for the second strap to make sure both fit cleanly against the arm’s surface.
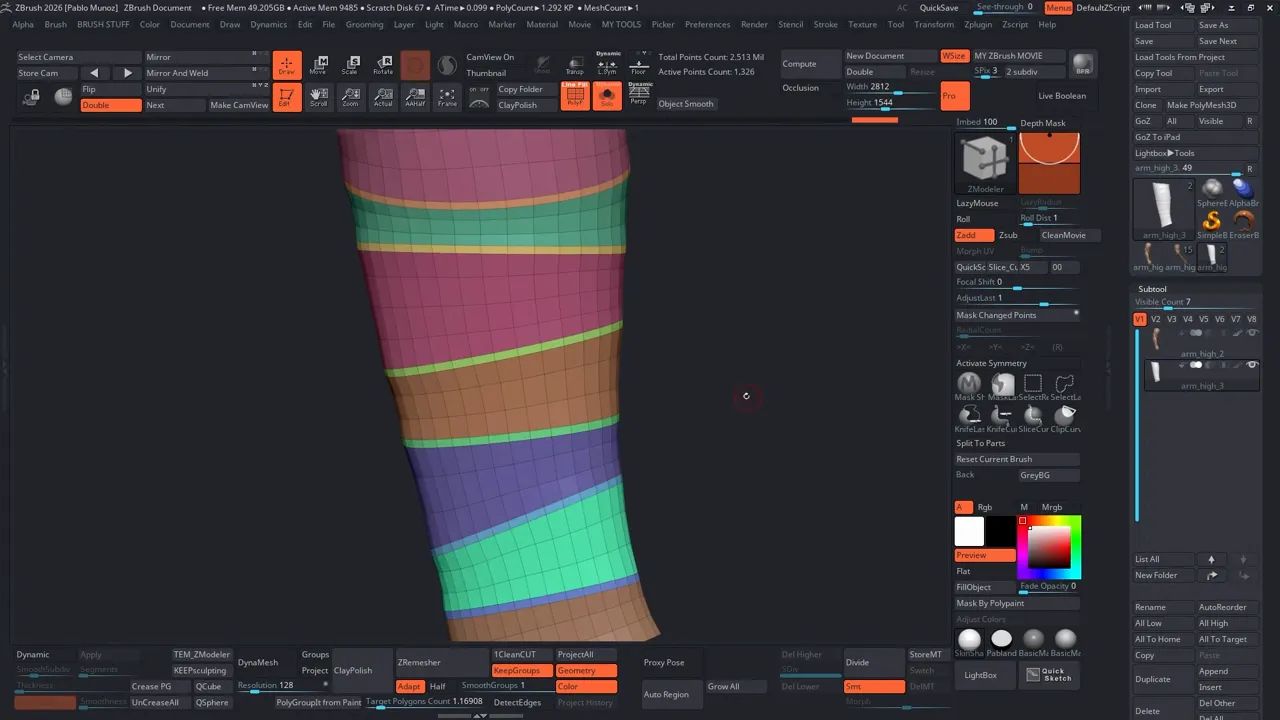
Merge and bridge edges with ZModeler to make a single continuous mesh
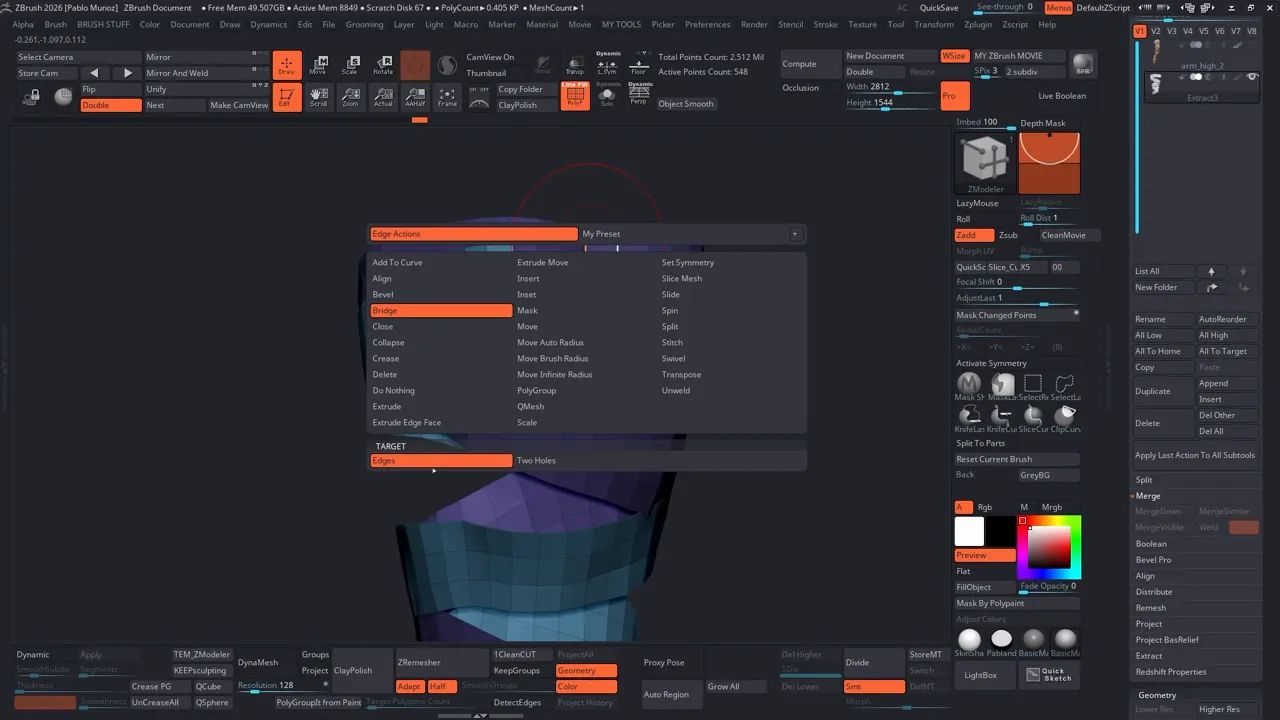
Merge the two strap subtools using Merge Down, so you end up with a single object made of two shells that nearly meet. Next, use the ZModeler Brush to bridge the gaps and create proper connectivity. With ZModeler active, right-click an edge, choose Bridge, and set the Target to Edges. Then, click on each pair of corresponding edges to connect them. If any bridge looks too stretched, simply right-click the edge again and choose Insert to add an extra loop for better spacing. Once everything is connected, isolate regions using Ctrl+Shift selection and run Auto Groups—the goal is to have just two clean polygroups, which makes masking and pushing certain sections over or under much easier later on.
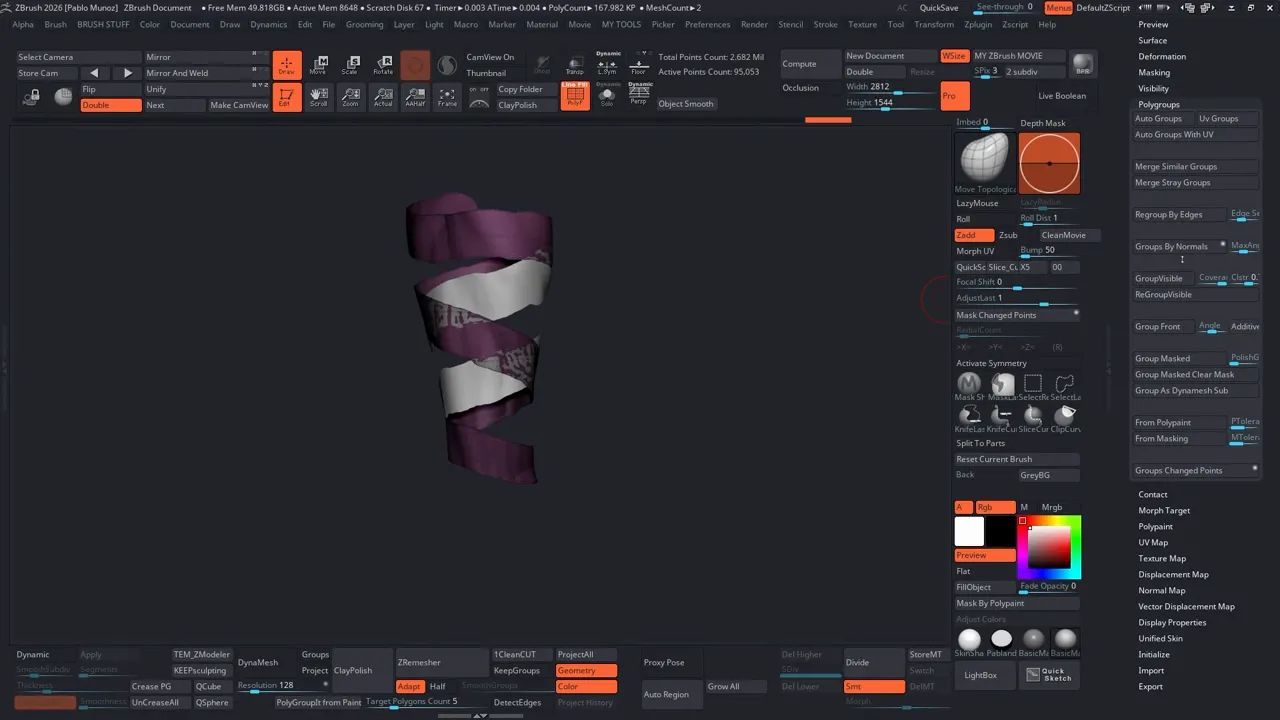
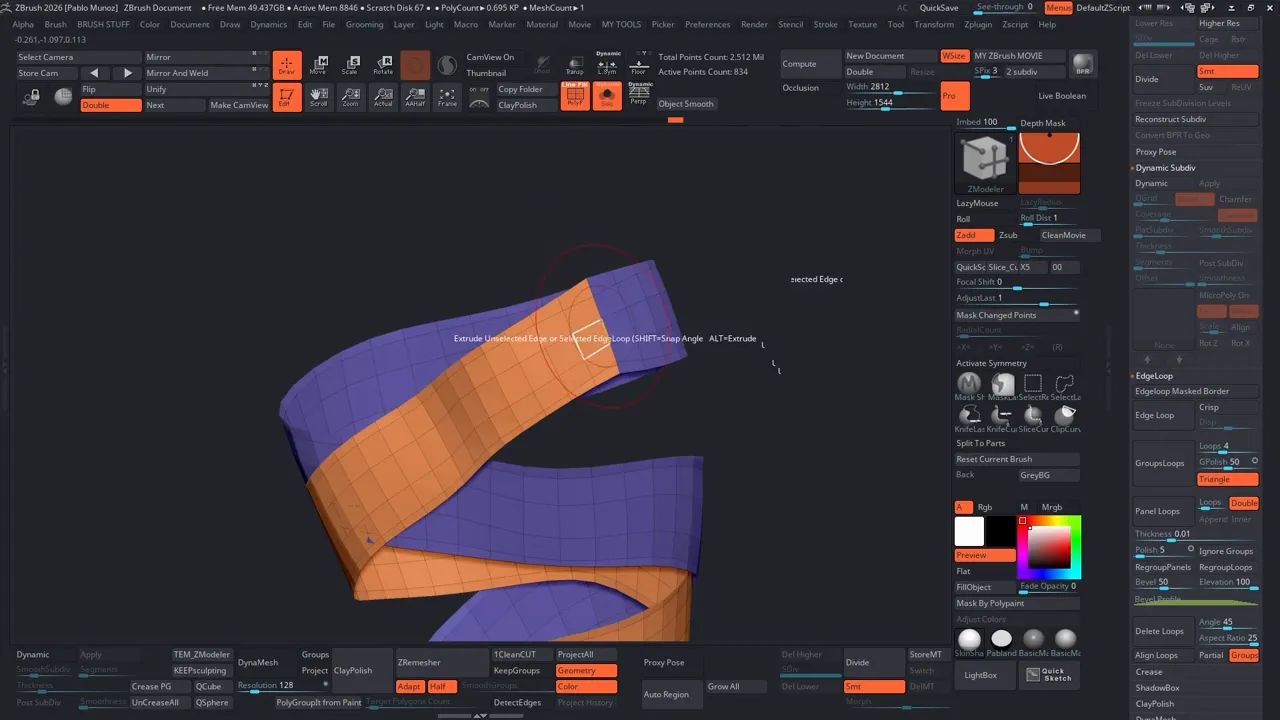
Dynamic thickness, edge sharpening and shaping the wrap
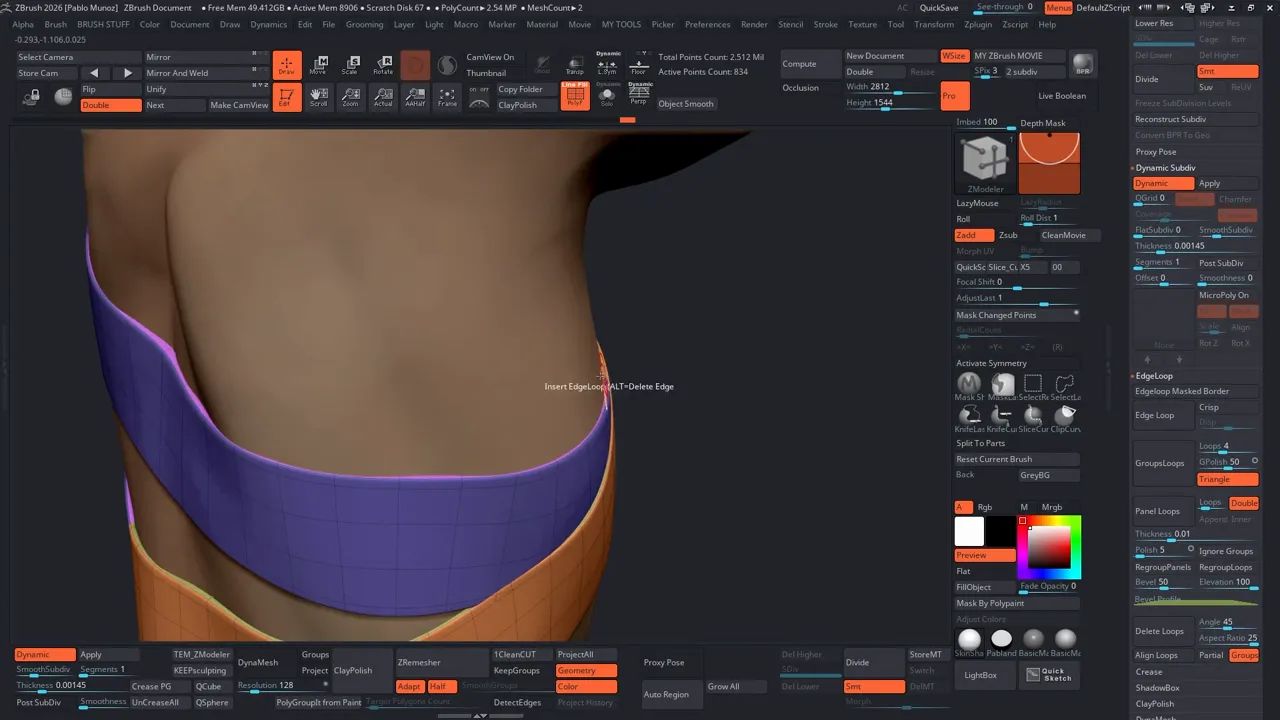
Enable Dynamic Subdiv and adjust the Thickness value to preview the strap’s volume. Rather than relying on extra dynamic segments for definition, I prefer adding a sharpening loop near the edge. To do this, switch to the ZModeler Brush, right-click an edge, and choose Insert to add an inner loop, this tightens and sharpens the silhouette. Finally, tweak the Dynamic Subdiv Offset so the thickness is pushed outward from the surface (set Offset to 100) to keep the straps sitting cleanly on top of the mesh instead of appearing sunken in.
Now use Move Topological and masks to weave straps over and under each other: isolate a polygroup, Control+click canvas to mask, invert mask and push the appropriate sections up or down. This is where the connected feel appears, straps truly look like a continuous piece wrapping and overlapping.
Turning dynamic thickness into real geometry (two methods)
Once you’re happy with the Dynamic Subdiv preview, it’s time to give the straps real geometry with actual thickness. I usually go with one of two methods. The first is Polygroup Extrude, just right-click, choose Extrude → Polygroup All, and drag outward to give the mesh thickness. This method is quick and works best when your polygroups are clean and well-defined.
The second option is to turn off the Dynamic Subdiv and using the ZModeler Brush select Edge Extrude, right-click an edge and drag to pull the geometry out. You can also hold Alt while dragging to toggle between extruding a single edge or the entire edge loop, which gives you finer control over thickness on a per-loop basis.
After extruding, add slide the inner loop (hover over an edge, Right-click → Slide) to tweak edge sharpness. Then turn on Dynamic Subdiv, adjust the thickness and apply it, the mesh now has geometry to subdivide further.
Subdivide and sculpt folds/wrinkles
Subdivide the strap mesh to add sculpted details. Add folds and compression wrinkles using either custom brushes or the standard brushes.
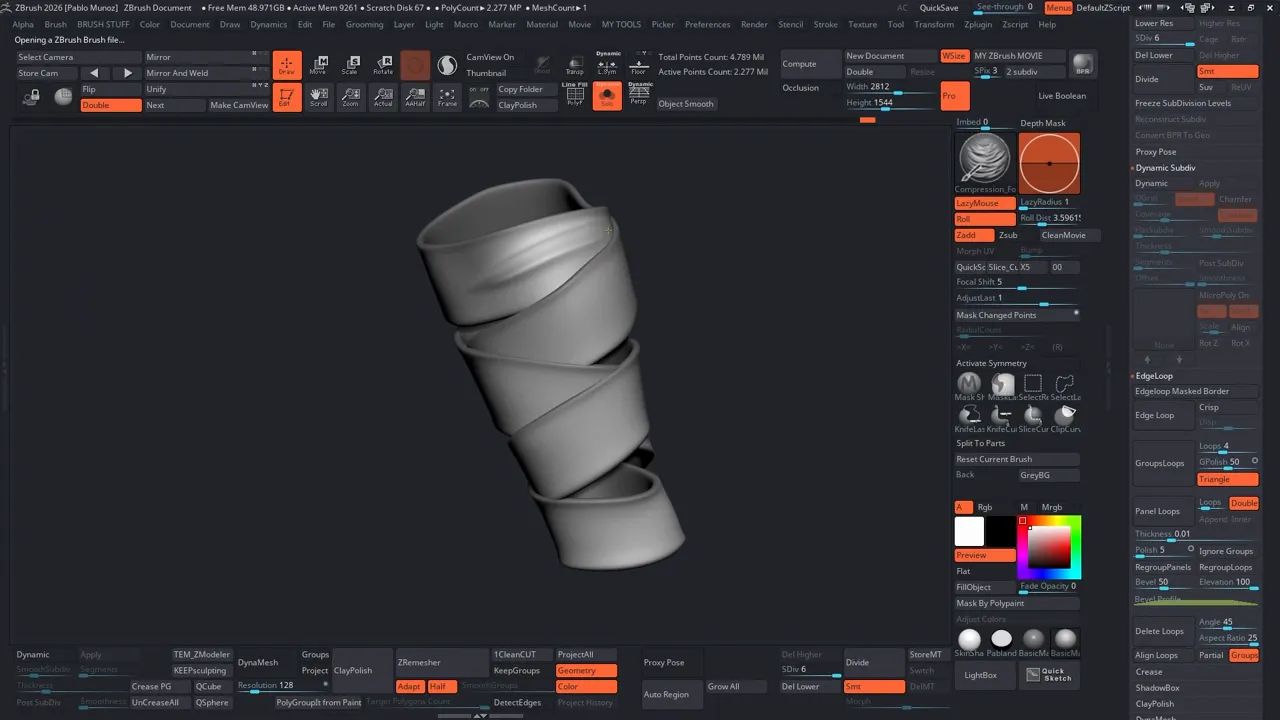
Here are some quick tips for refining your straps: start by masking only the top polygroup, then sculpt subtle compression folds where the straps bend or overlap. If you don’t have custom fold brushes, the Standard, Inflate, and Pinch brushes work just fine for creating folds; custom brushes simply help you move faster. Finally, remember that manual refinement always wins, take the time to adjust folds and placements by hand for the most natural, believable results.
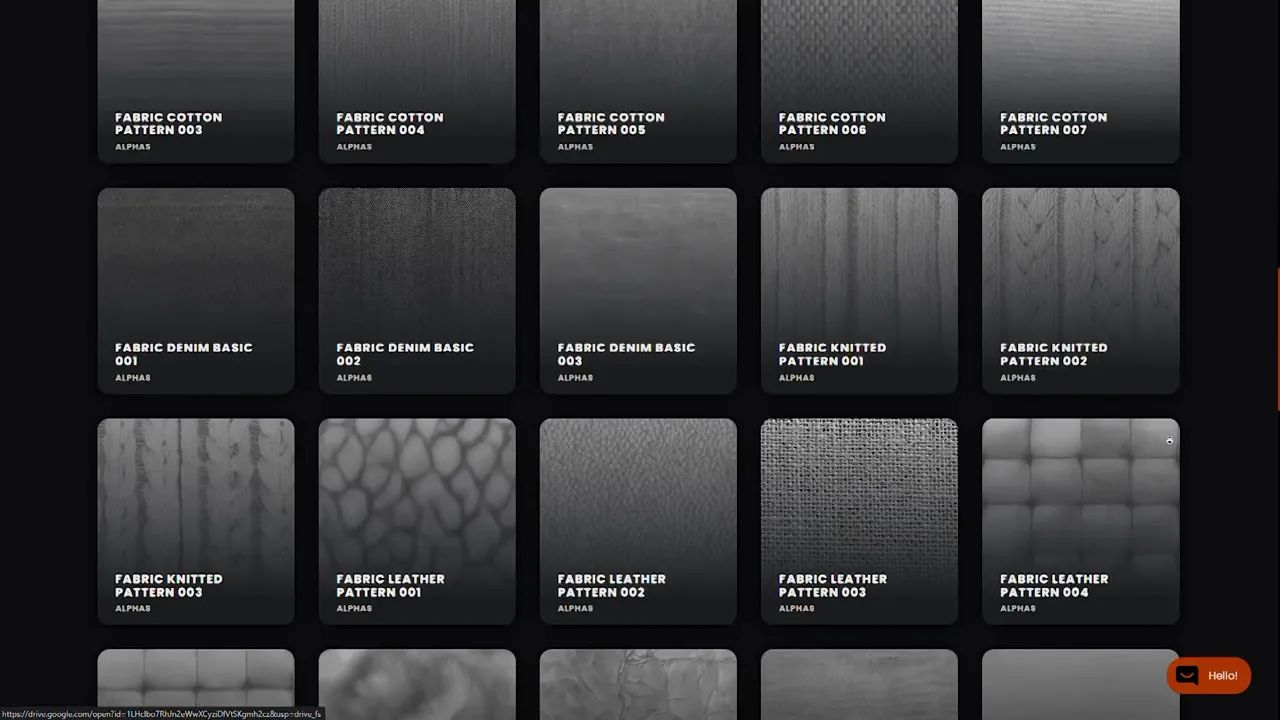
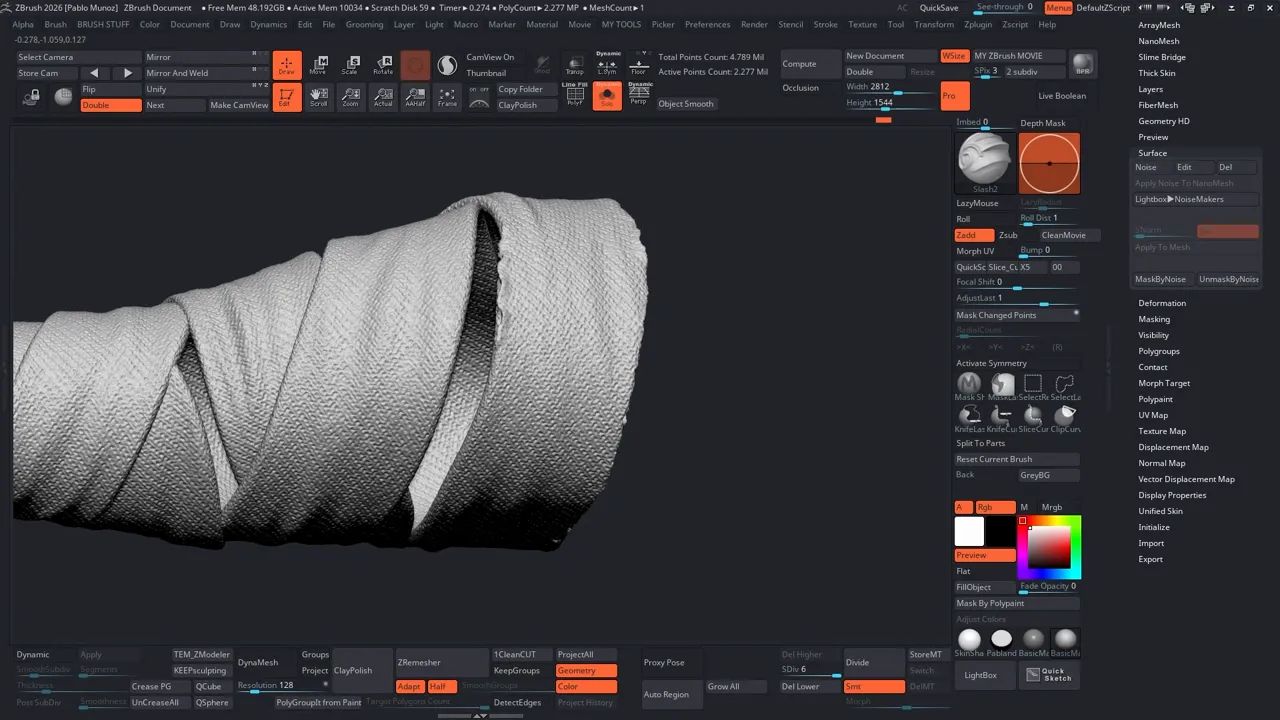
Add fabric surface detail with NoiseMaker and UVs
To add a fabric texture, like denim, linen, or canvas. I use NoiseMaker with UV projection. Here’s the workflow: start by going to the lowest subdivision level of the strap, then open ZPlugin → UV Master, enable Polygroups, and click Unwrap to quickly generate UVs. Once that’s done, return to the highest subdivision level and on the side panel open Surface → Noise. Change the Mapping mode from 3D to UV, then pick a fabric-style Alpha tile (bottom left corner of the NoiseMaker viewport). Set Mixed Basic Noise to 0 so the alpha fully drives the texture, and fine-tune the Alpha Scale and Strength until the pattern looks right. When you’re happy with the preview, click Apply to Mesh to apply the texture directly onto the surface.
If the noise looks pixelated, add another subdivision level before applying the noise.
Damage, edge cuts, and randomness
To break up the perfect fabric look, use strong standard or slash brushes to push and cut edges. The Slash brushes that ship with ZBrush work great for small cuts and irregularities. Use Alt to push, then blend or carve little nicks so the strap reads like it was cut from a larger fabric.
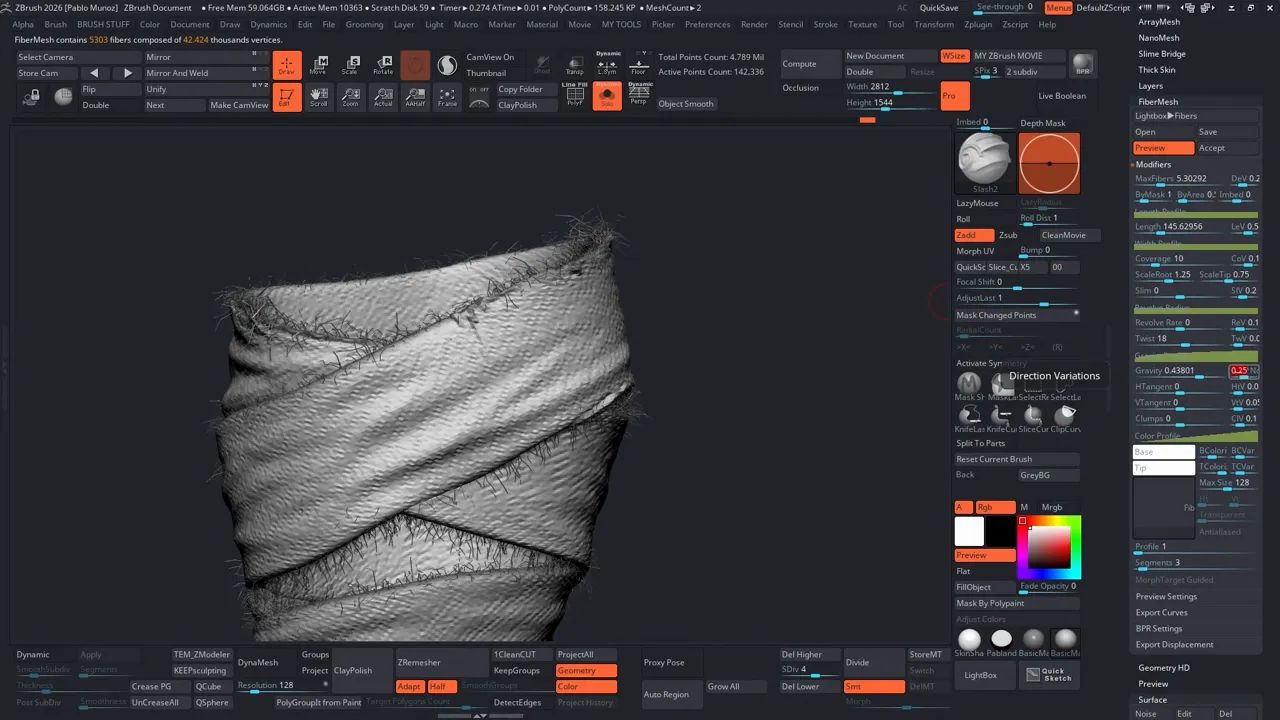
Adding flyaways with FiberMesh
For adding flyaway fibers along the strap edges, FiberMesh is the perfect tool. Since you’ve maintained clean polygroups, you can easily isolate the top edges, mask them, and preview the fiber effect before committing. Start by lowering the subdivision level to around 4 to make masking easier. Use Ctrl+Shift to isolate the edge polygroups, then Ctrl+click on the canvas to mask the edges, and Ctrl+click again to smooth the mask if needed. In Display Properties, make sure to turn Double off. This step is important for clean fiber generation, otherwise you’ll end up with fibers on both sides of the masked faces. Next, go to Tool → FiberMesh → Preview, and in the Modifiers section, fine-tune the count, length, thickness, curve, gravity, and width profile until the fibers look natural. Once you’re satisfied, click Accept to generate the fibers as a new subtool for further refinement or rendering.
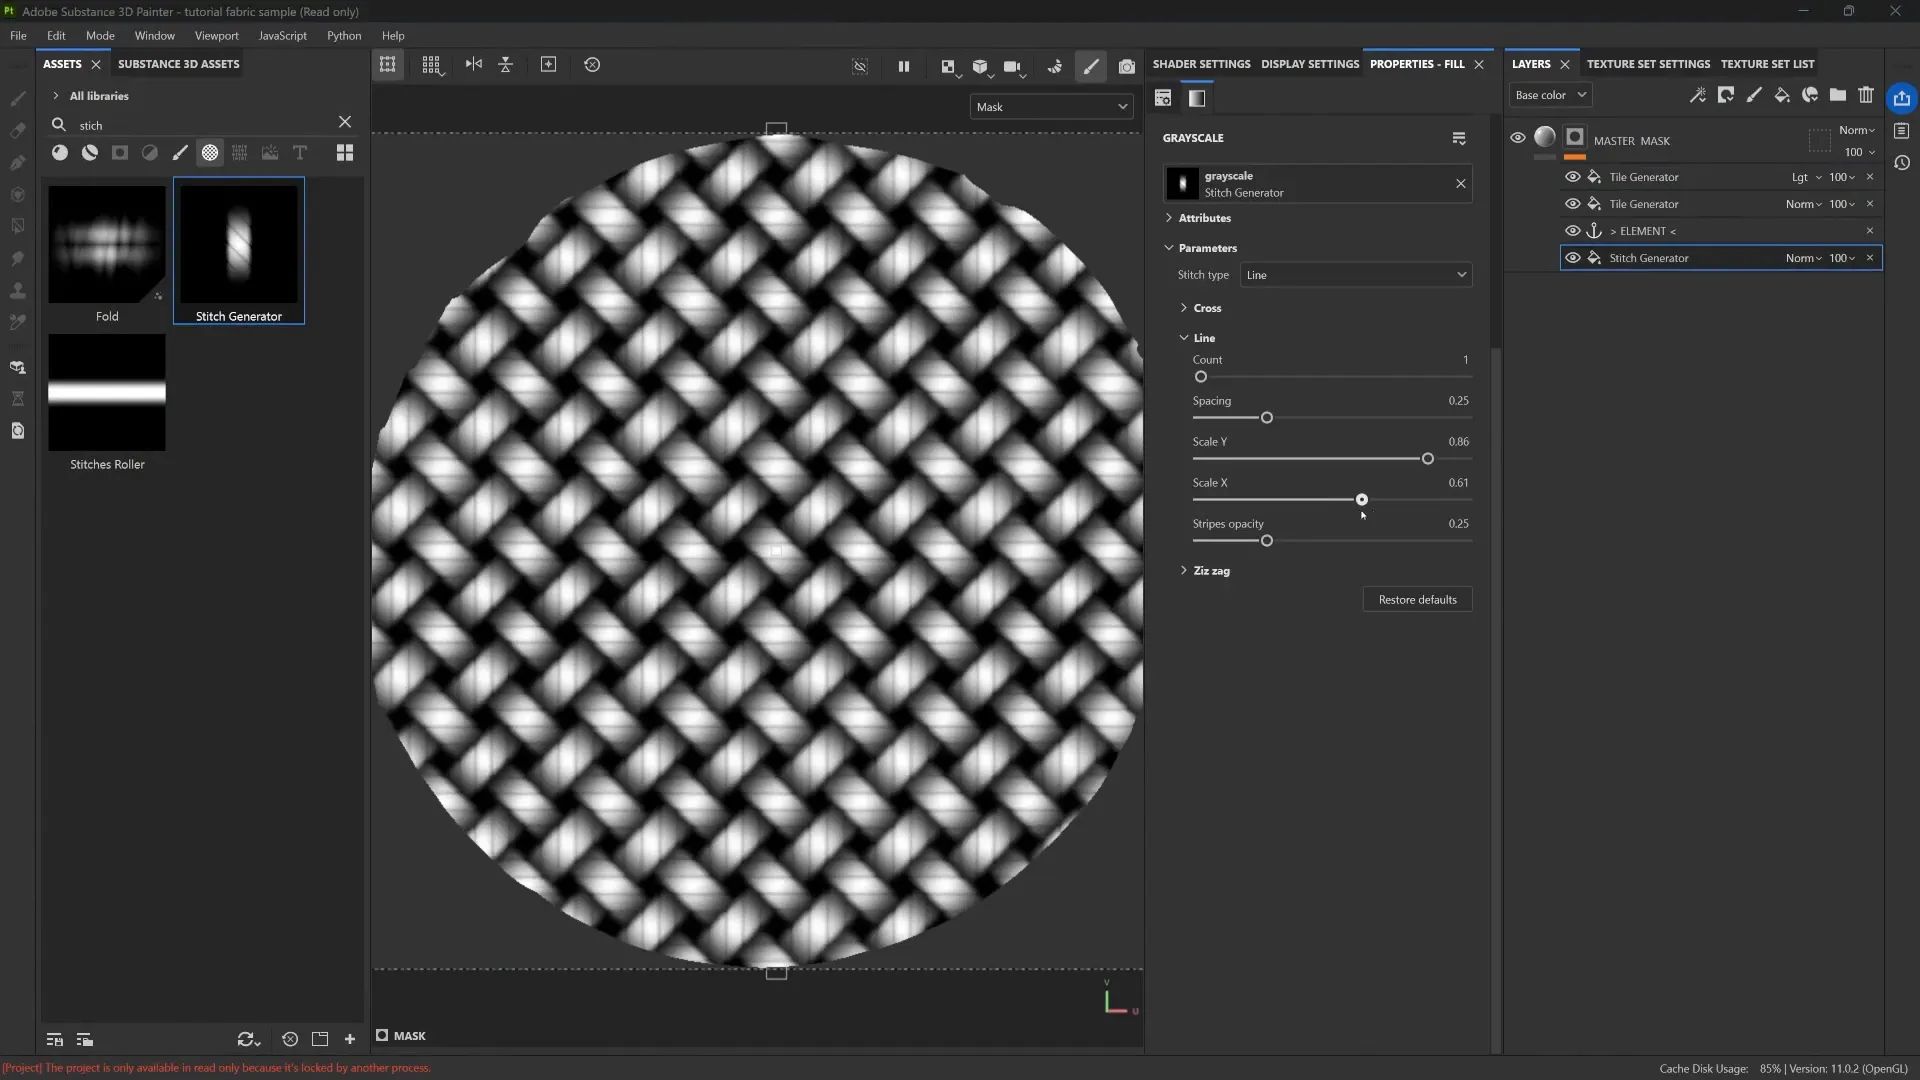
Exporting to Painter to create a more realistic texture
If you want to see how I created the realistic fabric texture and worn paint as in my example at the beginning, that’s done in Substance Painter. I exported the low-resolution mesh with UVs to the Substance Painter and create the texture based on another tutorial that I have on this page. It has the full Painter tutorial showing my fabric workflow.
Troubleshooting Tips
Here are a few troubleshooting tips to keep things running smoothly.
- If your masked edges look too soft, use the Mask brush and with the Focal Shift set to -100, or use a custom MaskSharp brush for cleaner, tighter selections.
- If Project All doesn’t align perfectly, try increasing the projection distance and ensuring symmetry is turned off during the projection; it often yields more accurate results.
- When working with FiberMesh, always turn Double off in Display Properties before previewing to avoid duplicate geometry issues.
- And for fabric textures, remember to increase your subdivision levels before applying NoiseMaker; higher resolution gives you much sharper, more detailed surface noise.
Wrapping up this workflow
This technique creates more believable straps and continuous geometry you can weave, mask, and sculpt as a single piece while retaining the flexibility to edit sections independently. It combines the speed of extraction with the precision of clean topology, ZModeler bridging, dynamic previews, and classic sculpting workflows.
If you want the brushes, alphas, and packs I use, they're available in the resources page in the Pablander Academy. That said, every step can be done with ZBrush's native tools if you prefer. Additionally, check out my Substance Painter tutorial if you'd like to recreate the exact fabric finish I use.
Let me know if you try this workflow and what variations you come up with. I'm always curious to see how people apply these techniques to straps, bandages, belts, or even wrapped armor.
Cloth and Drapery Brushes Pack
This is a pack of 54 custom brushes that will simplify and speed up the process of setting up folds, sculpt wrinkles and detail various types of fabrics in ZBrush!
Get resource
The ONE Anchor Point Technique You Need!
In this tutorial, I walk you through an anchor points approach in Substance 3D Painter that keeps everything within a single mask, while giving you full, reusable control over generators, blending modes, and fine detail. This workflow has saved me a lot of time, and once you understand the idea of thinking in black & white values and building from micro to macro when it comes to tileable textures, it opens up numerous possibilities for tileable materials, such as fabrics, tiles, and woven surfaces.
Check it out


.webp)

