.webp)
The first thing to make this whole process work is to make a tileable alpha so let's set that up first. Create a plane 3D and turn it into a polymesh. Then duplicate it and scale it to double the size to complete the setup.
Now, we’ll use the larger plane to subdivide and sculpt on and the small plane to quickly frame the document.
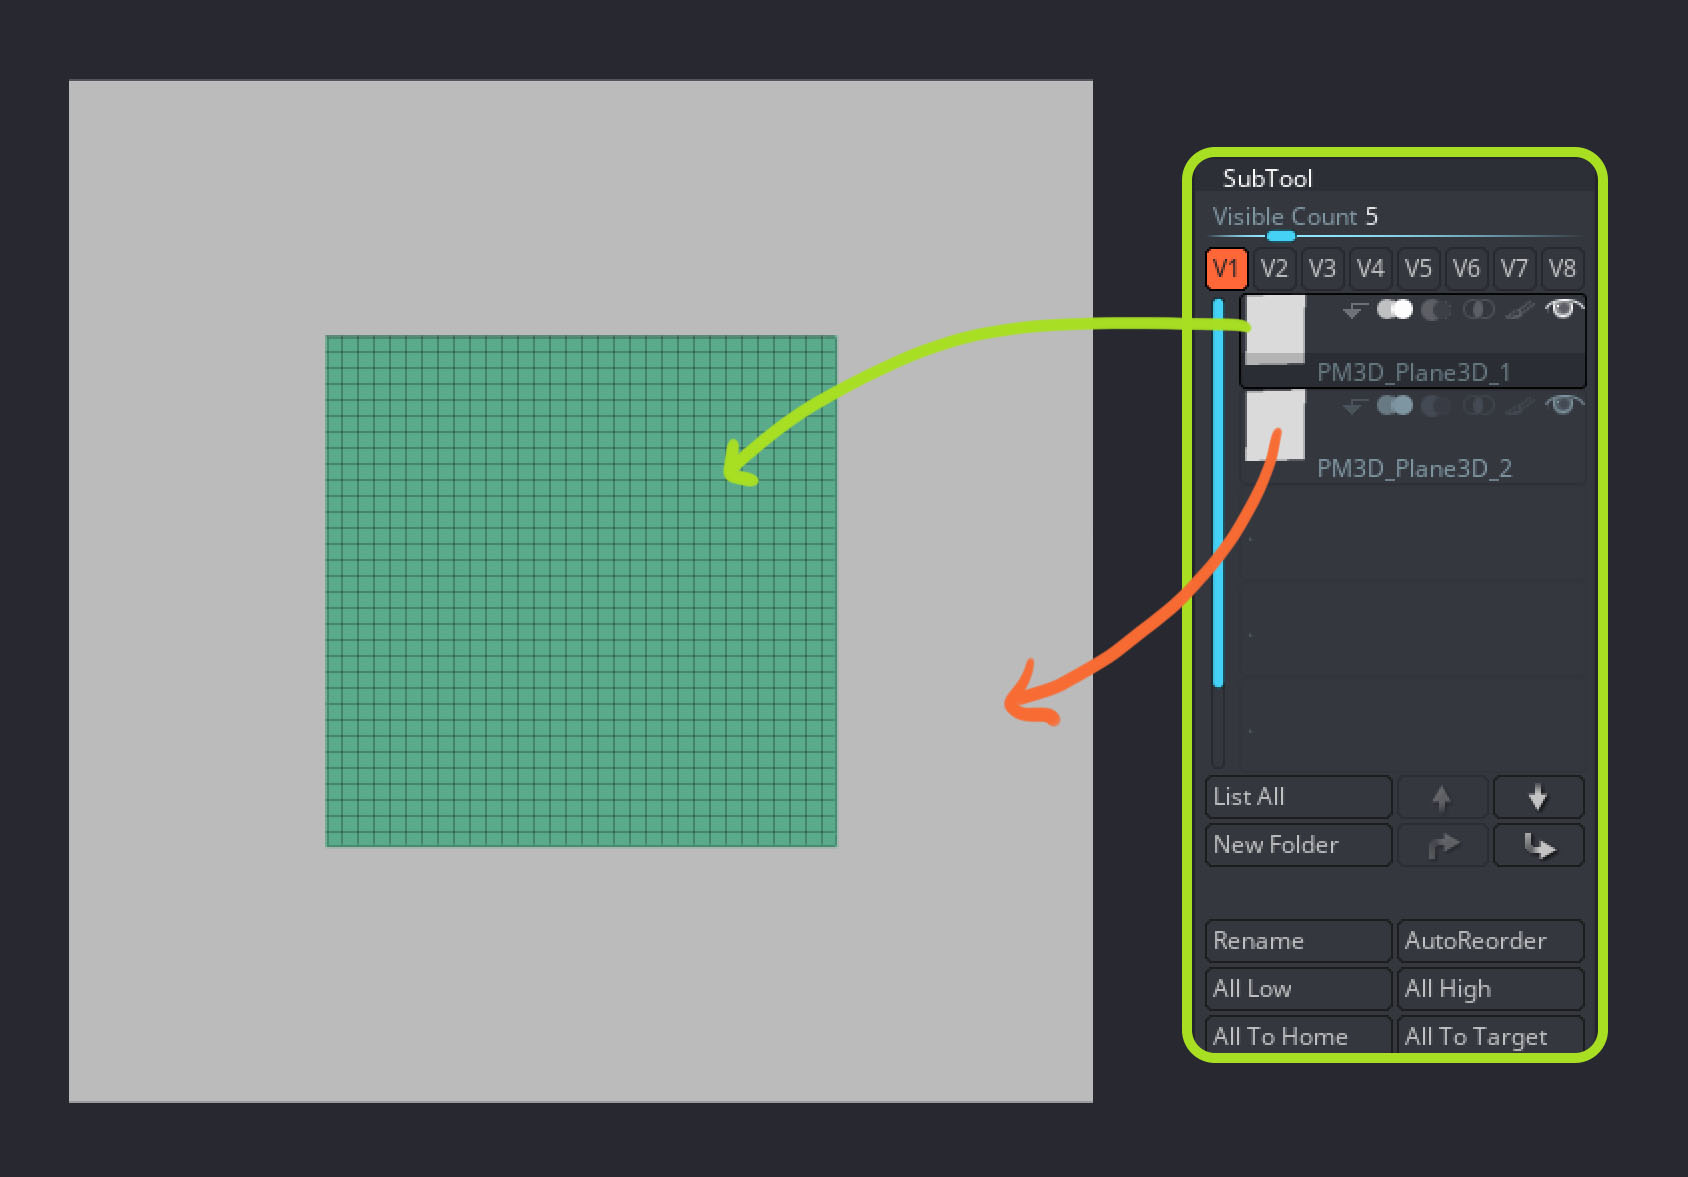
The next thing is to make sure you have a square document (the size determines the resolution of the alpha created, mine is 1024 x 1024). Then, you can frame the small plane and subdivide the larger plane to start sculpting.
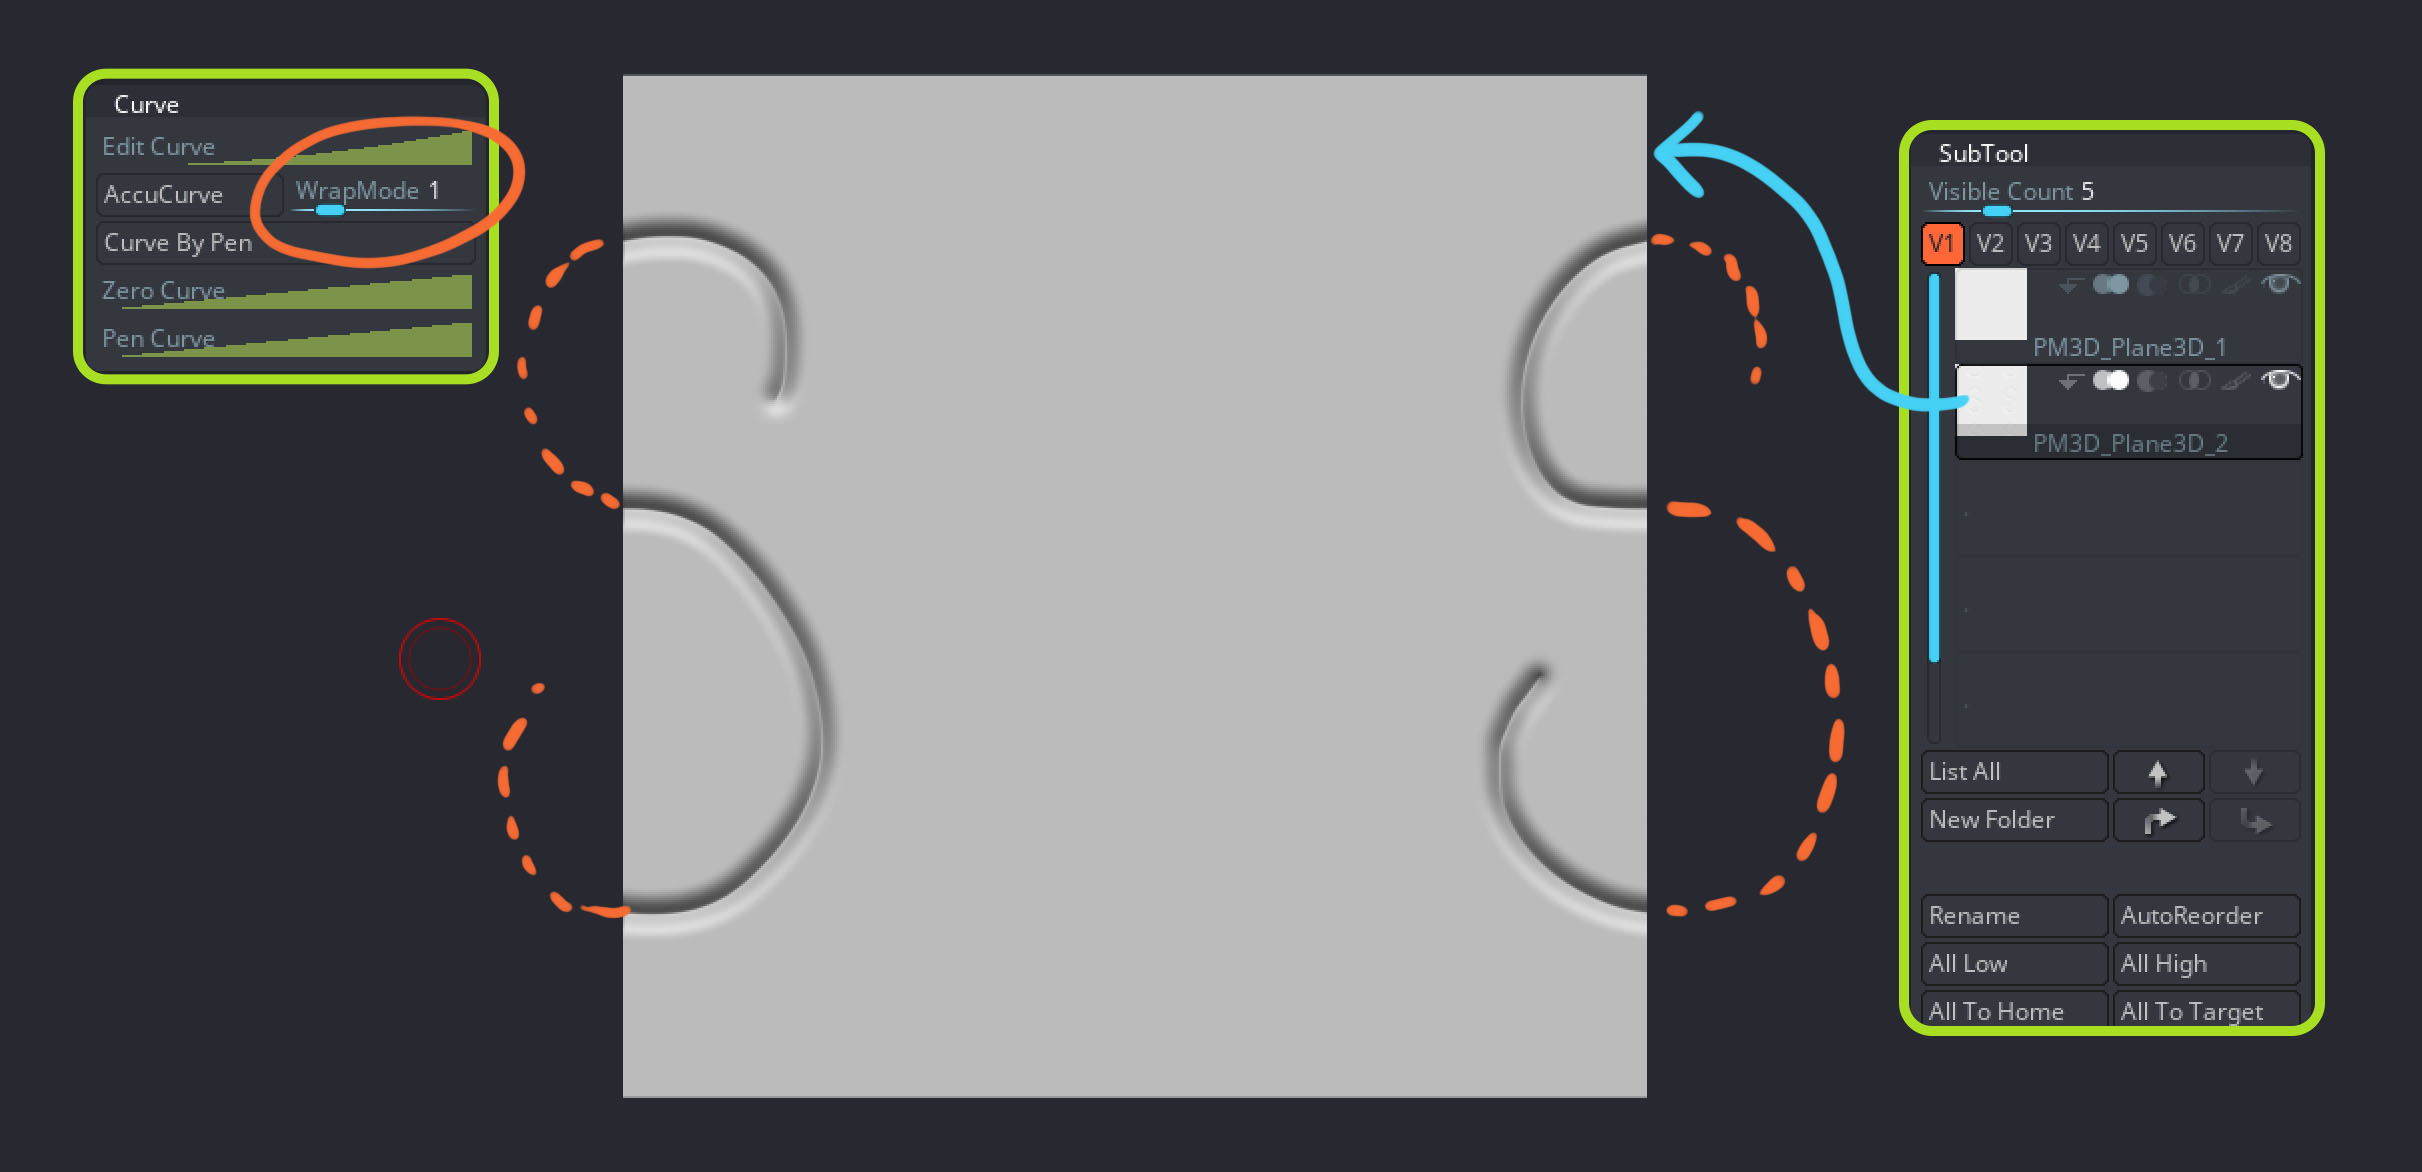
The final trick of this setup is simply to go to the Brush palette and under the Curve subpalette, set the Wrap Mode to 1. This will repeat the stroke of the selected brush, and you get the tiling effect.
The next step is pretty straightforward and is just about sculpting your alpha. The first thing I would do is to roughly define the pattern or shapes I want to create so I use the DamStandard brush to carve into the plane some larger scales in the centre and reduce the size towards the sides.
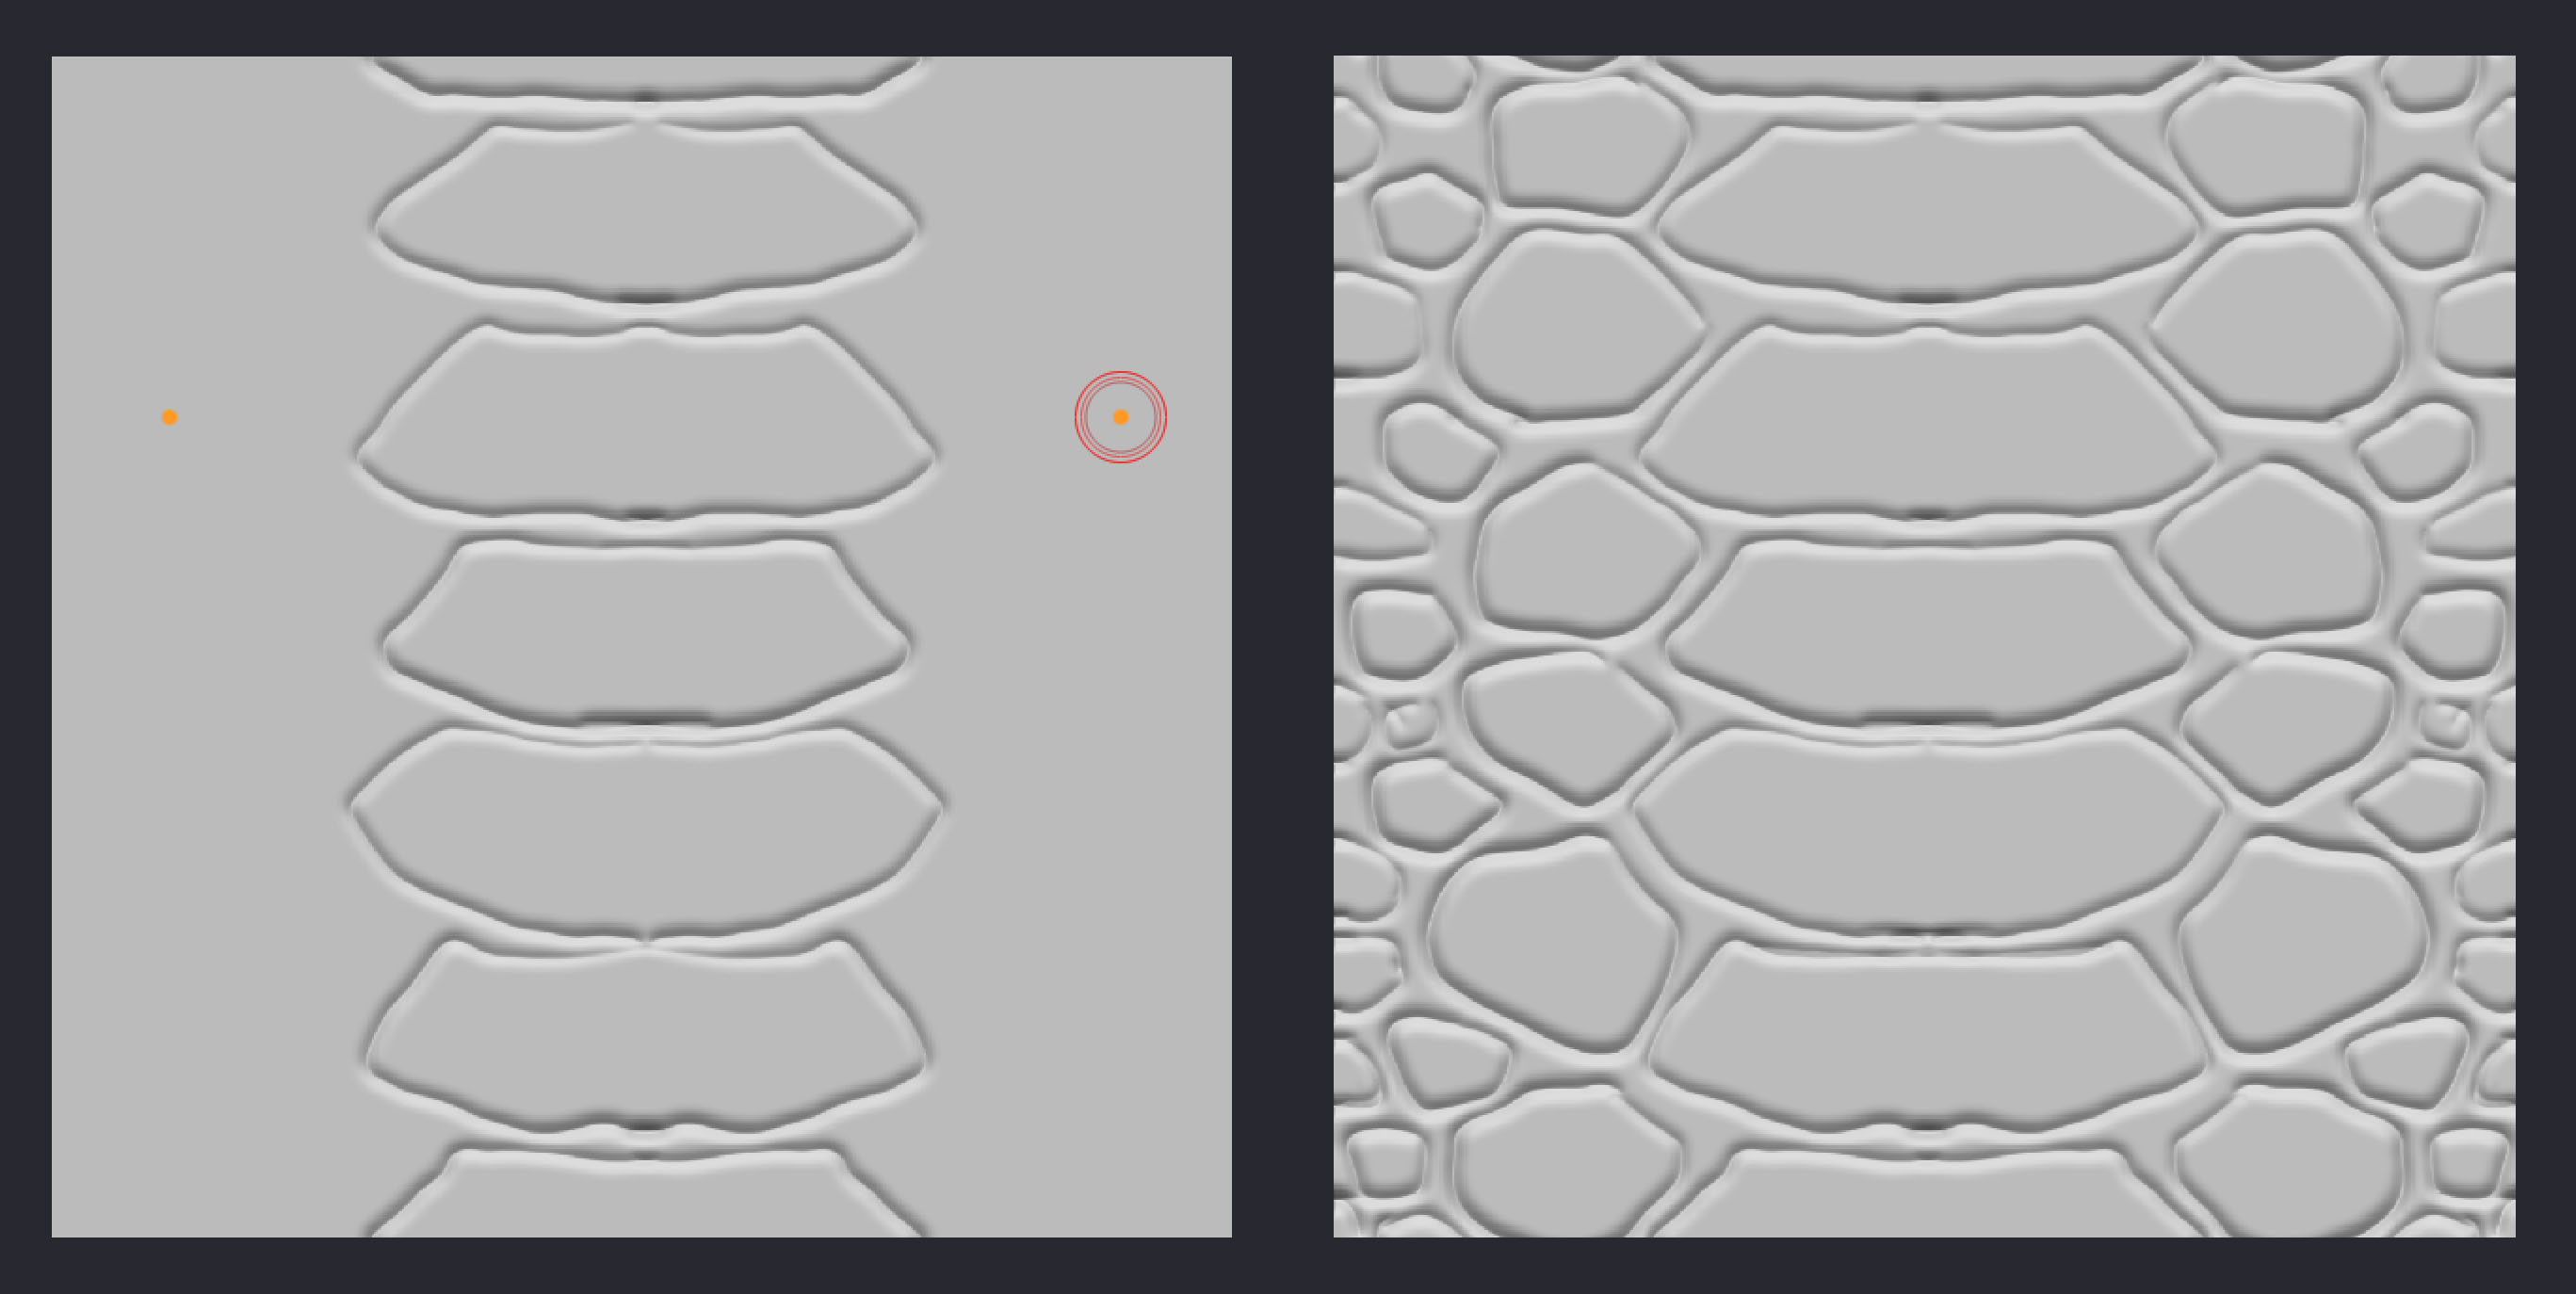
Once the basic ‘sketch’ of the alpha is defined then you can start add more volume and make the whole thing more interesting. I used the clay brushes to fill in those areas that I previously defined. Then, with the standard brush, I sharpen some of the edges of the scales and used the DamStandard again to create crevices and suggest a more organic skin underneath.

Once you finish sculpting your piece, it's time to turn it into an alpha. First, make sure you plane is properly framed and hit the ‘actual’ size of the document. Then from the Alpha palette, open the Transfer subpalette, and click on the GrabDoc. This basically grabs the depth of the document, and you’ll have your alpha right in the alpha palette.

These are the basis to create a cool custom brush in ZBrush. So to make your alpha behave better with your brush and since we set it up as a tillable alpha, you’ll need to enable the ‘roll’ switch from the Stroke > Modifiers palette.
Also, if you don’t want to deform the surface as much, click on the ‘surface’ switch in the Alpha palette. This option will grab the mid value of the greyscale in your alpha and will keep the details closer to the surface without distorting the volumes too much.

Done. Create an icon and save your brush!


.webp)
