
So, the first thing you want to do is have some nice set of polygroups:
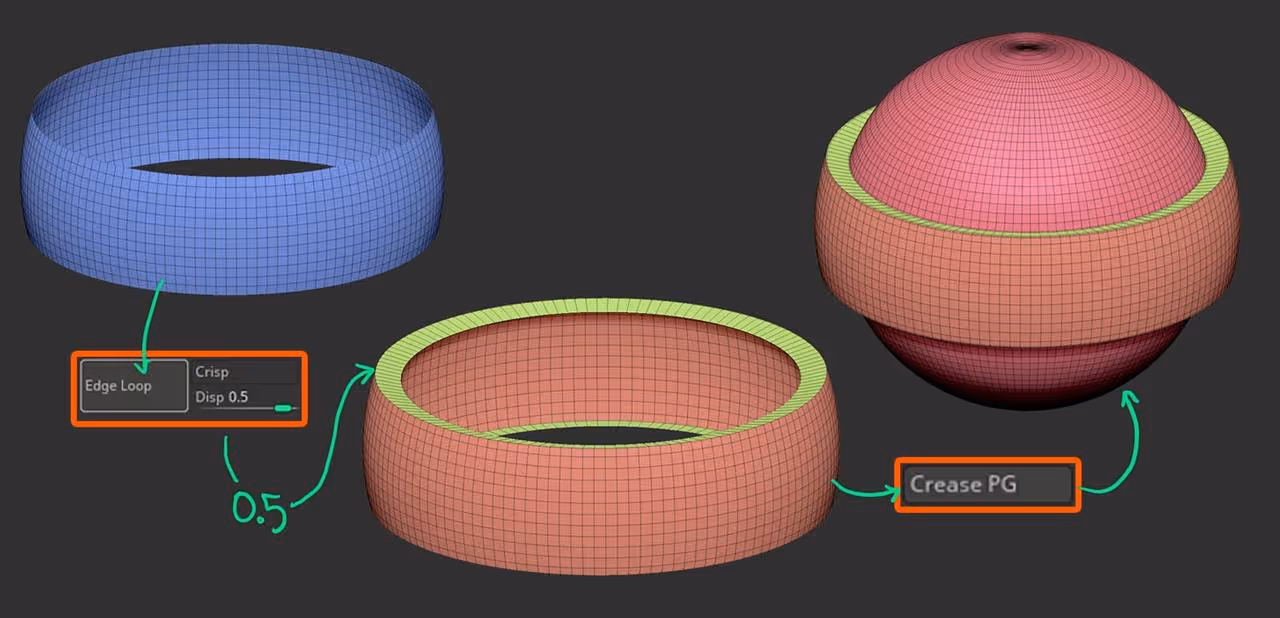
EdgeLoop Displacement + Crease PG
Once you have a 'polygrouped' area, you need to isolate it (Ctrl+Shift+Click) and use the EdgeLoop button with the 'Disp' slider next to it, set to other than 0. This will take the visible geometry and create thickness.
Right after this step, you can use the Crease PG button and this step will crease the edges between polygroups (after the EdgeLoop with Disp at 0.5 you'll get an extra polygroup for the thickness as well).
Bevel!!!
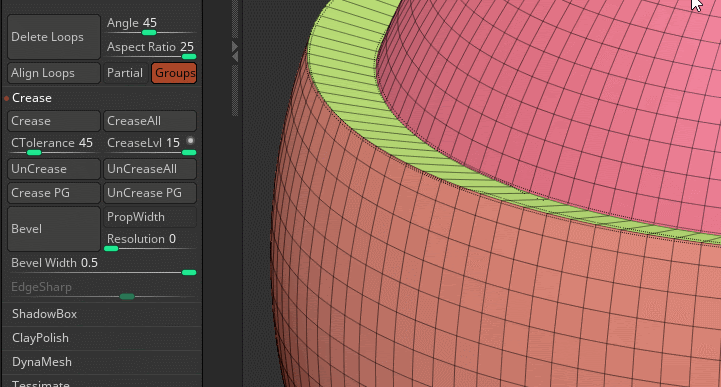
here is where the magic happens... Now that you have 'creased edges', you can use the Bevel sliders to add a nice bevel to the mesh.
You can change the width, the resolution and the sharpness by dragging the sliders and getting real-time feedback of the effect.
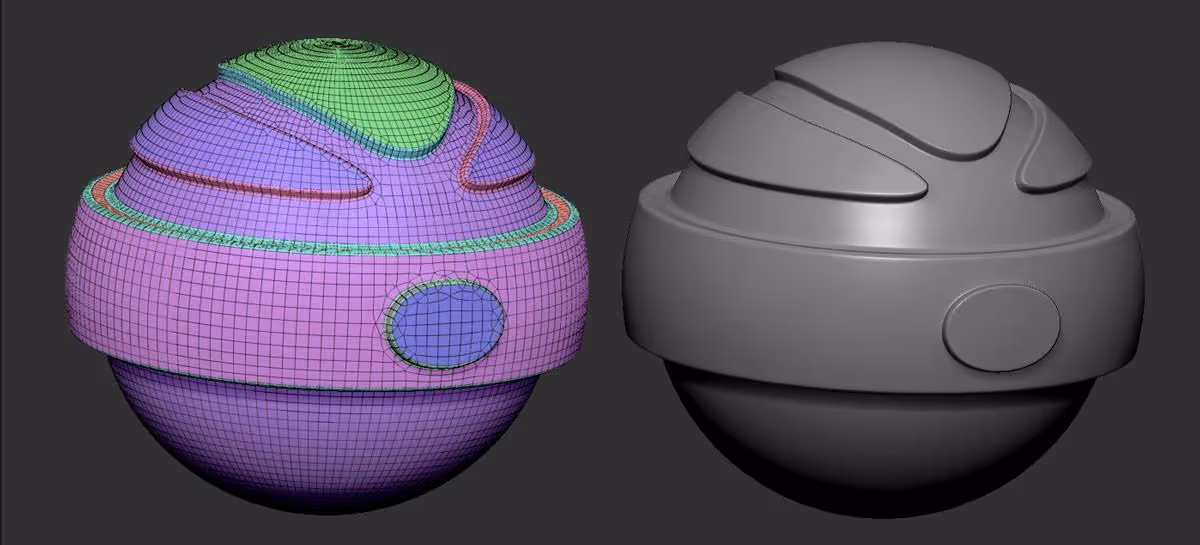
Dynamic subdivision and you're good to go...
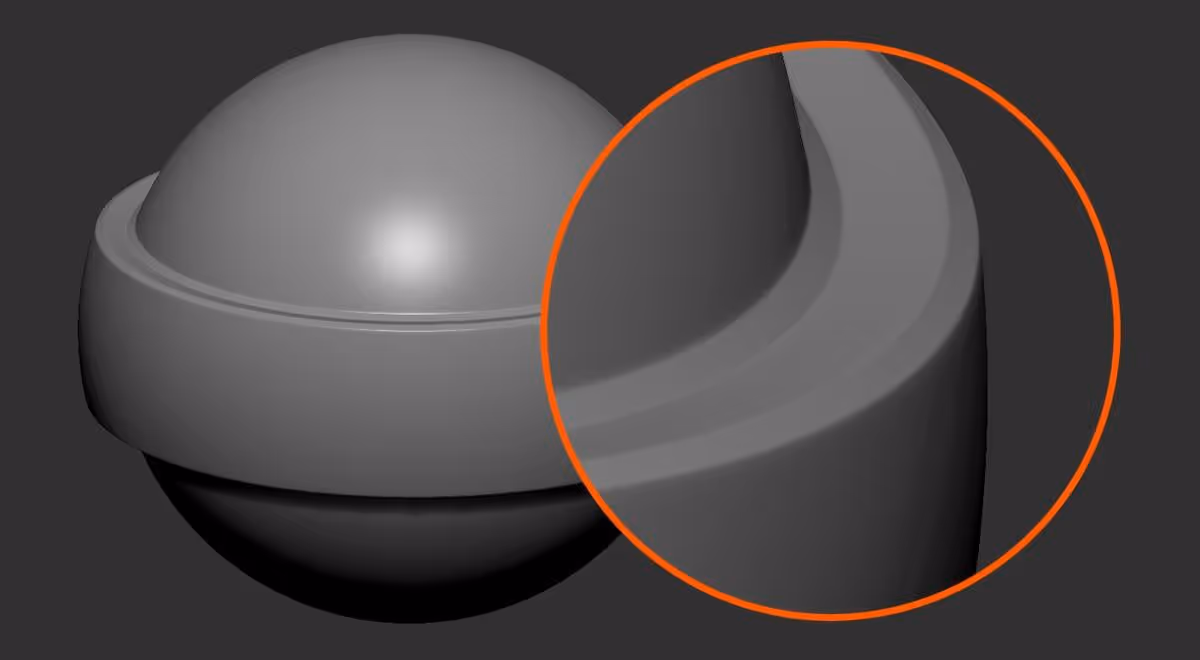
After adding a bit of bevelling to the poly groups, you can turn on Dynamic Subdivision for your mesh and the that really nice and smooth surface look with some sweet bevels around the edges.
I know what you're thinking...
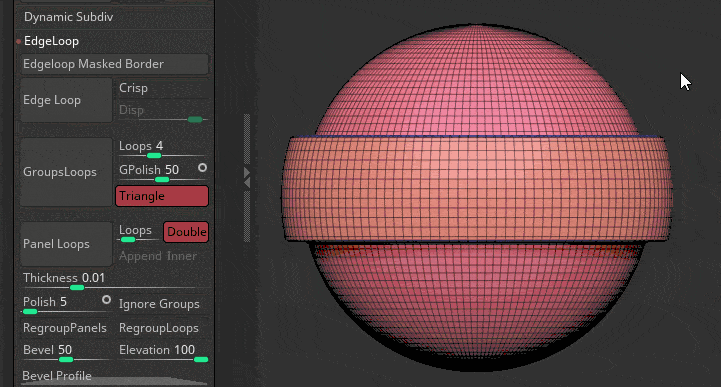
"All this could have been done using the ZModeler"... Yep, true, but this process comes in really handy in certain pieces and you can combine it with the EdgeLoop Mask Border to crease panelling effects that feel very organic and polished at the same time:
Simply mask any area of the mesh, click the EdgeLoop Mask Border, to create a clean cut an polygroup out of the masked area.
Clear your mask, isolate the polygroup and repeat the process from before... EdgeLoop with displacement, Crease PG and Bevel:
That's it for now! I hope you have found this tip useful.


.webp)

.webp)