
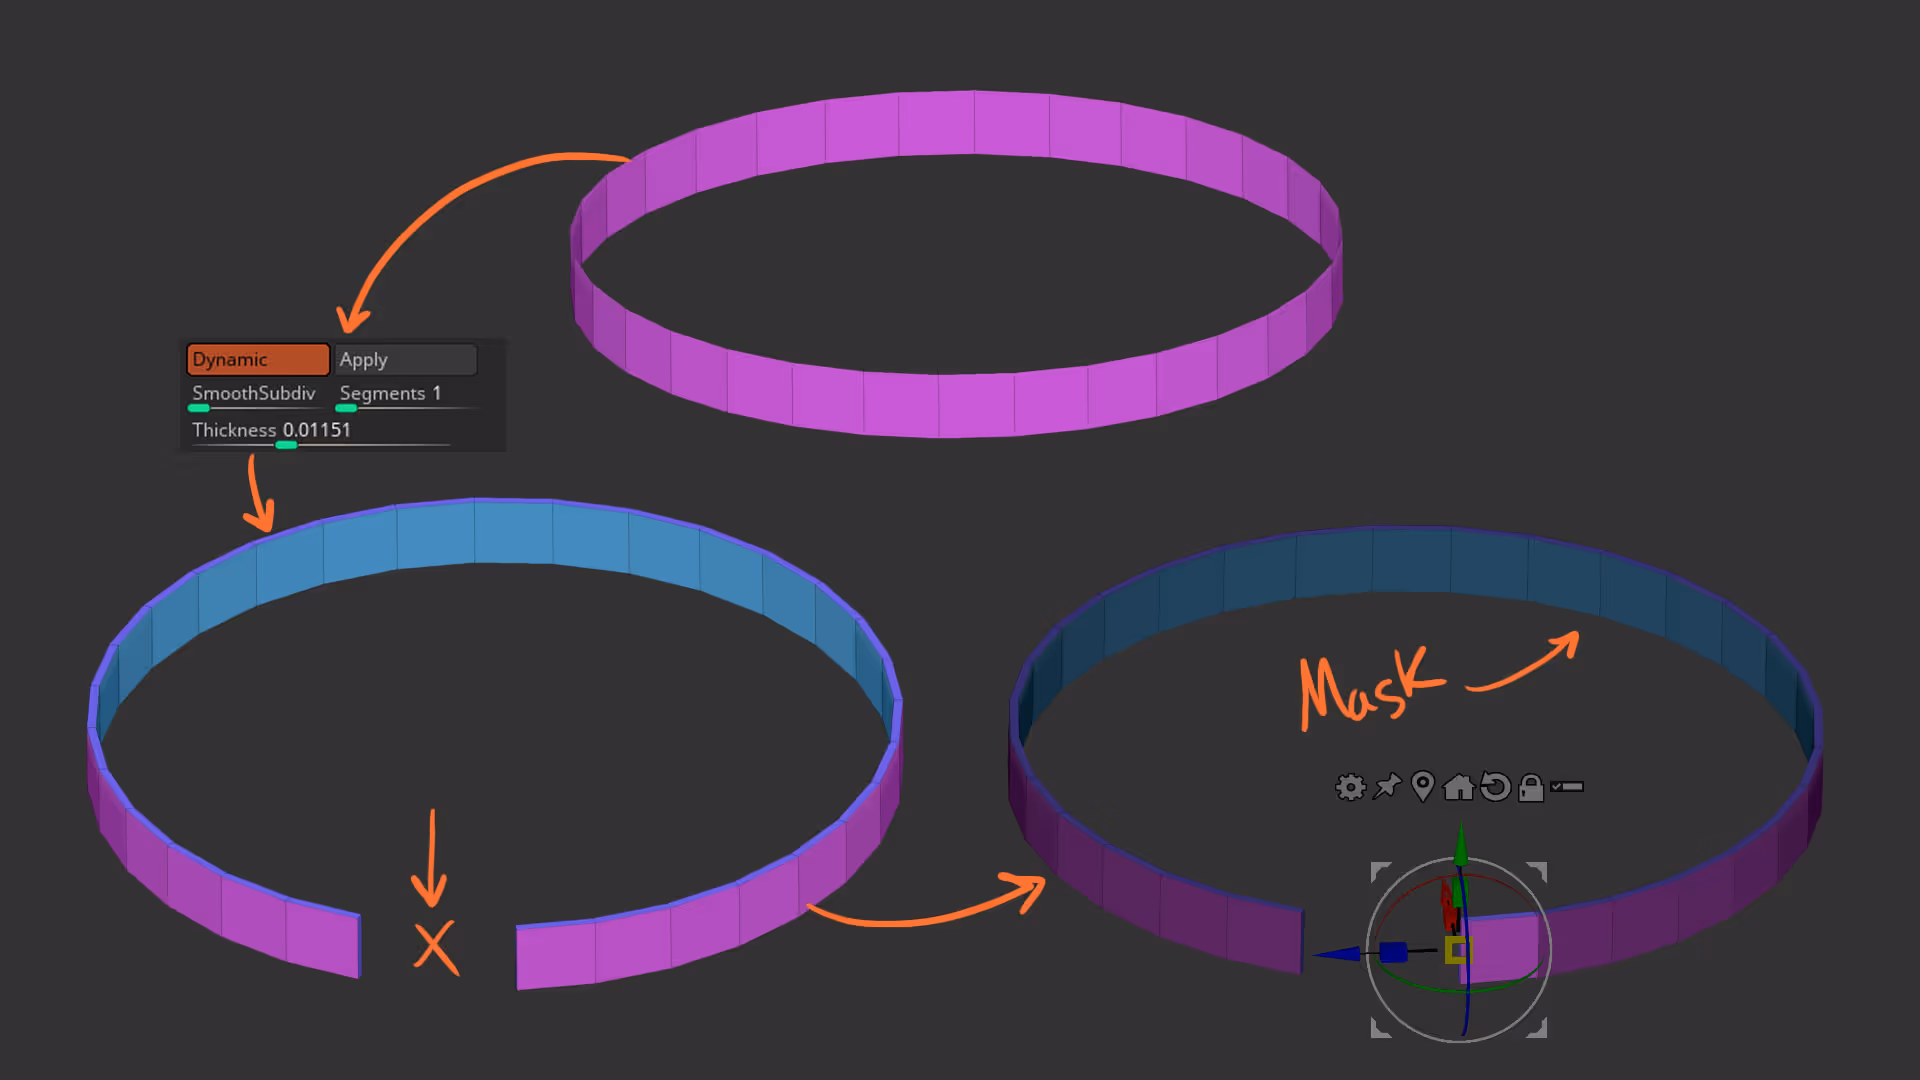
So, I would start with a cylinder and delete everything but one poly loop, then delete a couple of quads to open the ‘loop’, add thickness with Dynamic subdivision and apply it or with the ZModeler. Once you have a thickness you can mask the end and centre the Gizmo:
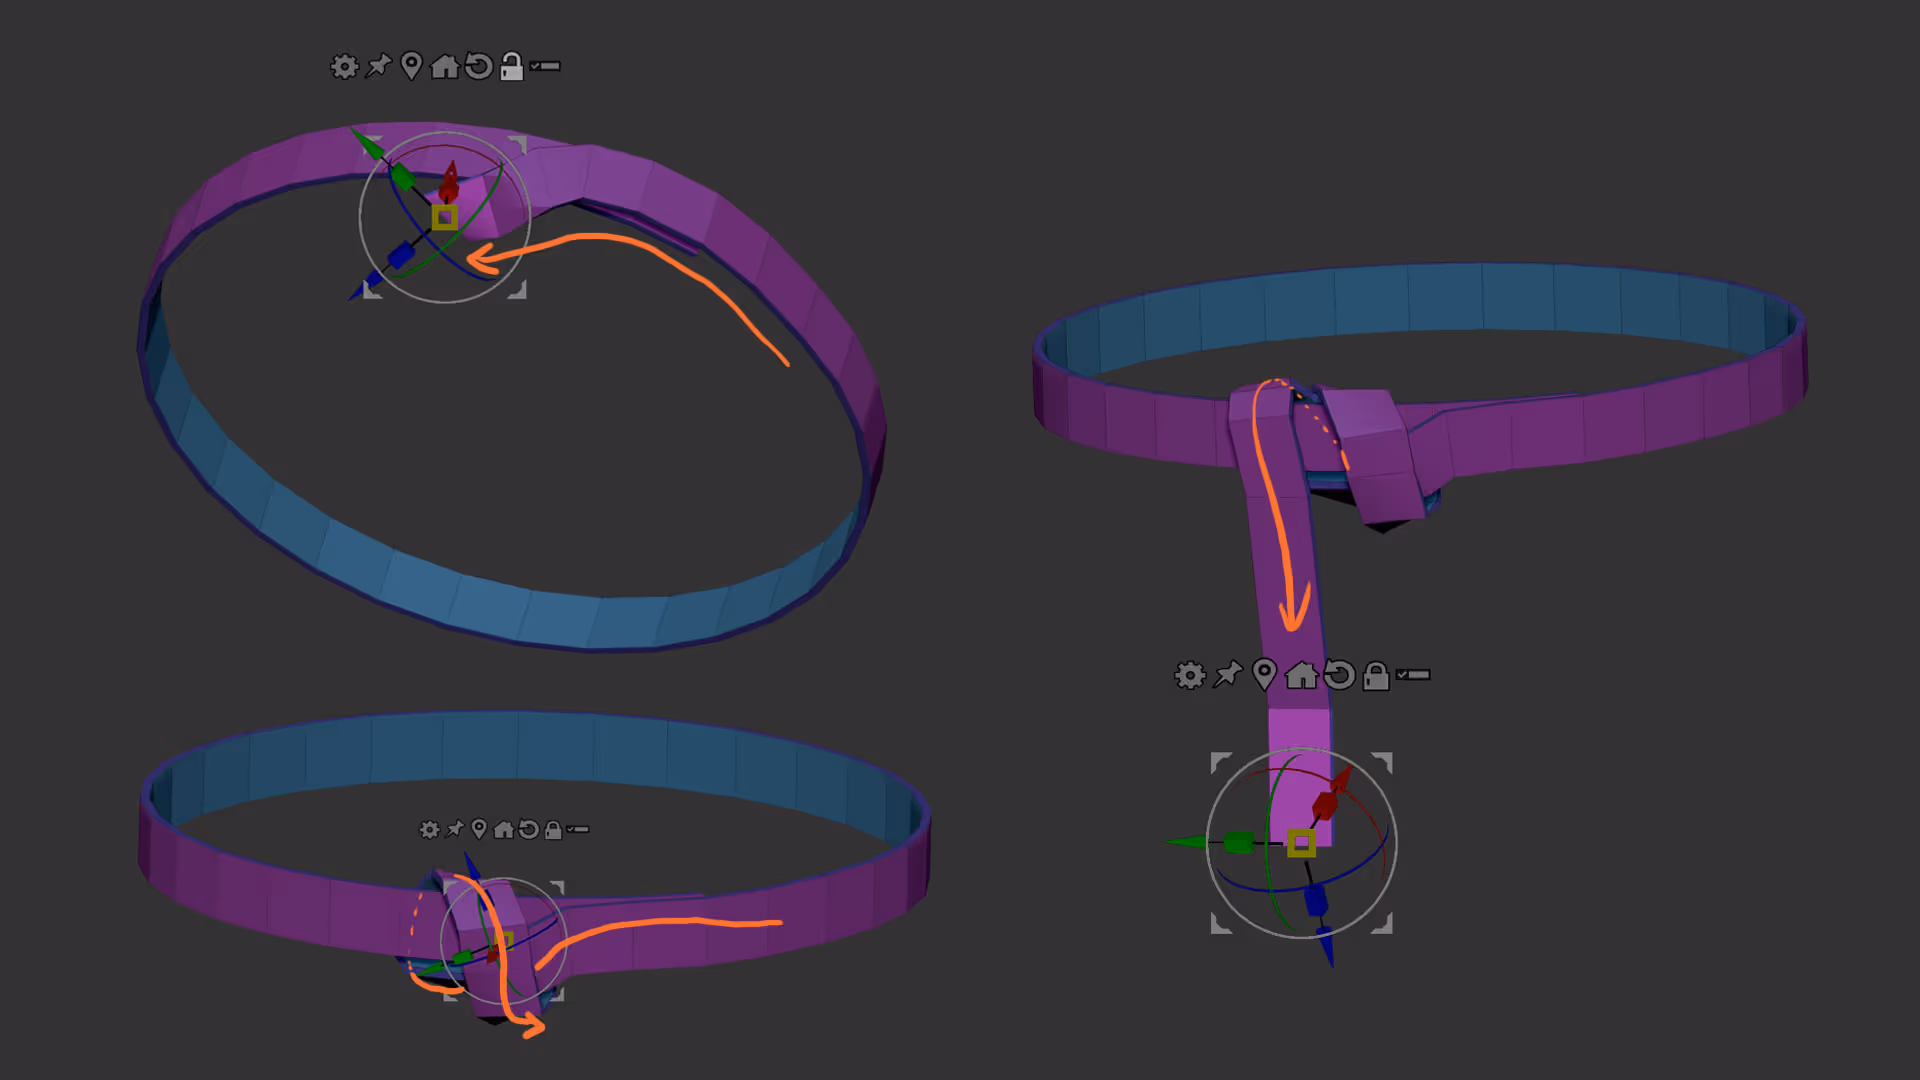
While holding Ctrl you can click and drag the gizmo to Extrude the face at the end of the belt. Repeat this process of Ctrl + Click+ drag to go around and create the ‘wrap’ of the belt. As you extrude new faces, keep in mind you can rotate them and align them nicely to keep the thickness consistent.
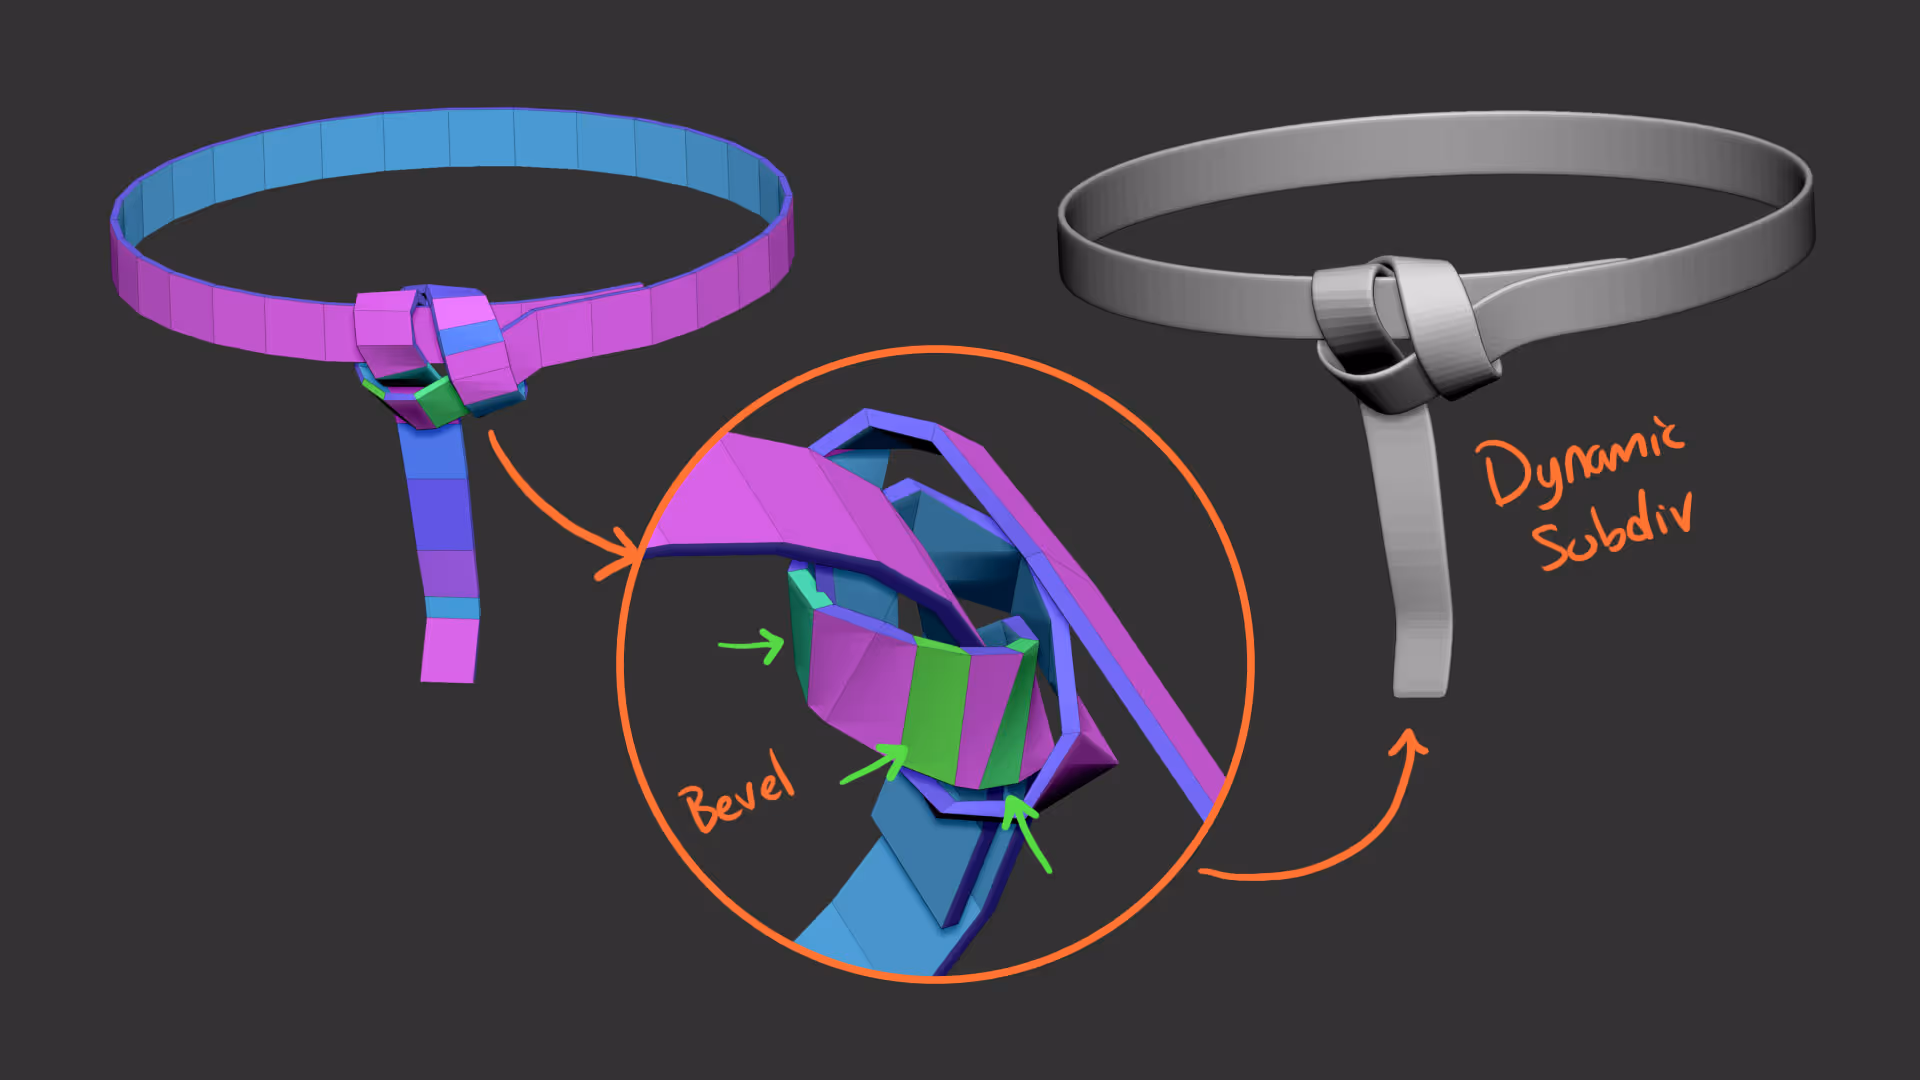
once you have the ‘knot’ completed, you can use the ZModeler to add some ‘bevels’ on some of the edges or Insert a few more to make the path of the belt smoother. You can also check how things are looking by enabling the Dynamic Subdivision:
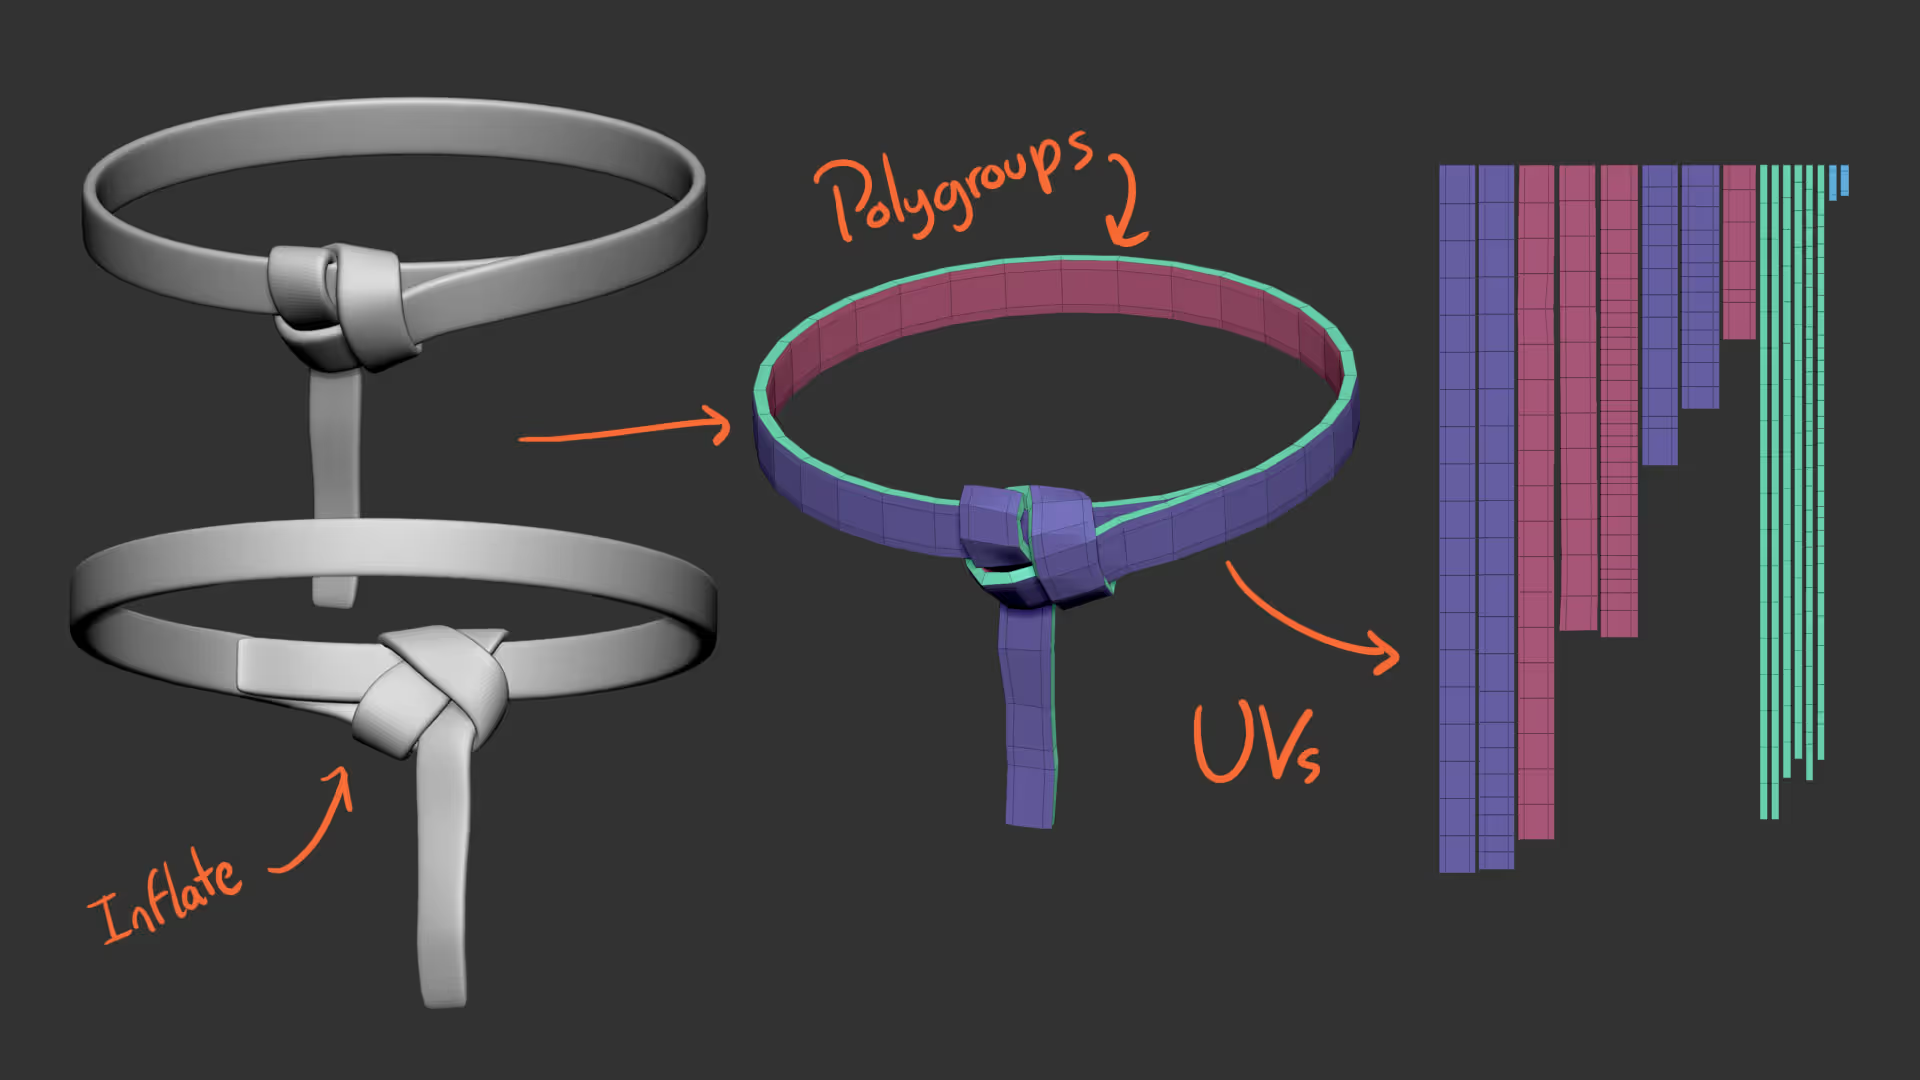
Finally, I would add a bit of thickness to tighten everything up using the Inflate slider from the deformation palette, re-group everything and generate some UVs based on the polygroups:
Here’s a cool trick for the pattern. I exported a UV texture to Photoshop as white, and create a random tileable pattern in black and white that I then repeated over the UV islands. I saved the patter as a new black-and-white texture and imported it into ZBrush to apply it to the belt:
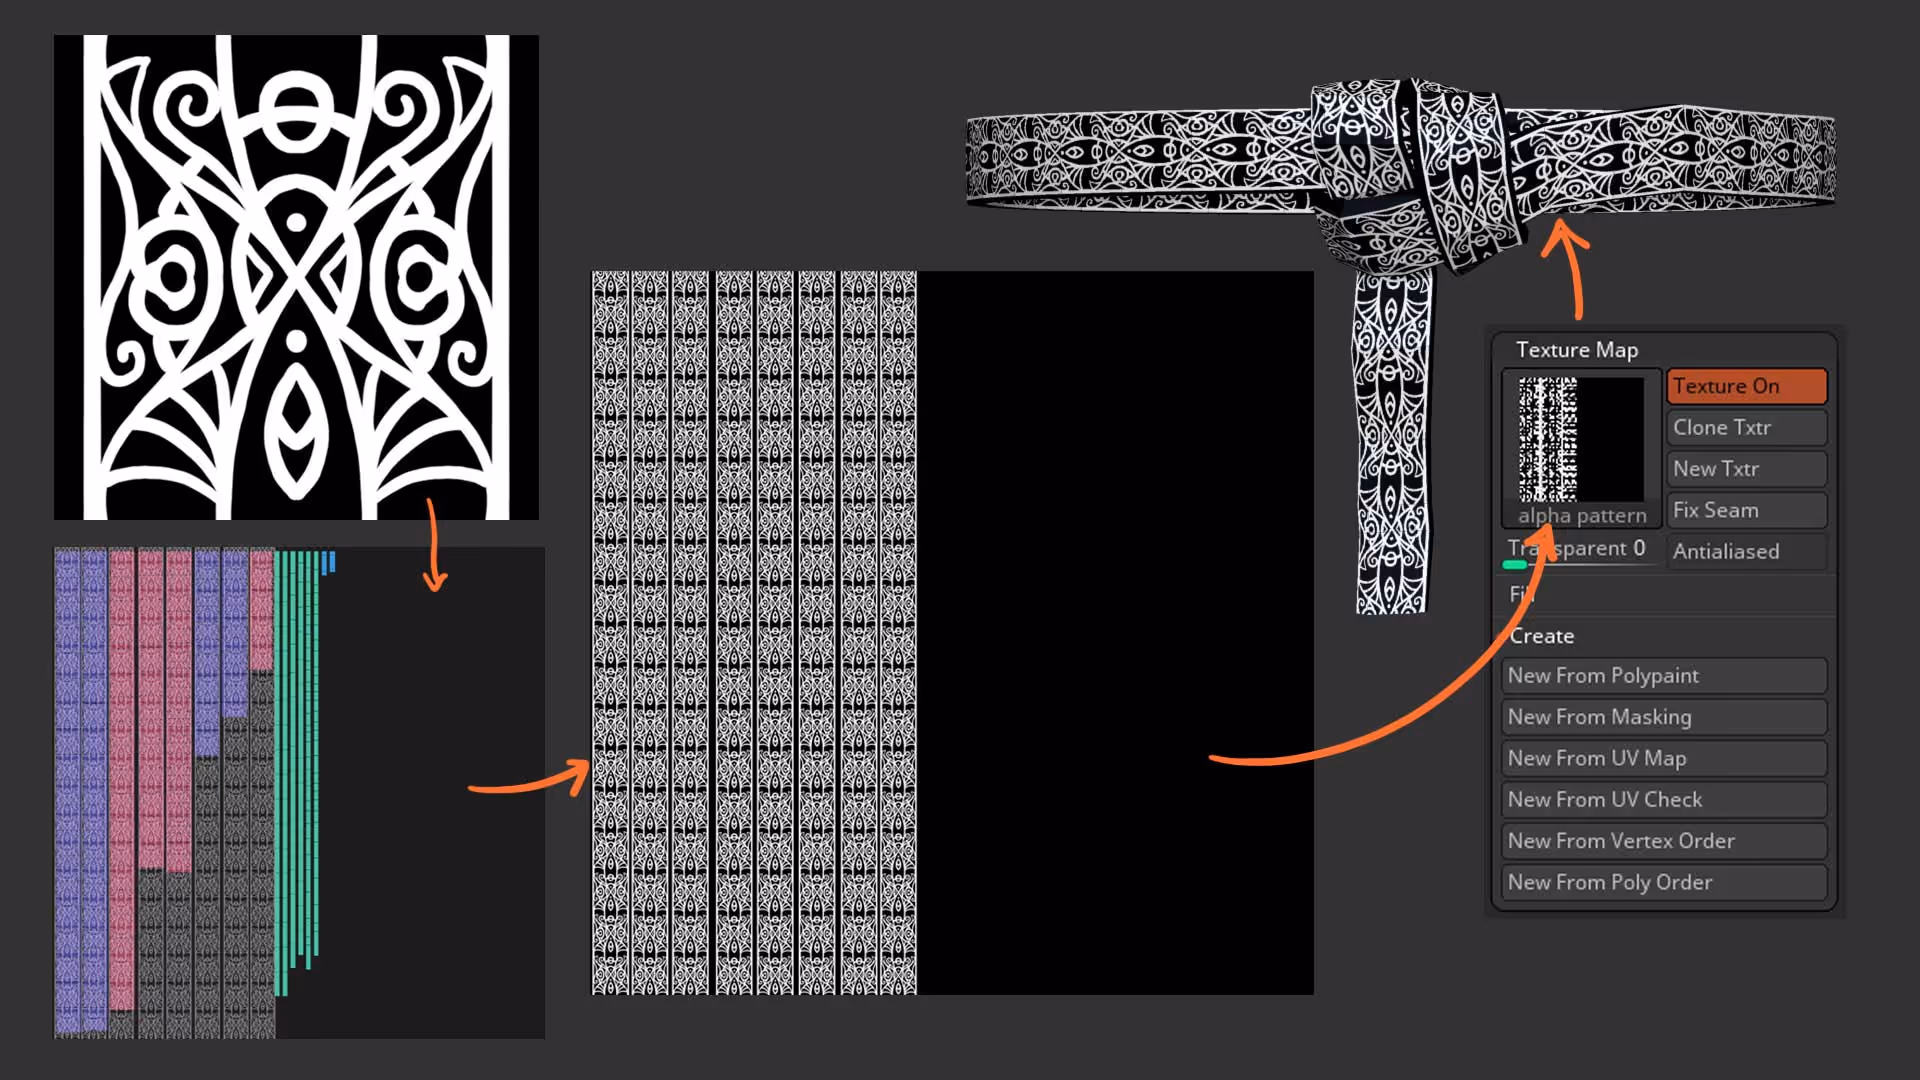
NOTE: remember to ‘flip vertical’ the image so it matches the UVs in ZBrsuh.
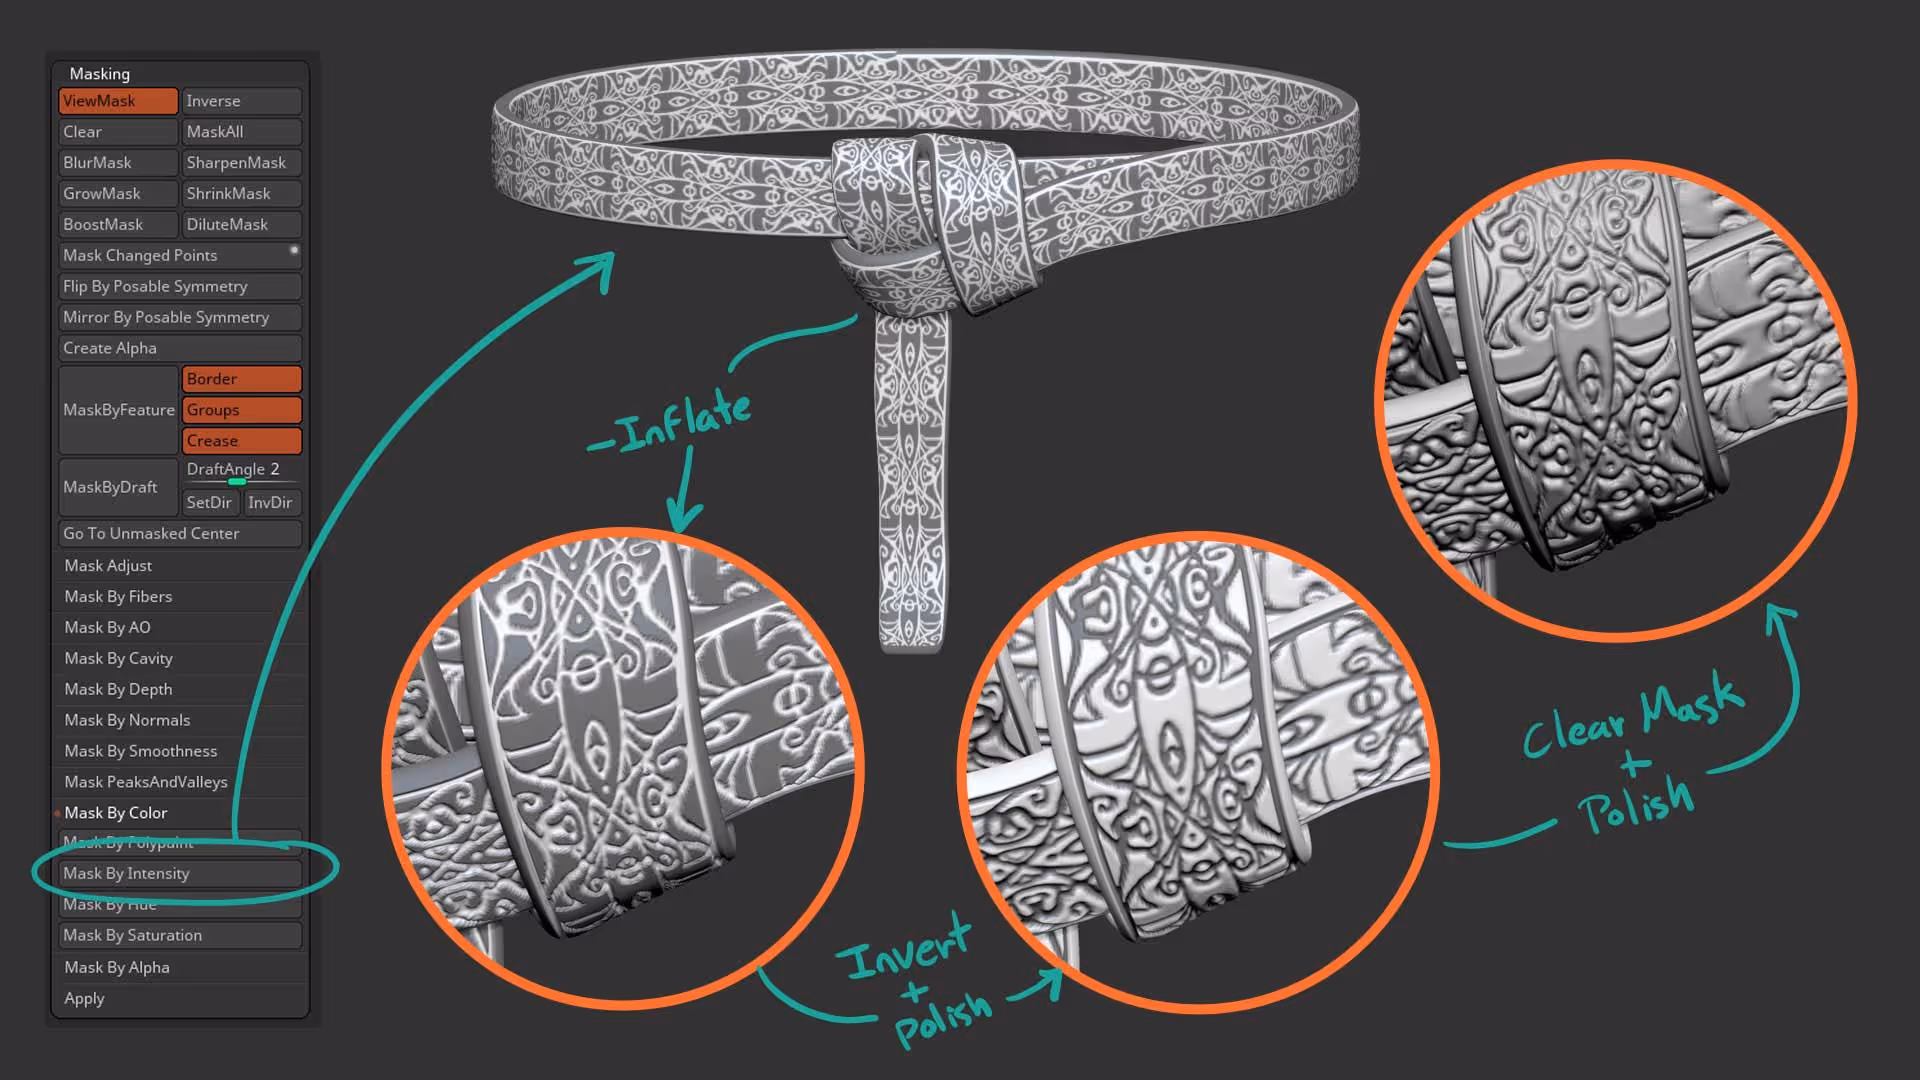
If you have Dynamic Subdivision, make sure you apply it and/or add more subdivision levels to increase the resolution. From the Polypaint subpalete, click on Polypaint from Texture to transfer the texture pattern and then use the masking palette to ‘Mask By Intensity’.
Once the mask if applied to the belt, you can go crazy with details…. to keep it simple, I used the Inflate slider in negative values, then inverted the mas and polish things before clearing the mask and running another quick polish:
That's about it. I exported a low and a high res to substance painter and create the textures for this asset example:


.webp)

.webp)