
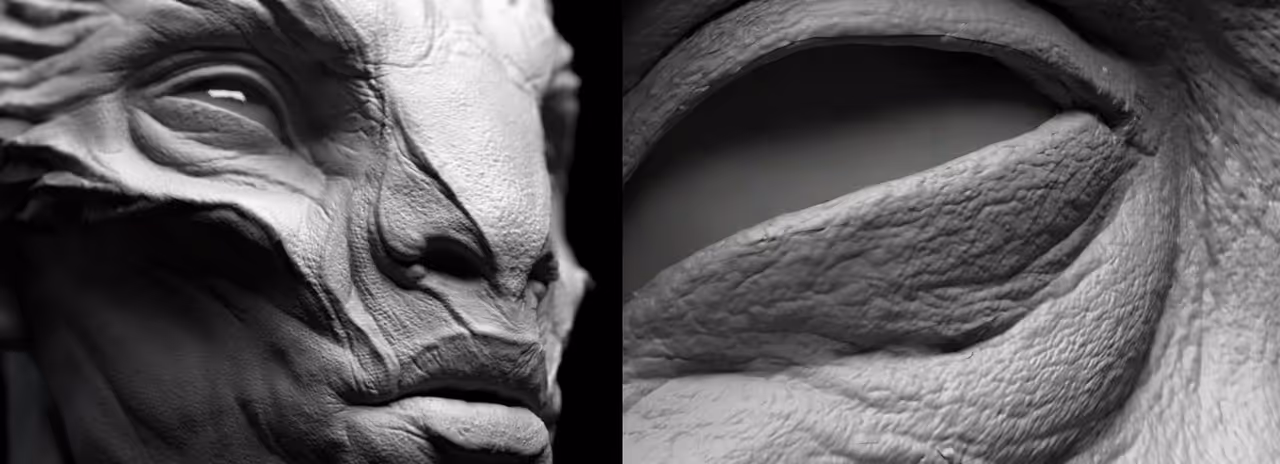
Here is how it works. First, you obviously need a mesh with subdivisions in ZBrush and UVs. So I’ll be using my Gaspar Loren character as an example (since it already has plenty of high-frequency details).
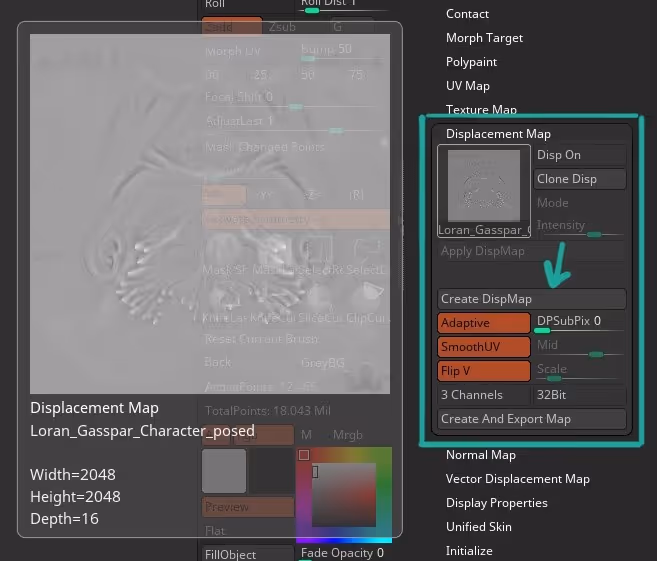
Step 1 - With your mesh selected in ZBrush go to the Displacement tap from the tool palette and create a Displacement map texture. The ‘mid’ value is important and it should be at 0.5 by default.
Step 2 - Import your base mesh into Maverick as an FBX or OBJ, it doesn't matter as long as you keep an eye on the scale of the object (Scale is rather important when it comes to displacement).

If you look at the bottom right of my UI, my mesh is about 40cm tall.
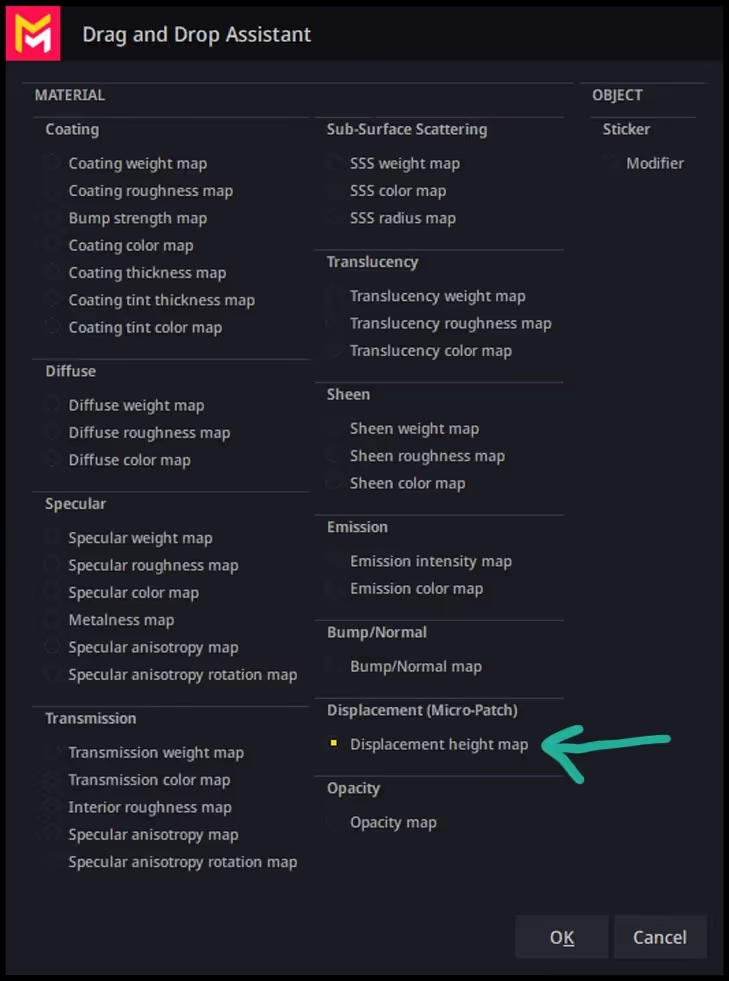
Step 3 - Drag and drop the displacement from ZBrush into the object and Maverick will bring a pop up window and should automatically detect it is a Displacement (if not you can manually choose it)
Step 4 - All you have to do now is click on the ‘Revel extended rollup’ from the properties of the material in Maverick. Make sure that the toggle of Displacement (Micro-Patch) is enabled and from the top of the UI click the ‘reload geometry’ button to refresh it.
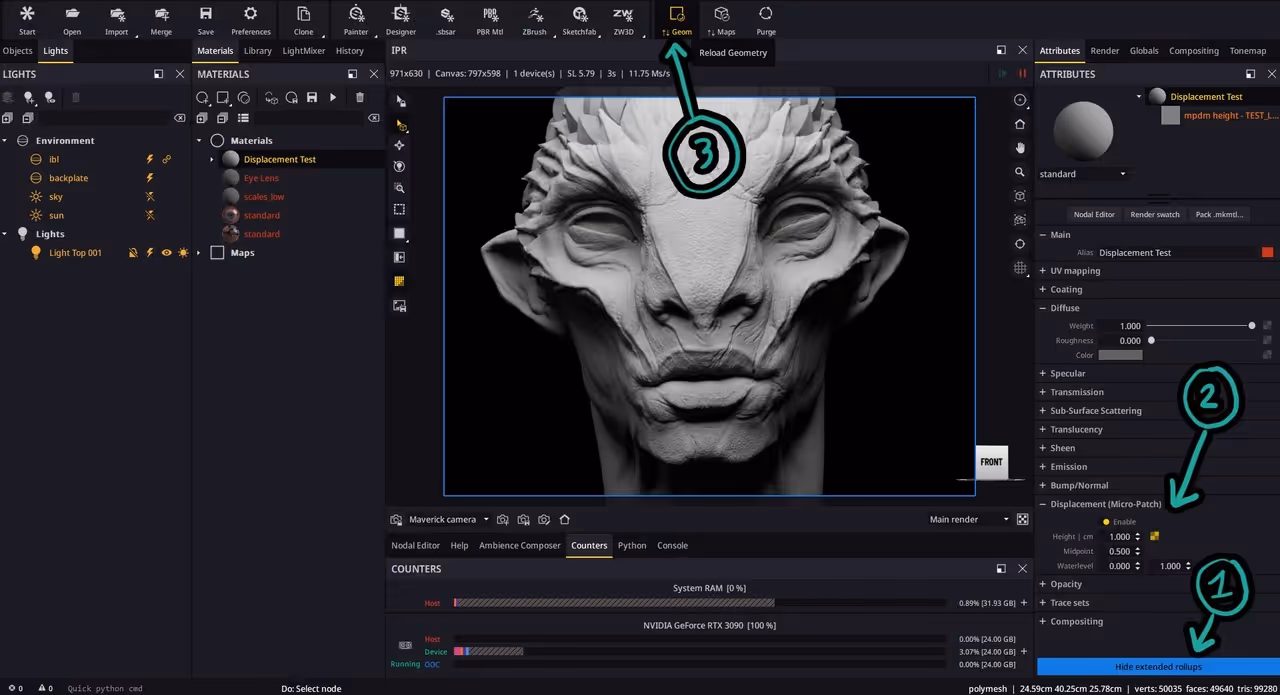
Step 5 -Then from the Displacement (Micro-Patch) section make sure your settings match what you exported from ZBrush and you can adjust the intensity if you need to. AND THAT’S IT!
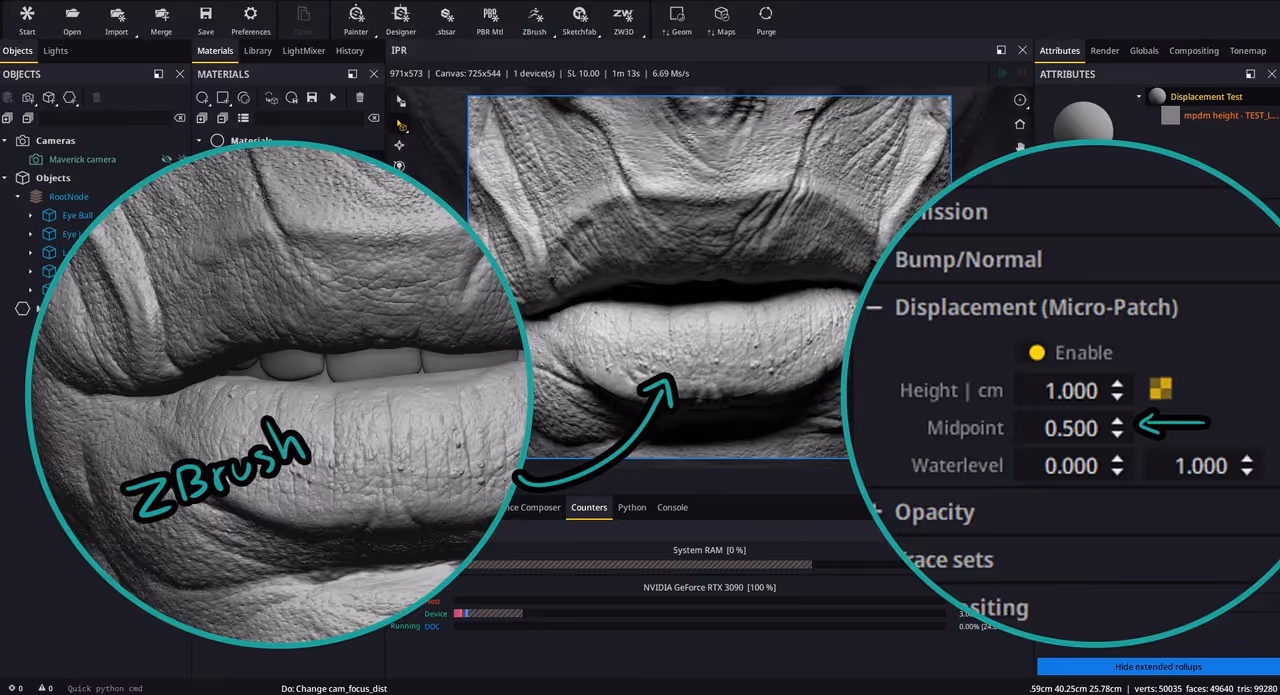
You literally have all the details from ZBrush in a single map with just a few clicks and no complicated setups… in fact this new micro-patch technology doesn’t even affect the processing time much so it is super light to render! Trully a game changer I think.


.webp)

.webp)