Basically, the idea is to use the 'Thick skin' feature from ZBrush 2021.5 (Tool > Thick Skin) to maintain a bit more of the volume when adjusting the mesh right after a quick pose. The posing process is actually pretty straigh forward, you can just mask the area you want to protect, bring in the Gizmo 3D and place the pivot where you want it (holding 'Alt' you can reposition it and set the rotation) and then just rotate or move the mesh.
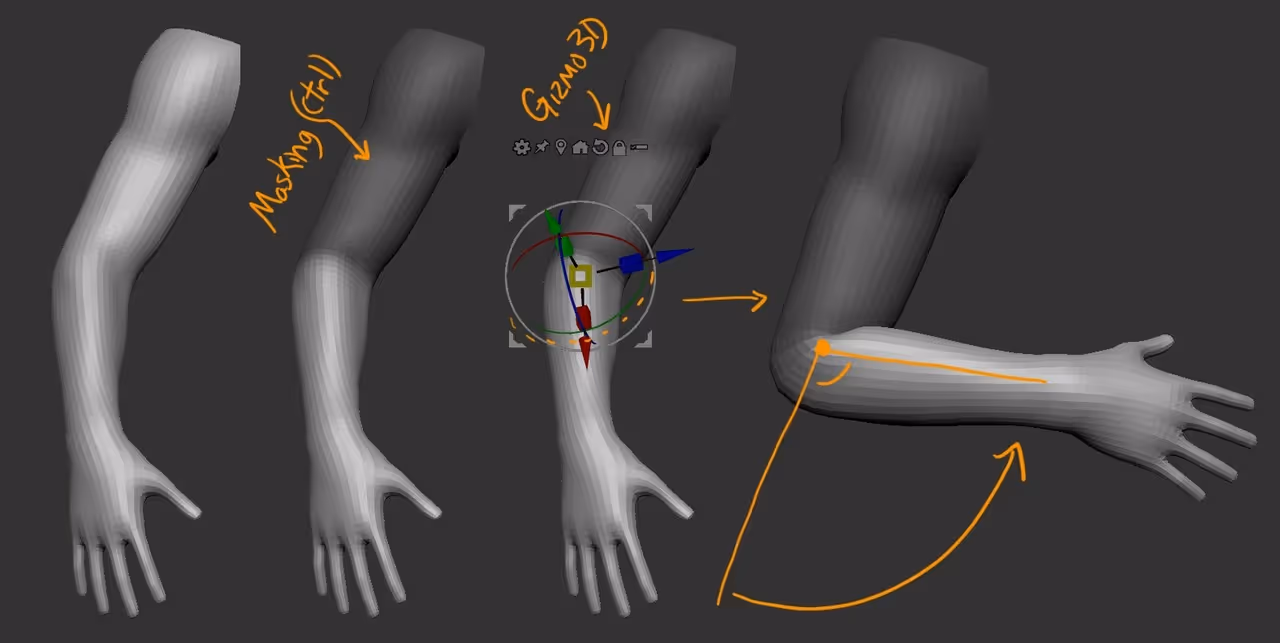
Now, this is a pretty standard process to pose things in ZBrush. The issue is that you'll probably end up with a bit of stretching of the polygons close to the area where the pivot is (elbow in this case). So to fix those stretched polygons after the pose, you can use the Alternative Smoothing brush which will maintain a bit more of the volume and relax the points to even out the polygons.
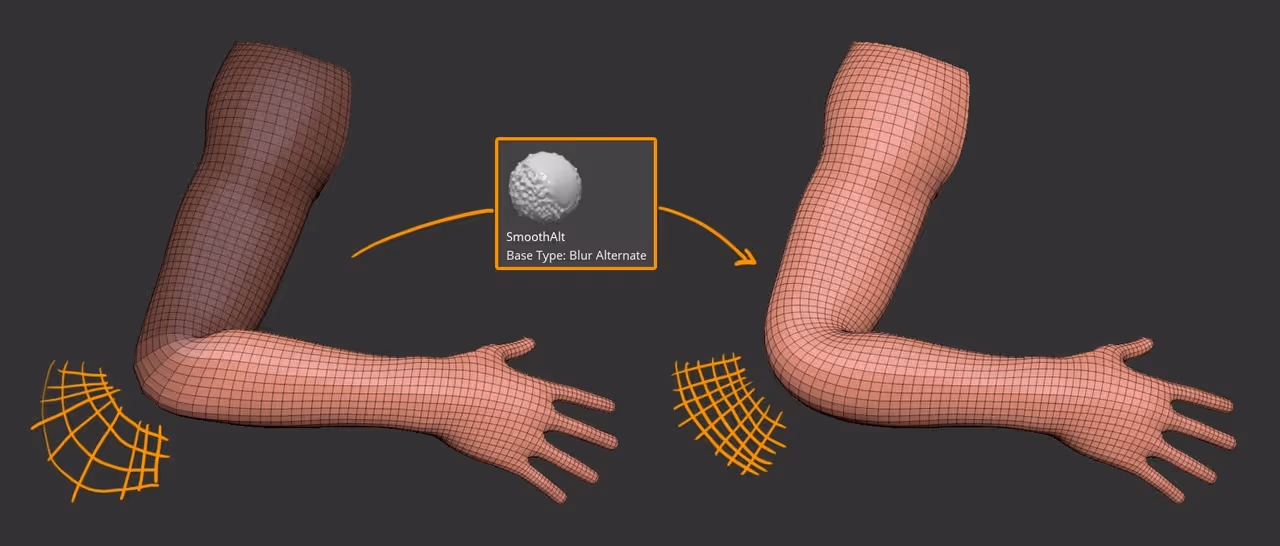
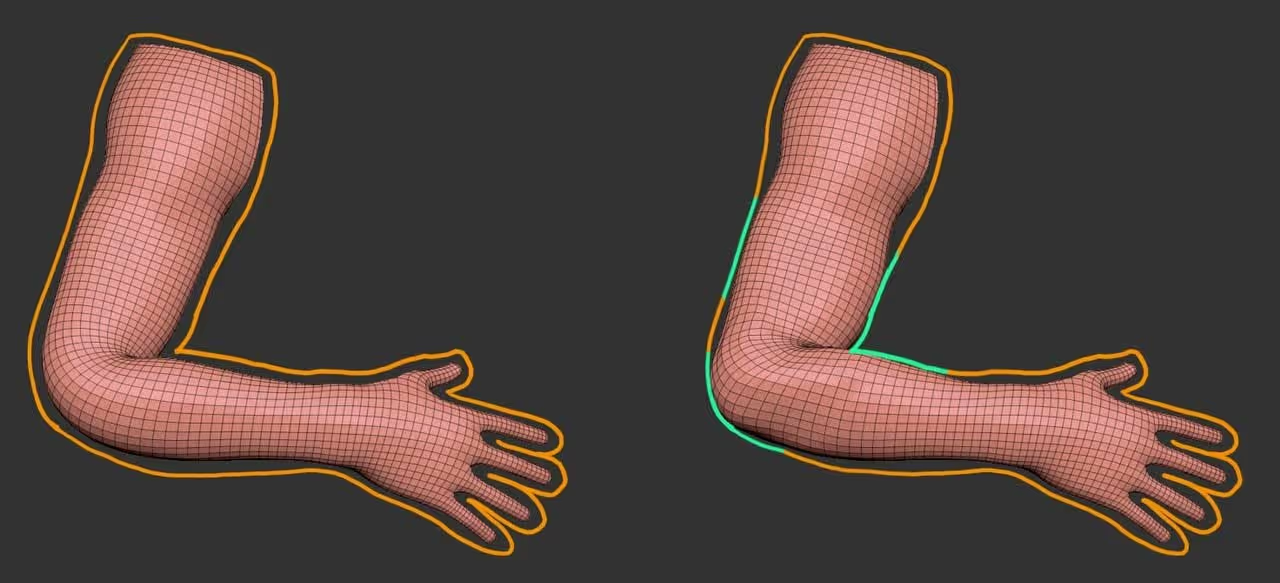
So now we end up with a nicer distribution of polygons but we are losing some of the sharpness around the elbow area. Here is where I found the Thick Skin feature to be really handy as well as adding volume in other areas like the Biceps and forearm to reflect the changes of a flexed arm.
The idea is to simply use the Thickness slider of your Thick Skin subpalette, like a 'bounding volume' or a 'limit' (yellow line in the image below) so you can set it to something that covers roughly the maximum volume you want to adjust for the elbow or biceps for instance:
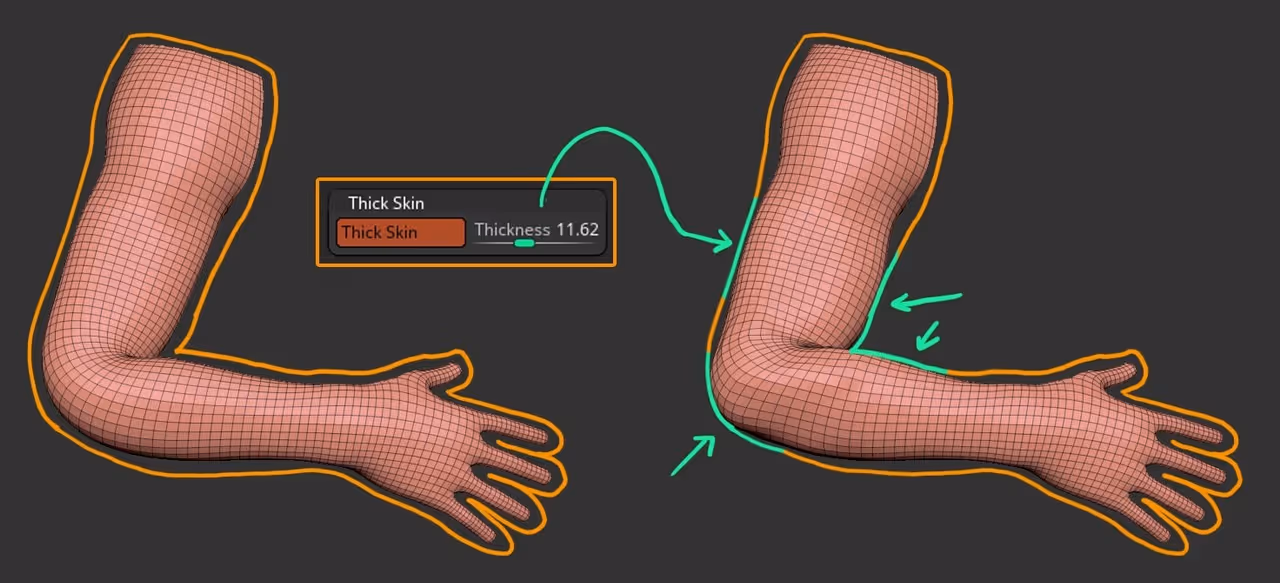
Once the 'limit' is set, you can use the move brush or inflate brush (any brush really) to recover the sharpness of the elbow or adding volume to the biceps... this can all be done without the thick skin, but setting that 'bounding volume', can speed up the process and prevents you from 'overdoing it'.
Transpose line with a custom profile curve (very cool)
Now here is an alternative method for posing limbs which is not new at all, but I think it needs more exposure because it can simplify the posing in ZBrush quite a bit. Depending on how long you've been a ZBrush user you might or might not know the Transpose line... just because it has been replaced with the Gizmo 3D as a more streamlined tool to manipulate objects. However the transpose line is AMAZING and has some additional feature that the Gizmo 3D doesn't have.
To access the transpose line select the Rotate tool (or move, or scale) and turn OFF the 3D Gizmo icon.
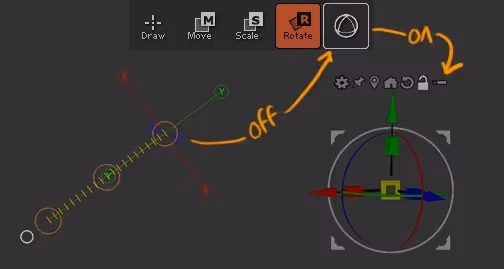
If you haven't used the Transpose tool, it might take you a while to get use to it but you can basically click and drag over the mesh to set the line and then use the inner red circles at the ends to manipulate the mesh.
What's great about the Transpose master, is that you can tweak the Profile curve (like you would with some brushes: Brush Palette > Curve > Edit Curve) and that you can also access alternative methods to affect the mesh using the 'Alt' Key.
So if you set the transpose line from the shoulder to the elbow of an arm, edit the 'fade off' of the curve (like the example in the top-left corner of the image below) and hold the 'Alt' key while rotating from the end of the transpose line, you'll get a pretty nice rotation that maintains the volumes really well...
And.... no need to mask ;)
An extra tip: You can hold Ctrl+click and drag the transpose line to quickly mask volumes (one of my favourite features of the transpose line)
Posing is just the beginning, there is a lot of extra adjusting that should be done (obviously depending on the type of project), but getting the initial tweaking of the pose right from the beginning will definitely help with the rest of the process... here is a quick sketch after posing:


.webp)

.webp)