Step 1
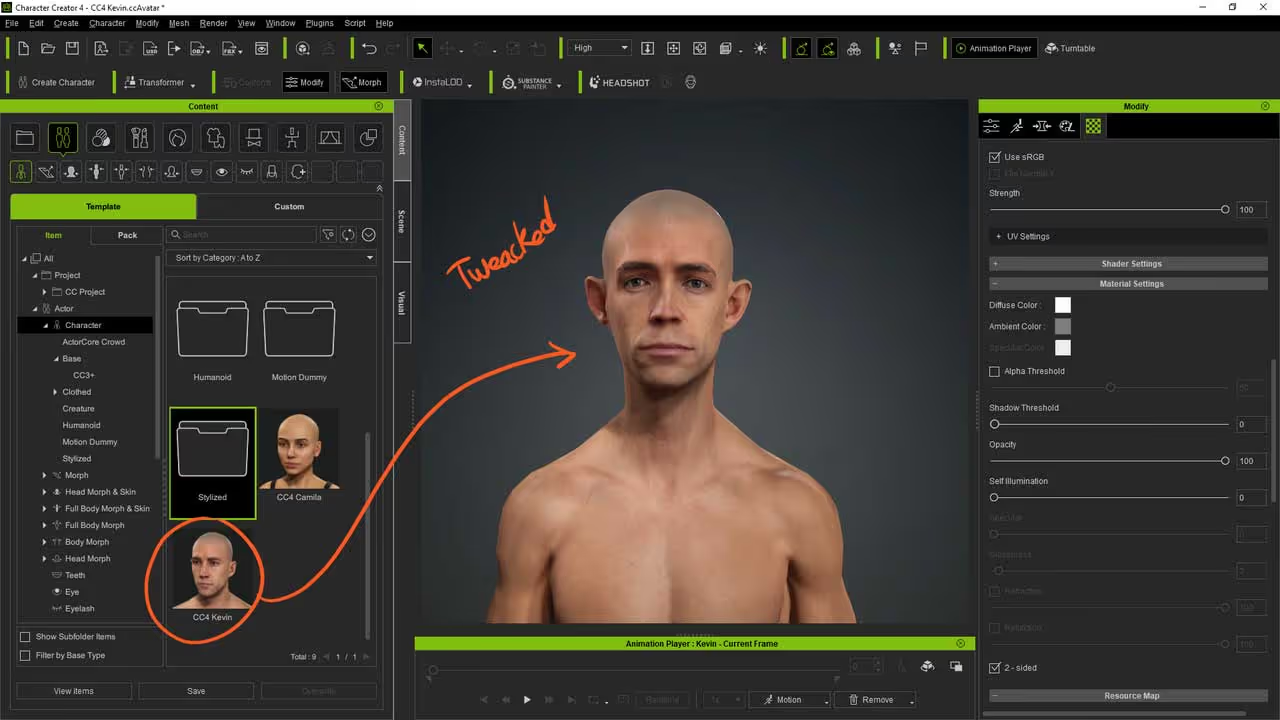
You can just start CC4 and load a default avatar. The new CC4 has a generic male called Kevin which is pretty decent as a starting point. Just like in CC3 you can still hover over the areas of the body and face and pull them to adjust the character or use the sliders from the morphing tab to tweak the shapes more precisely.
Step 2
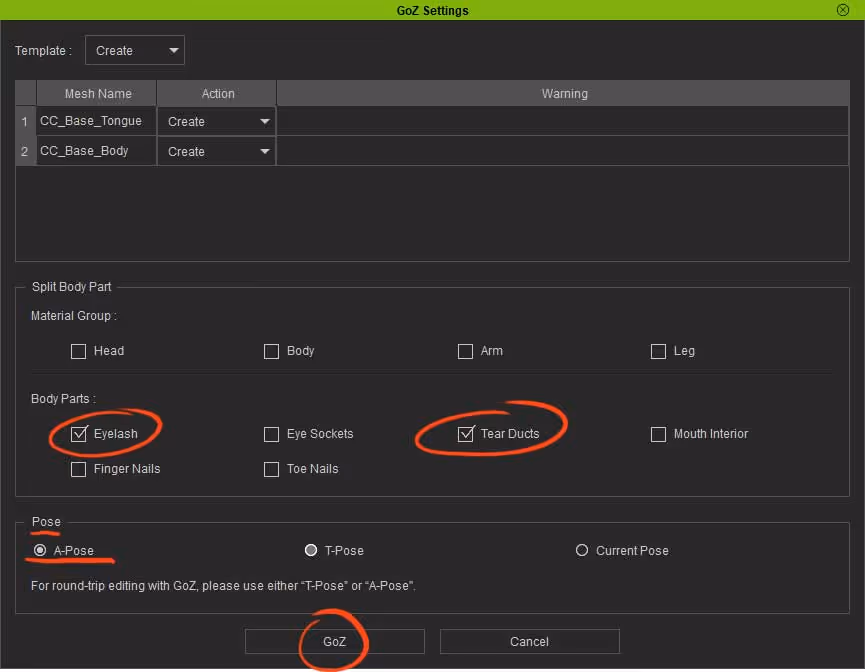
Make sure that ZBrush is also open and from the CC4 window, click on the ZBrush ‘GoZ’ icon from the top. A new window will pop up where you can choose how to separate the mesh and the pose you want to use. I like to keep the ‘eyelashes’ and the ‘tear ducts’ separate… but the most important thing is to select either an A-pose or T-pose from the ‘pose’ section so that you can bring your character back into CC4 after editing it in ZBrush.
Hit the ‘GoZ’ button when you are ready.
Step 3
In ZBrush you can start moving points and sculpt the mesh and even subdivide the base if you want to add more details. Here is a very quick timelapse of some modifications I made to the mesh at subdivision level 3:
This is a simple process, I used the moving brush, the standards brush, some clay brushes and smooth to give the ‘generic’ mesh a bit more personality.
The cool thing about this whole workflow is that you can also create new pieces directly in ZBrush and send them to CC4 for posing. So I also created a few primitives around the head and played with dynamesh to sculpt some sort of helmet… purely for demonstration purposes, I know is not a great design haha.
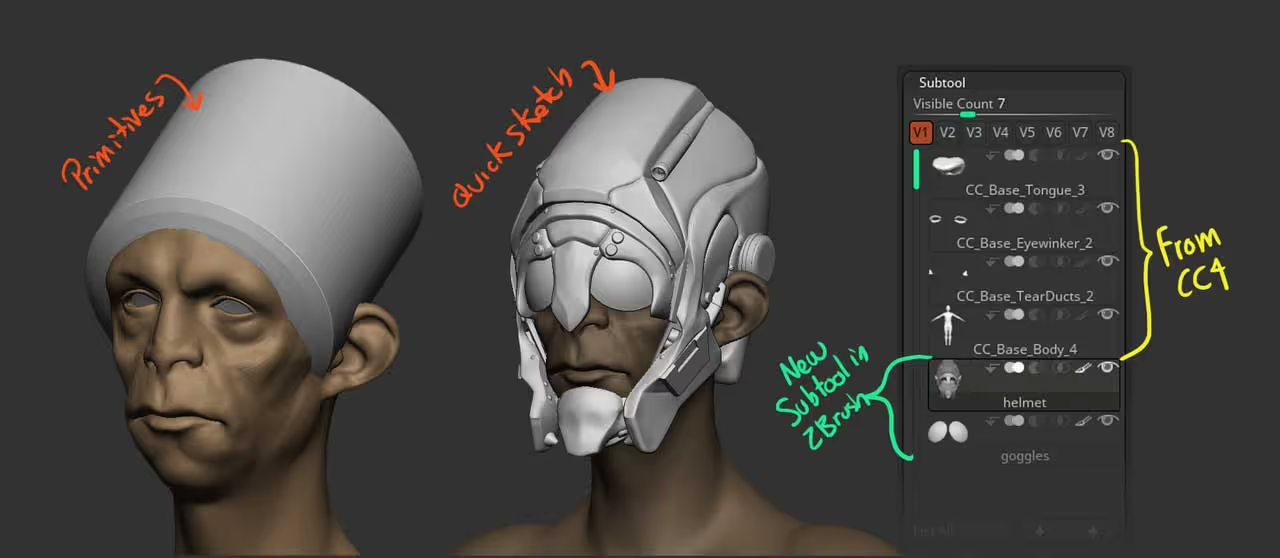
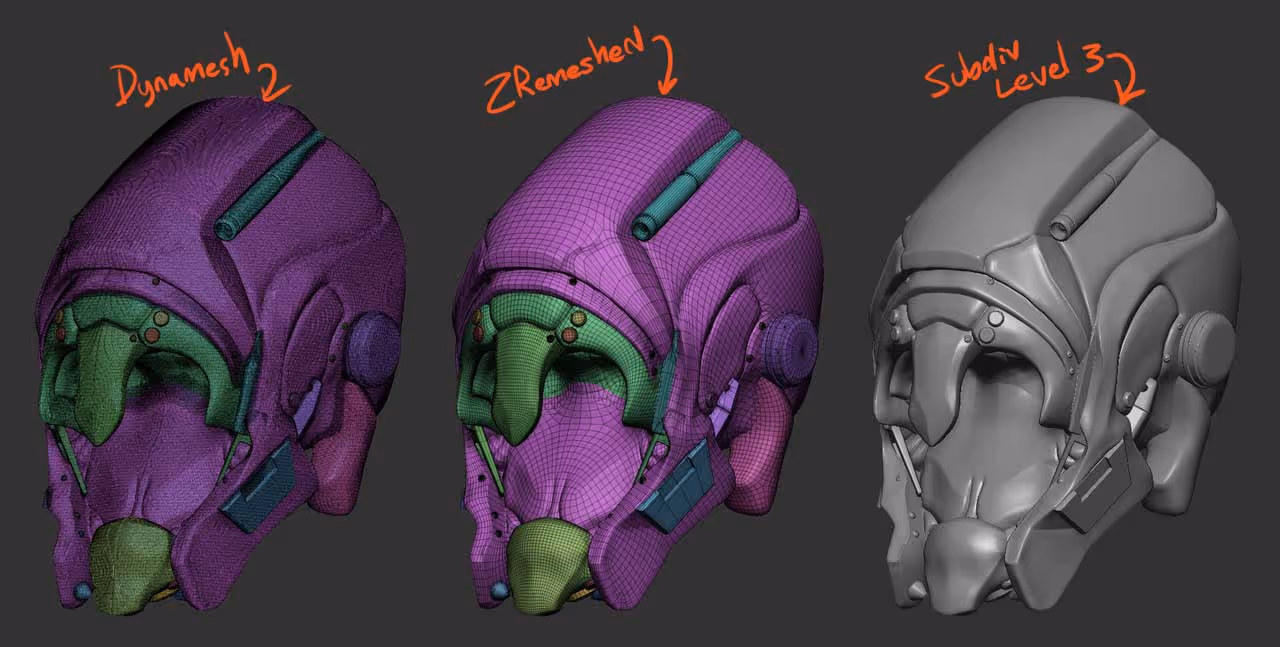
Once I had the rough sketch of the ‘helmet’ I ran a quick ZRemehser to simplify it and projected the details from the dynamesh sketch (and added a few IMM details):
Step 4
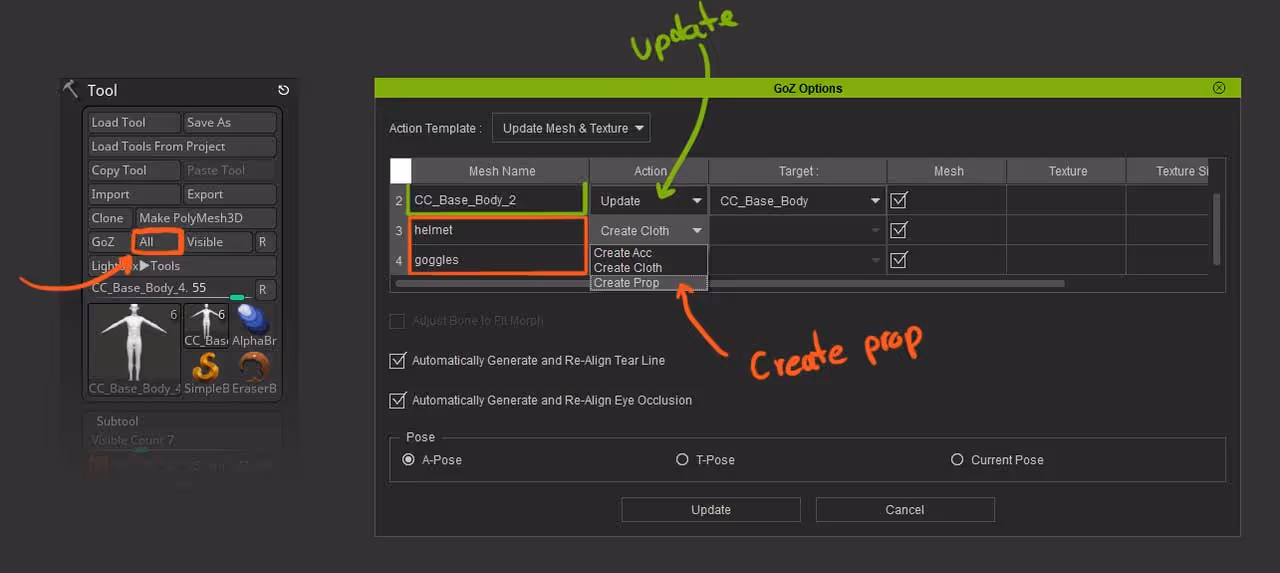
Once you have your tweaked base mesh and any new additional mesh you want to add, you can simply click on the ‘All’ button next to the GoZ in ZBrush to send all the subtools back to CC4. This will send everything to CC4 and from the ‘GoZ Options window, you just need to import the new meshes as ‘props’ (or ‘cloth’ if you have something like a shirt to deform with the body).
Step 5
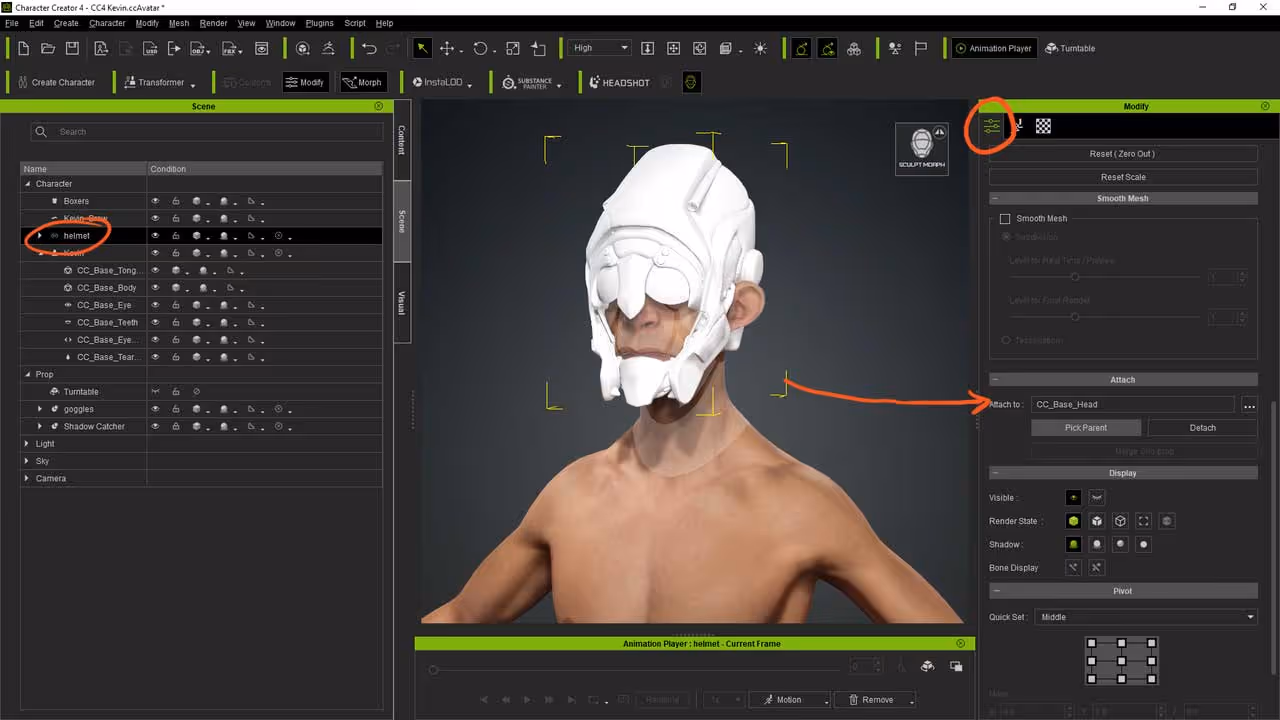
Once everything is imported into CC4, you need to select the objects, in my case the helmet and chose which ‘bone’ to parent it from the modify panel. You can click on the ‘pick parent’ button and select the head… after you do that you can go ahead and have fun posing the character!
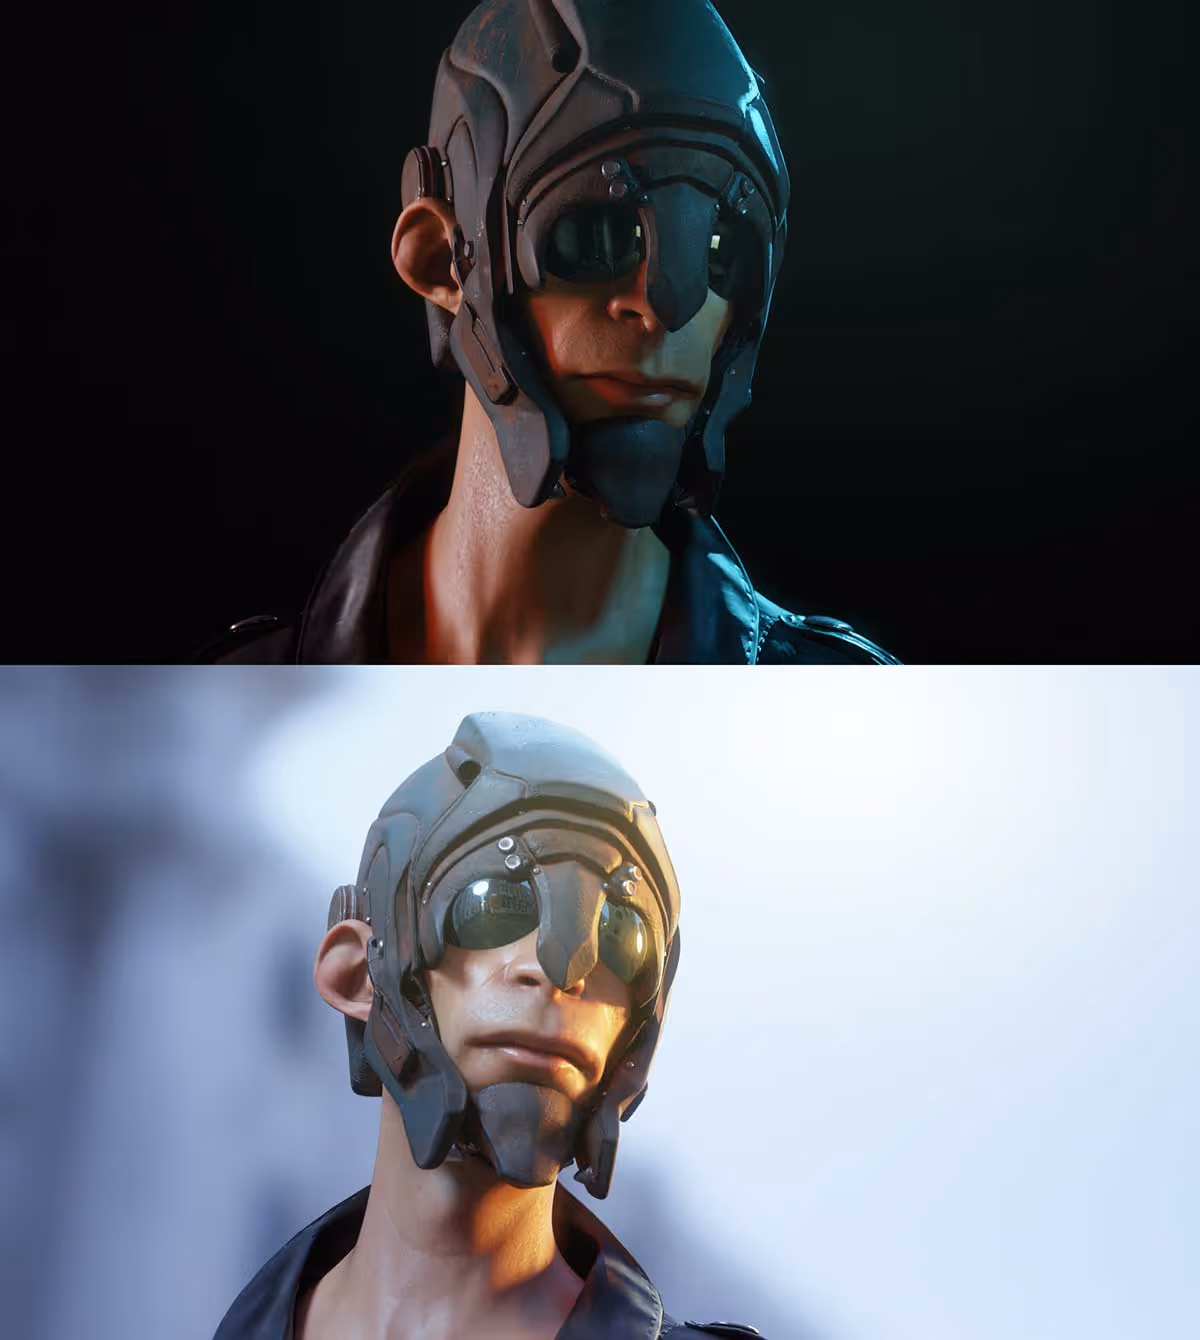
That’s pretty much it for this tip! - Of course, you can do a quick UV pass for the objects you send to CC4 and make some cool textures in 3D Painter before you render your concept out!
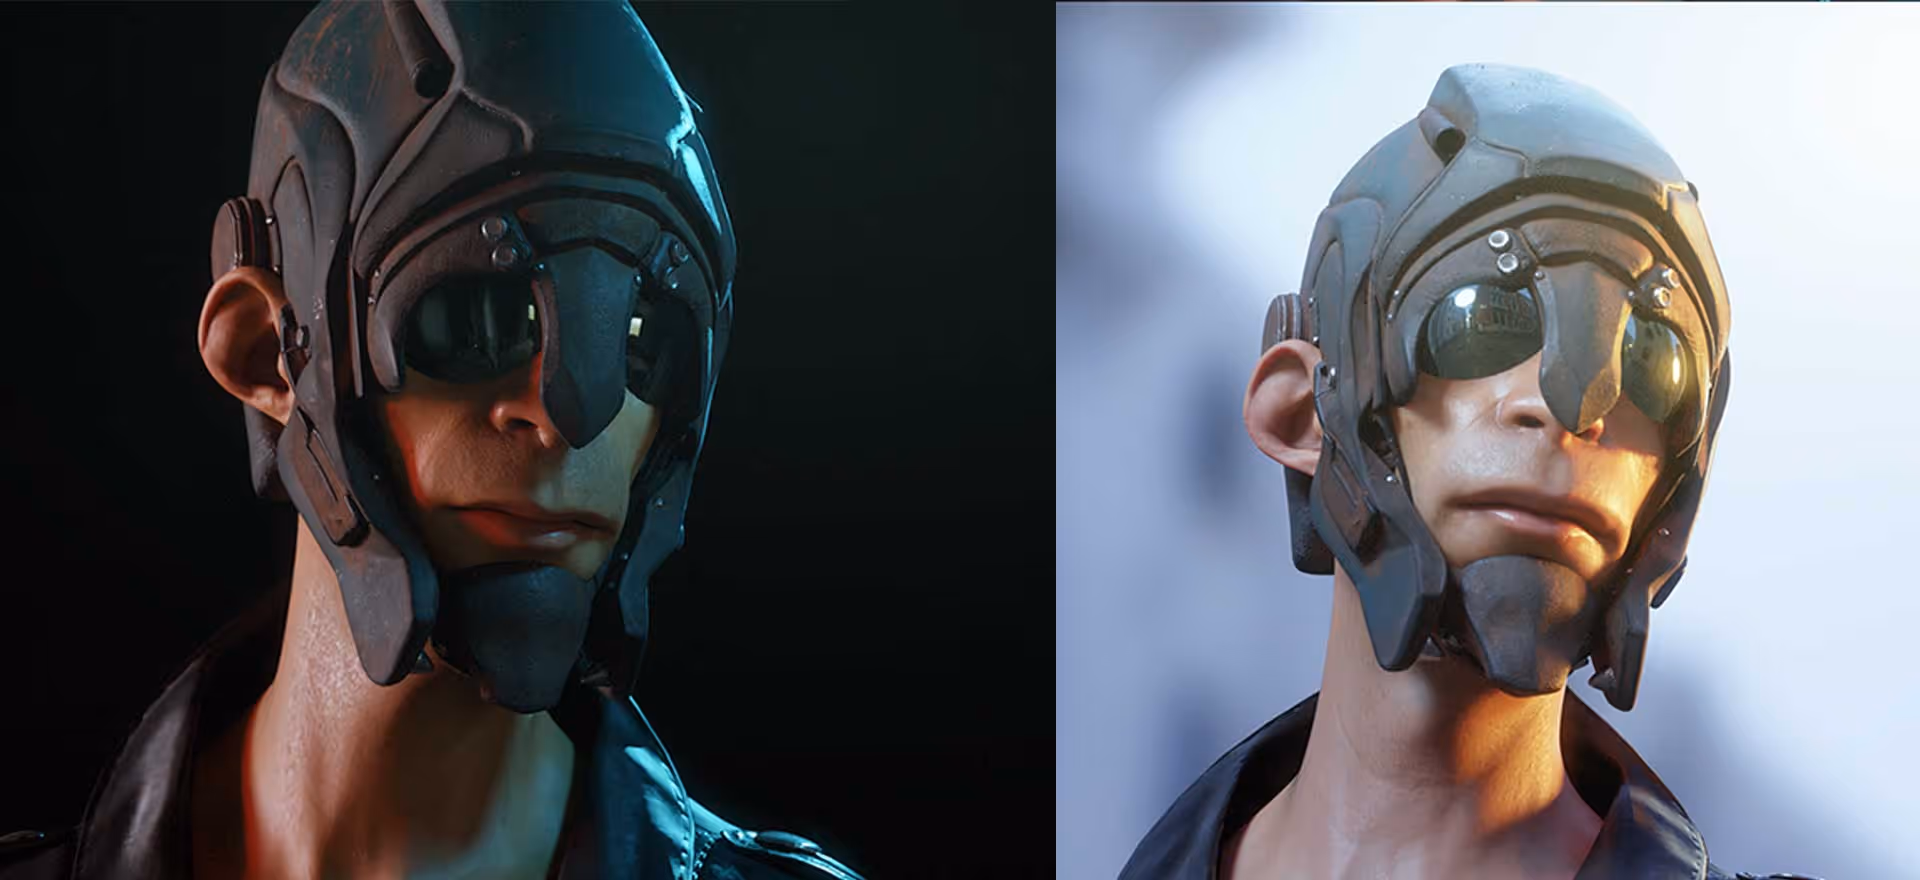
This is a pretty sketchy concept of a weird sci-fi dude but, with some textures in 3D Painter and some interesting lights in Marmoset, you can get something that looks alright:


.webp)

.webp)