The idea is to create a quick volumes that mimic muscles using the ZSphere sketch feature. For this trick you’ll need some kind of armature… I just did a quick base for a creature thing using ZSPheres:
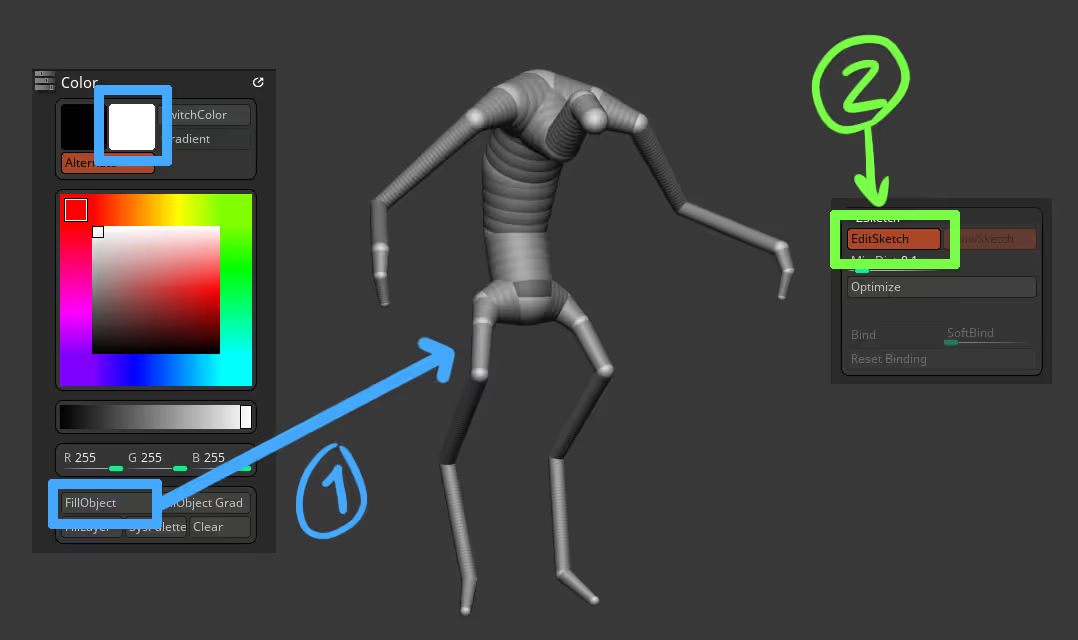
Once you have your armature, you want to go to the colour palette and fill the armature with a white or pail yellow colour to simulate the ‘tendons’ of the anatomy. Once you fill the armature with a white colour, go to the ‘ZSketch’ palette and turn the EditSketch switch on… this will allow you to sketch over the armature with a very particular set of brushes.
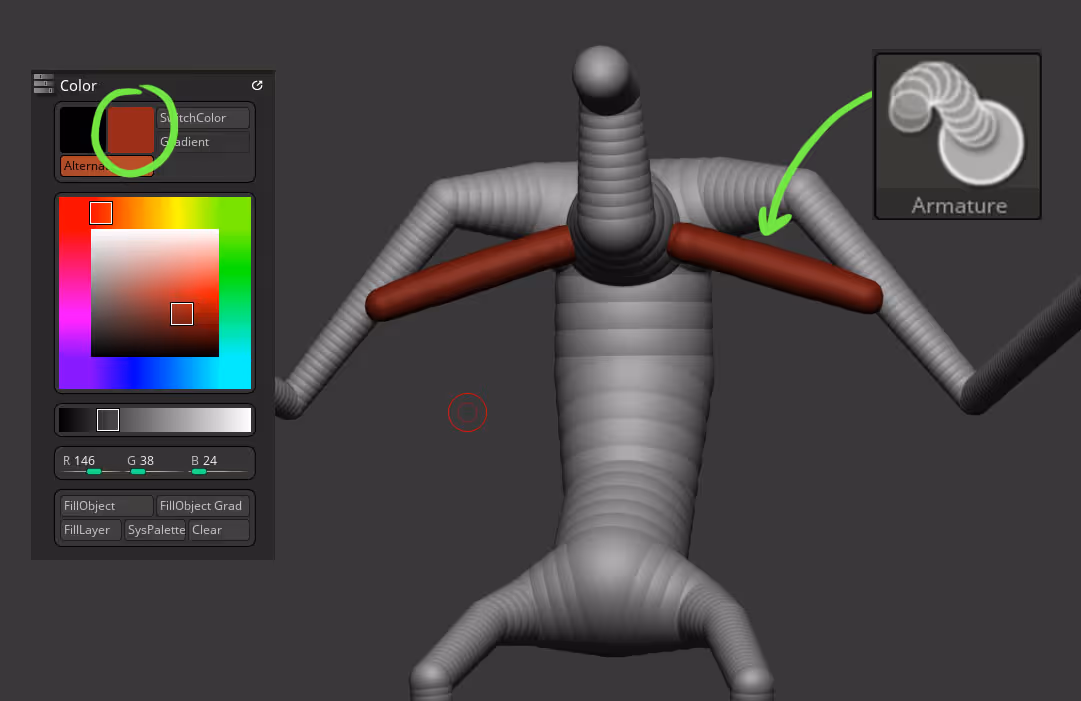
The next step is to select a red colour or similar and using the sketching brushes draw connecting lines to build the volume of the muscles. The Armature brush allows you to connect two parts of the armature:
Once you have places a couple of this strokes on the mesh you can hold the Shift key to access your smooth brush and smooth out the connection between the sketch an the ZSphere armature… this is where the magic happens. Just make sure that you have RGB enabled on your smooth brush:
ZBrush basically smooths out the transition of the ZSketch as well as the colour information… and because we had a white colour on the armature, the transition to the red colour of the sketch also fades nicely creating the effect.
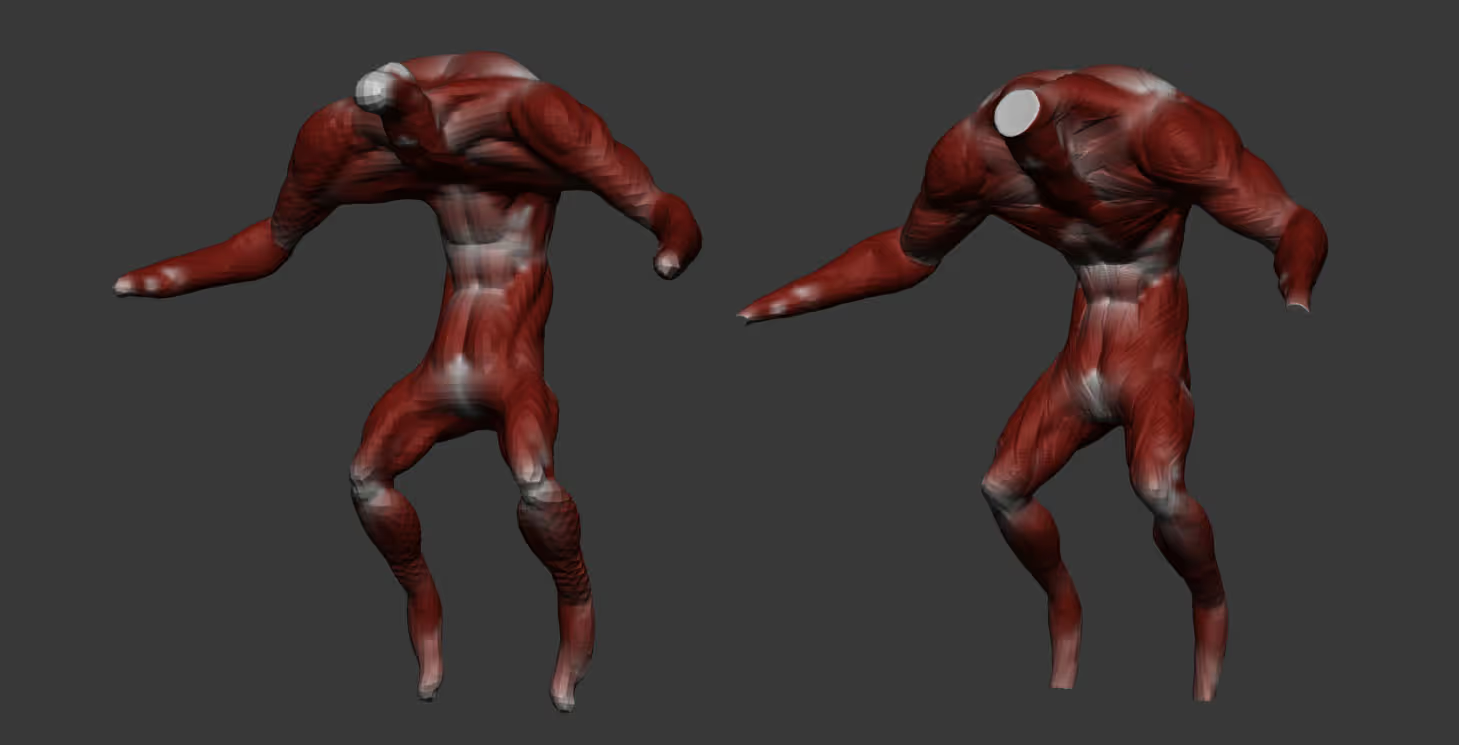
This is a really fun way of building volume and once you get used to the way it works you can build the bases for a concept in 5 minutes. Here is the rough block out for my creature:
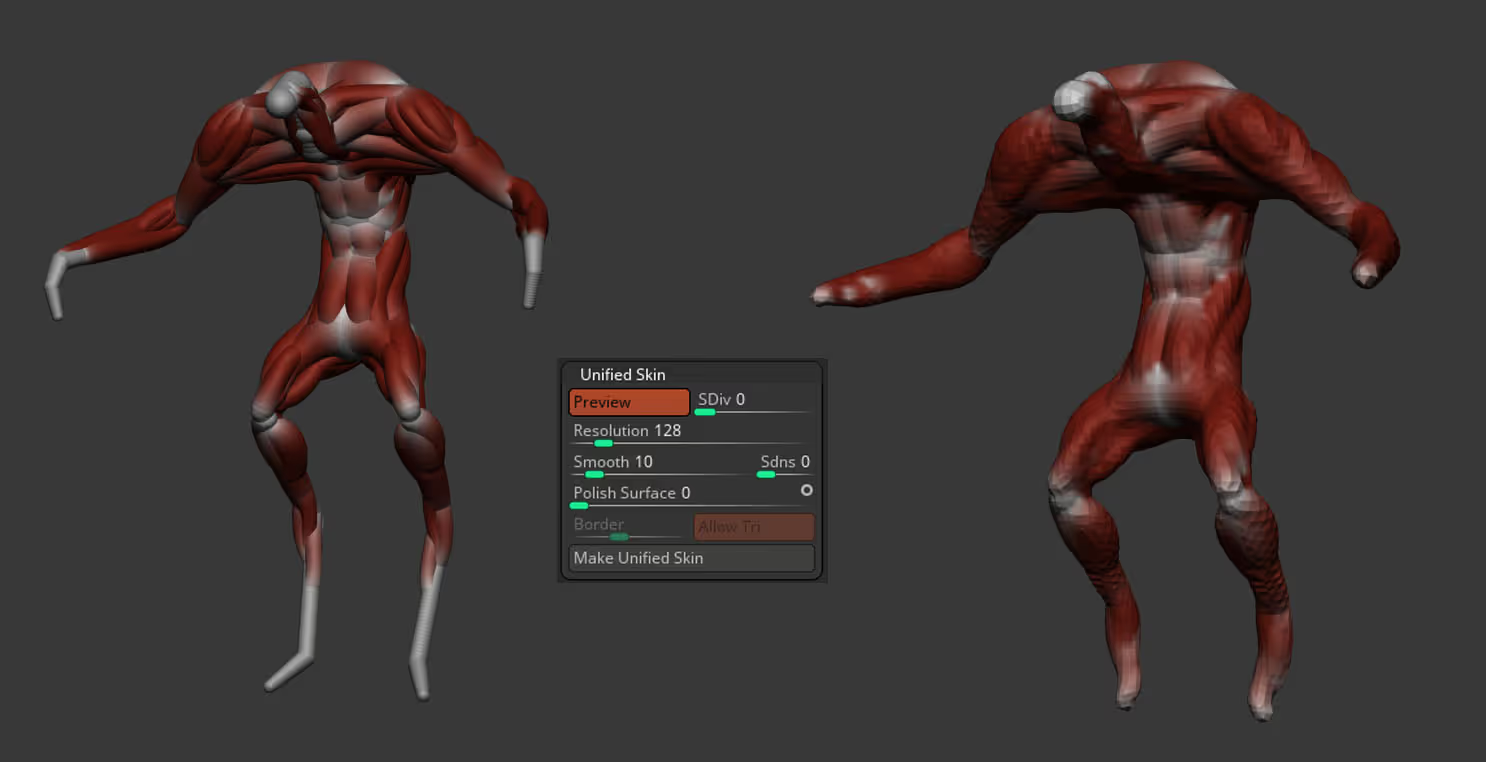
it is obviously not perfect but the nice transition between white and the red of the muscles gives you a nice suggestion of how to continue the refinement process of the volumes. To start sculpting on this sketch and use the usual sculpting brushes, you need to create a ‘Unified skin’ (subpalette towards the bottom of the tool palette). You can click on the ‘preview’ switch to visualise the resolution and the volumes that will be produced…. once you are happy click on the button ‘Make Unified Skin’
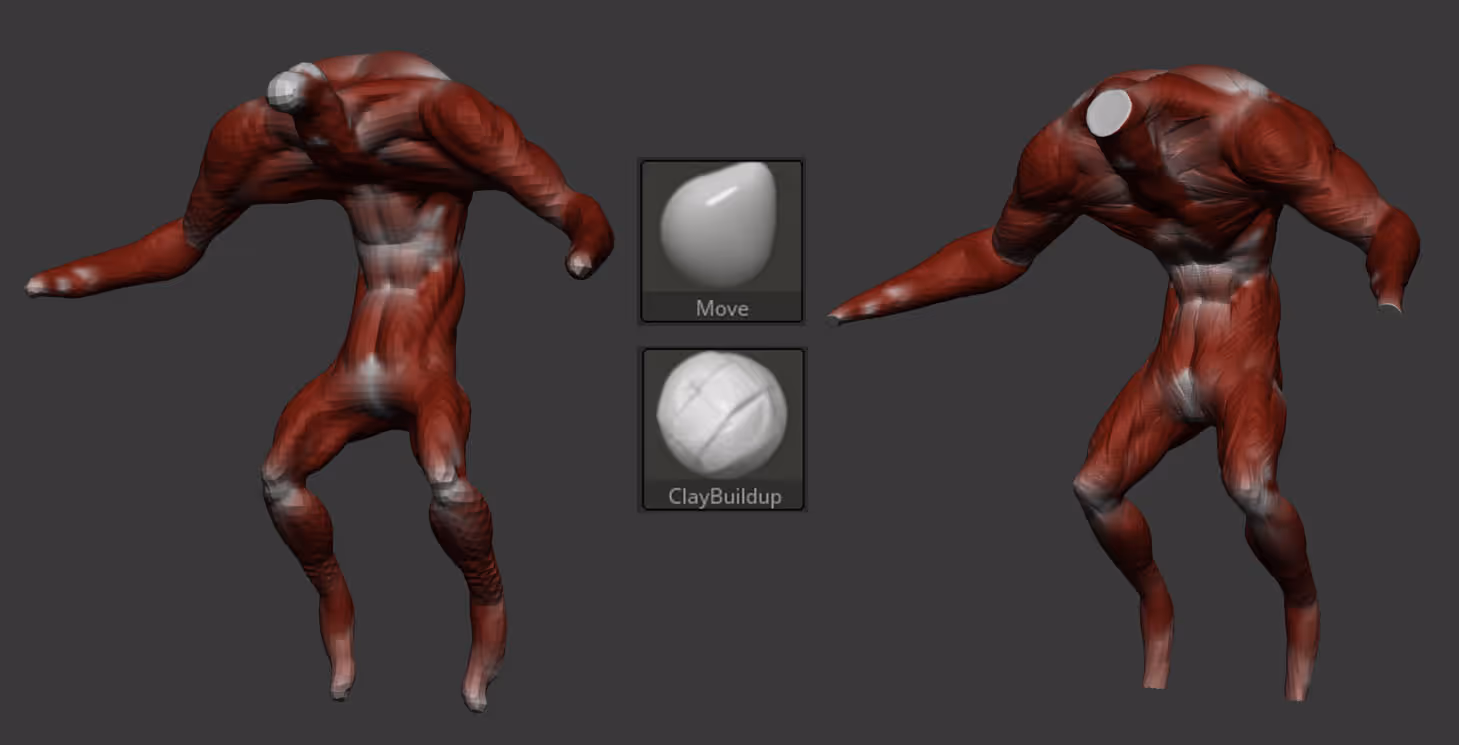
At this stage, this is just a Dynamesh object so you can play with the sculpting brushes to refine it a bit… for this quick demo I used the move brush to adjust the placement of the volumes a tiny but and then the ClayBuildUp brush to refine the volumes of the anatomy:


.webp)

.webp)