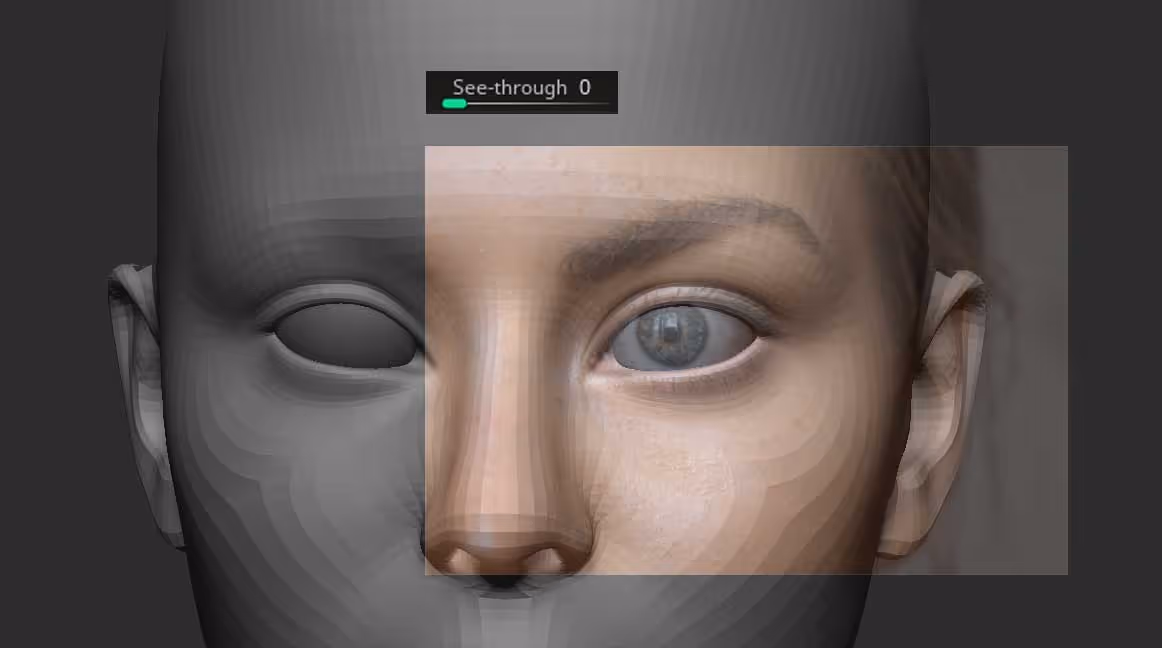
I found a nice high-res photo of a closeup of a face and I placed it behind ZBrush in a Photoshop document. Using the 'See-through' slider I tweak the camera in ZBrush and placement to match the image in the background and adjust the mesh with the move brush a bit:
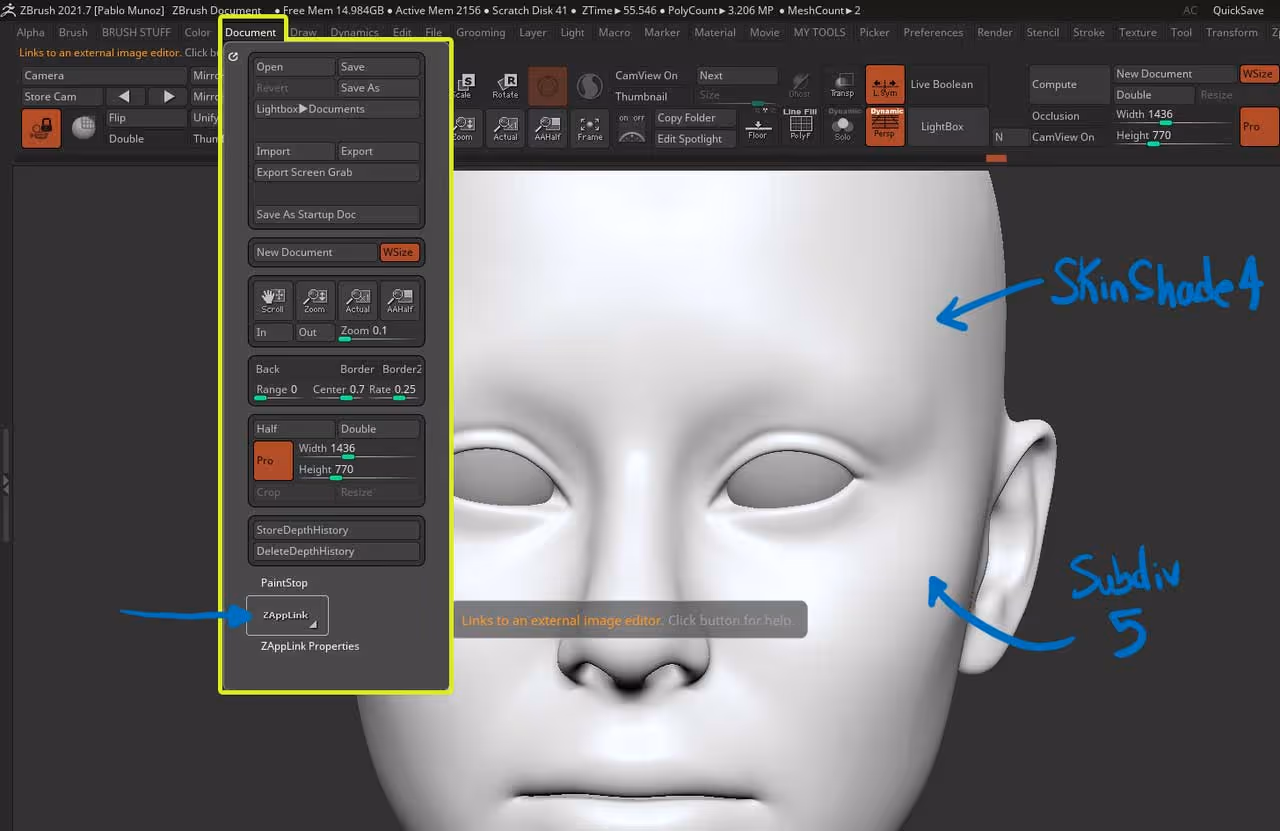
Once the portion of the face I was interested in was matching the photo I used the ZAppLink from the Document Palette to take a screenshot of the ZBrush canvas and send it to Photoshop for texturing. A tip for you is to change the material to SkinShade4 so it is easier to see the texture in Photoshop and subdivide the mesh enough to add the polypaint details (5 subdivisions in my case).
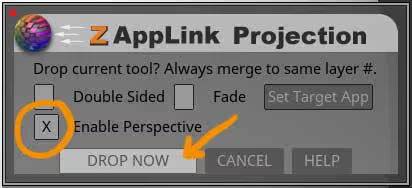
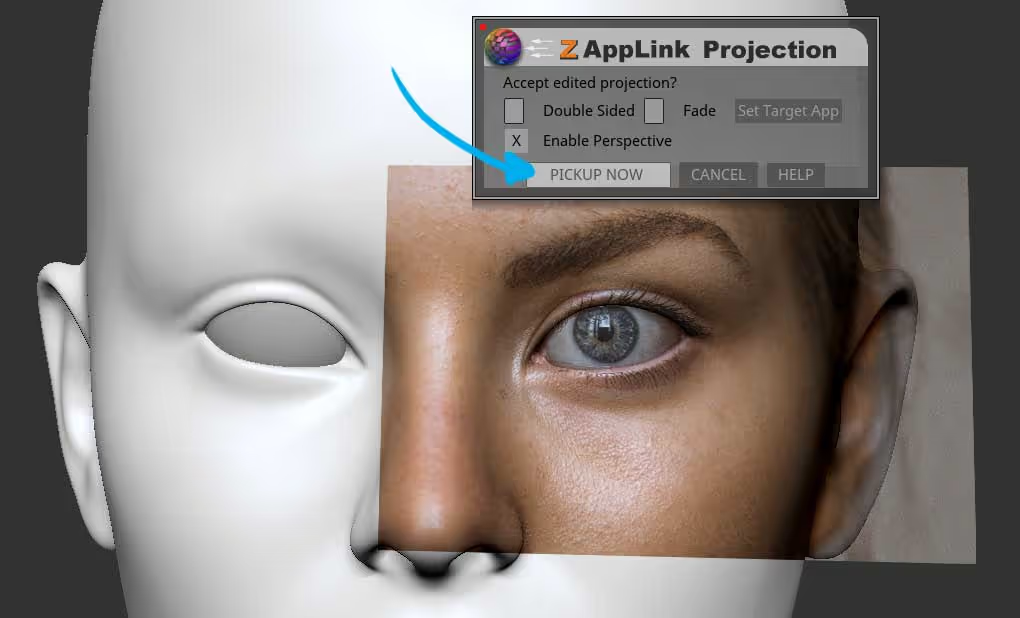
After you click on the ZAppLink button, you'll get a pop up where you can connect your preferred 'Target App' which for me just Photoshop. I check the 'Enable Perspective' and click on the DROP NOW button:
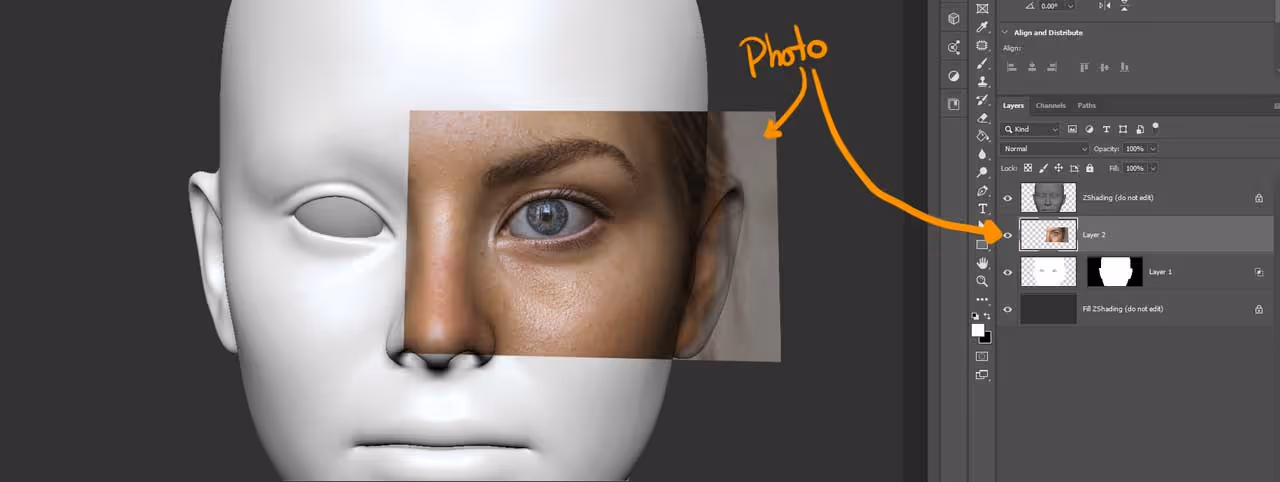
This button will send the current view from the ZBrush Canvas into Photoshop. Once in your image editing app, you can bring in the same photo you used for your reference and place it below the top layer (ZShadding). Once you are ready to adjust the placement of the image, make sure you merge the layer with the one below (the one with the mask) and save the document (Ctrl+S).
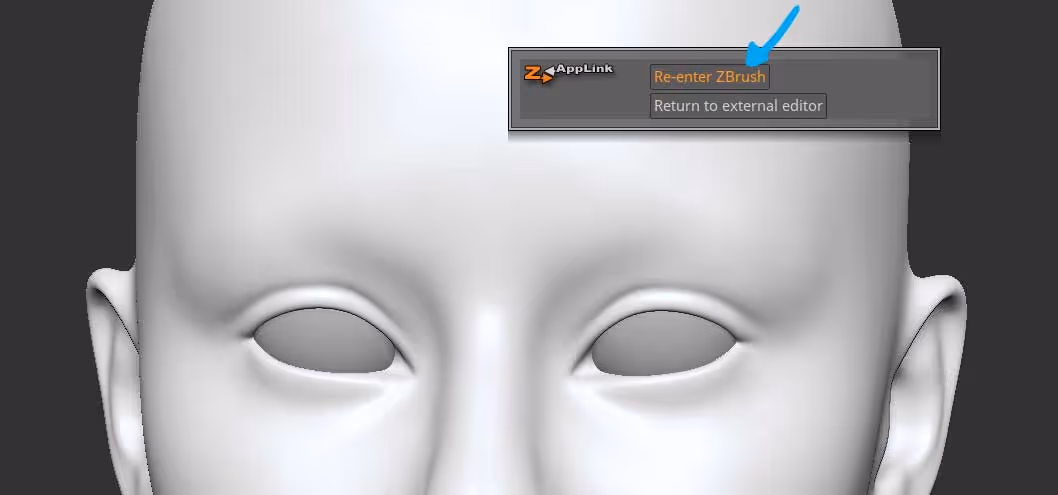
After saving you can go into ZBrush again and click on the 'Re-ender ZBrush' button. From the following pop up you can click on the 'PICKUP NOW' button to get the Photoshop document projected into your 3D mesh.
Now you have a pretty decent starting point to texture you mesh. Keep in mind that the photo obviously has shadows and highlights that makes is useless as an albedo, but you can use the variation in hues to refine the albedo color yourself.
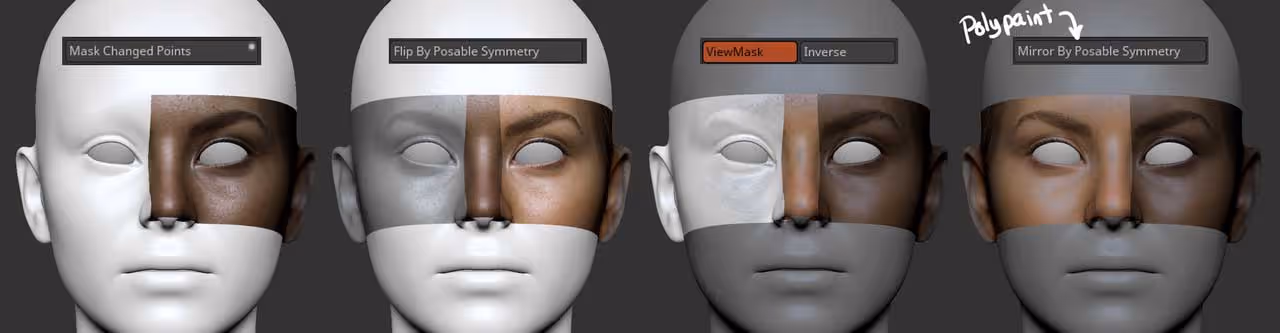
Also here is the trick with the new ZBrush tools to complete the effect and 'mirror' the polypaint to the other side:
- From the Masking palette, you can click on 'Mask Changed Points' to mask only the points that got the Polypaint.
- Flip the mask to the other side using 'Flip By Posable Symmetry'
- Invert the mask to restrict the polypaint effect to only the specific area of the eye/
- From the Polypaint palette, click on Mirror By Posable Symmetry:
That's it! you can now use a painting brush with symmetry to refine the texture and adjust the stretching from the original projection:
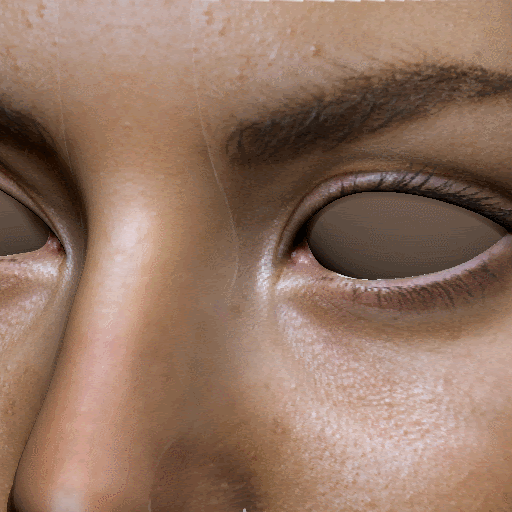
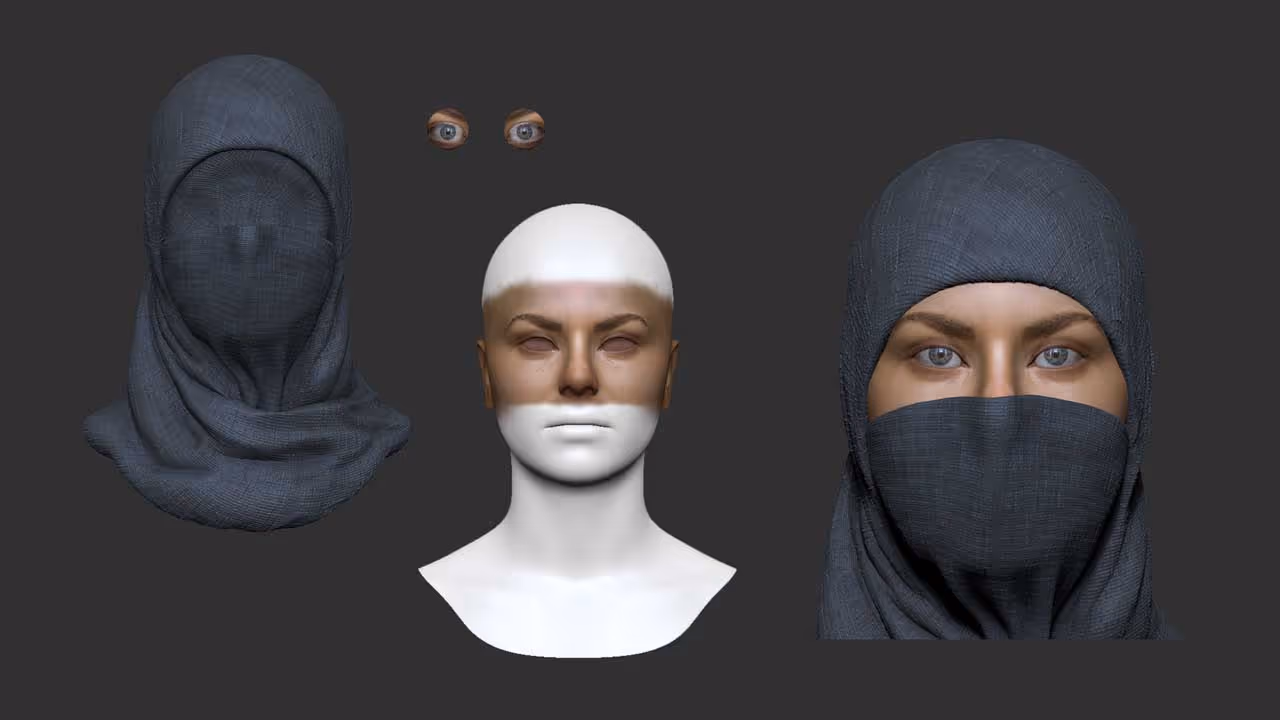
I used the same ZAppLink workflow for the eyes and added an extra mesh to cover the areas without skin (I didn't have time to work on the rest of the textures haha).
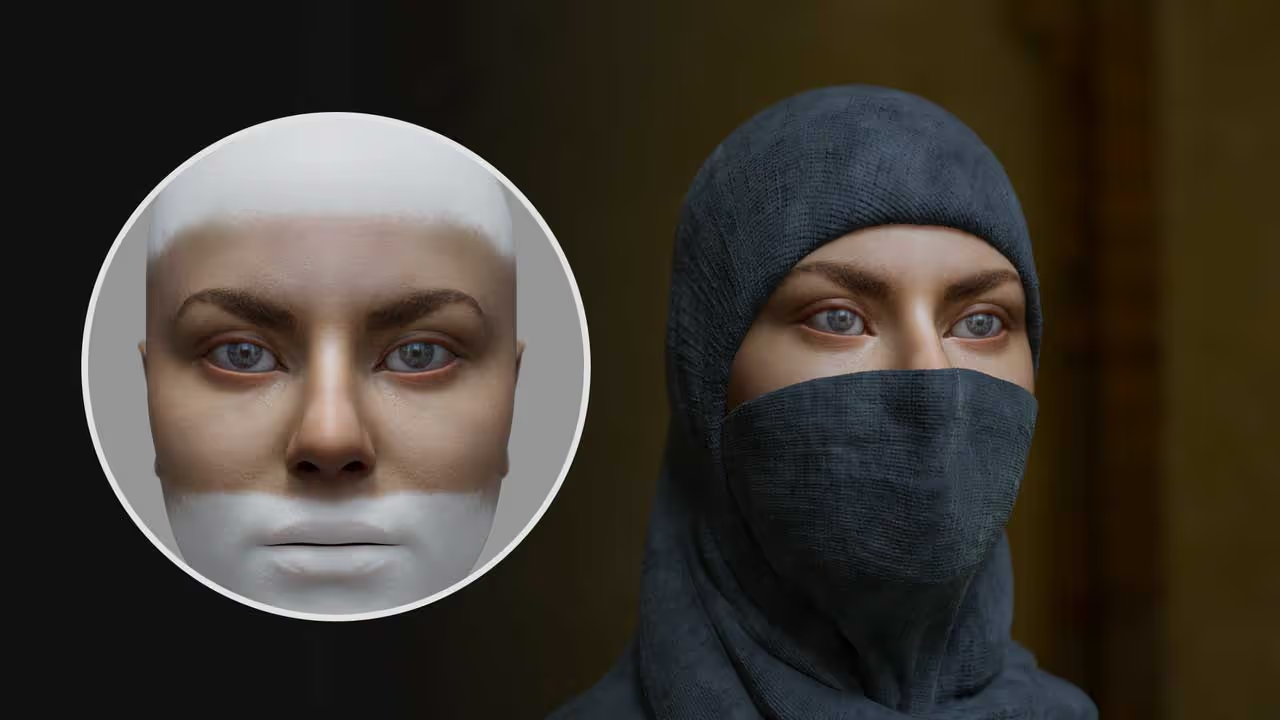
I did a quick prototype render in Marmoset using the polypaint from ZBrush. It might not be the absolute best quality, but this is a technique that takes a few minutes and lets you test different options before committing to something more 'sophisticated'.


.webp)

.webp)