Now, for the tip I want to share with you today, is basically to reinforce one of the main concepts I covered in the tutorial: The intentionality of the light. (by the way I use blender in this example because is free, really really good renderer and easy to use but the principles apply to any other renderer out there).
So you can achieve something very cool and interesting with a single light source. It is just about the intention of what you want to create. For example you can create a nice presentation render that showcases the surface quality and the volumes of your WIP with a single area light.
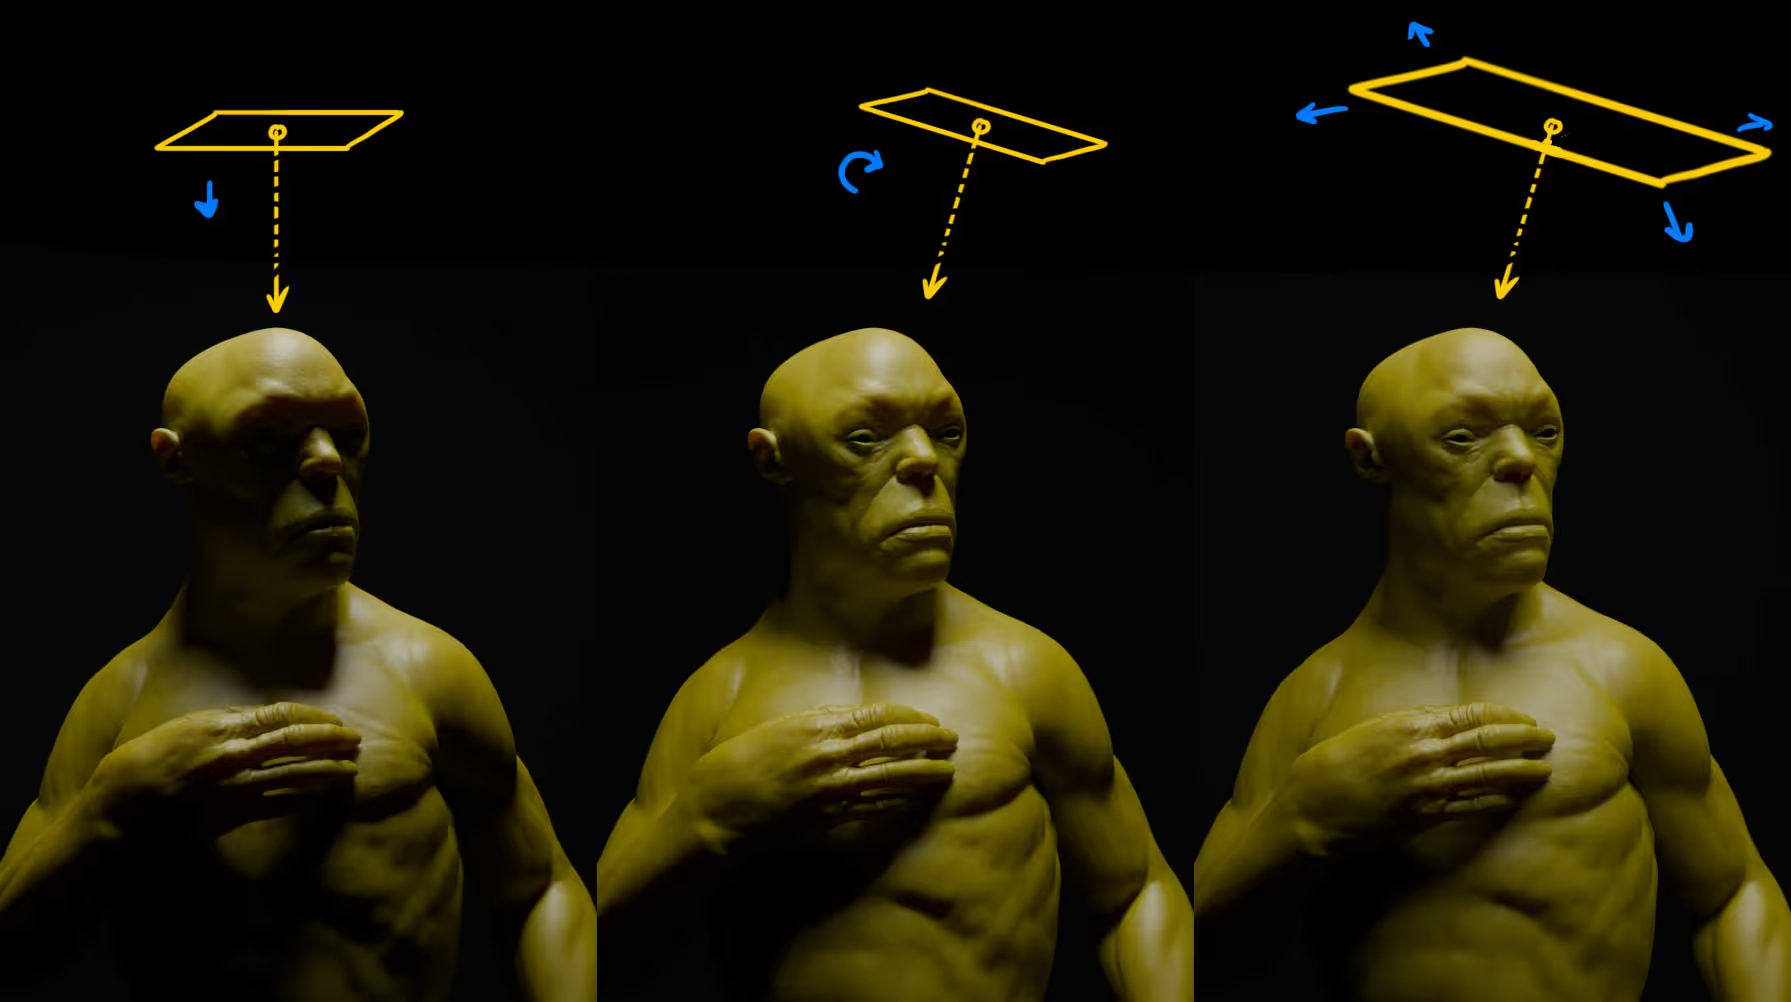
First, a single area light straight from the top can give you a more sinister look by hiding portions of the face. Then rotating that same light a bit can still give you a dramatic render but pushing the face and expression of the character to the light (we’re drawn to read faces first so it is always a good focal point). Finally, you can increase the source of the light (scale the area light) to diffuse the light and have a more uniform lighting to present the character… very effective and very simple:
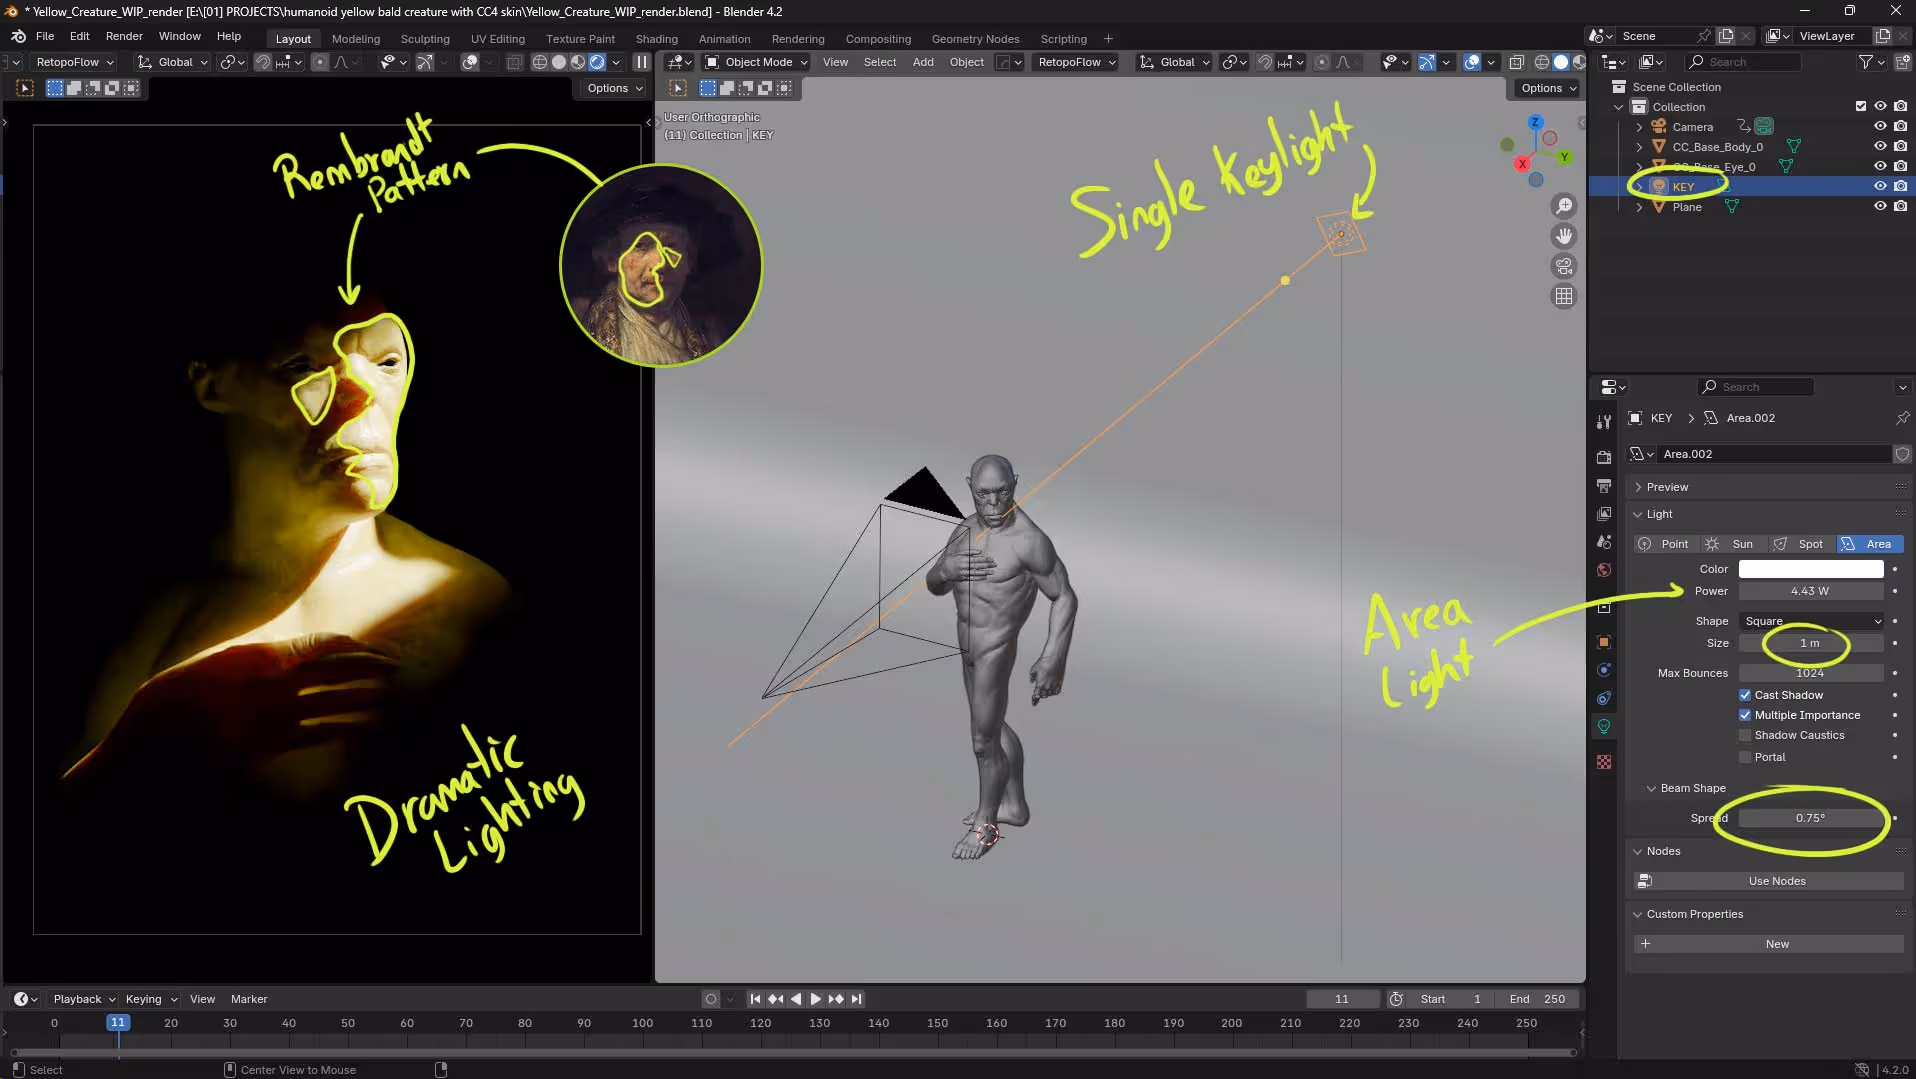
But there is a lot more you can do with a single light source… if you definitely want something more dramatic, you can reduce the size of the area light, reduce the ‘Spread’ significantly and play with the ‘power’ of the light… Here is an example of positioning the light in a way that creates a ‘Rembrandt pattern’, like a tiny opening in a very dark room:
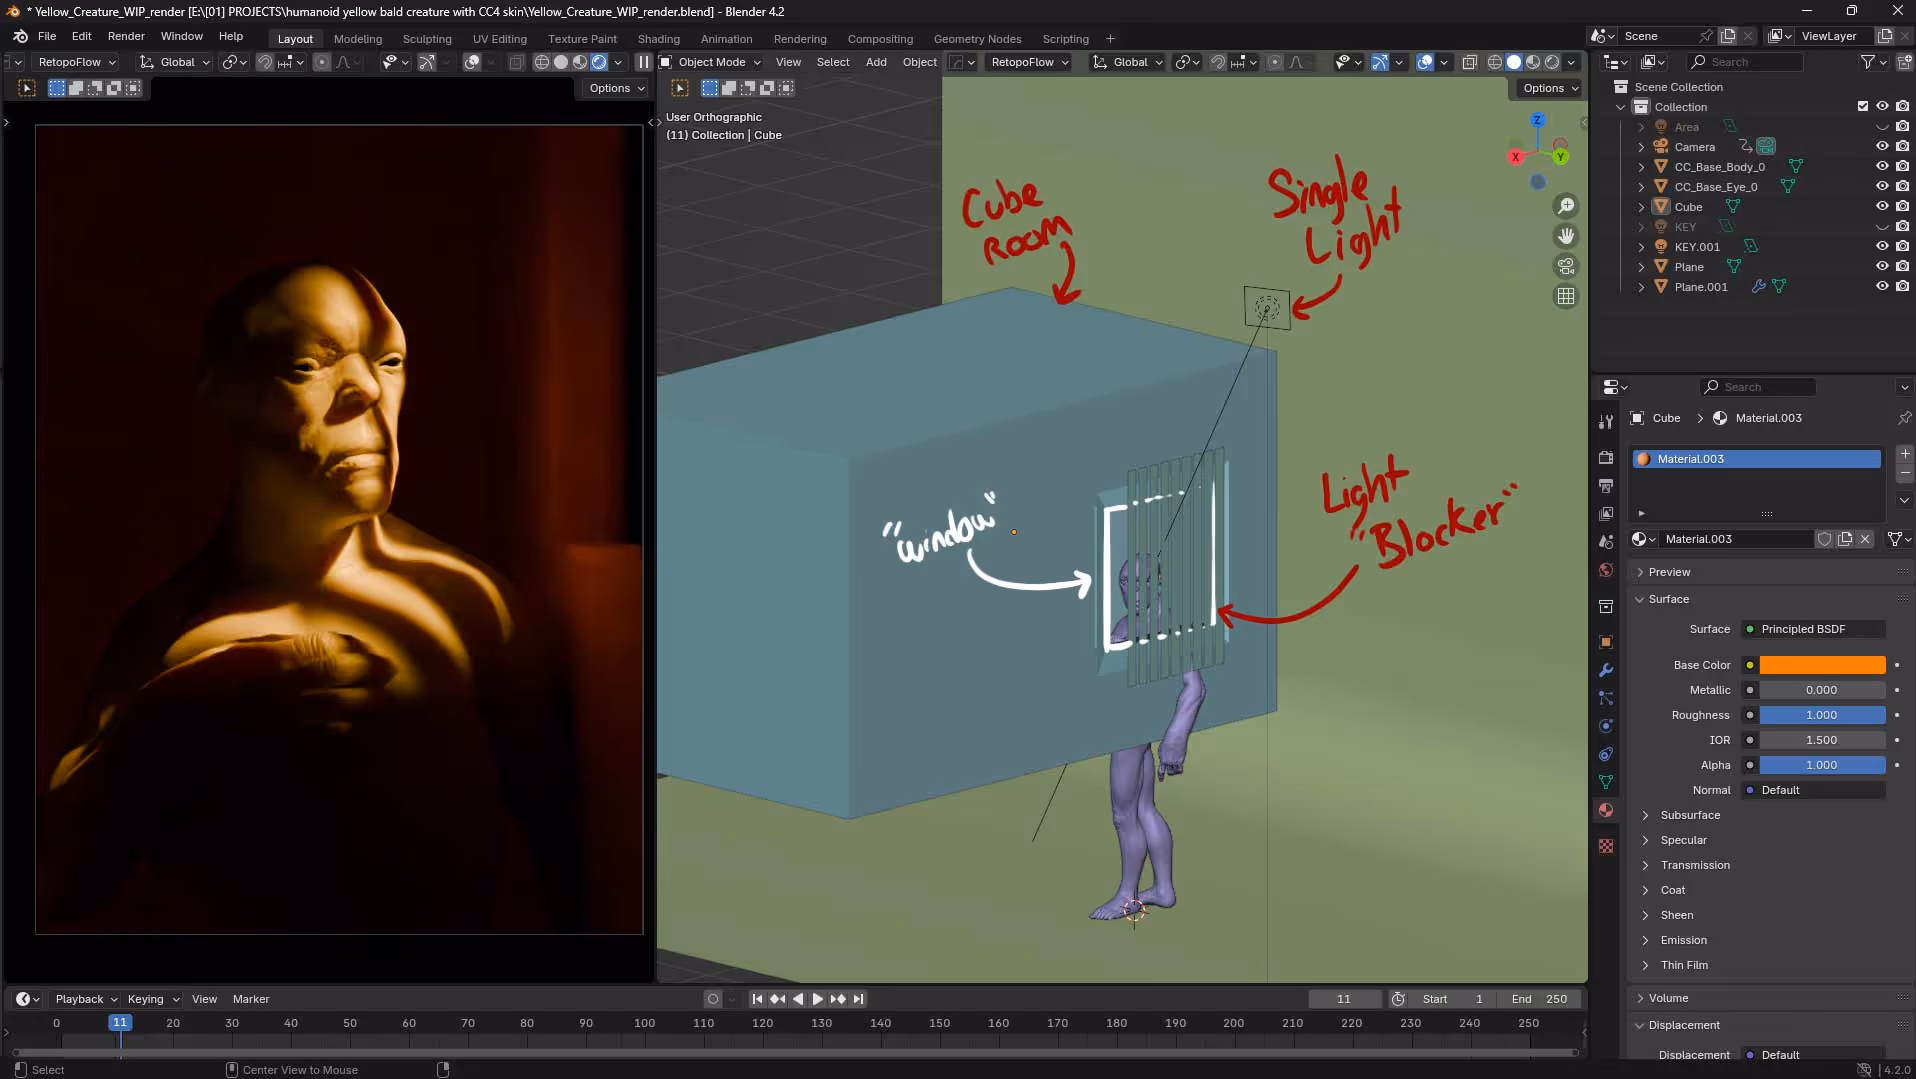
Or you can make a very ‘moody scene’ with the exact same light but adding a cube with an opening to simulate a room and add some simple planes to ‘block the light rays’ to create a more interesting pattern. I also tinted the single light with a warm colour and having the ‘room’ make the light ‘bounce’ and fill some areas:
Alright one last thing that you might find interesting… also using a single light with intention: you can change the Shape of the area light into something like a circle, place the light in front of you concept and tint it with a bit of green to create a creepy night shot where the character is lit up by torch!
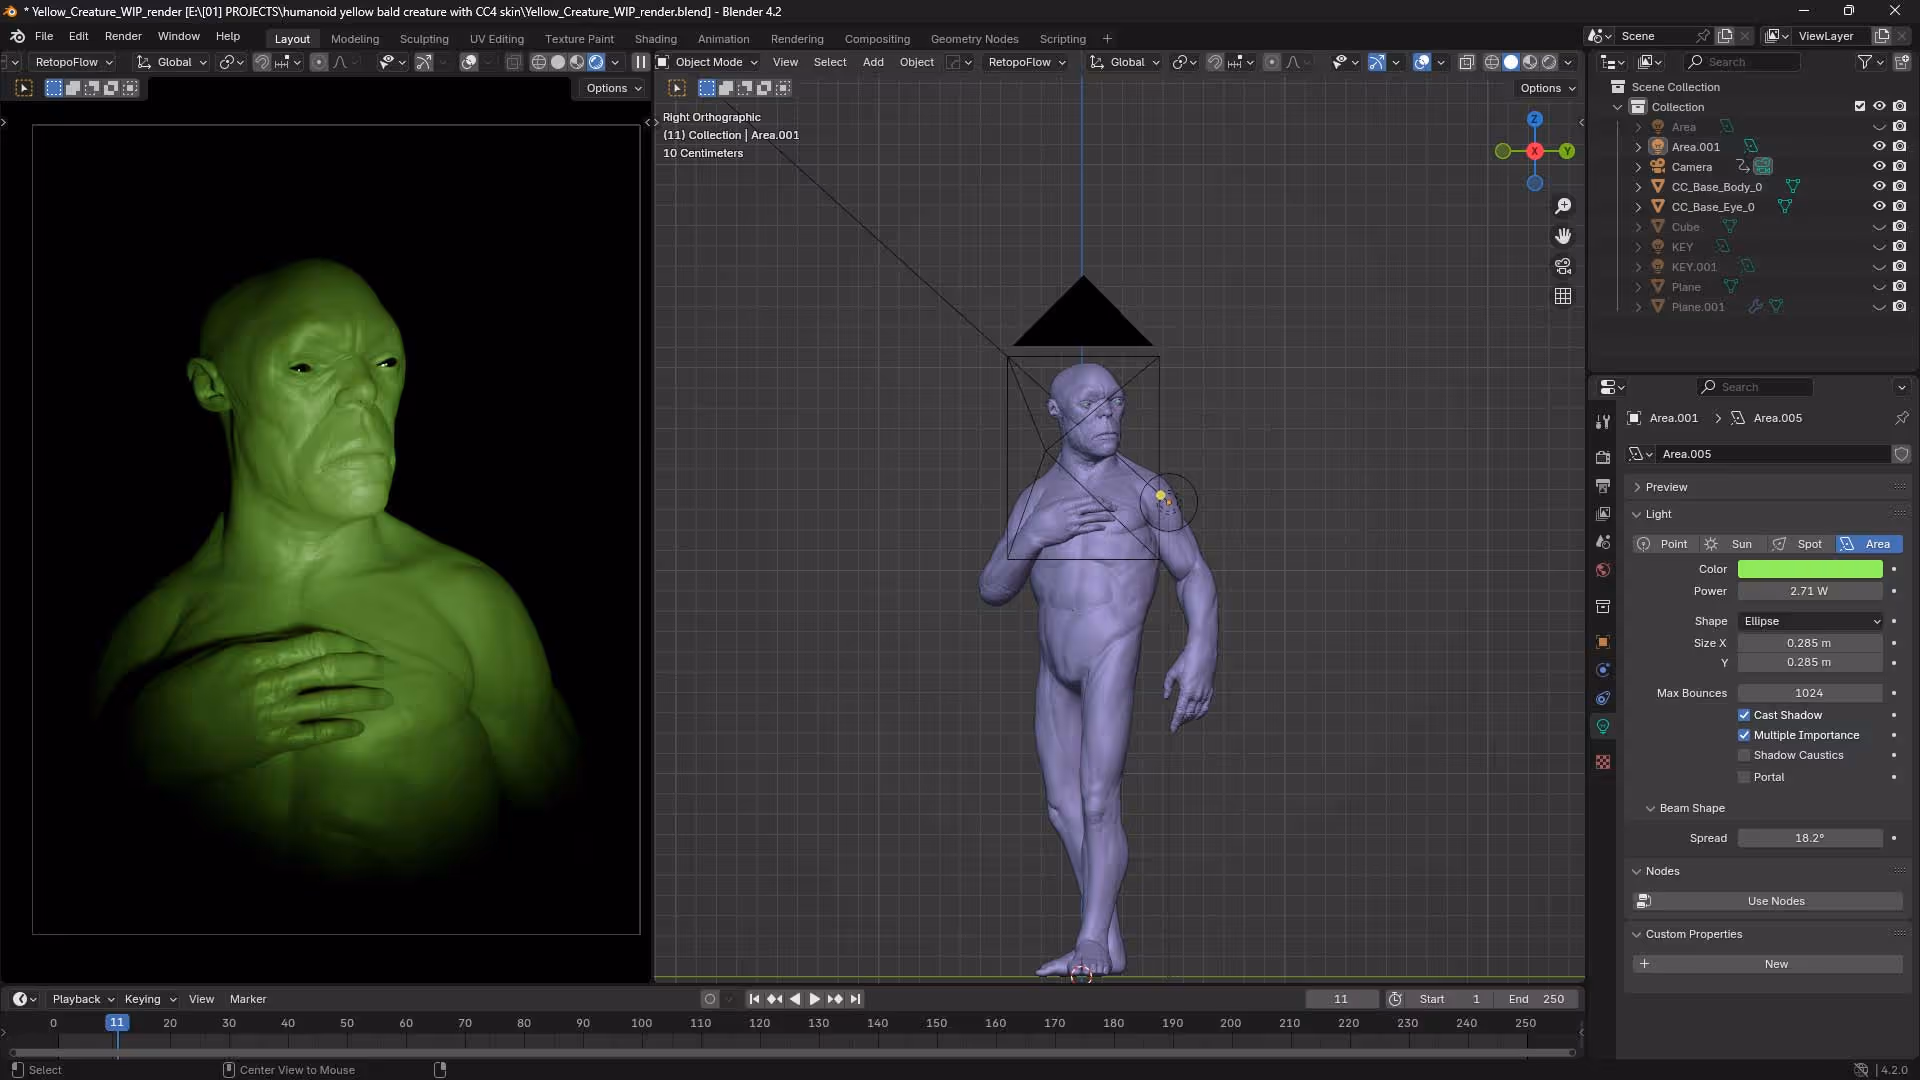
It is all about the intention of the light. You can totally add more and more lights but always ask yourself why you are adding any lights and if you really need them to showcase what you want.
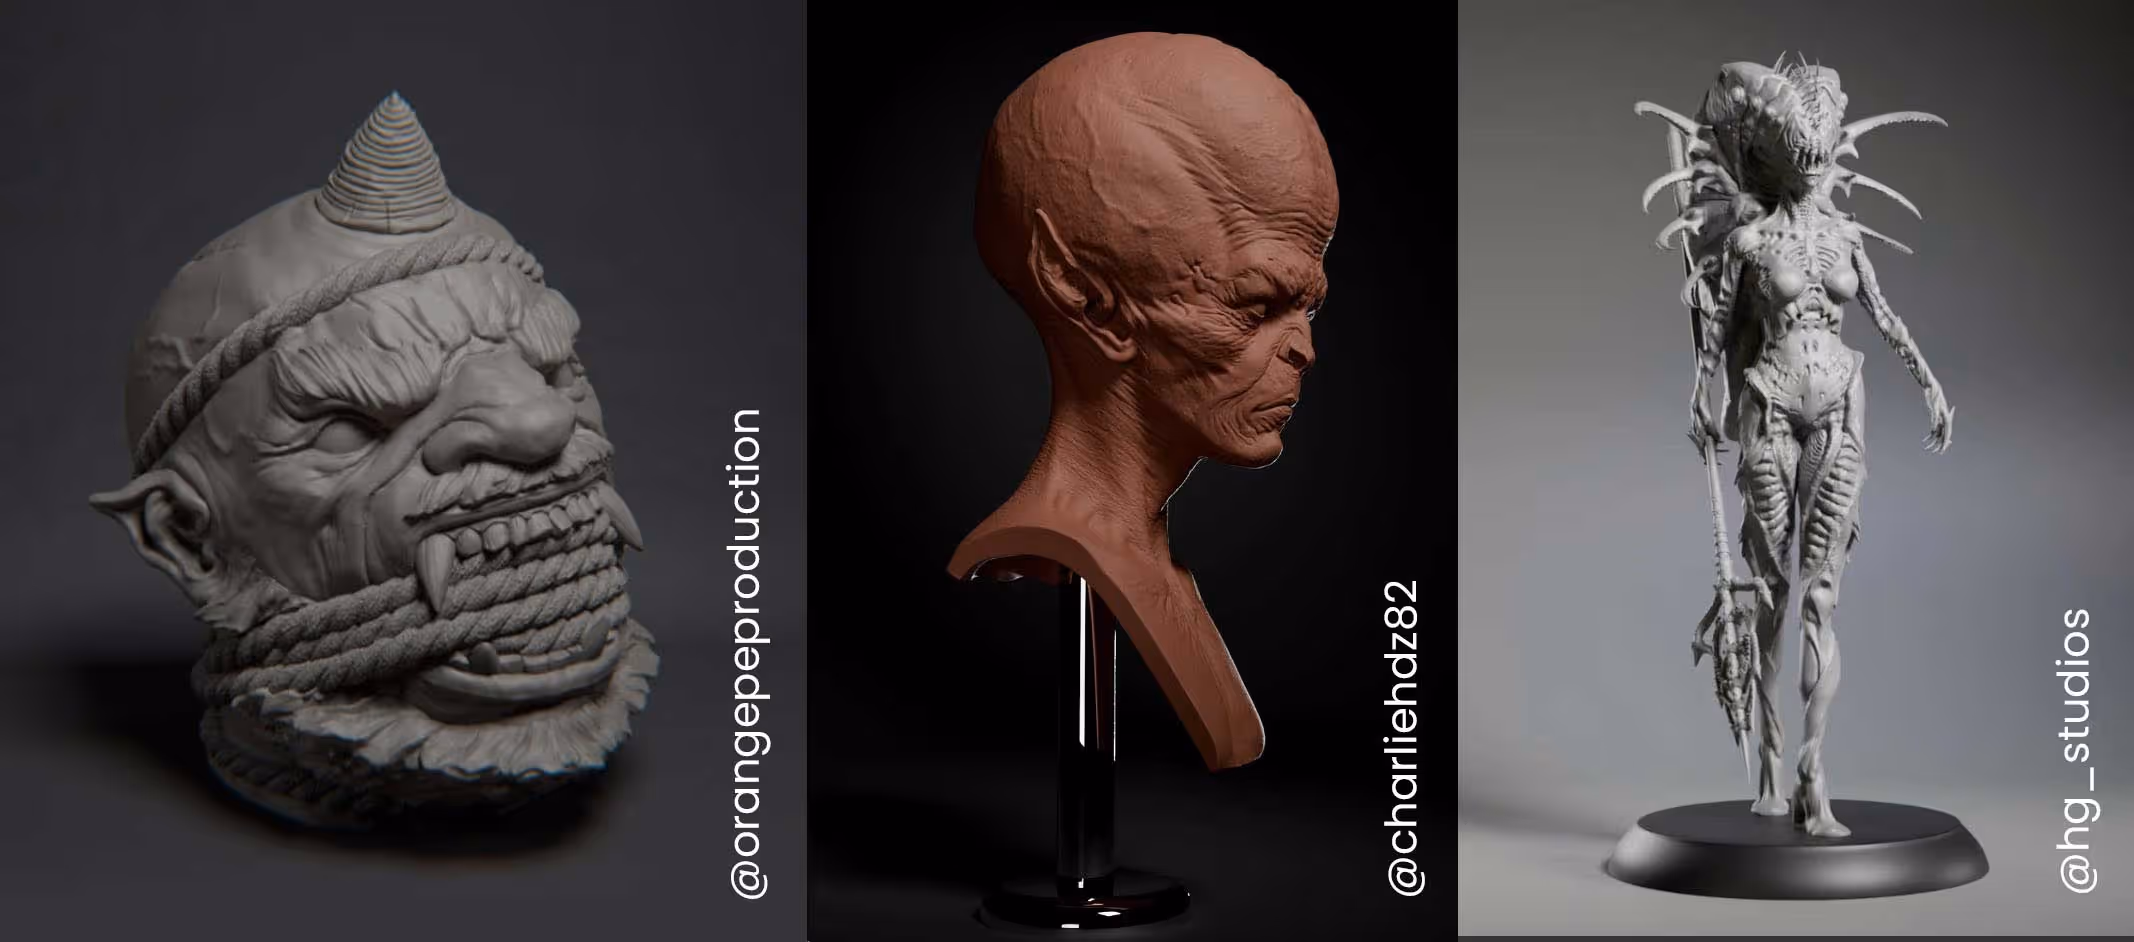
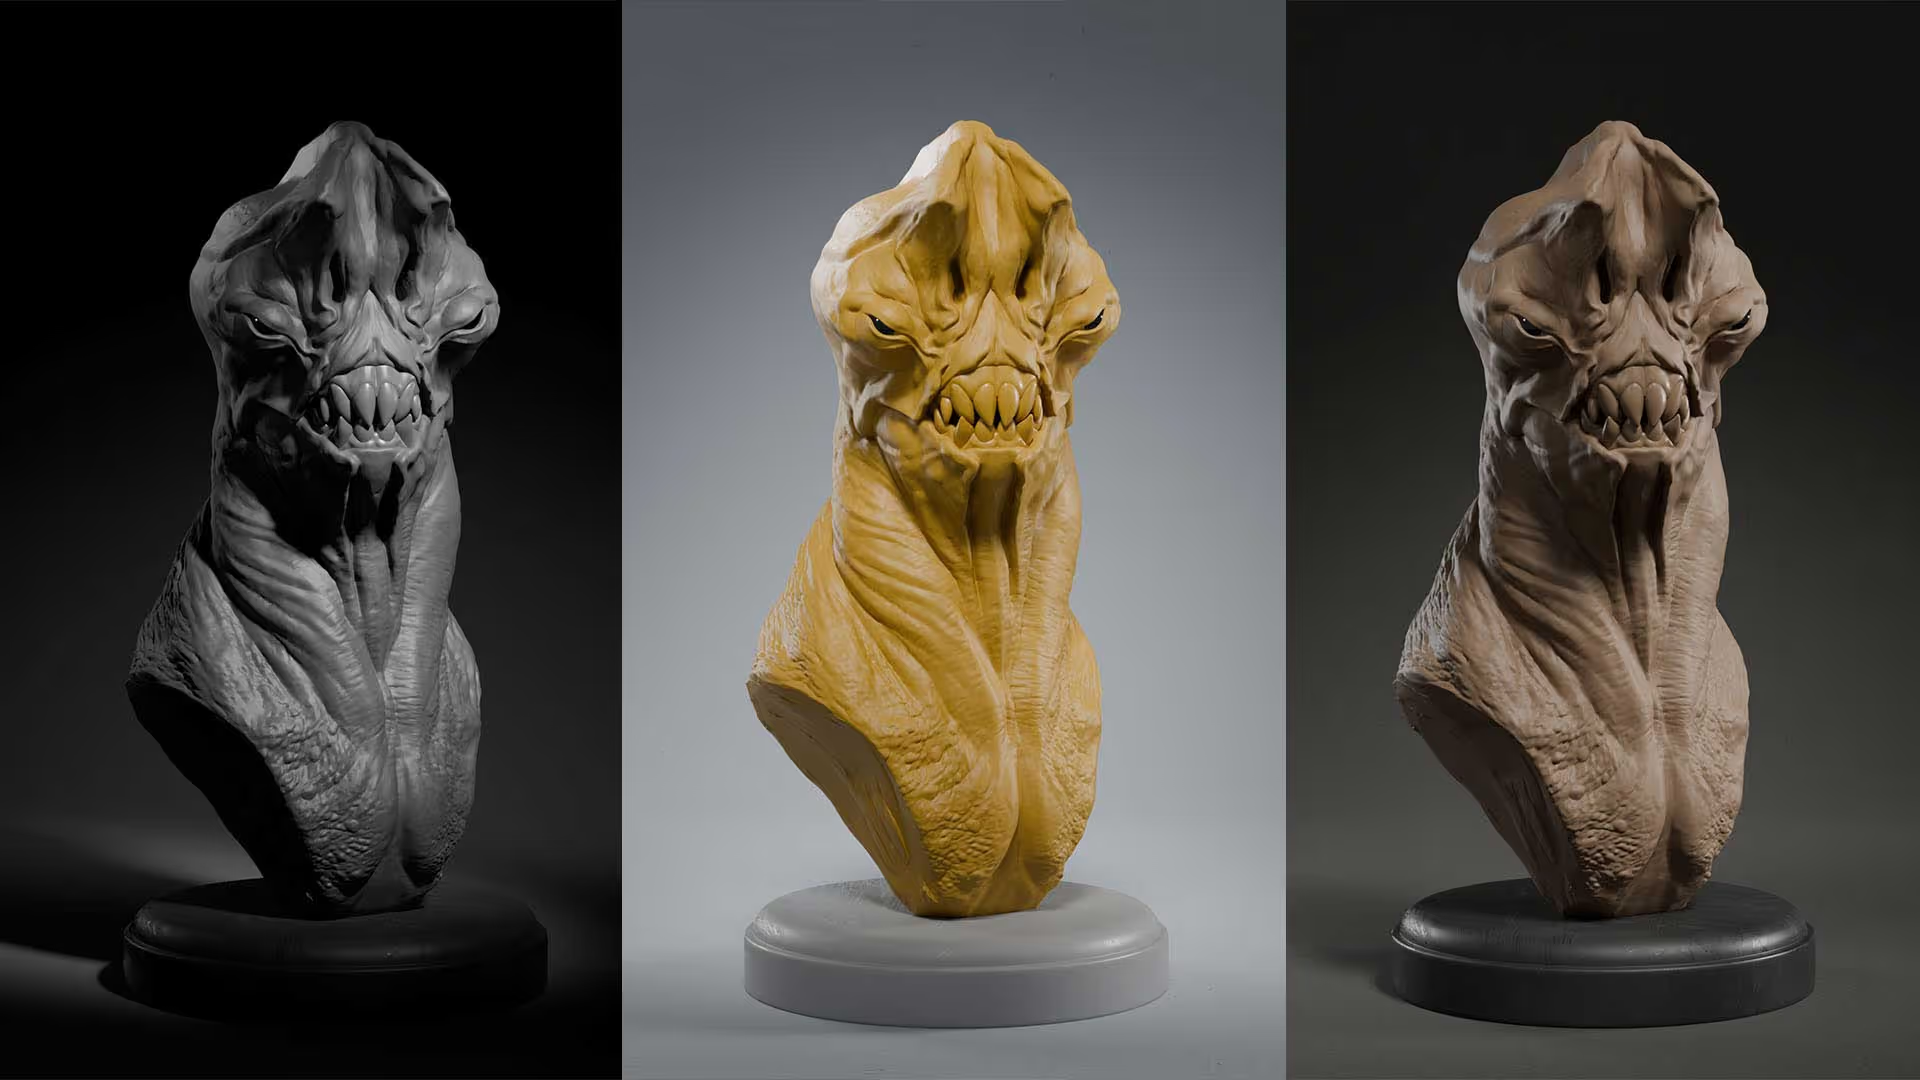
By the way, if you find the tutorial useful, feel free to tag me @Pablander I’d love to see the results. Here are some of the cool stuff people have shared with me after completing the tutorial:


.webp)

.webp)