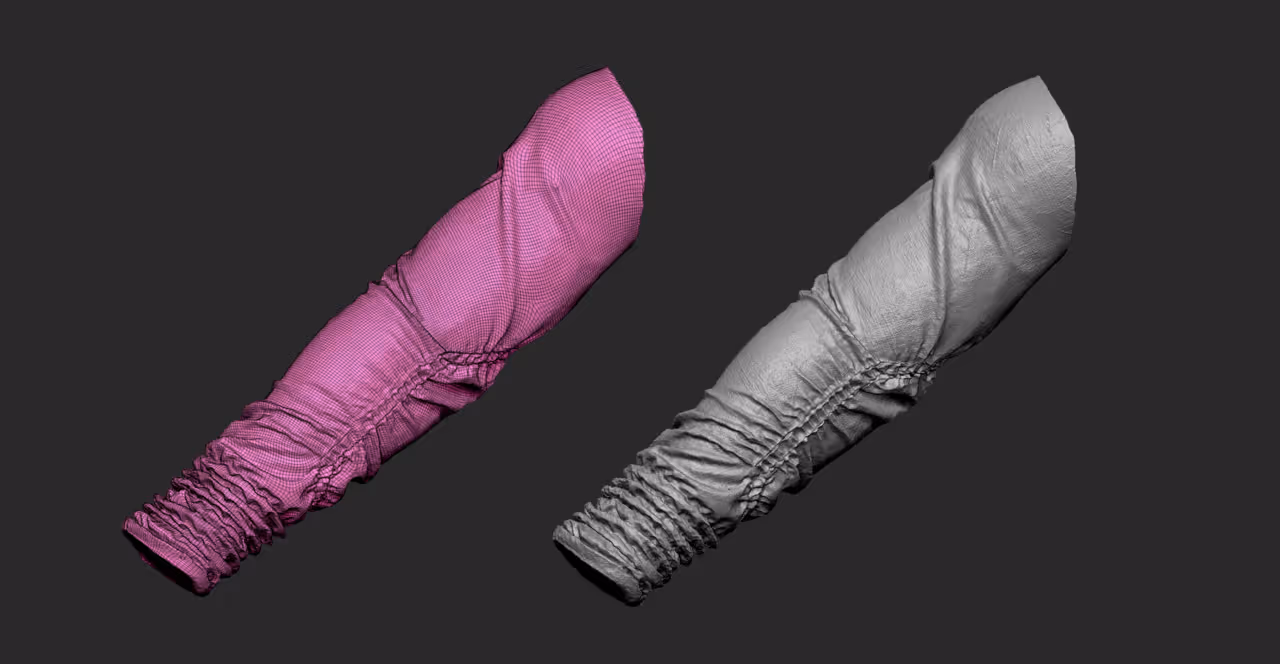
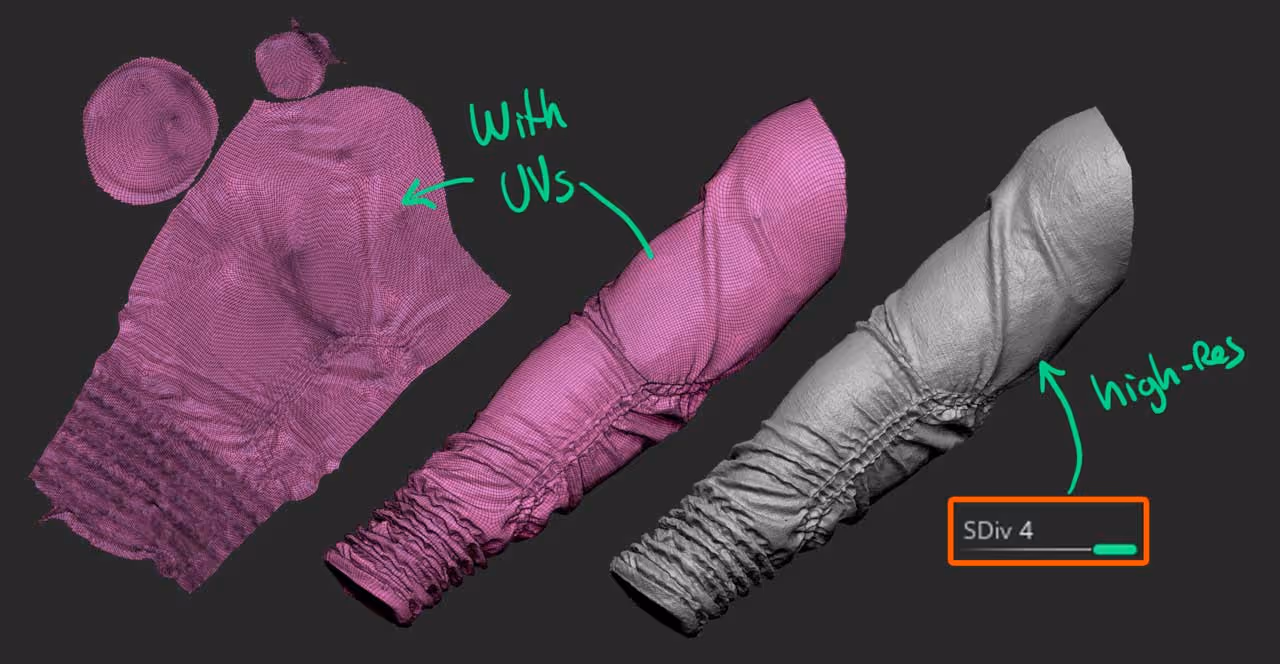
All you need is a mesh with UVs. As an example I'm using the sleeve from a character I was working on. I have some quick UVs from the UV master and 4 levels of subdivision with details:
The UV Morph features is awesome!
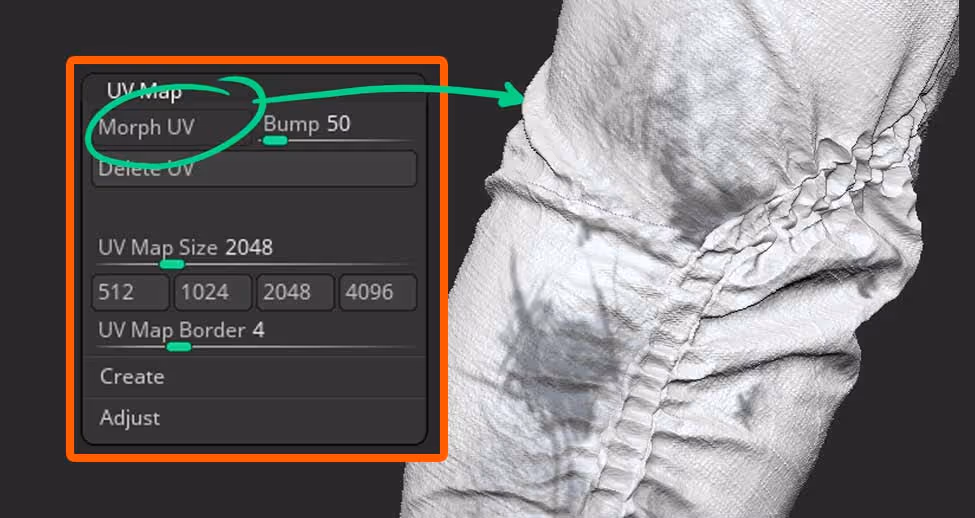
The next step would be to take advantage of the UV Morph feature from ZBrush 2020. It allows you to have an EDITABLE flat view of your model as long as you have UVs.
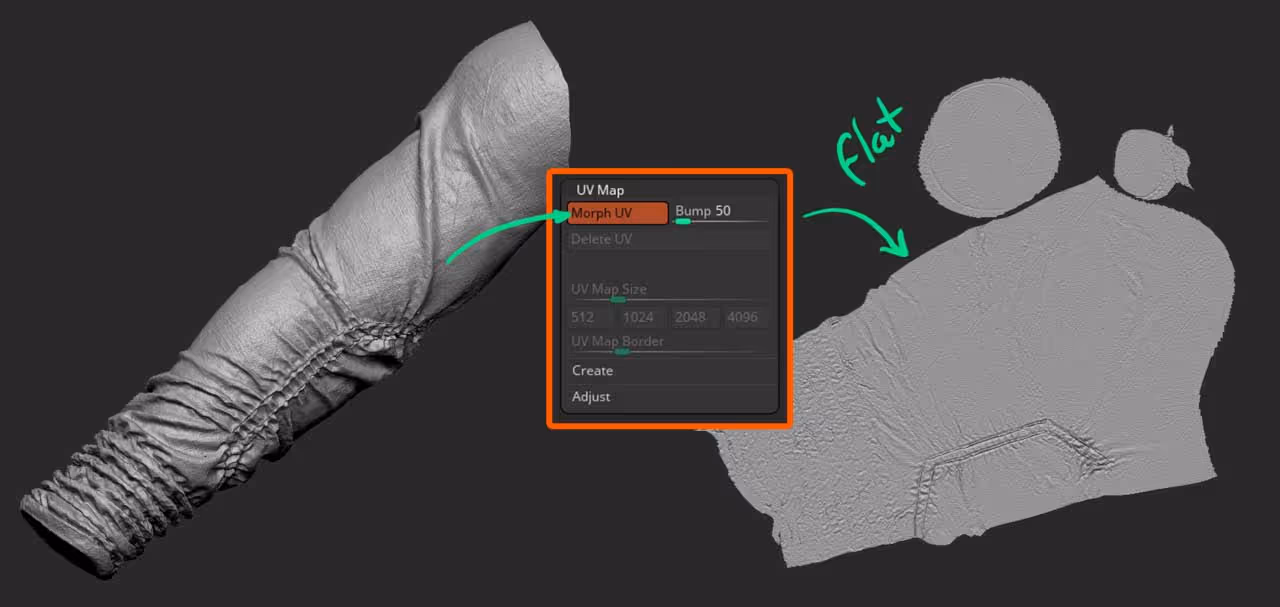
From the UV Map sub-palette click the UV Morph switch while you are in the highest subdivision level of your mesh:
Masking!
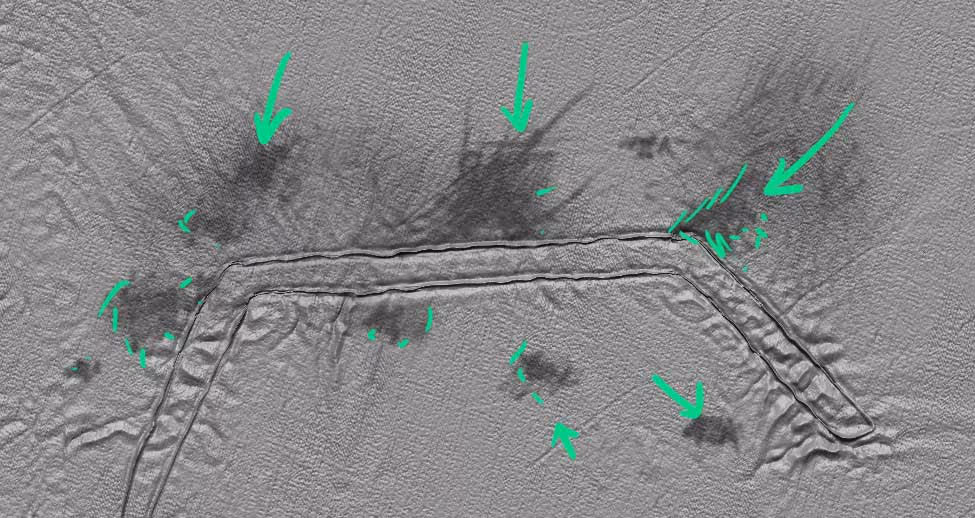
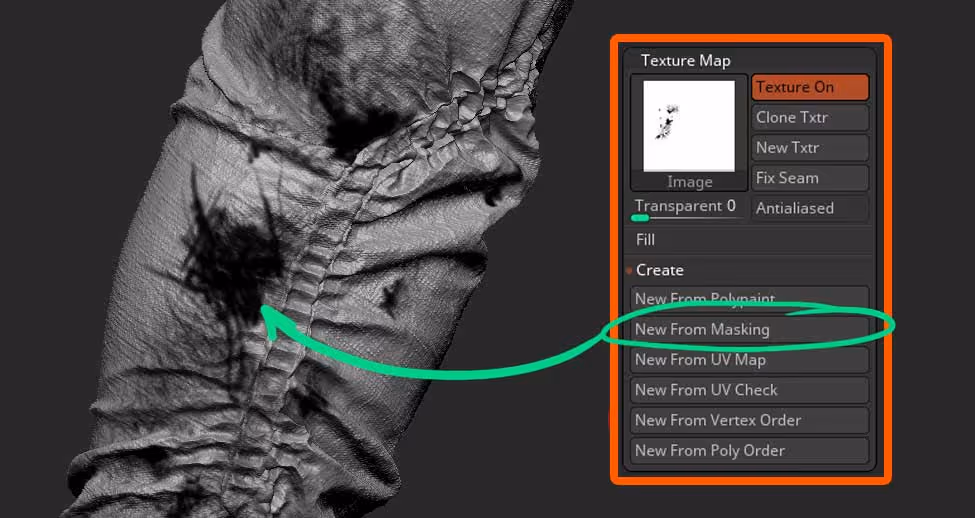
Now is all about masking. You can use any masking tools to define the areas you want to 'torn apart' in your fabric. I found the flat view of the UV morph feature super useful but you can also switch of UV Morph and continue the refinement of your mask:
Texture from Mask
Now that you have the areas defined with your mask, you need to go to the Texture sub-palette and click on the 'New from Masking' button. This will create a black and white textures based on the masking you did.
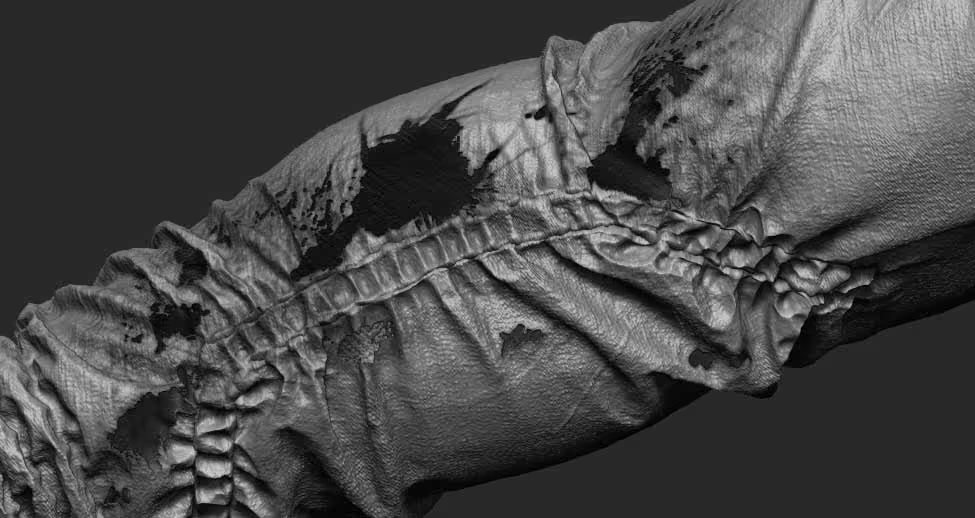
Here is the magic...
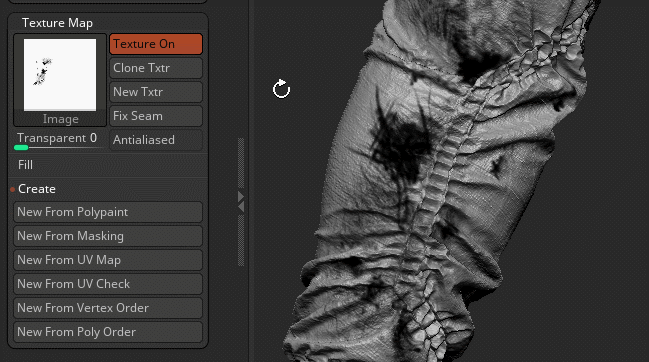
Now that we have a black and white texture from the masked areas, we can use the Transparent slider and ZBrush will interpret anything that is black in that texture, as transparent! (make sure you switch 'Antialiased' ON as well).
(if there is anything you don't like, you can simply mask or unmask things again and create another texture from masking).
The great thing about this trick is that the BPR render in ZBrush will respect those transparent areas at render time!
This tip is something that I cover in my Clothes & Drapery mini course, so if you are interesting in more of these techniques, check the links to the course below ;)


.webp)

.webp)