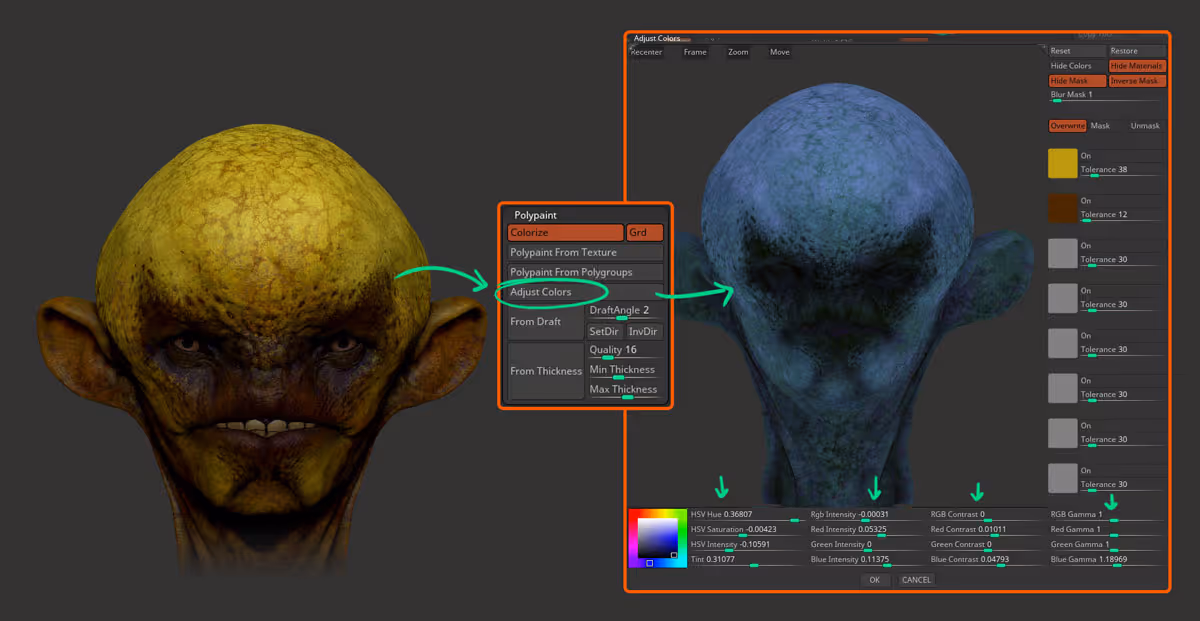
- To start with, I have a detailed polypaint texture in a subdivided model (~7mil). To push the color variation and explore patterns, you can use the Adjust color button from the polypaint palette... the trick is to change the entire polypaint, so don't worry about masking areas, simply change the hue, contrast, gamma, etc. to the whole thing:
- Now, after you accepted the changes, you can repeat the process of altering the entire polypaint a few times and each 'new version' will be recorded in the Undo History:
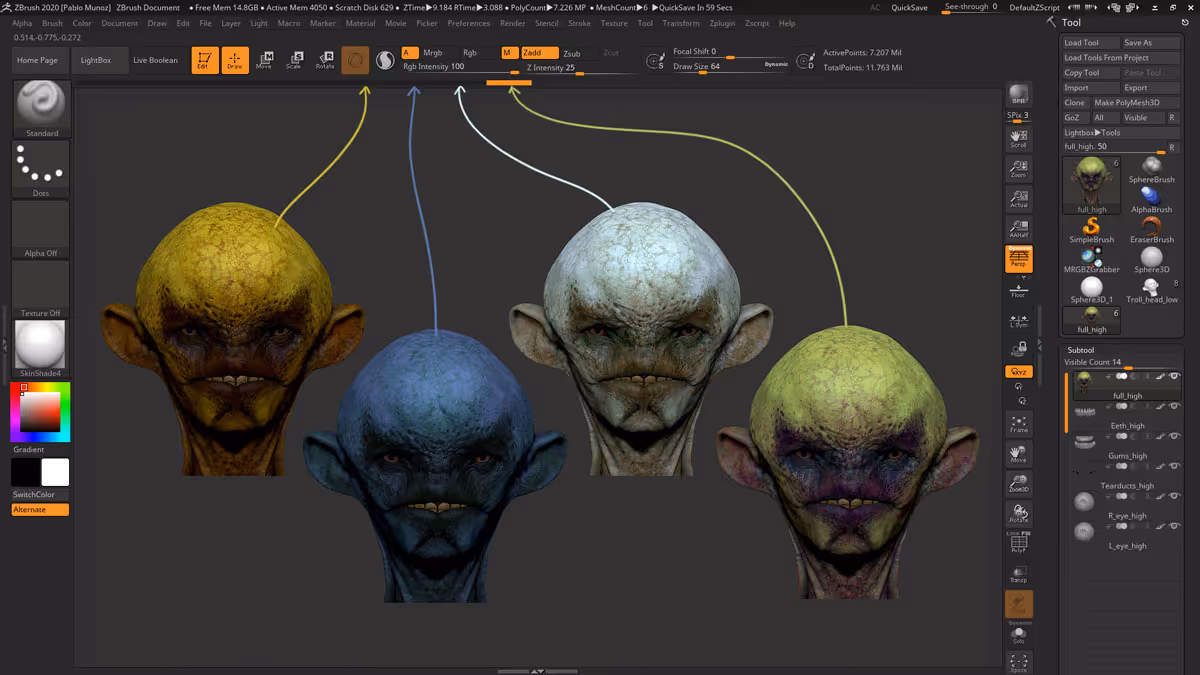
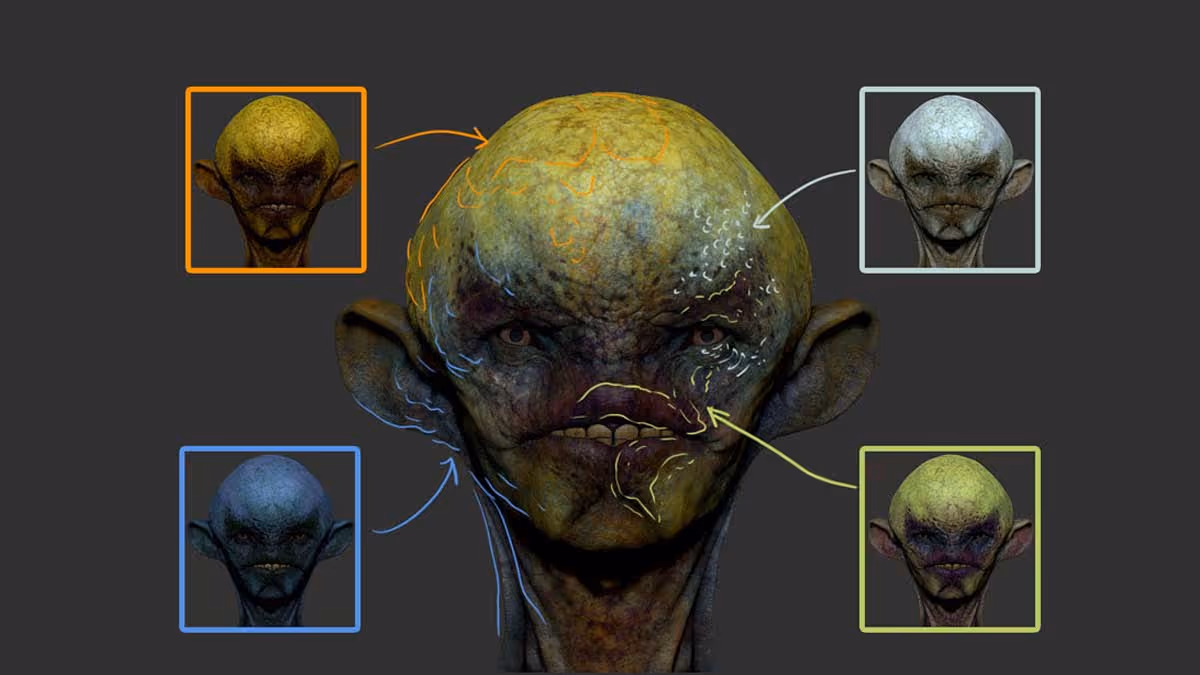
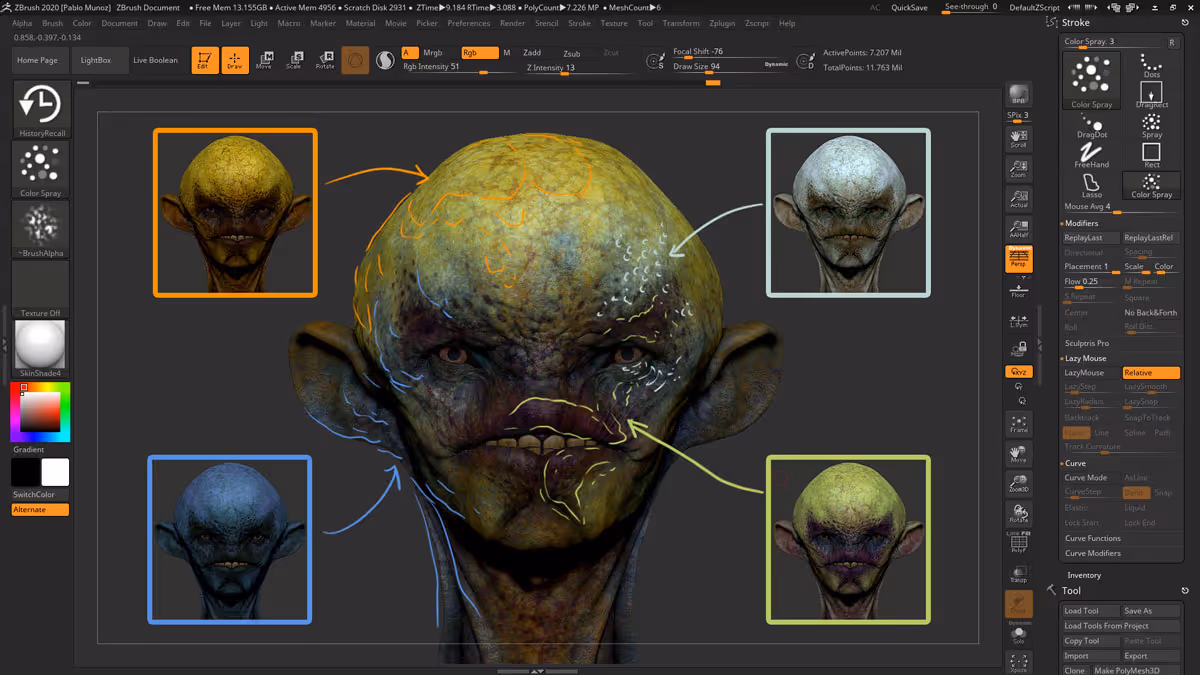
- So basically you end up with a bunch of colour variations each one of them living in its own 'undo' step so we can use the History Brush (BHR) to apply any of these variations to our 'latest' version of the polypaint. To set a 'marking', hold Ctrl + click the undo you want and then go back to the latest step to paint (make sure only the RGB switch is enabled).
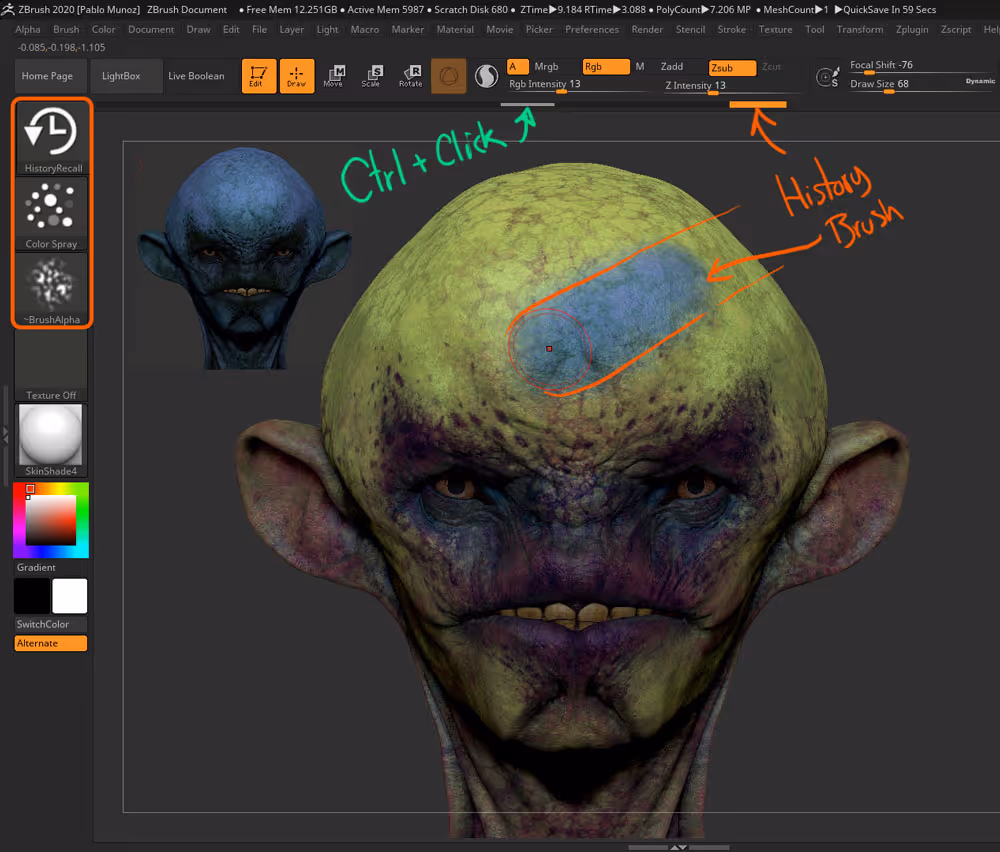
- You can change the stroke and the alpha on the History Brush and use it as a very unique painting brush that only paints with the colour information set in previous steps (colour variations).
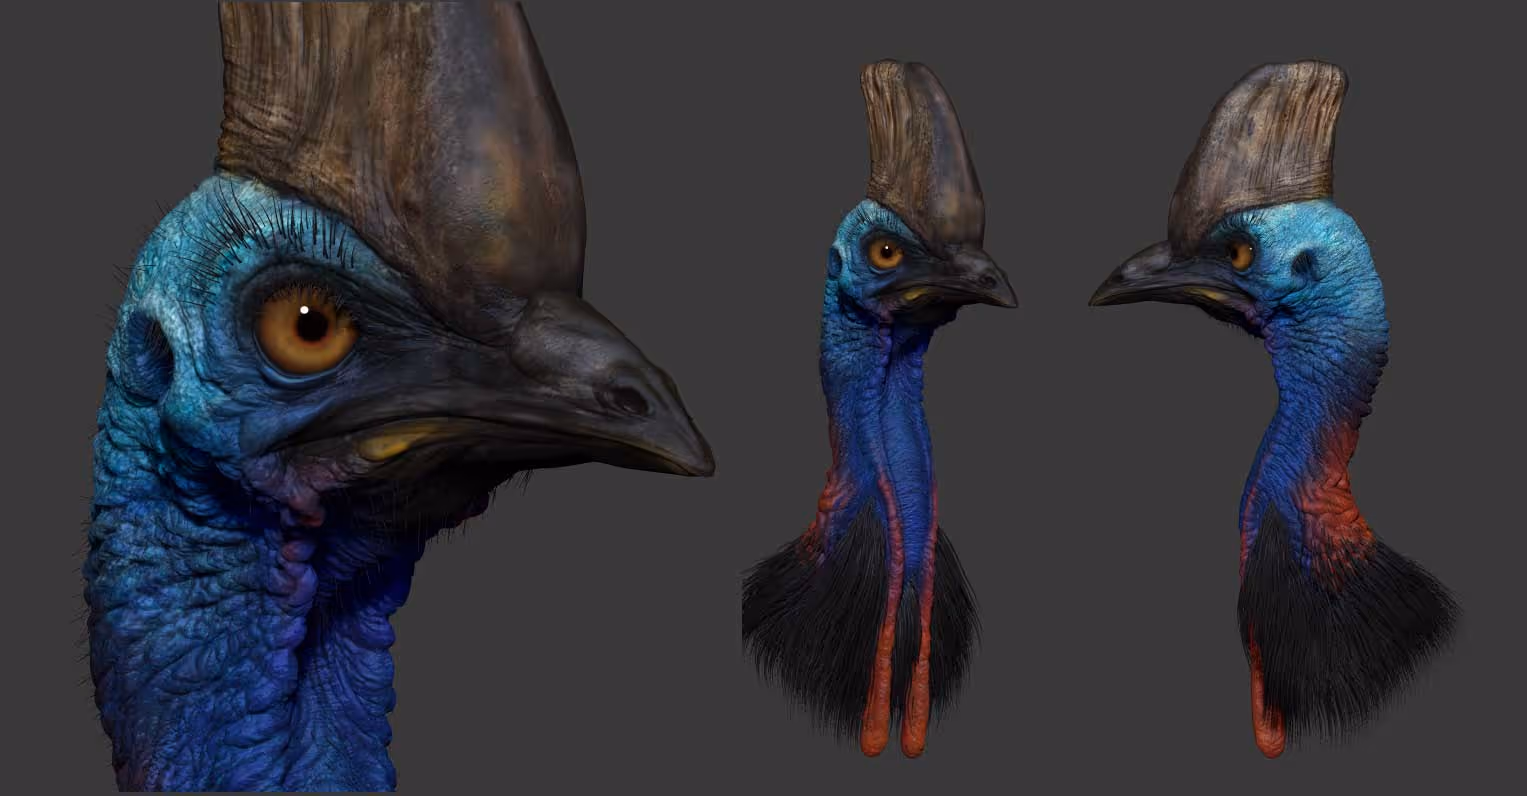
That's it! I found this polypainting approach very powerful and it allows you to produce a very intricate texture very quickly.


.webp)

.webp)