Anyway, the tip is pretty cool and is applicable to lots of different scenarios because it is like ‘pealing and orange’ (or similar… I’m running low on metaphors).
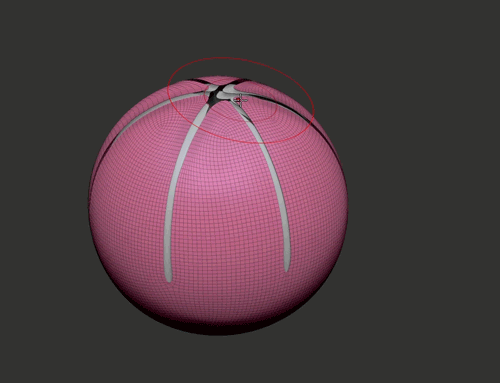
Let’s start with a subdivided polysphere and use the selection tools (or ZModeler) to delete some faces in this fashion:
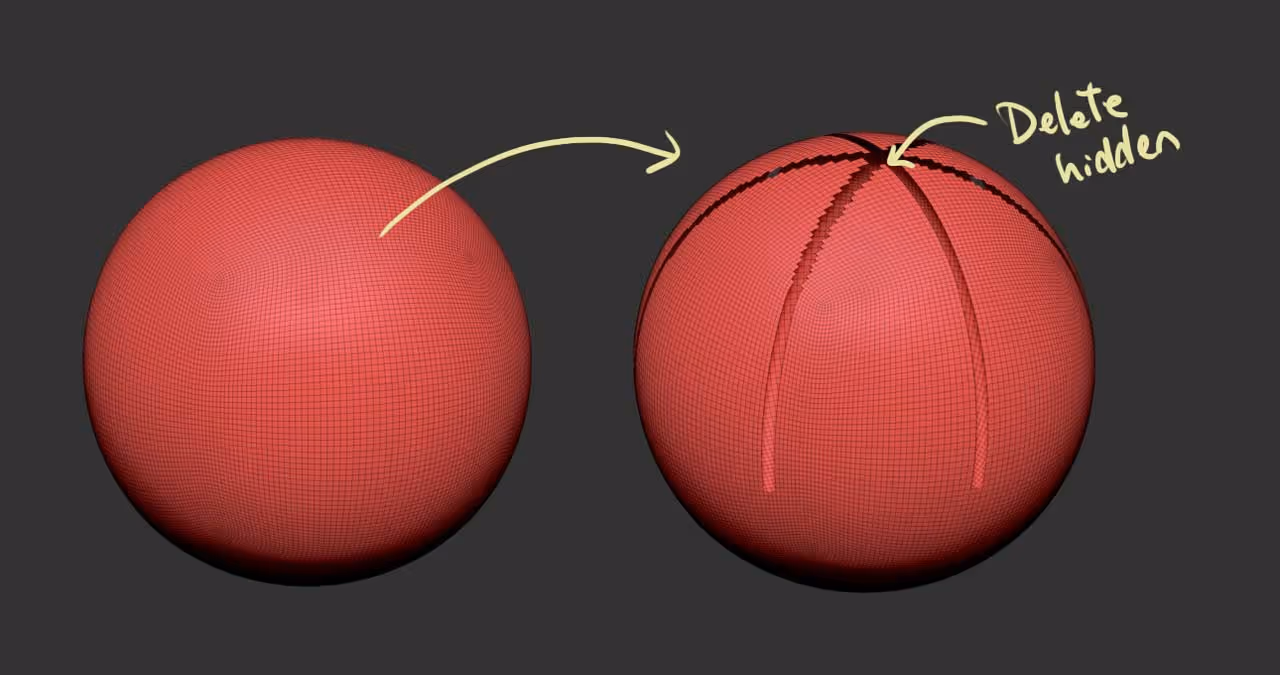
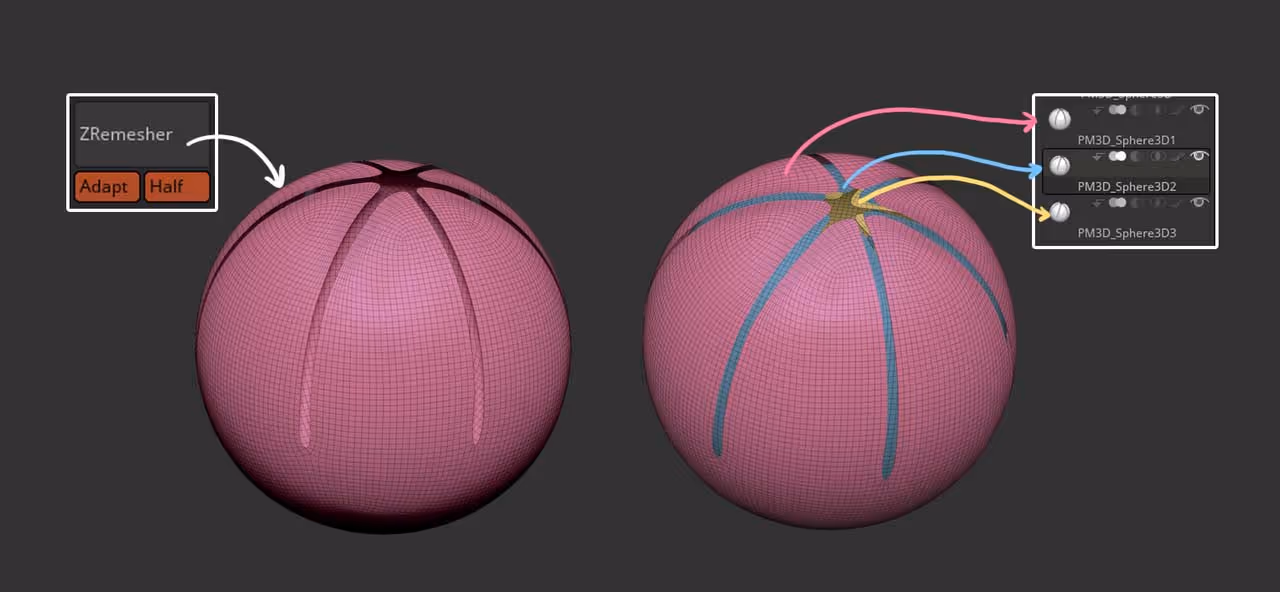
Delete the hidden faces and to clean up those edges you can run a quick ZRemesher to have a more decent topology. Duplicate the sphere a couple of times and scale it inwards a bit.
Now you can switch to the ‘ClothMove’ brush and turn on the Topological switch from the Auto Masking sub-palette in the Brush palette. Also, make sure you switch on the CollisionVolume switch in the Dynamics Palette.
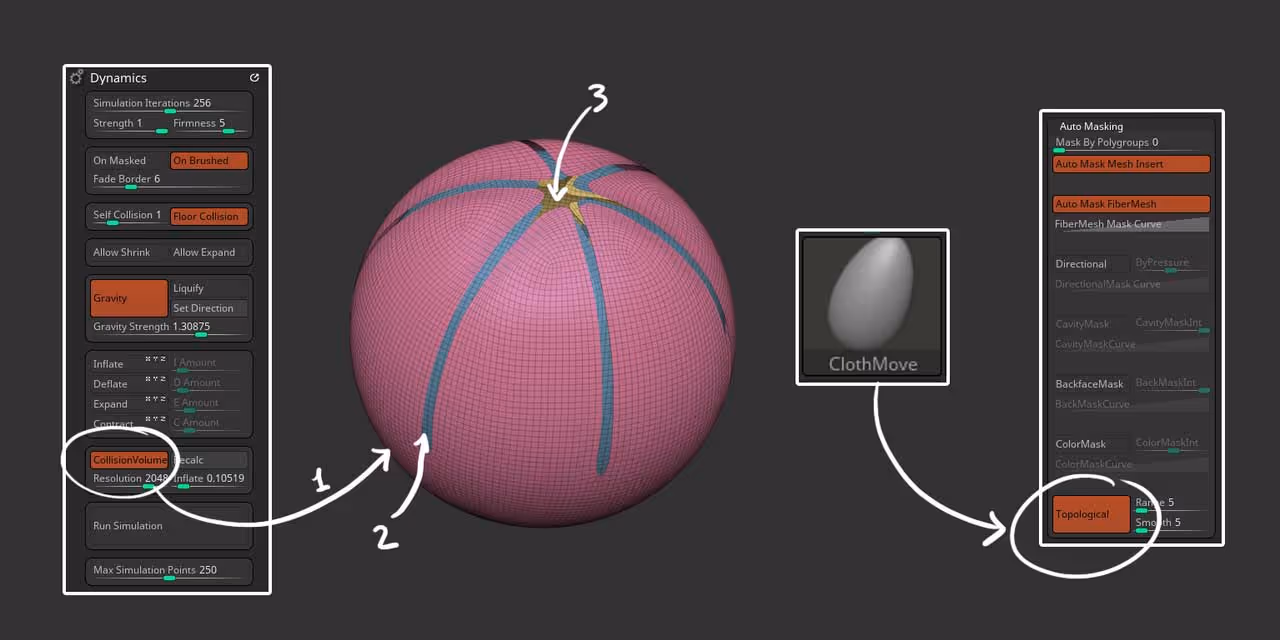
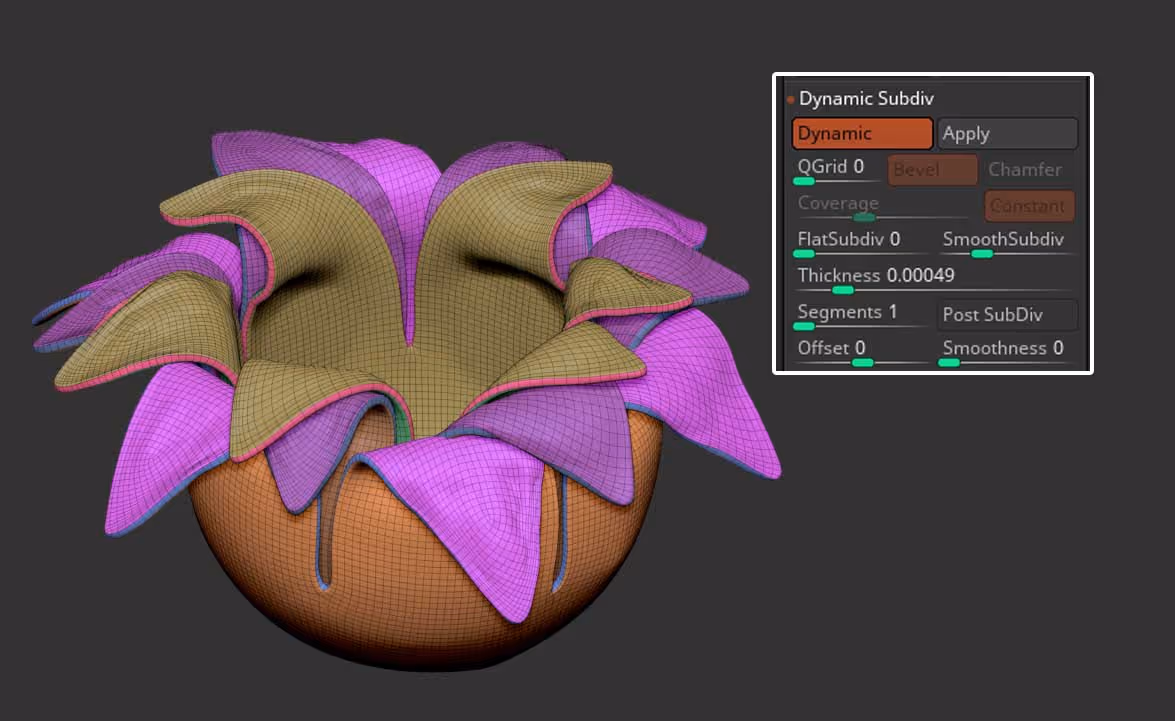
Now with this simple setup, click on the top of the sphere pieces and drag them out to ‘peal’ the spheres and watch the magic happen the Dynamics in ZBrush (you can tweak the Firmness settings to make in the Dynamics Palette to give it more ‘structure’):
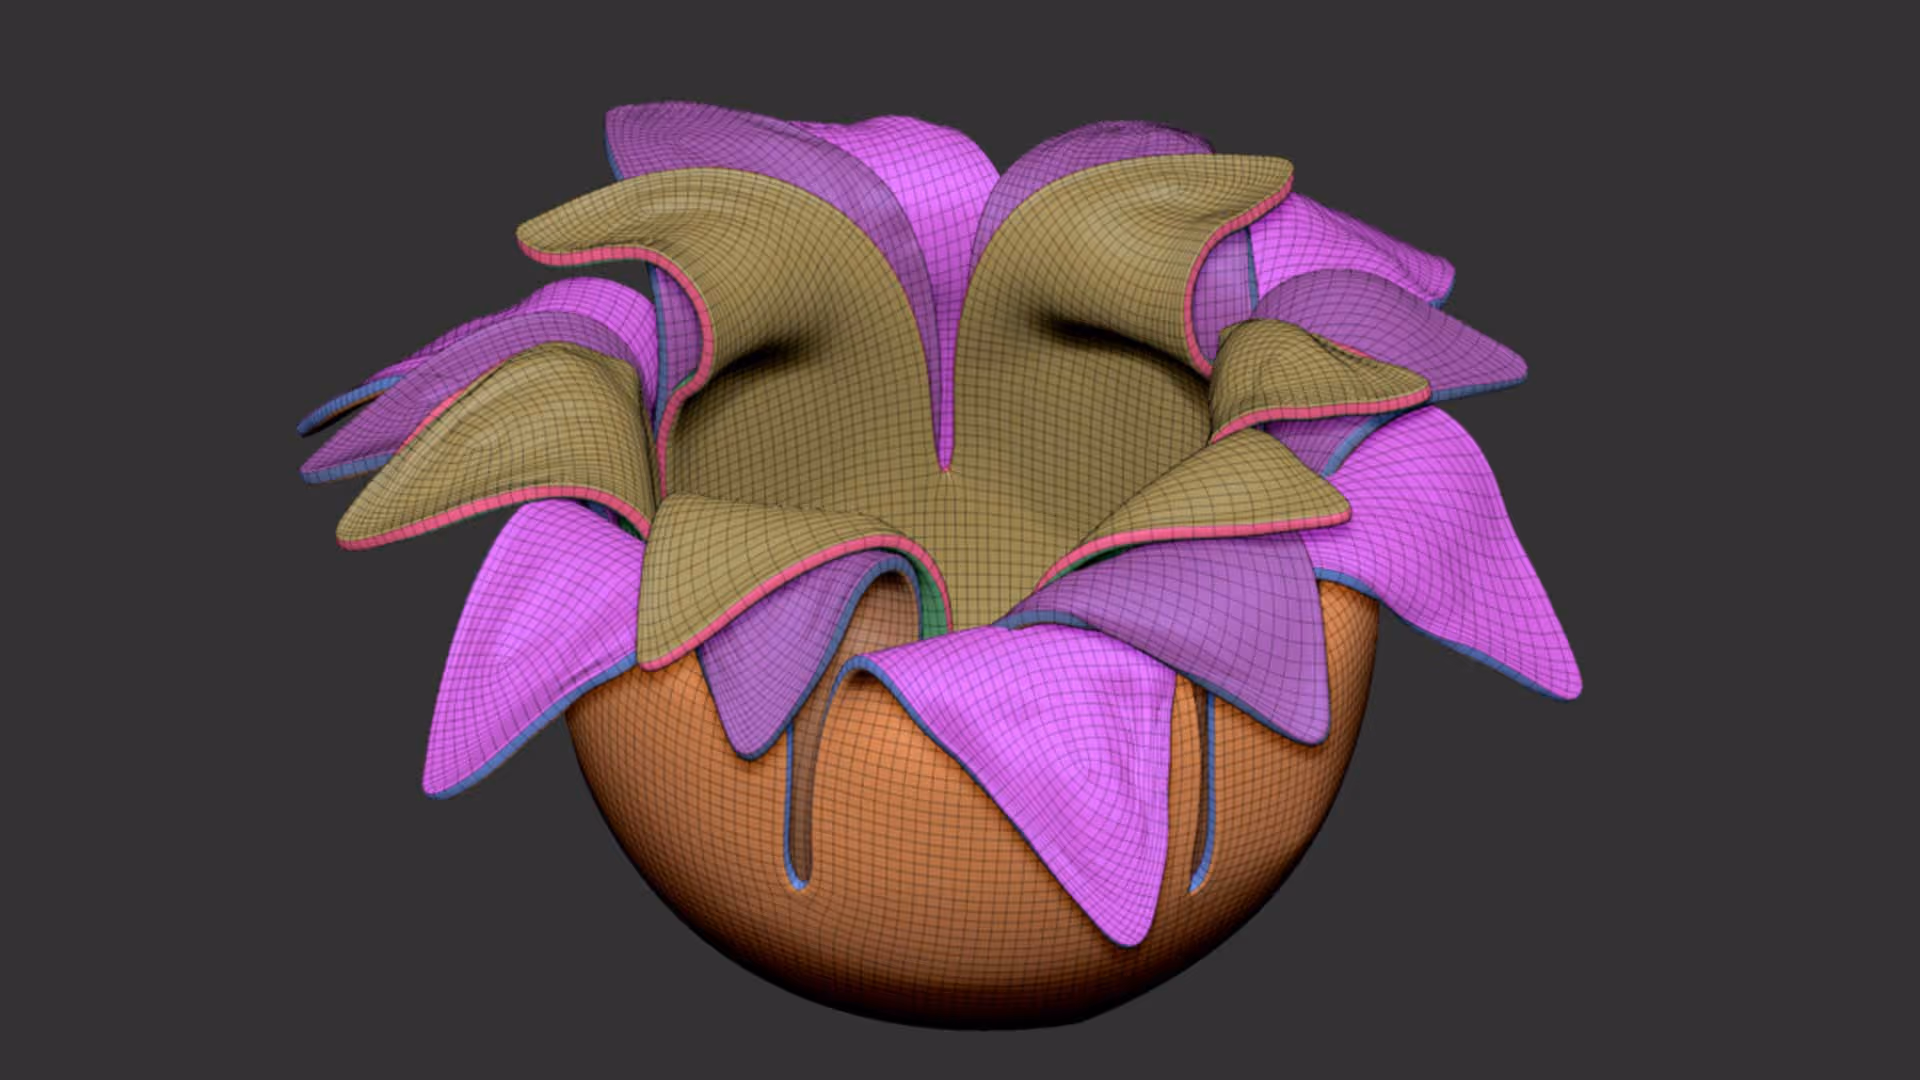
Repeat the process for all sections of the outer and inner spheres and add a bit of thickness with Dynamic subdivision… Pretty cool right? I’m sure you can see the usefulness of this process in a variety of scenarios.


.webp)

.webp)