Published
June 7, 2022

Comic-style outlines with geometry in ZBrush

In this short video tutorial, I’m going to share a quick tip to create comic-style outlines in ZBrush using geometry. You can achieve a very decent ‘comic look’ using the Comic material I shared in this tutorial, but this additional tip allows you to control the outline to make it more consistent or even ‘sculpt the thickness’ yourself… Also, it works as an outline on any material so you don’t need to rely on the comic shader ;)

Comic-style outlines with geometry in ZBrushComic-style outlines with geometry in ZBrush
Comic-style outlines with geometry in ZBrush
Play Icon
Comic-style outlines with geometry in ZBrush
Play Icon
Comic-style outlines with geometry in ZBrush
Play Icon
Comic-style outlines with geometry in ZBrush
Play Icon
Comic-style outlines with geometry in ZBrush
Play Icon
Comic-style outlines with geometry in ZBrush
Play Icon
Comic-style outlines with geometry in ZBrush
Play Icon
Comic-style outlines with geometry in ZBrush
Play Icon
Comic-style outlines with geometry in ZBrush
Play Icon
Comic-style outlines with geometry in ZBrush
Play Icon
Comic-style outlines with geometry in ZBrush
Play Icon
Comic-style outlines with geometry in ZBrush
Play Icon
Comic-style outlines with geometry in ZBrush
Play Icon
Comic-style outlines with geometry in ZBrush
Play Icon
Comic-style outlines with geometry in ZBrush
Play Icon
Comic-style outlines with geometry in ZBrush
Play Icon

Applying the workflow in other software

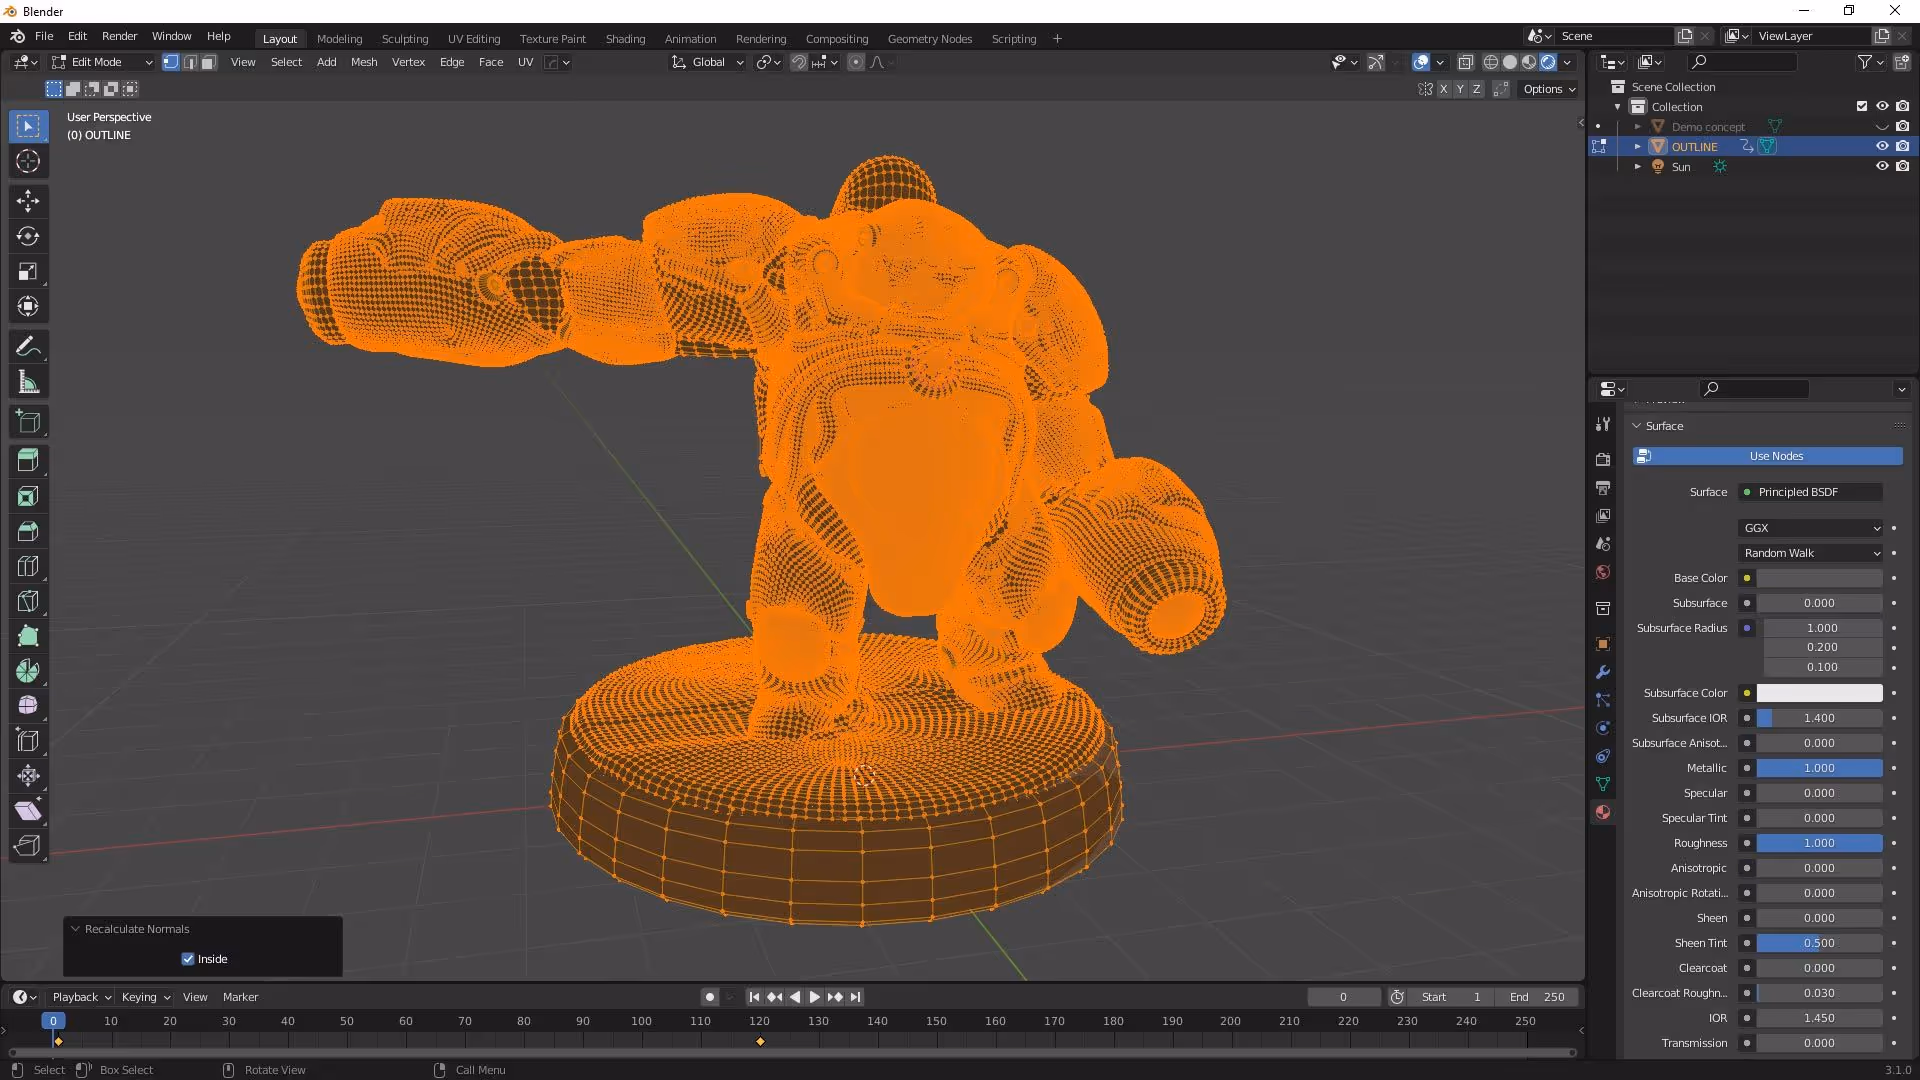
As I mentioned in the tutorial, the cool thing about this technique is that you can pretty much replicate it in most 3D software. Al you have to do is have a duplicate of the mesh and flip the normals.

For instance, in Blender, you can select the duplicate (I called it ‘OUTLINE’) and go into edit mode. With all the faces selected, you can press ‘ Alt + M’ to flip the normals.

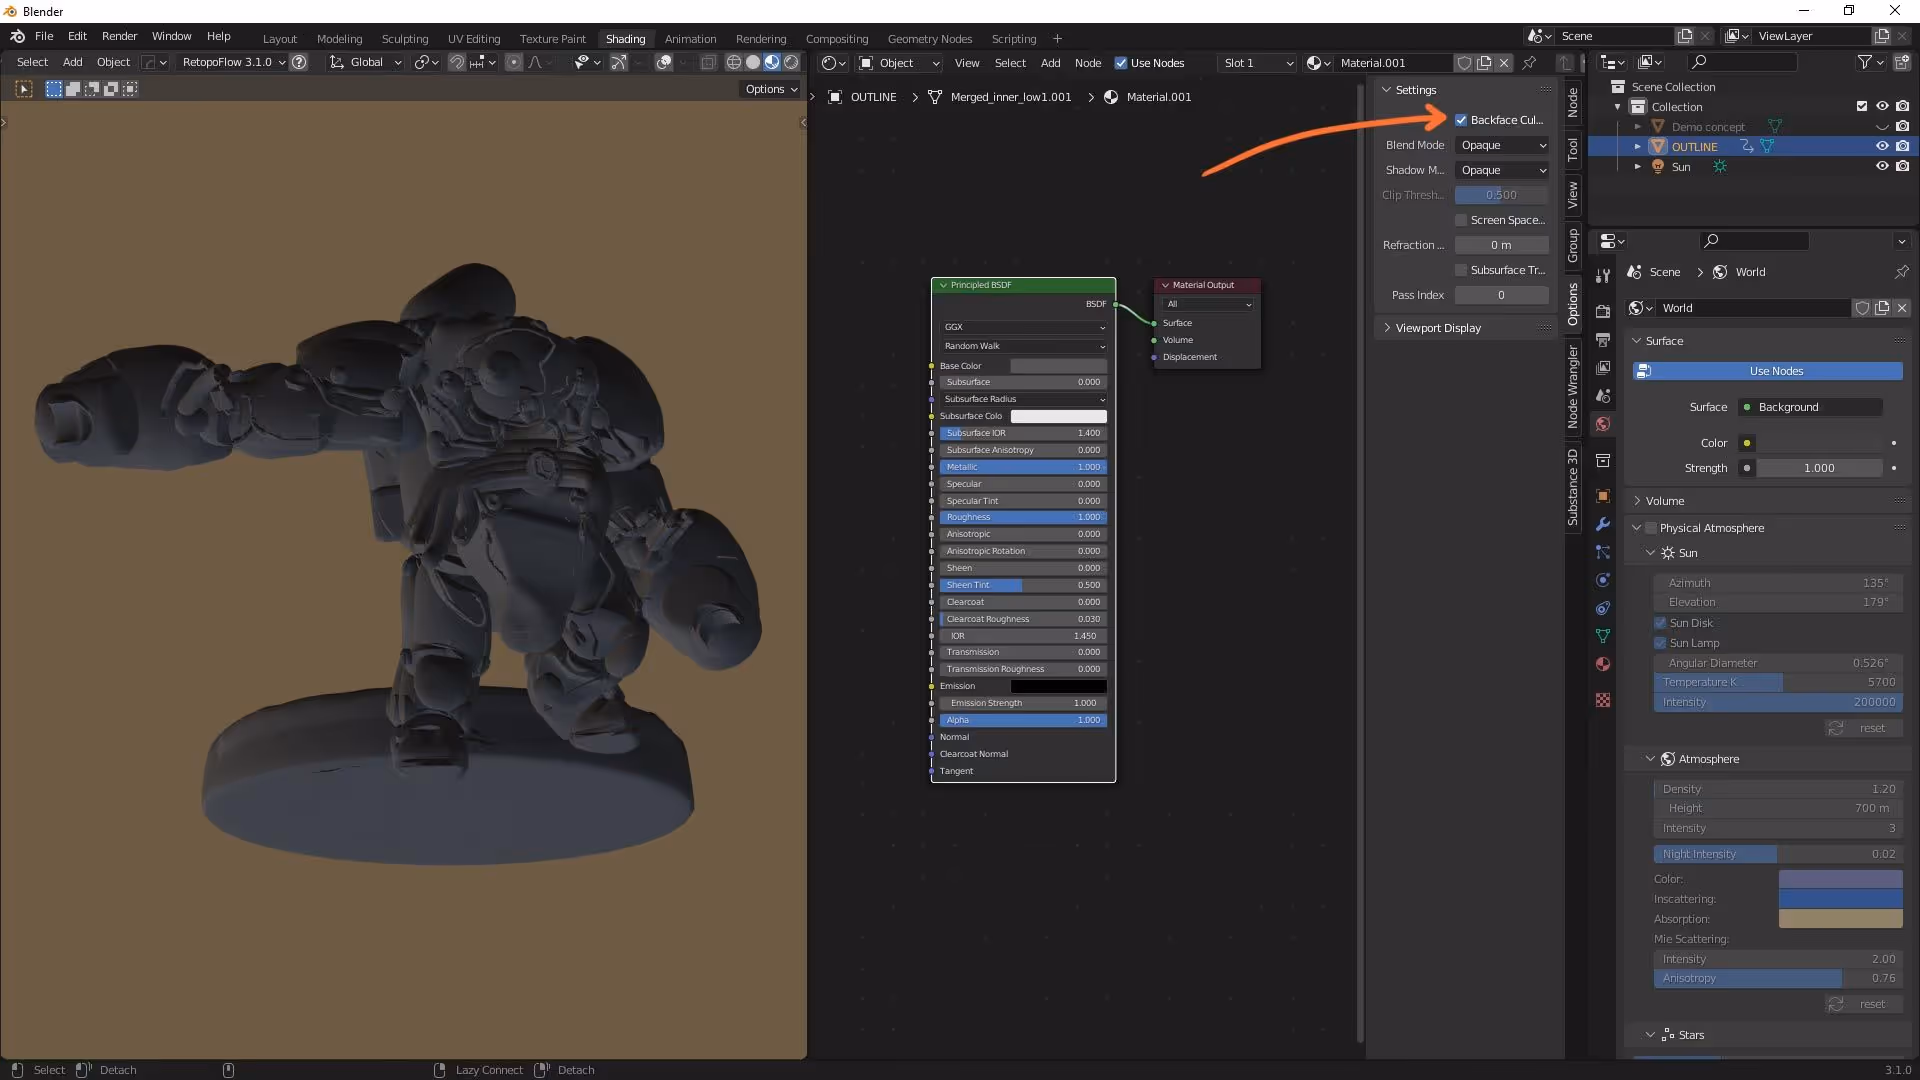
If you can't see the difference straight away, go out of edit mode and from the opines tab of the shader Editor makes sure that the ‘Backface culling’ check box is ticked in the settings:

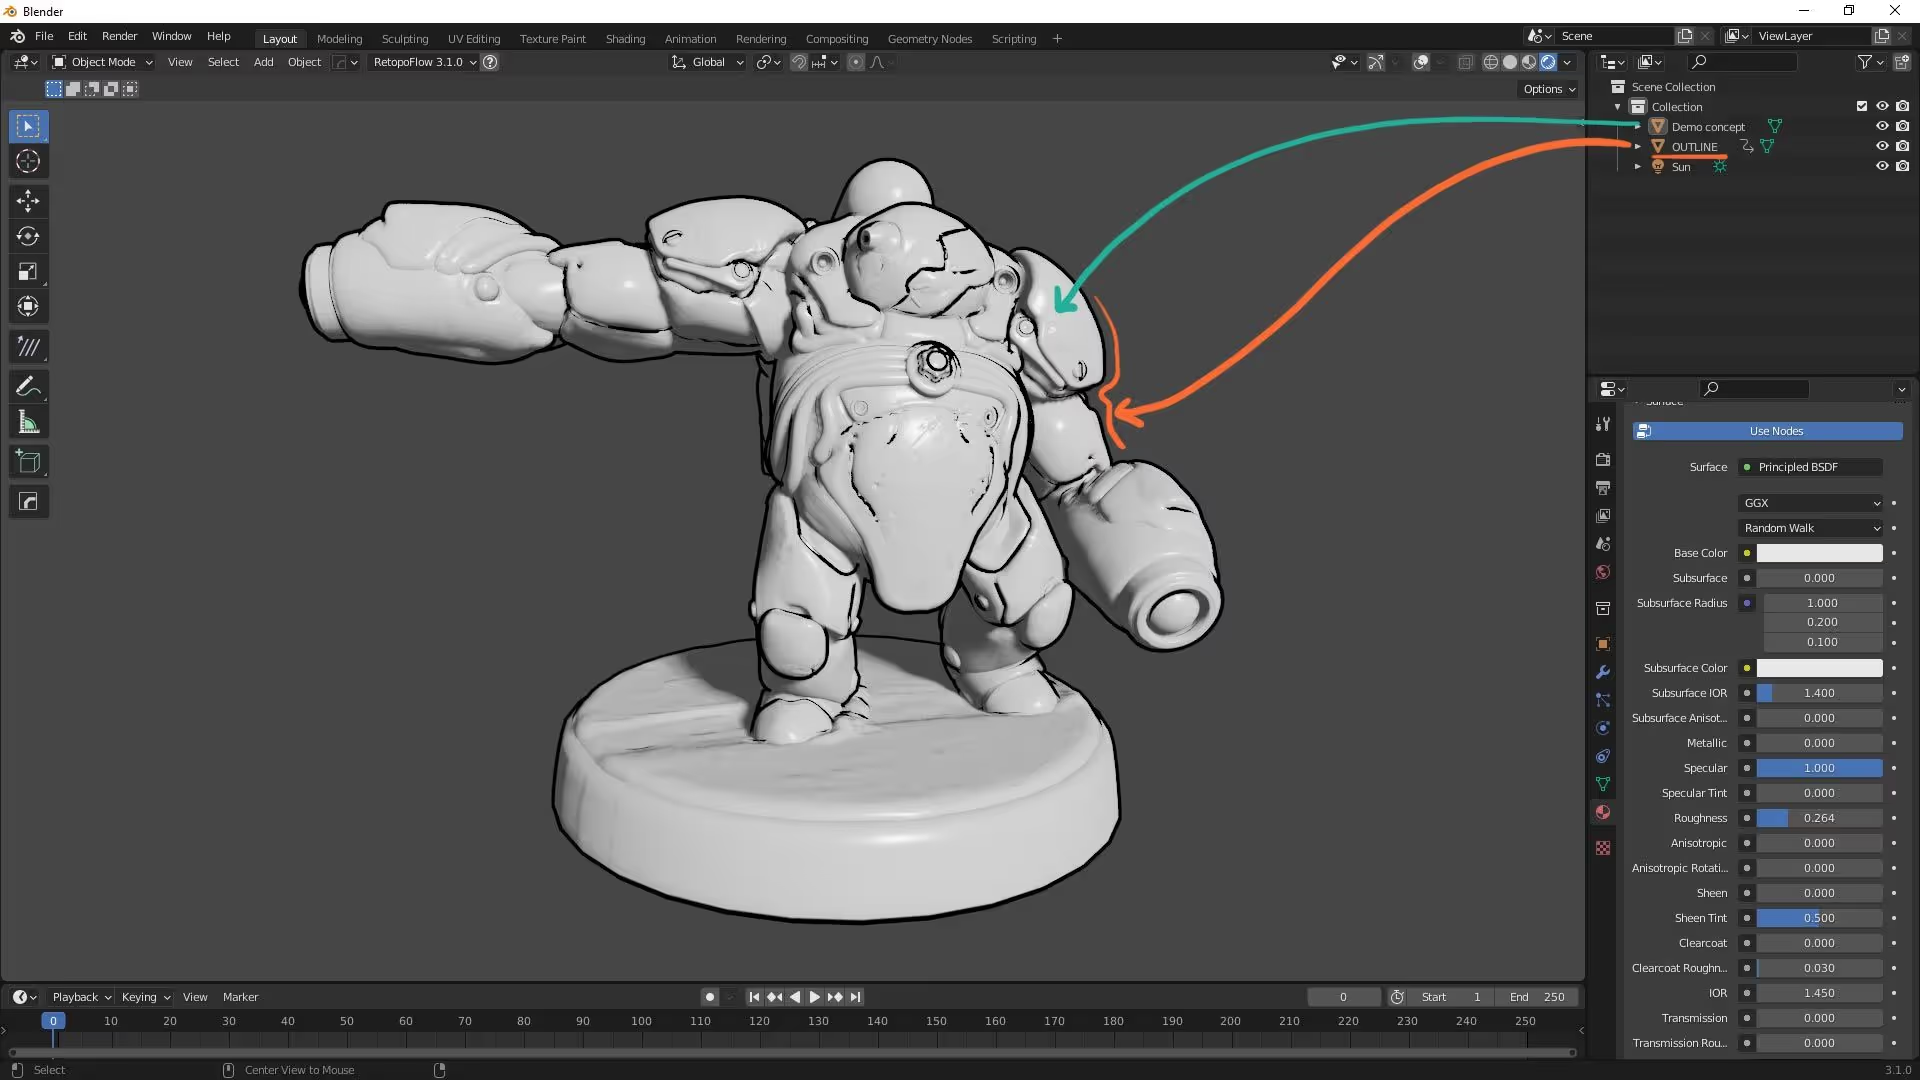
You can go back into edit mode with all the faces selected and use the ‘Alt + S’ command to move the faces along their normal (essentially inflating the mesh to achieve the thickness of the outline).

AFFILIATE DISCLOSURE: This tutorial may contain affiliate links which means if you decide to make a purchase through a link, I may earn a small commission at no additional cost to you.
Related Resource

Get resource
Download Here

Comic matcaps for ZBrush

These MatCaps are specifically a Comic Style render in ZBrush. The resources work great on their own so you can assign different comic materials to different meshes without the need of additional polypaint or color.

Check it out
Comic matcaps for ZBrush