.webp)

.webp)

Why this workflow
Texturing, baking and complicated setups are useful, but they also slow you down. When you need a clean presentation of a sculpt, turnarounds, portfolio shots or quick character concepts, the fastest route is:
- Export your ZBrush subtools as FBX
- Use Vertex Color (PolyPaint) as the Albedo in Marmoset
- Control lighting with a compact three‑light rig (Key, Fill, Rim)
- Render with Ray Tracing, export PNG + shadow catcher for compositing
What you'll need
- ZBrush with PolyPaint already applied
- Marmoset Toolbag 5
- Basic Photoshop (or any compositor) for final background / colour tweaks
Quick Overview: The Steps
- Arrange a compact Marmoset workspace.
- Export FBX from ZBrush (visible subtools).
- Import into Marmoset and set a correct scene scale.
- Create a shadow catcher and set the background to a neutral colour.
- Switch each material Albedo to Vertex Color to recover PolyPaint.
- Pick an HDRI sky (soft/overcast for control) and enable ray tracing.
- Create a render camera and compose a three‑point light setup.
- Tweak volumetric/transmission for thin parts (feathers, ears) where appropriate.
- Enable camera focus, set output to PNG + transparency + shadow catcher, then render.
- Composite background colour and gradients in Photoshop.
Step‑by‑Step
1. Set up a compact Marmoset workspace
Dock the Render and Library windows and create a custom workspace so you can switch quickly between layouts. Keep Materials and Scene easily accessible on the right and the Library collapsed on the left for quick HDRI access.

2. Export from ZBrush as FBX
From ZBrush, export visible subtools via the FBX plugin (FBX 2020 is reliable). Make sure "Visible" is ticked so only the parts you need end up in the FBX.

3. Import into Marmoset and name your pieces
Drag the FBX into Marmoset. The subtools come in as separate objects (same as your ZBrush subtools). Quickly rename the obvious ones (body, feathers, horns, eyes) so you can manage materials easily.
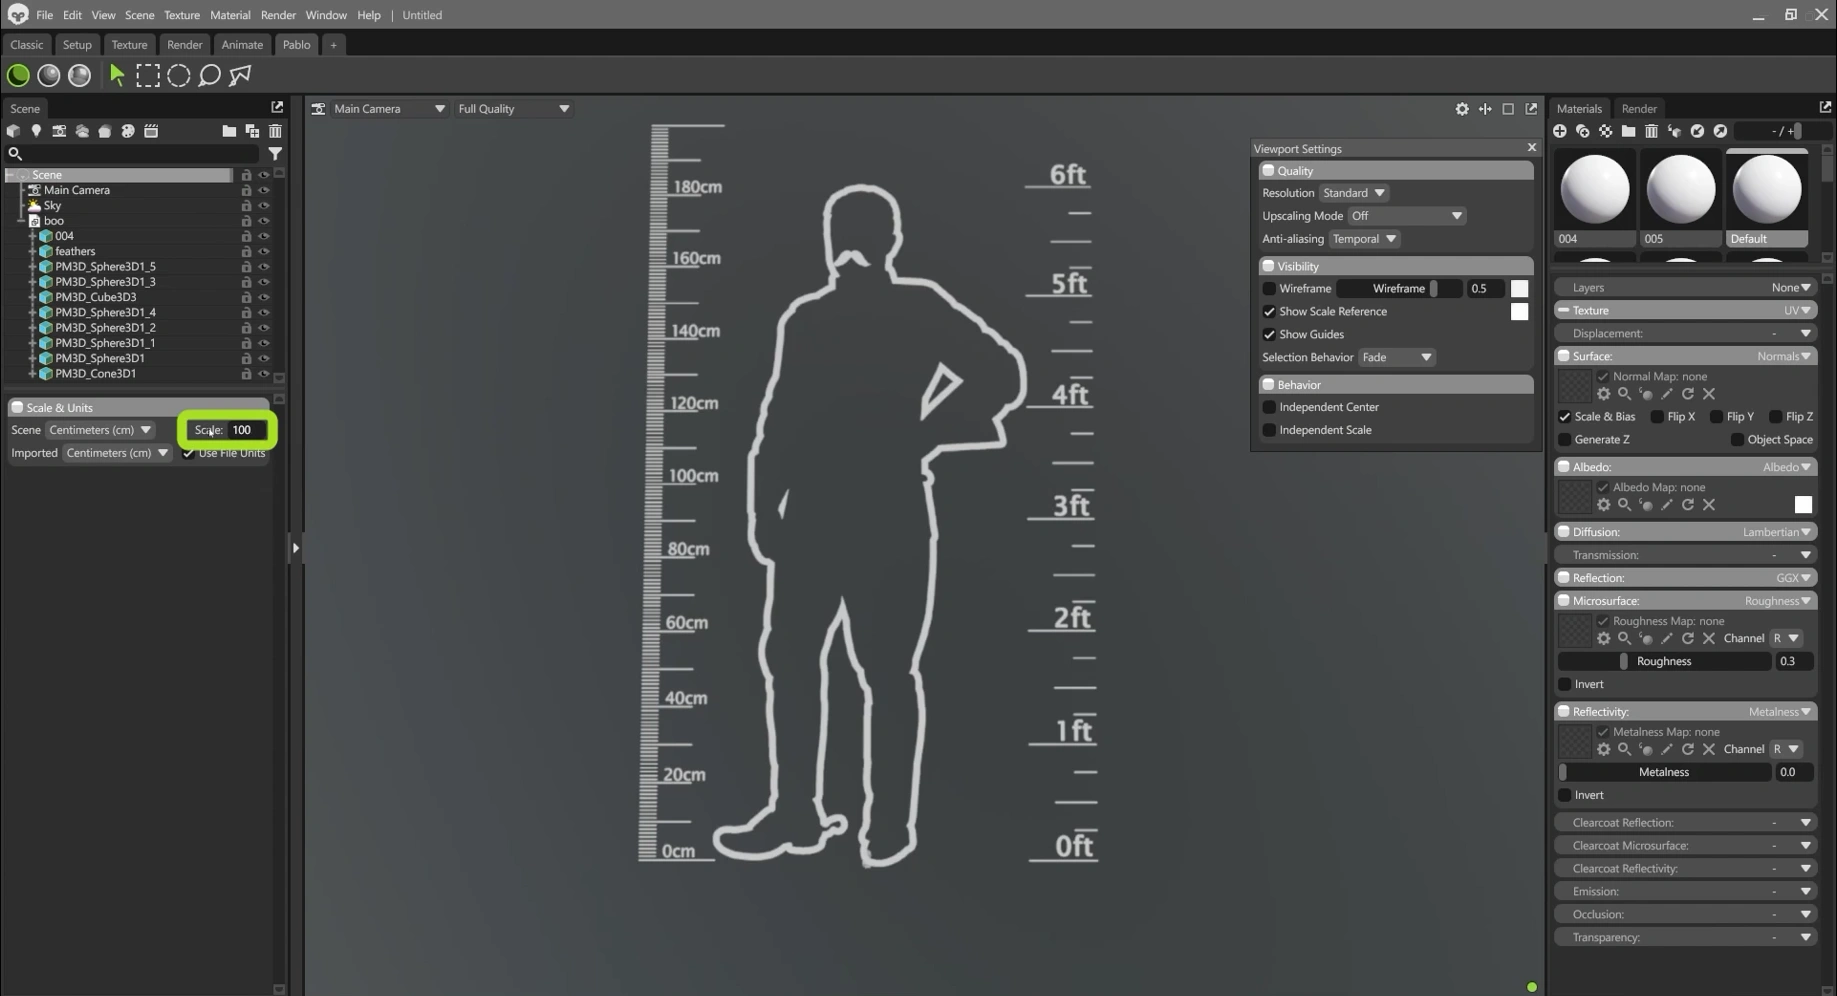
4. Set scale correctly
Accuracy matters for lighting and SSS. Enable the scale reference (human) and adjust the Scene scale until your model sits at a realistic relative size. This makes lights and transmission behave predictably.
5. Add a Shadow Catcher and set the document
Add a Shadow Catcher plane at the model’s feet, scale it up, and tweak the fade radius so the shadow looks soft and organic. Also, change the Ambient Sky to a plain colour if you prefer rendering with transparency for post work.
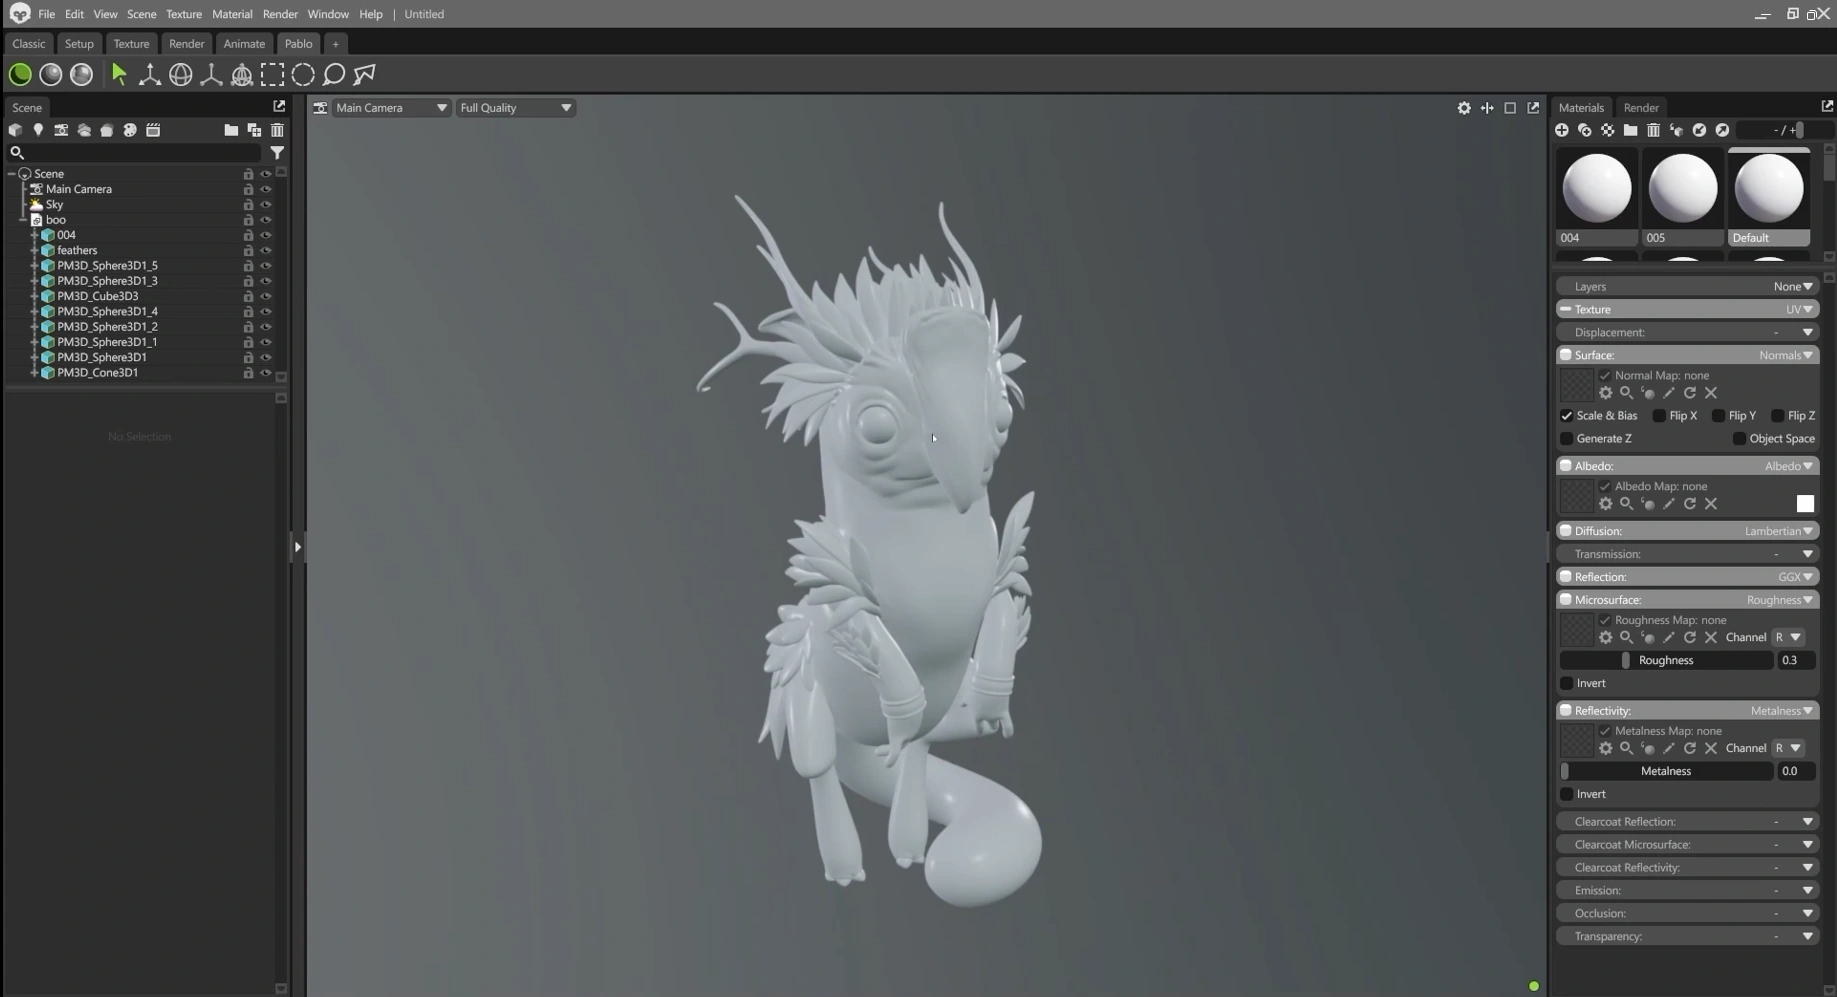
6. Use Vertex Color as the Albedo (recover ZBrush PolyPaint)
For each material you want to use, open the material properties and switch the Albedo source from texture to Vertex Color. That immediately brings your ZBrush PolyPaint into Marmoset… no UVs or textures required.

Group similar parts under a single material when appropriate (for example, body + hands + tail) so you can adjust roughness and other properties for multiple pieces at once.
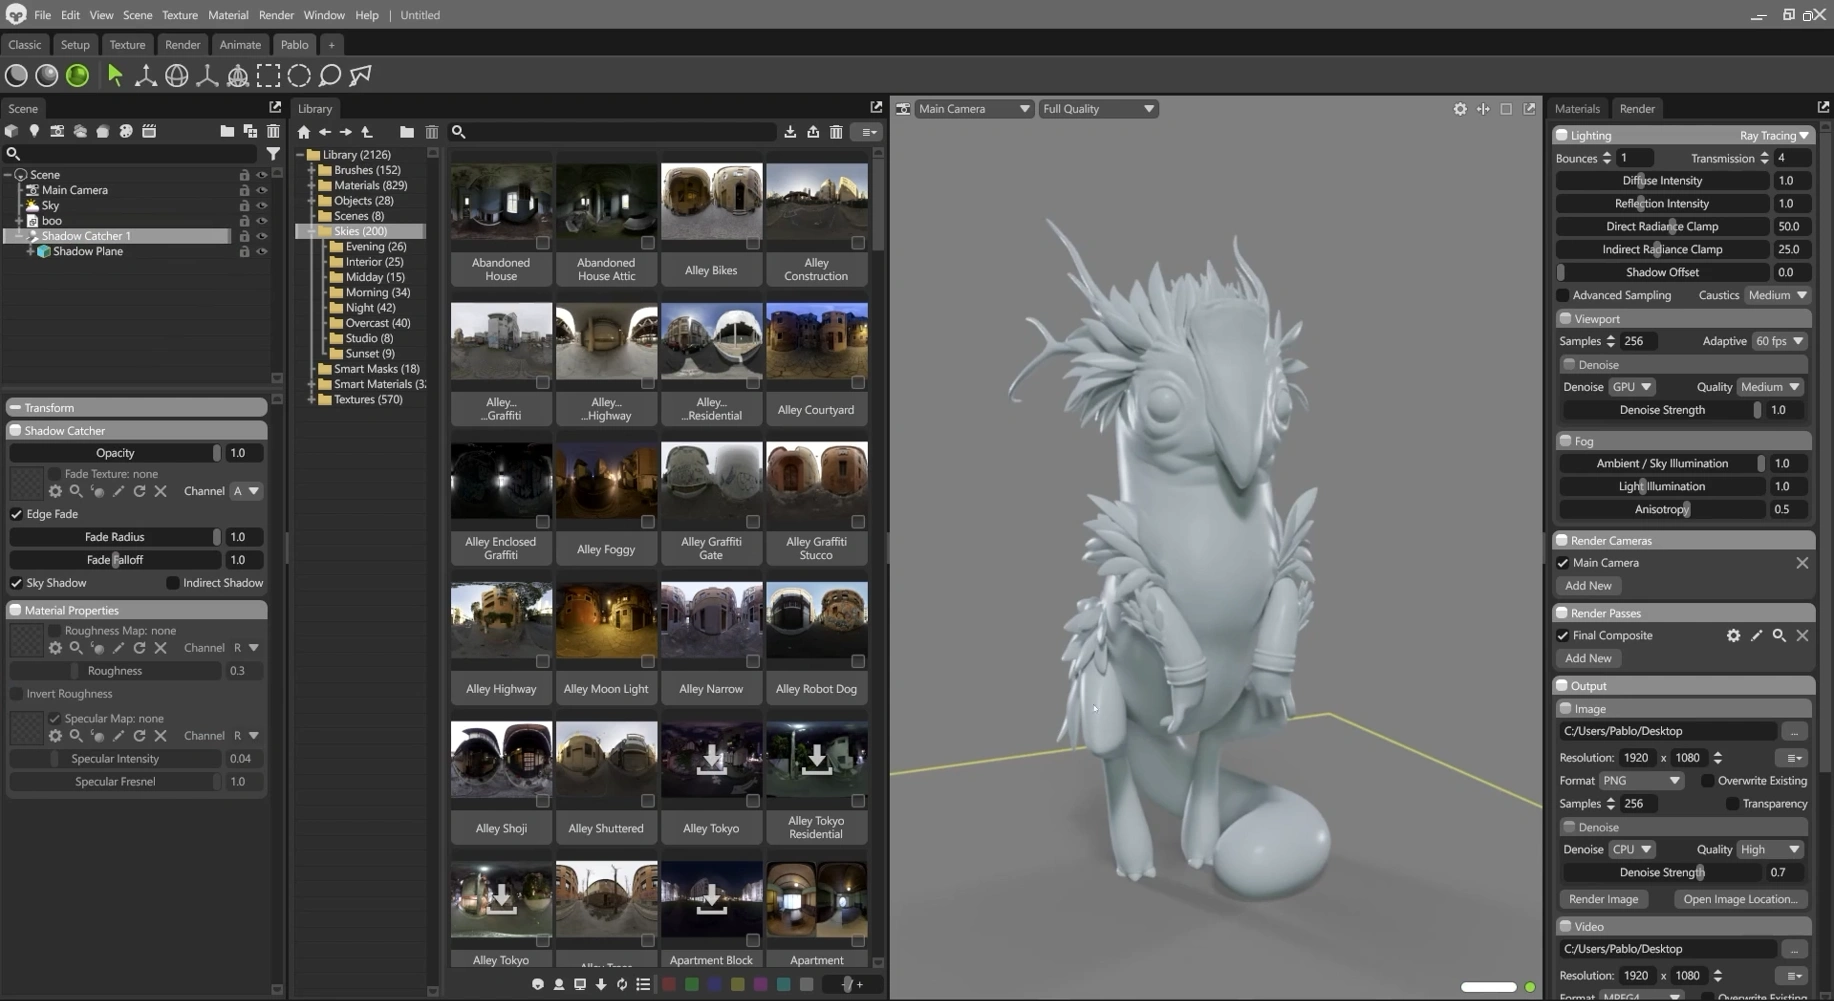
7. Pick a Sky and enable Ray Tracing
Choose a soft, overcast HDRI to act as your ambient base lighting. Then set the renderer to Ray Tracing to see the HDRI and material interactions correctly. This provides a nice diffuse starting point while leaving control to your custom lights.

8. Create a Render Camera (Split Workspace helps)
Duplicate your workspace and split it. One side shows a framed render camera, the other is your working camera. Set the framed camera resolution to portrait or the final aspect you want, then adjust field of view (or lens mm) for a flatter look (85mm is a good starting point for head/portrait).

9. Light the model… Key, Fill, Edge
The lighting is what sells your sculpt. Use a simple three‑point setup:
- Key (spot) - main directional light, controls shape and primary highlights.
- Fill (spot) - softer, wider source to lift shadows and keep detail readable.
- Edge / Rim - placed behind to separate silhouette from the background.
One useful trick: turn the HDRI off temporarily so you can see the exact contribution of each light while you position and tweak it.
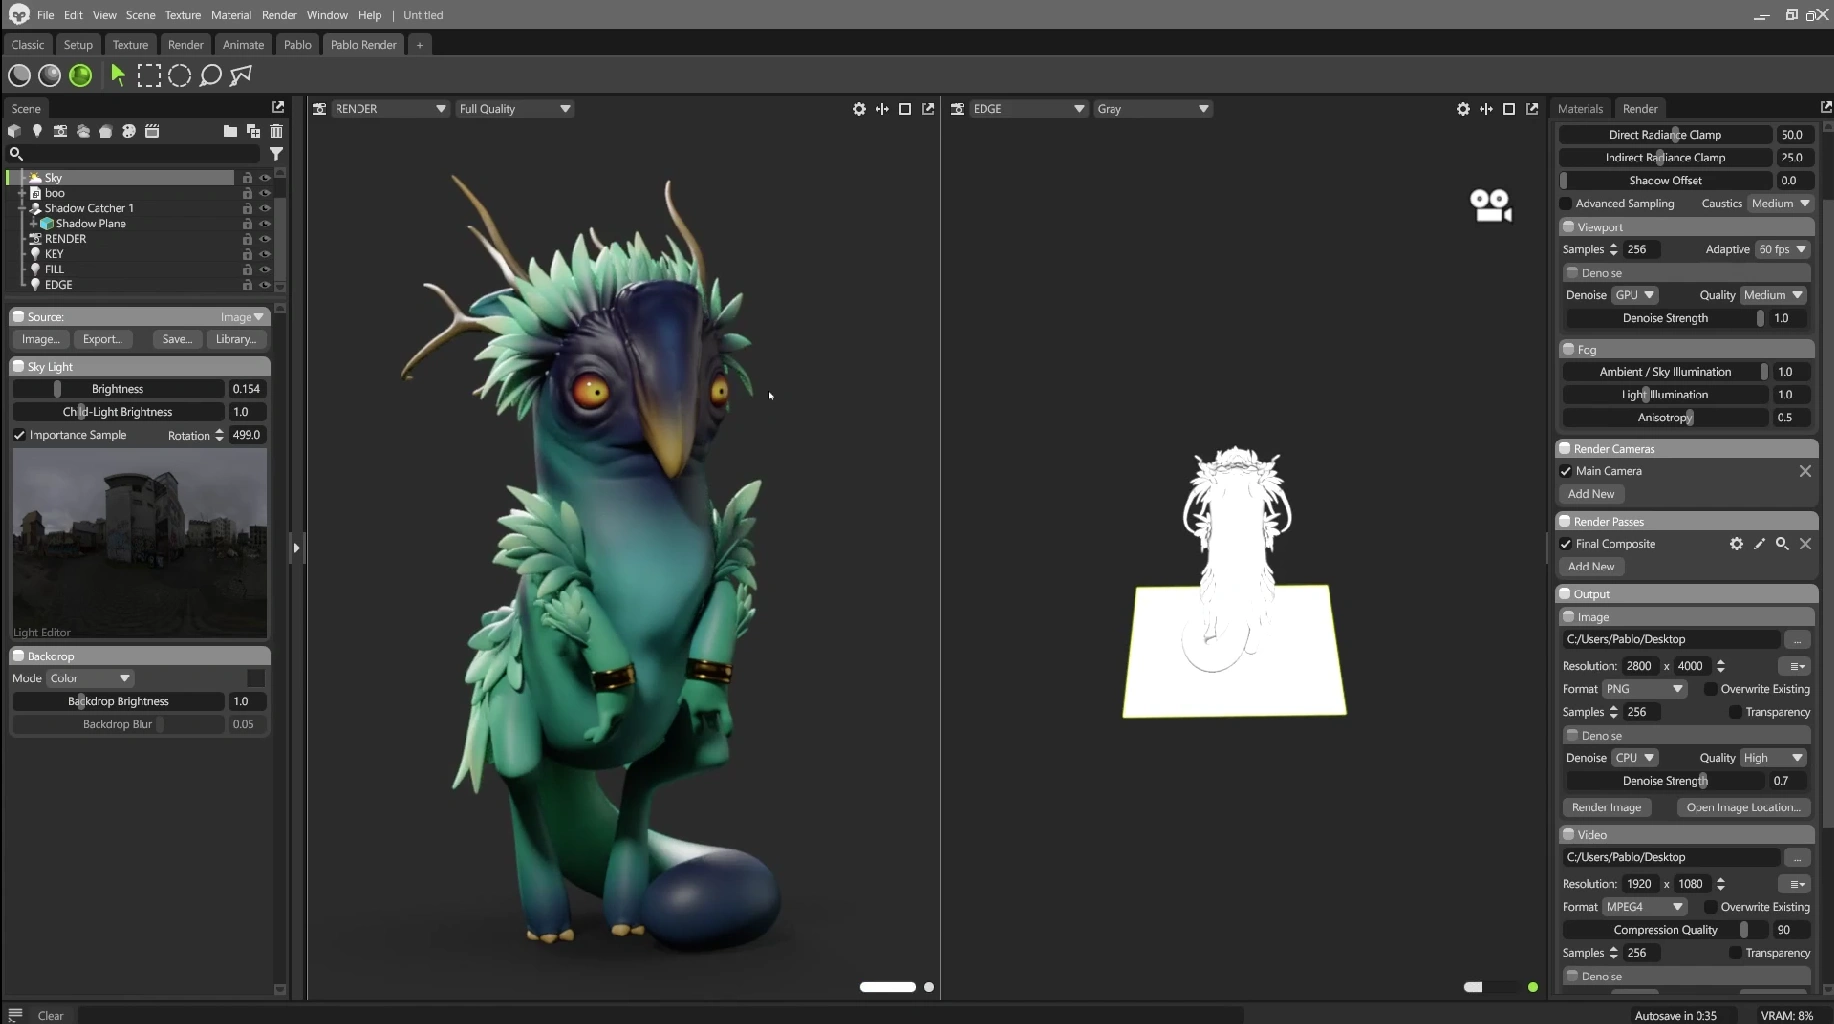
Another handy method is to "look through" a light by switching the right viewport to show that light. This lets you place and shape the spot precisely using the viewport frame rather than moving the camera itself.

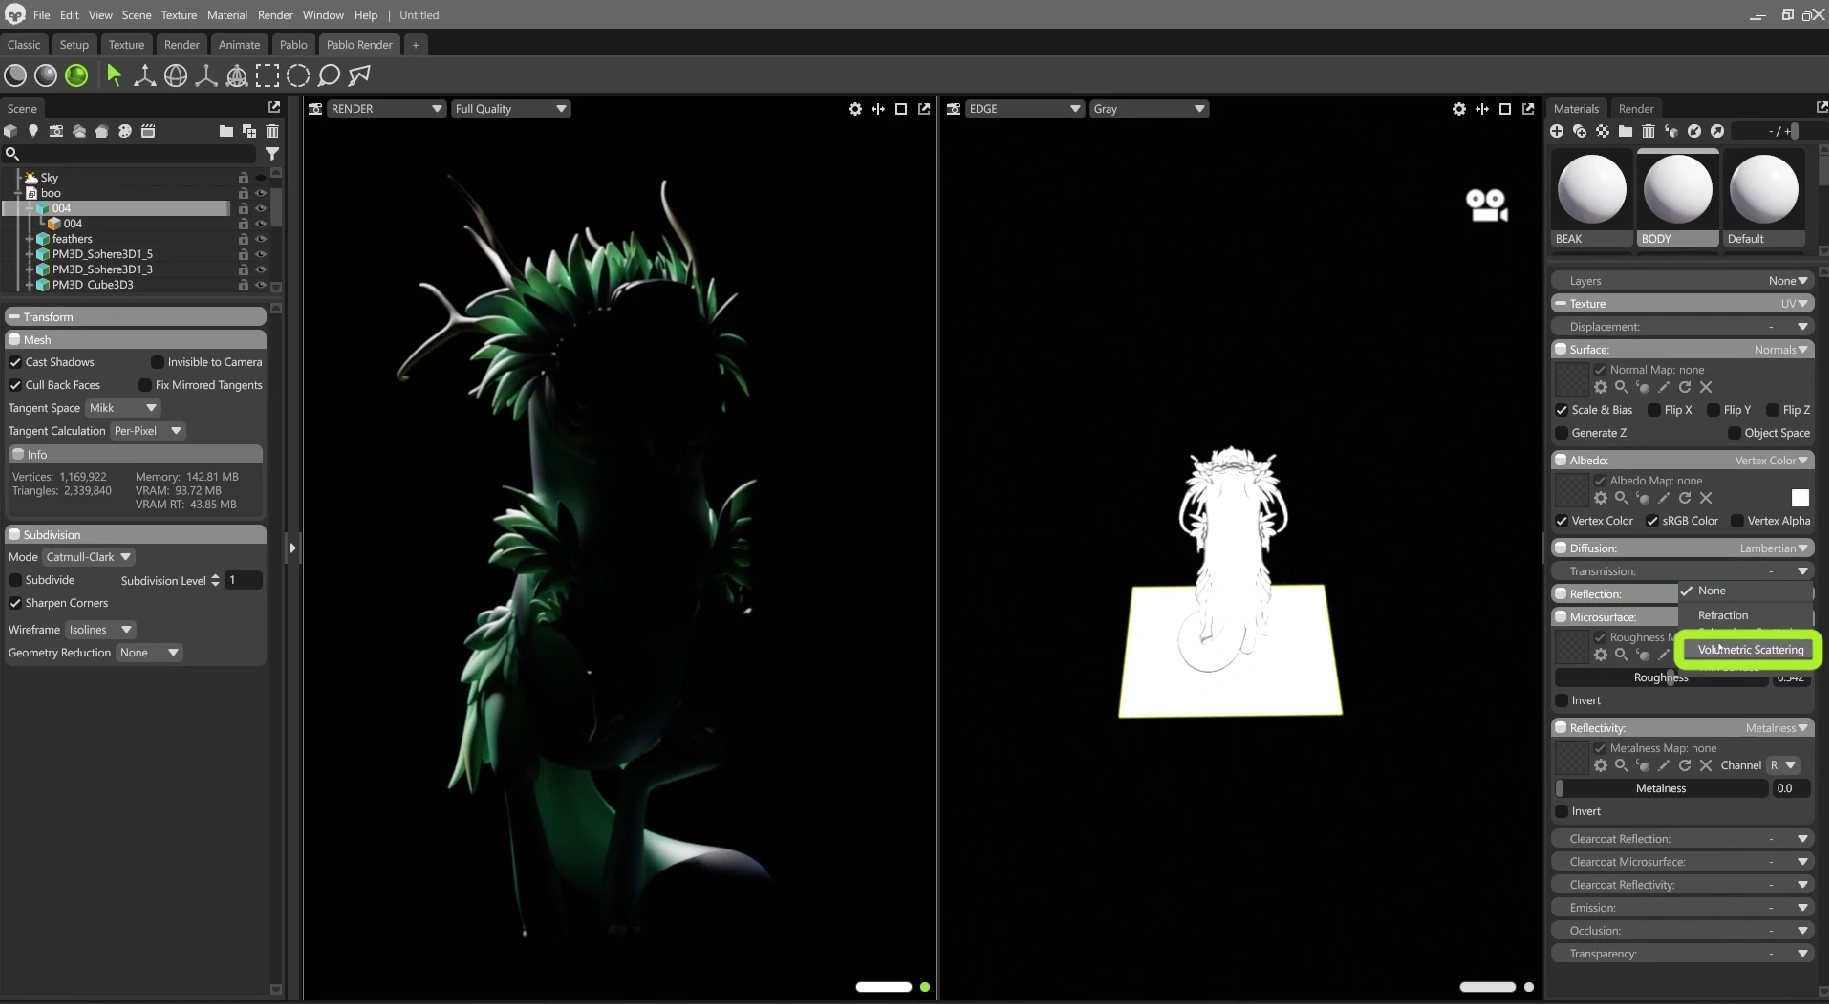
10. Add subtle Transmission / Volumetric Scattering for thin parts
For thin elements (ears, stylised feathers) enable Volumetric Scattering (in the material > Transmission dropdown). Keep the effect subtle… it’s powerful and easy to overuse. Back lights (rim/edge) make this translucency readable.
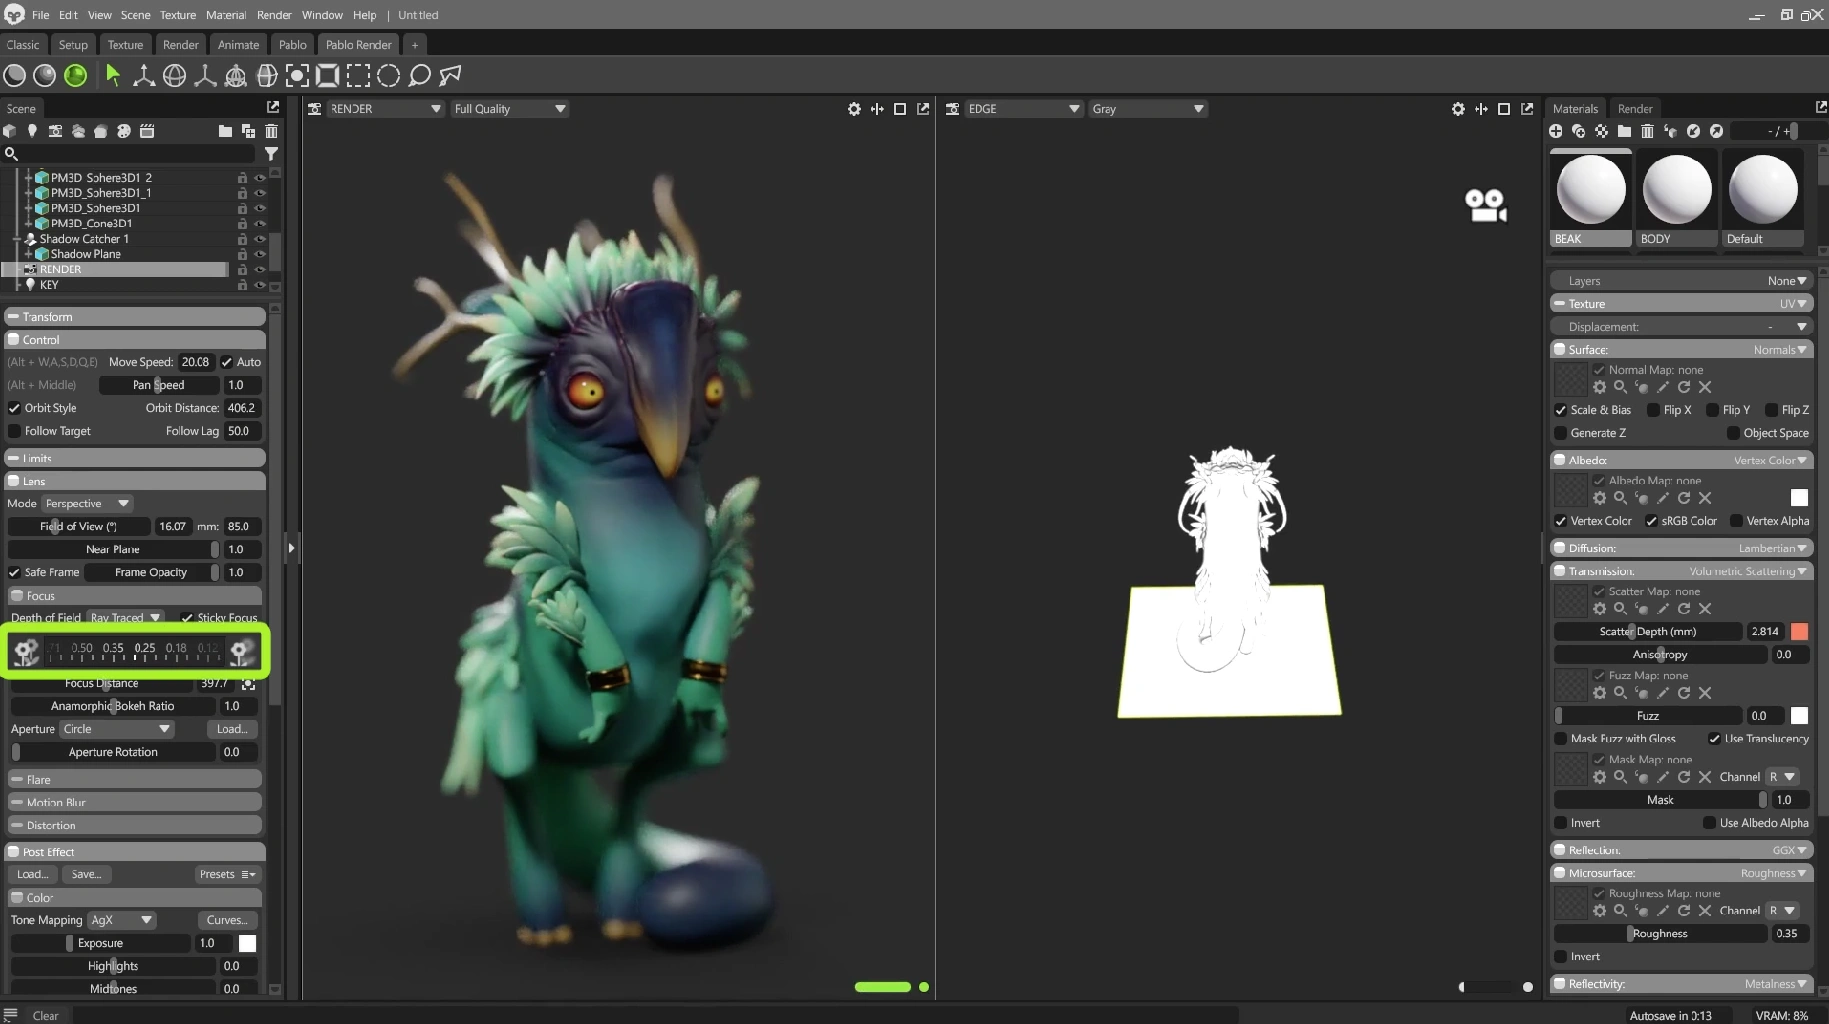
11. Camera Focus… Sticky Focus for depth of field
Use Ray‑traced focus and enable Sticky Focus to pick a point (usually the eyes). Pull the depth slider back until you get a gentle, cinematic depth of field. Subtlety is key… heavy blur can kill detail and readability.
12. Render settings… Transparency + Shadow Catcher
In the output settings:
- Choose PNG with transparency.
- Enable the shadow catcher so the shadow is exported with the image while the background remains transparent.
- Increase samples (512 is a good balance) and set transmissions/bounces up if you have transmissive materials.

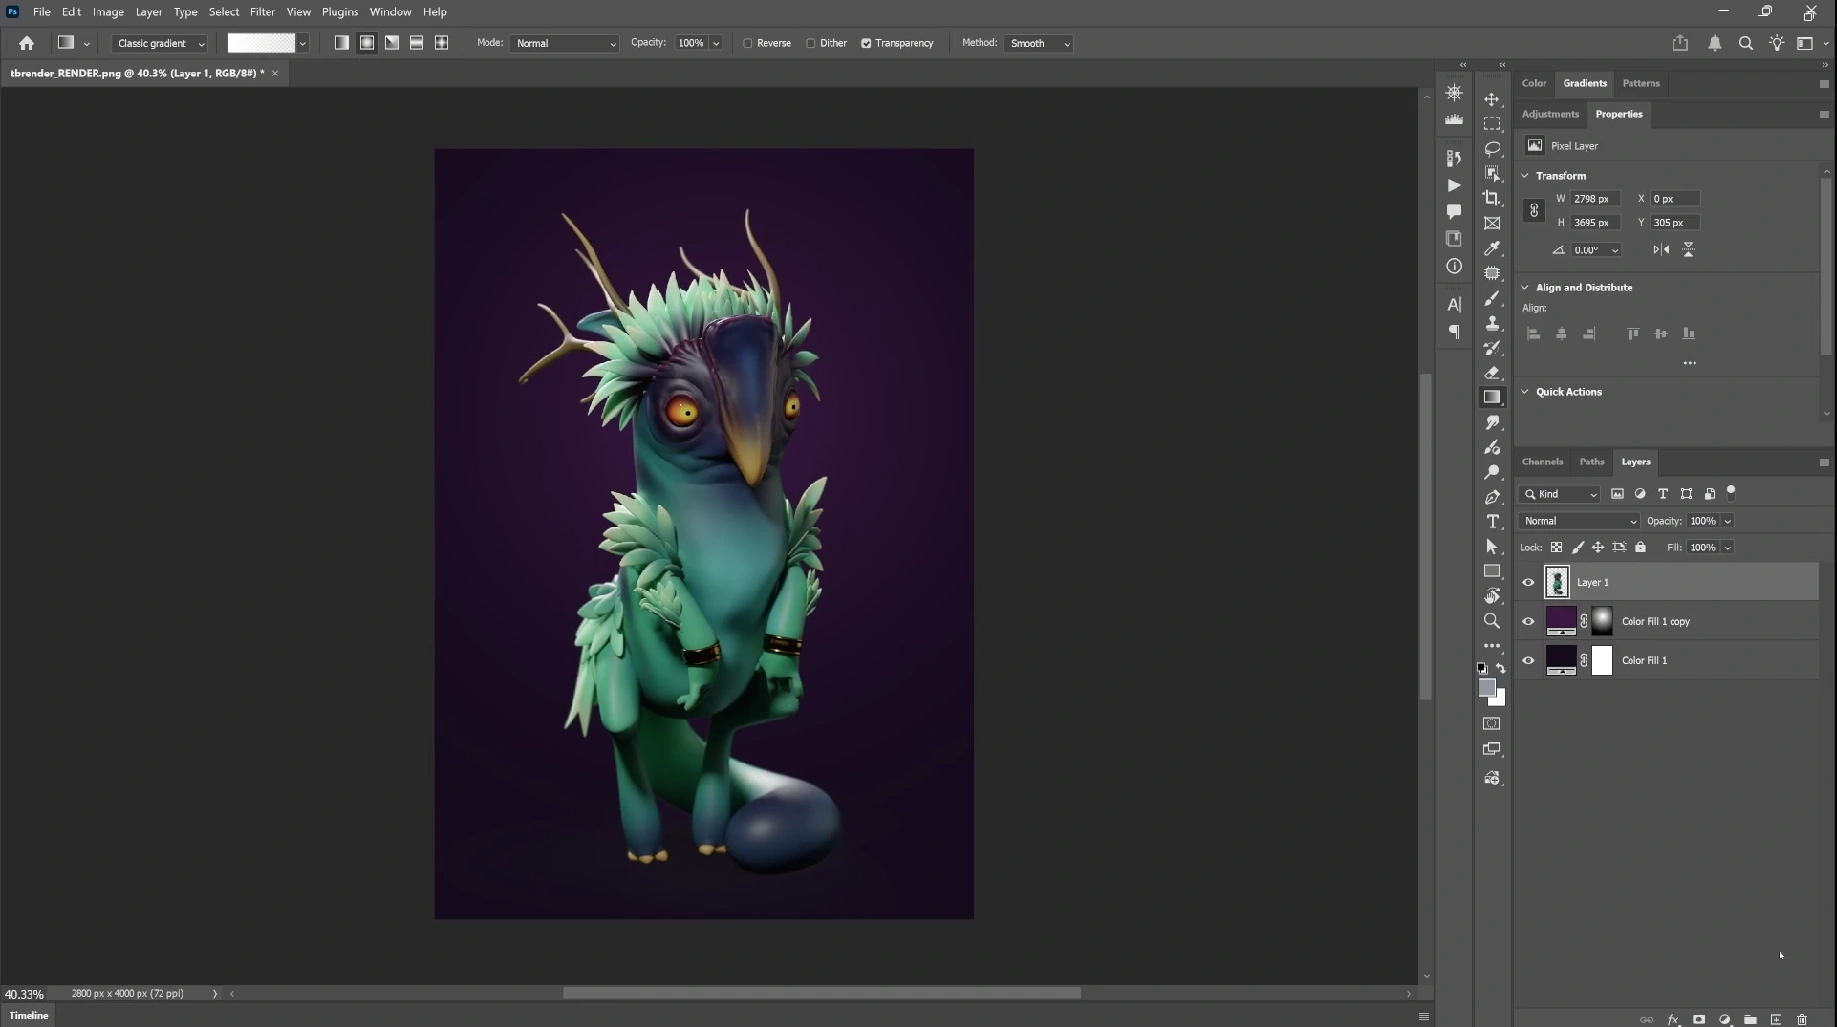
13. Composite the final background in Photoshop
With a transparent render and shadow catcher you can quickly create a coloured backdrop that complements your PolyPaint. Two quick fills with a radial mask, a dark desaturated base and a brighter, saturated radial to create a subtle halo, will frame the character and enhance the silhouette.
Troubleshooting & quick tips
- If colours look flat: check that the material albedo is set to Vertex Color.
- Scale feels wrong: enable the scale reference and adjust scene scale… lighting and SSS depend on realistic scale.
- Eyes lack catchlights: set eyes roughness to 0 and use a specular highlight from a small bright source or tweak HDRI rotation.
- Shadows cut off: scale up the shadow catcher or increase its fade radius to avoid abrupt edges.
- Render camera mismatch: ensure you select the render camera in the output settings. Marmoset will render whatever camera is set as the active render camera.
- Slow renders: reduce ray tracing bounces/samples for faster iterations, bump up for final export.
Summary… why this works
This workflow is effective because it focuses on the essential: good colour (PolyPaint), correct scale, an HDRI base and a small, controllable lighting rig. It gives you crisp, presentable renders quickly and keeps the pipeline flexible. Add textures and more complex materials later when you need them, but for presentation and iteration this approach is fast and reliable.
Final thought
If you need a quick, repeatable pipeline for showing sculpted characters, this method will save you time while delivering clean, polished images. Start simple, iterate on lights and materials, and only add complexity when the render demands it.
CharLumi Character Lighting Scenes
A collection of high-resolution HDRI setups designed to make character lighting simple, fast, and flexible. This pack contains 60 clean studio HDRIs at 8K resolution, created specifically to give your characters an instant, reliable lighting base… from neutral setups to stylised and mood-driven variations.
Get resource
How to present your 3D characters in a simple and effective way
In this video, I'll show you how to present your 3D characters effectively, even if they're unfinished, using ZBrush and Blender. Learn practical tips for lighting, materials, and contrast to create professional-looking renders.
Check it out


.webp)

