In most cases you’ll end up with various essential maps like curvature, position, thickness, etc.… one of the most useful ones is the Ambient Occlusion or ‘AO’ because it allows you to define where are the ‘contact shadows’ or ‘occluded’ areas in your model. so for instance around the neck or connecting joints of the robot in the screenshot below:
.jpg)
Now here the ‘issue’ and how to fix it…
In Painter you can add a bunch of really cool details like scratches and rust and they usually have depth right? let’s just make a really exaggerated dent or scratch in this simple object as an example… I’m using the height channel to push this detail in so it kind of like ‘sculpting’ with textures, but because this is texture information (in other words, it wasn't added in the high-res model as a detail), then when you do the bakes in Painter, it is not part of the AO.
But don’t worry, this is an easy fix. All we need to do is tell painter that we want to include any new details we create with textures (with height or normal info) into the AO. Here are the simple steps:
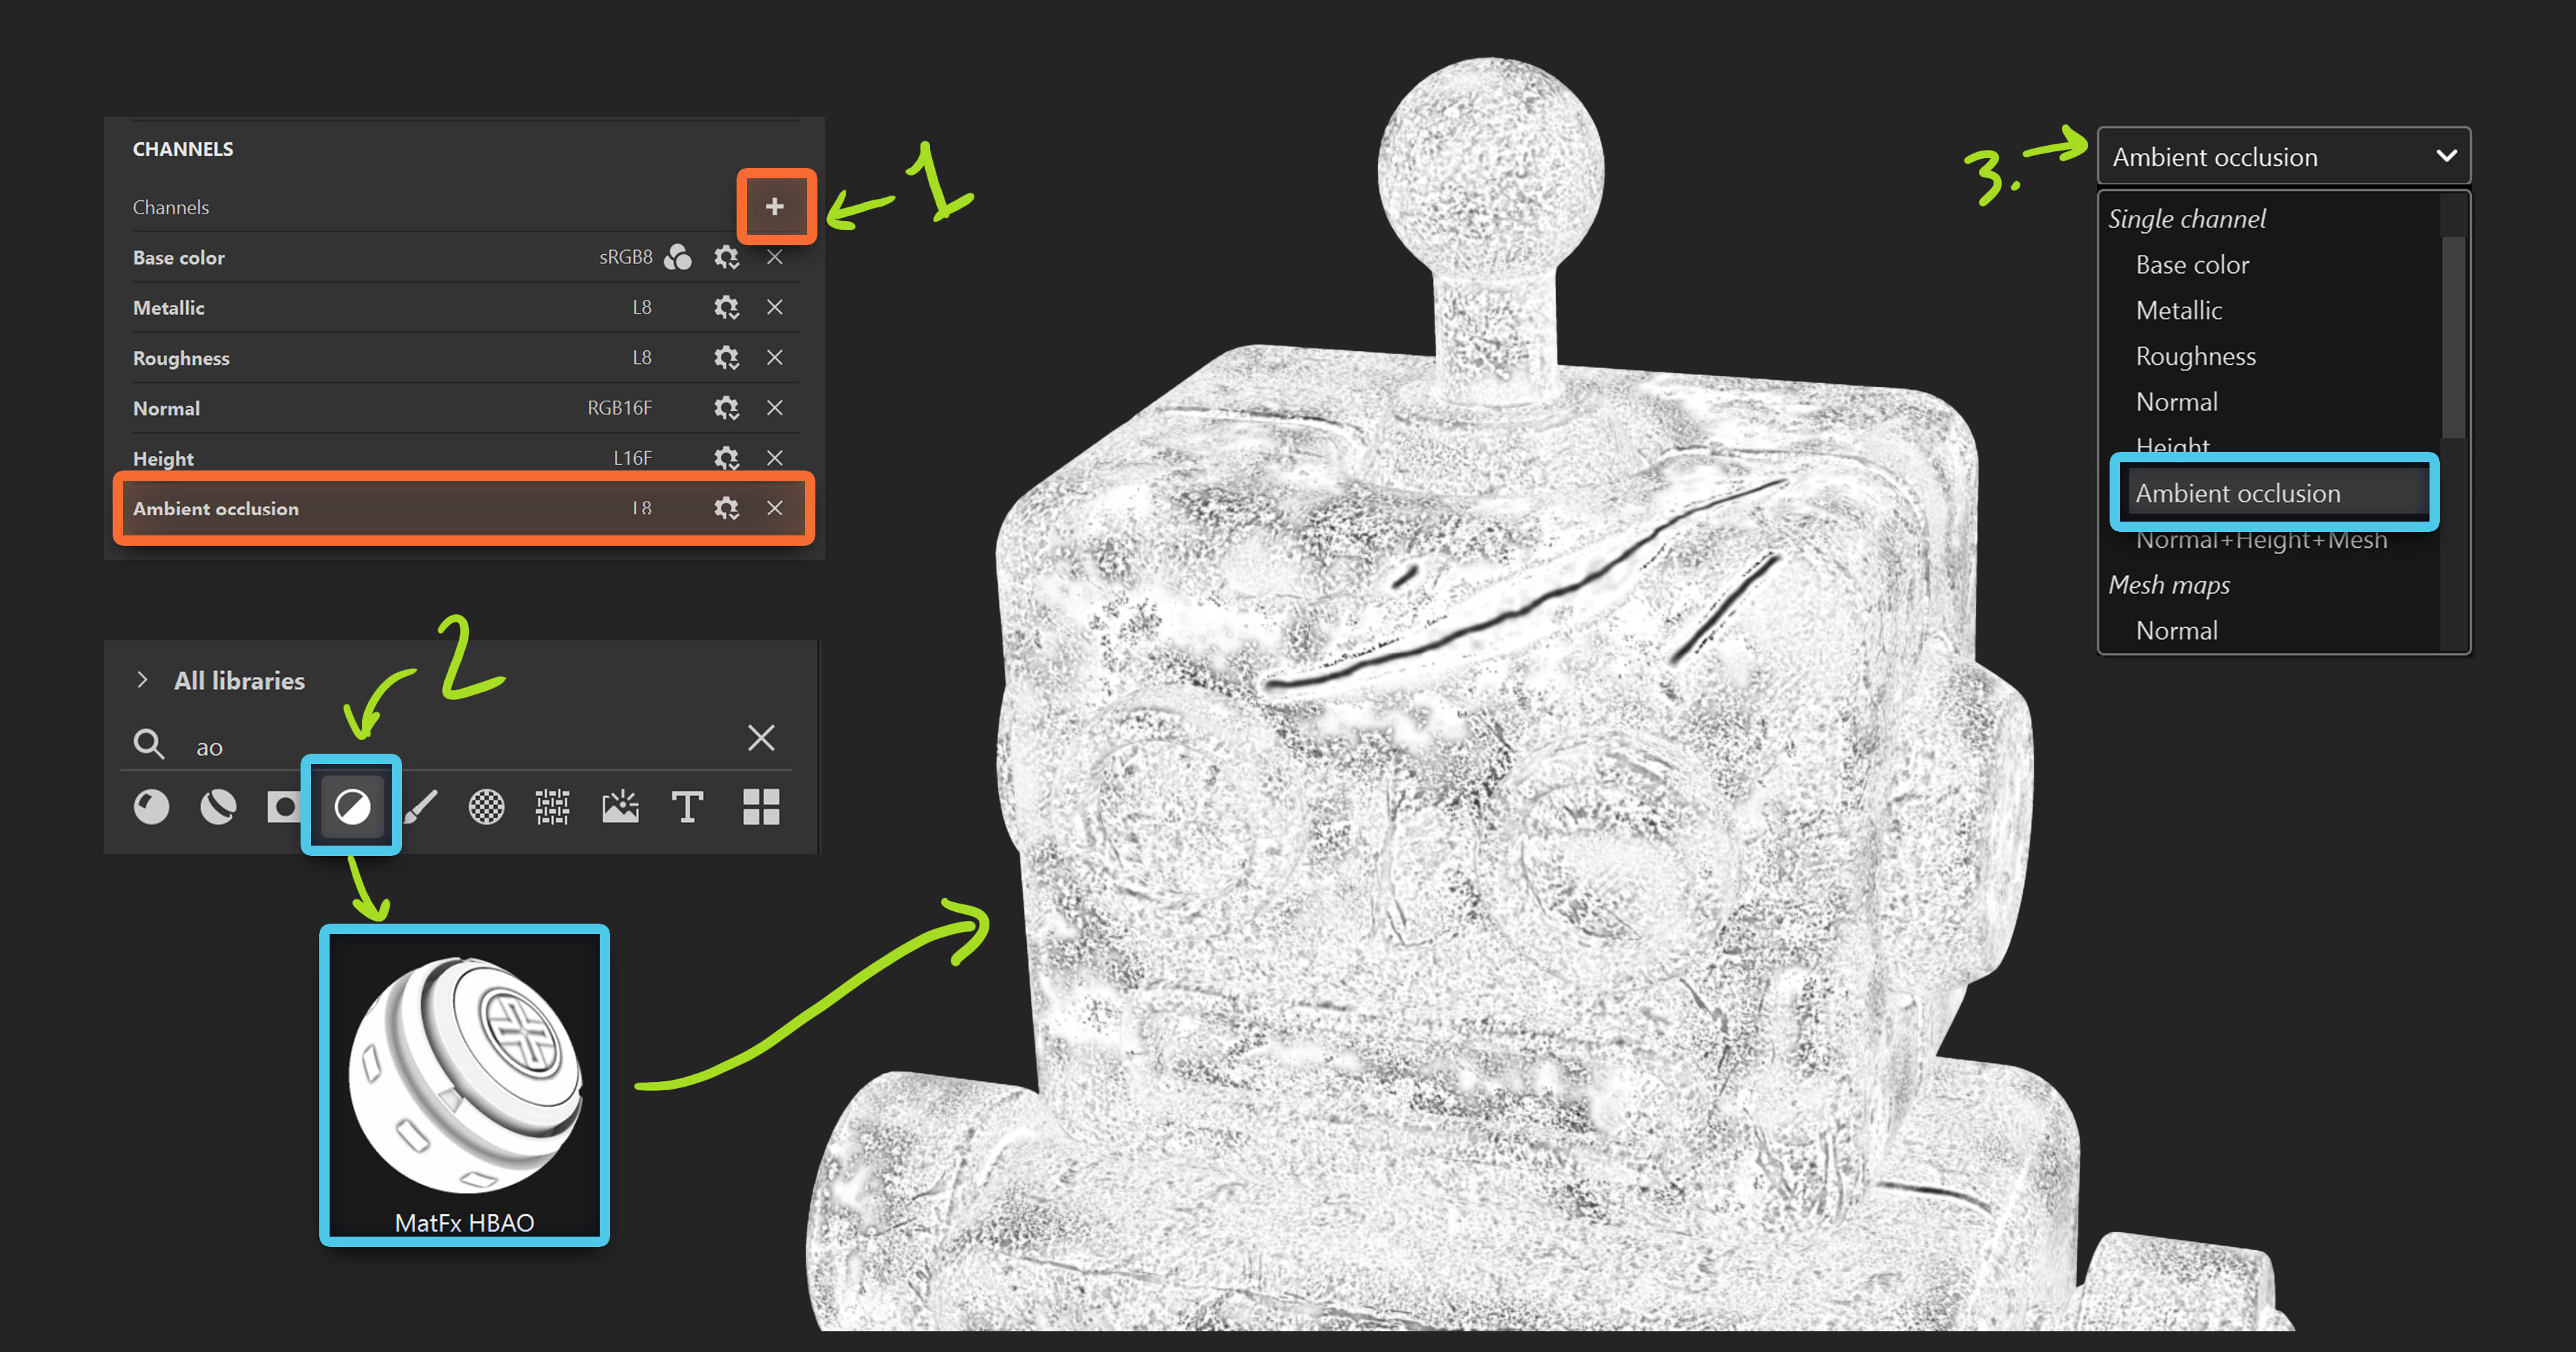
- Create an AO channel in your texture set form the texture set settings
- From the asset library, choose Filters and find the MatFx HBAO
- Drag and drop the MatFx HBAO into the model
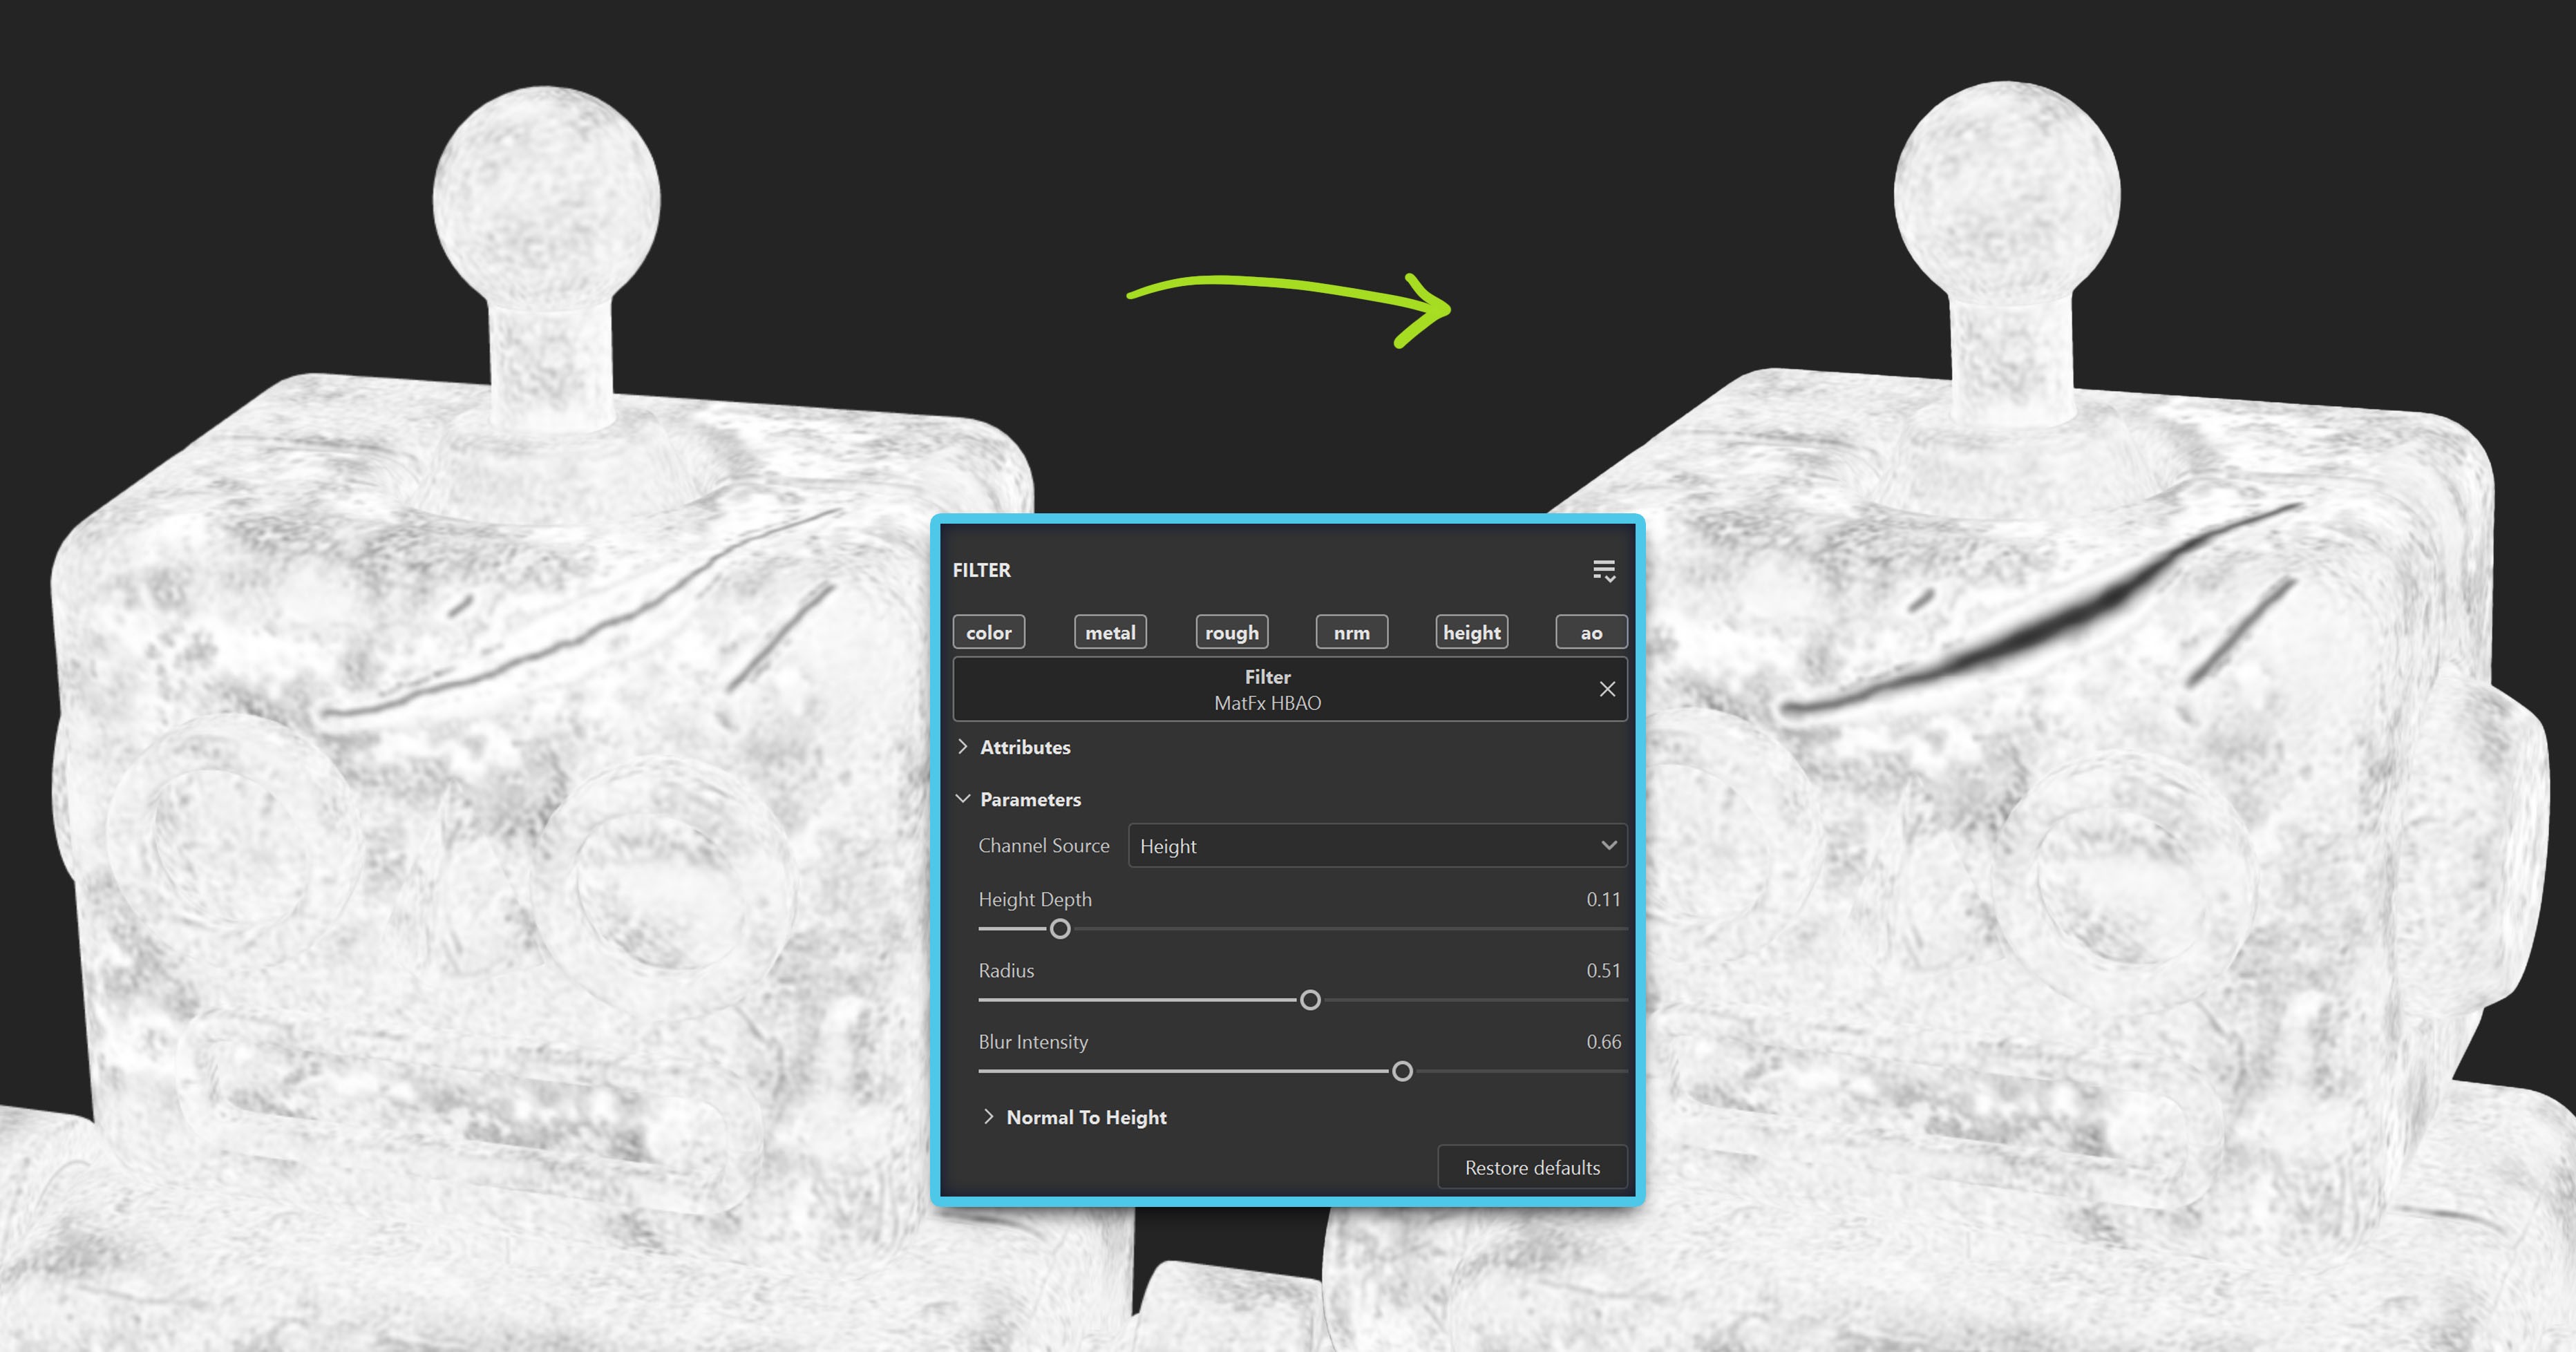
you should see that all of your height details now have a bit of AO:
Depending on the type of details you have and the intensity of them, the AO effect might look a bit noisy or make you textures look a bit murky, so make sure you adjust the settings and keep things subtle… if the details are very small they probably don’t need as much AO but if they are large then you can darken up those areas a bit more.
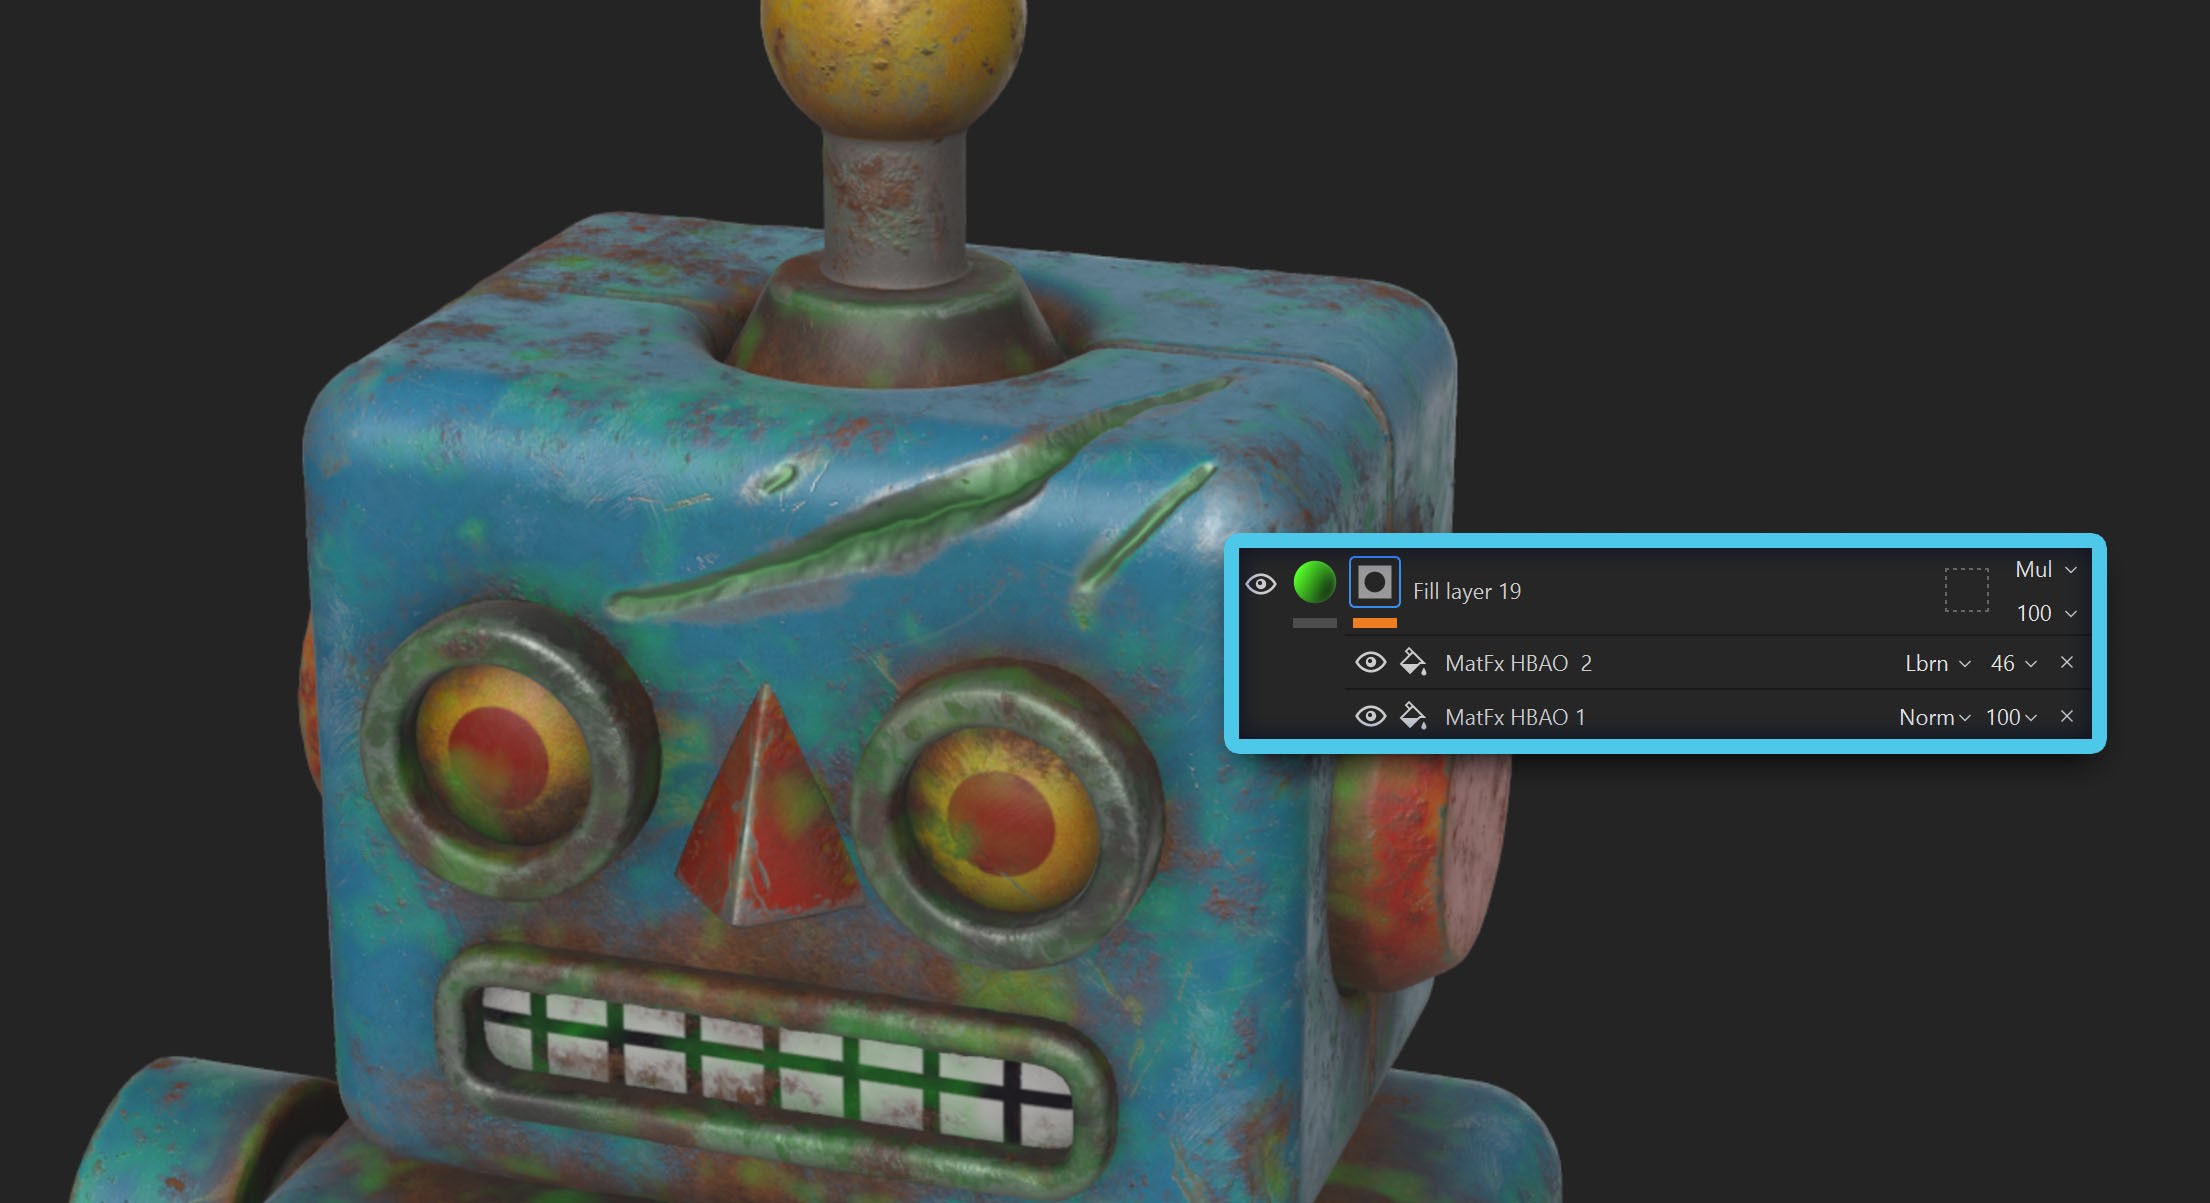
Extra tip: you can use more than one MatFx HBAO and use masking to hide parts that are not as useful.
That is all you need to do to get AO in those details. When you look at the model you might not see a huge difference but remember that when it comes to texturing, is all about subtleties:
one more thing… if you don’t need the additional AO in your details keep in mind that this is just another way to create some really cool custom mask. You can drop an anchor point into the MatFx HBAO and recall them from a separate layer to add some dust or dirt in those tiny crevices. Here is an example with a very bright green colour in the layer for reference:


.webp)

.webp)