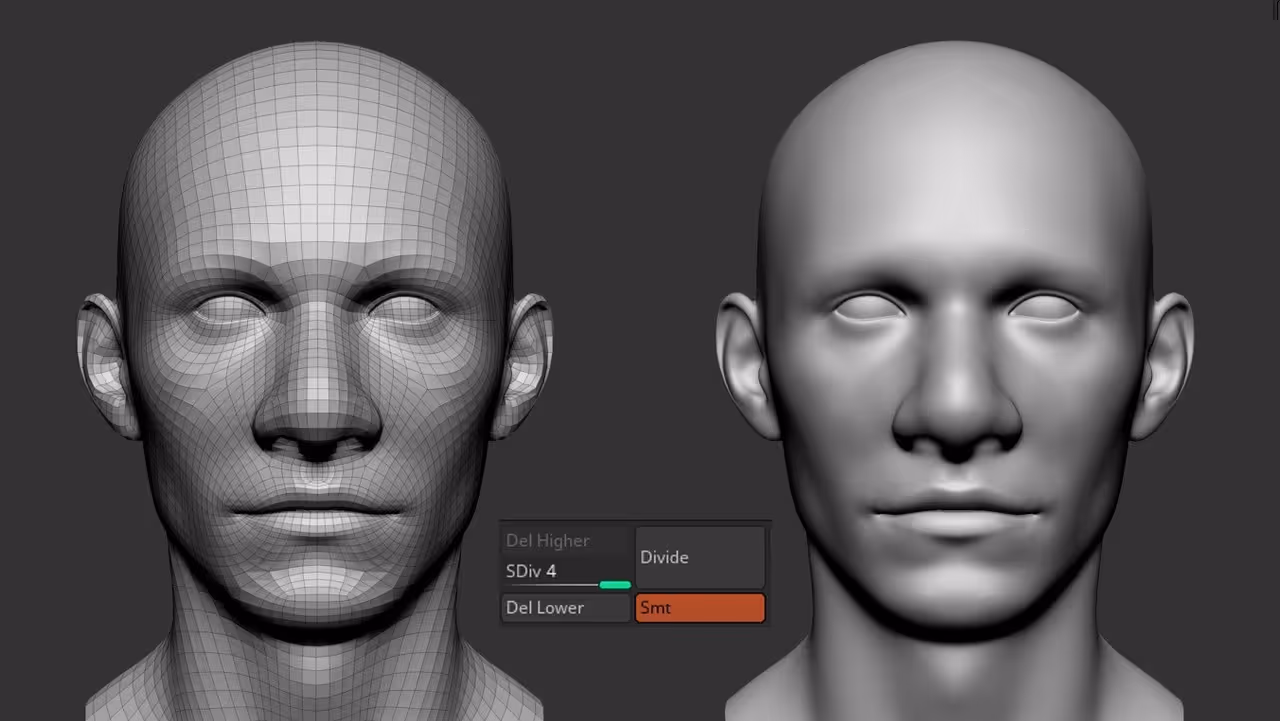
First Start with your base mesh, ideally a model with subdivisions and clean topology. I had a base head that I subdivided 4 times to get enough resolutions to add some details if needed.
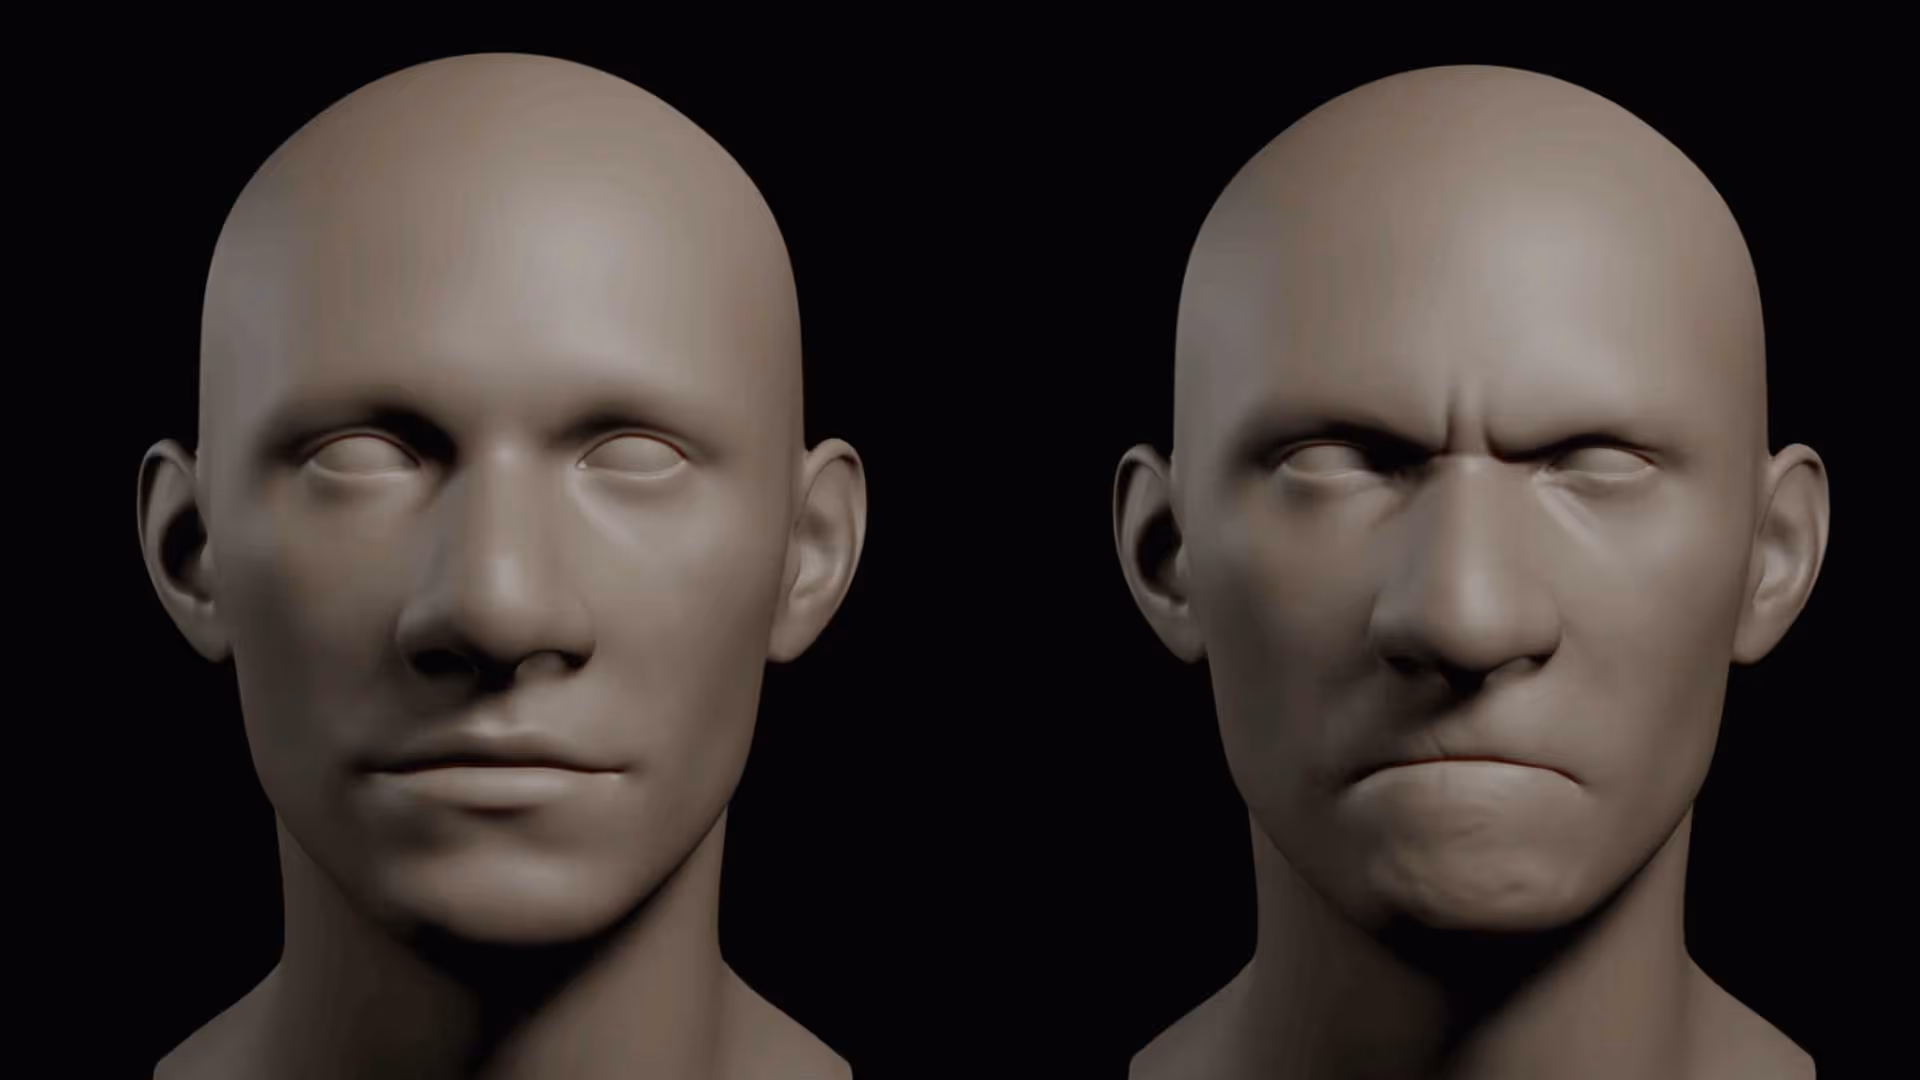
Step 2 is super simple… Go to the Layers subpalette (while your model is at the highest subdivision level) and click on ‘new’. As soon as you create a layer it should start recording straight away and you can begin the sculpting process to tweak the expression:

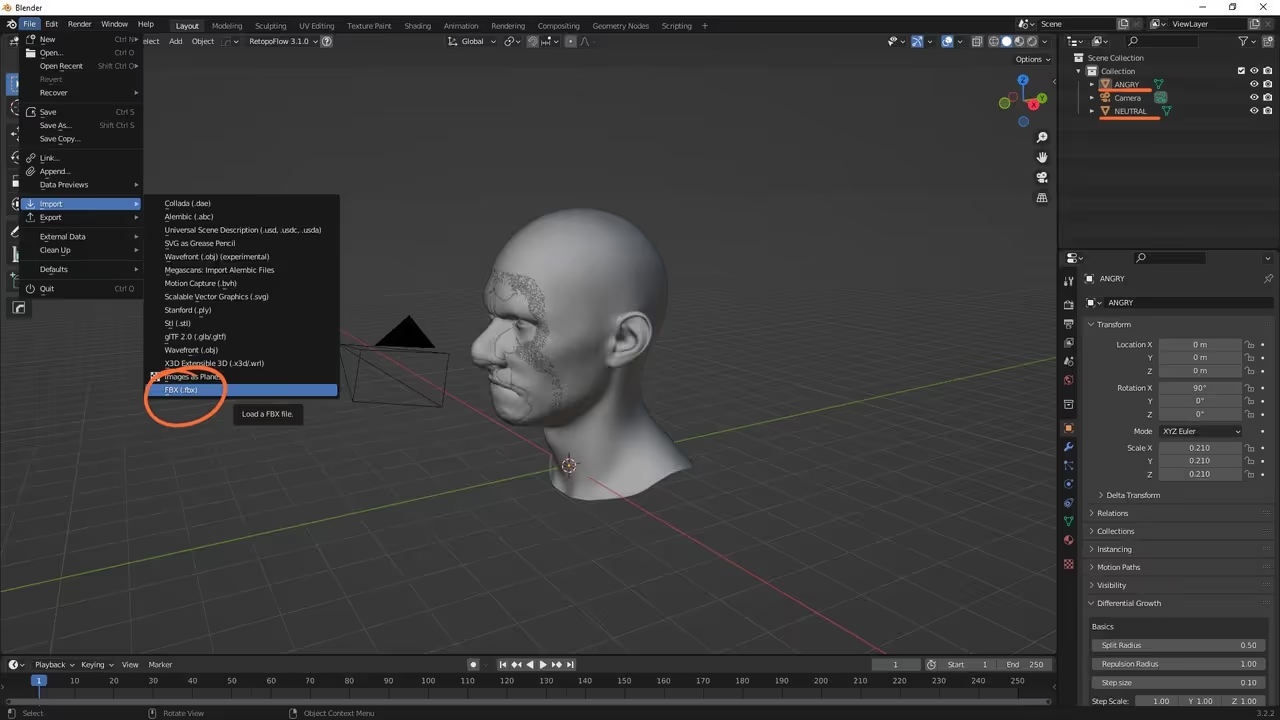
Once you have your expression in a layer, use the FBX exportImport plugin to export the head twice, one with the ‘expression layer’ at 0 and another FBX with the layer at 1. You can export these meshes as OBJ if you prefer and you can repeat this process for more multiple layers (multiple expressions).

In Blender, use the File > Import > FBX file option to import both meshes (the neutral base and the expression head).
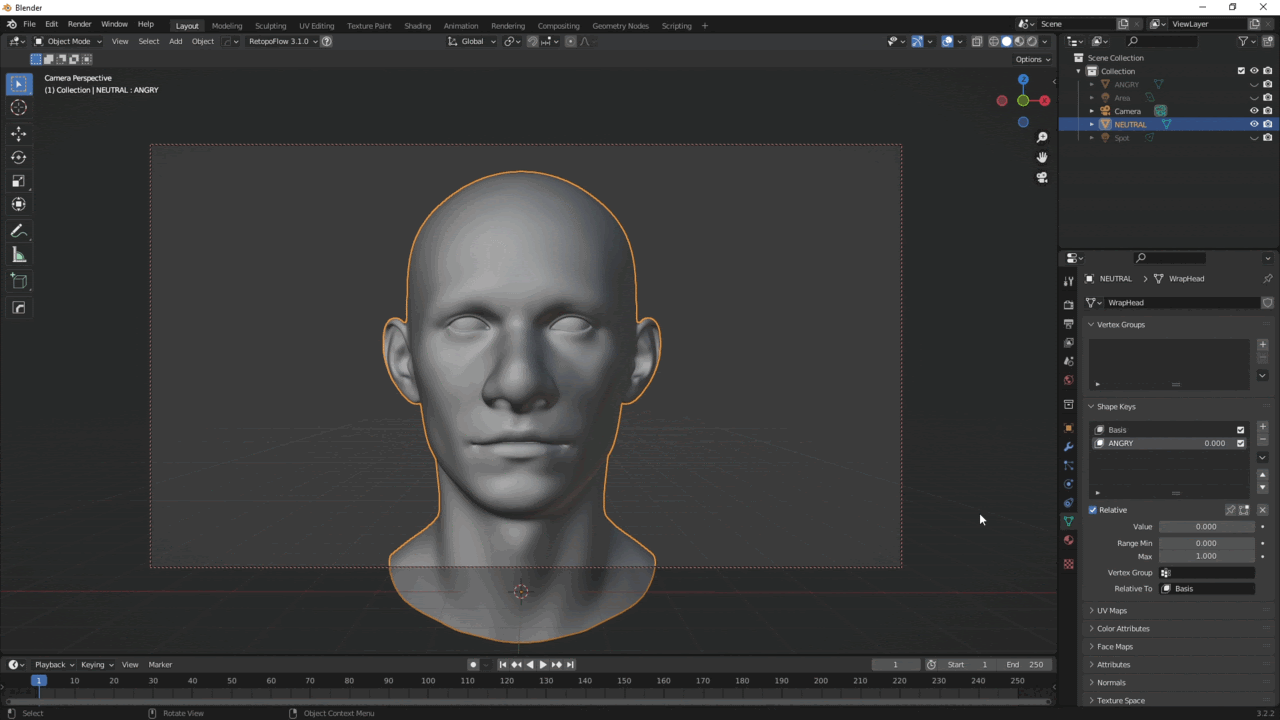
Once you have them both in Blender, you can move the expressions out of the way. Then with the neutral base selected, go to the ‘Object Data Properties’ and from the ‘Shape Keys’ click the ‘+’ button to add the BASE layer.
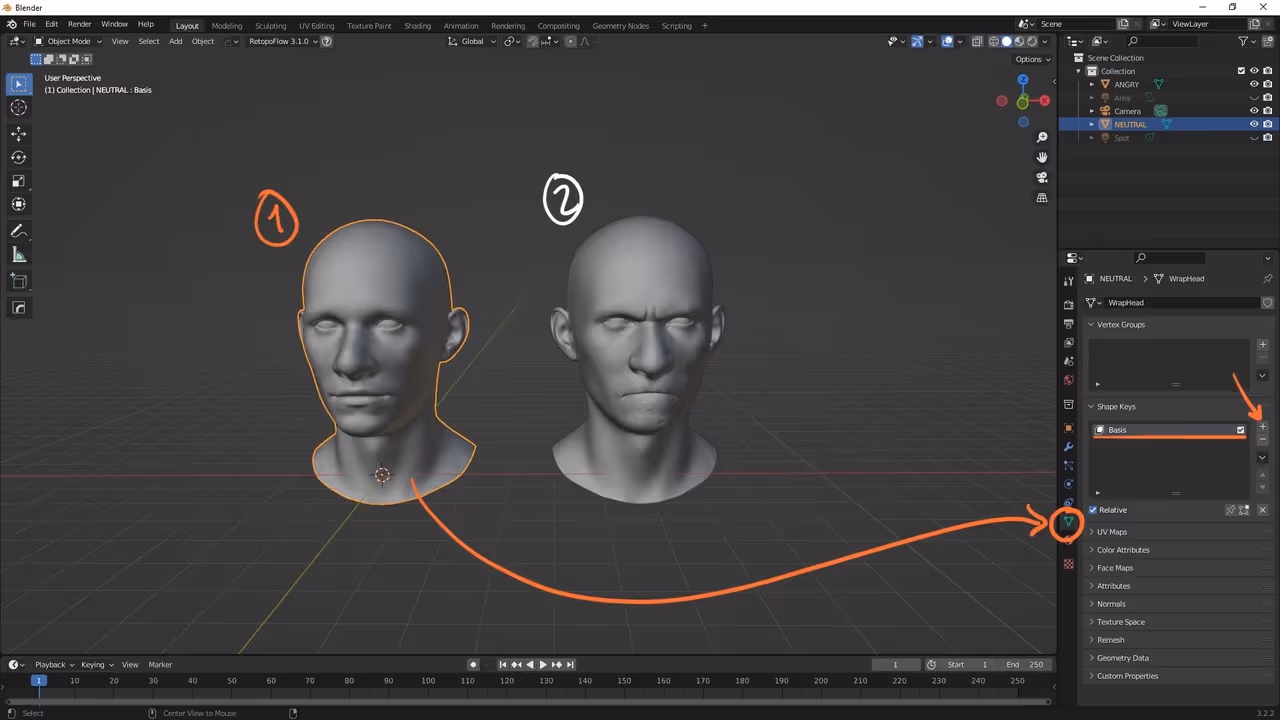
To create the actual blend shape from the other mesh with the expression, click the head with the expression or blend shape, then shift+click select the neutral base last and from the Shape Keys section, this time click the arrow and choose ‘Join as shapes’

This creates a new blend shape on the neutral base model with the expression. You can now hide the extra head(s) and use the ‘Value’ of the new blends hape to blend between the two shapes of the head:

That’s about it! pretty simple but very helpful workflow. You can also right-click on the Value slider of the blend shape and click on the ‘Insert frame’ to create a frame in the timeline so you can animate the transition ;)


.webp)

.webp)