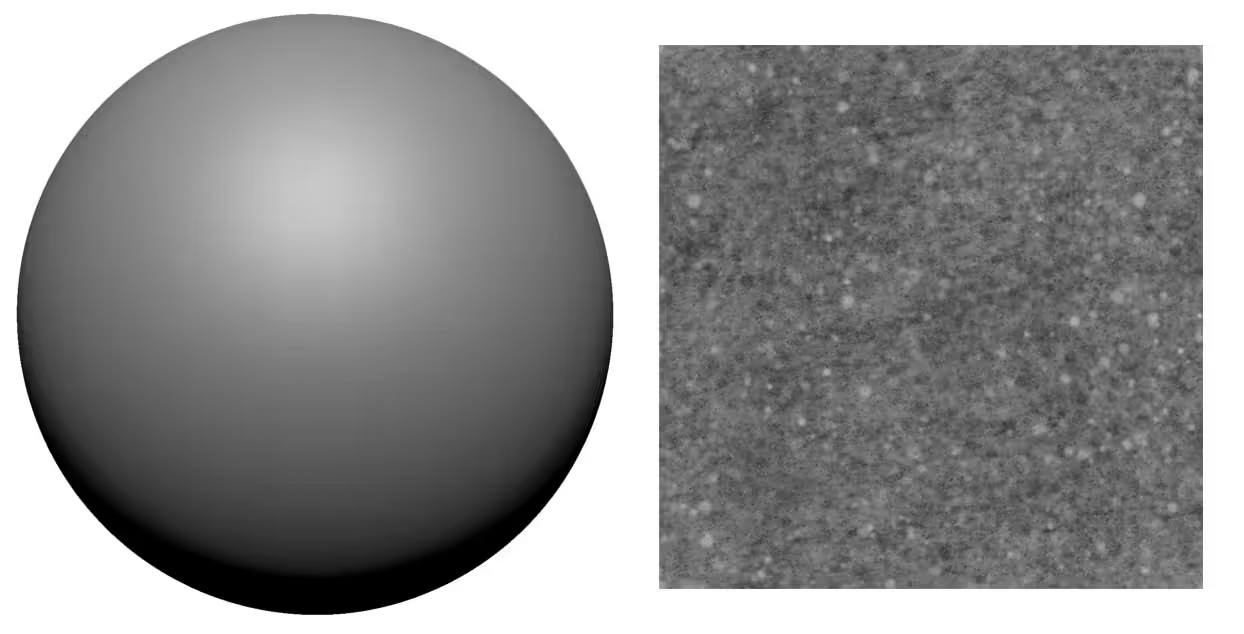
I have a subdivided sphere with UVs and a tileable alpha texture (click here to download texture)
So the idea with this trick is to use the alpha texture as a mask so that we can manually determine the influence of the details (where they are placed, how deep, how high, how soft, etc). To start with this process, let's apply the texture as a surface noise.
- from the surface noise palette, click the noise switch. From the noise window, click the 'Alpha on/off' button at the bottom left corner to select the PNG file with your image.

- Now, instead of using the noise as a way to fill the model with details using the alpha (which is actually a very nice workflow on its own), we just need to use this feature to wrap the texture around the model. Click on the 'Uv' switch at the top right and then set all the sliders to '0'. Also, to see the size of the texture on the model (alpha scale), you can set the ColorBlend slider to 1, choose a dark color and click OK:
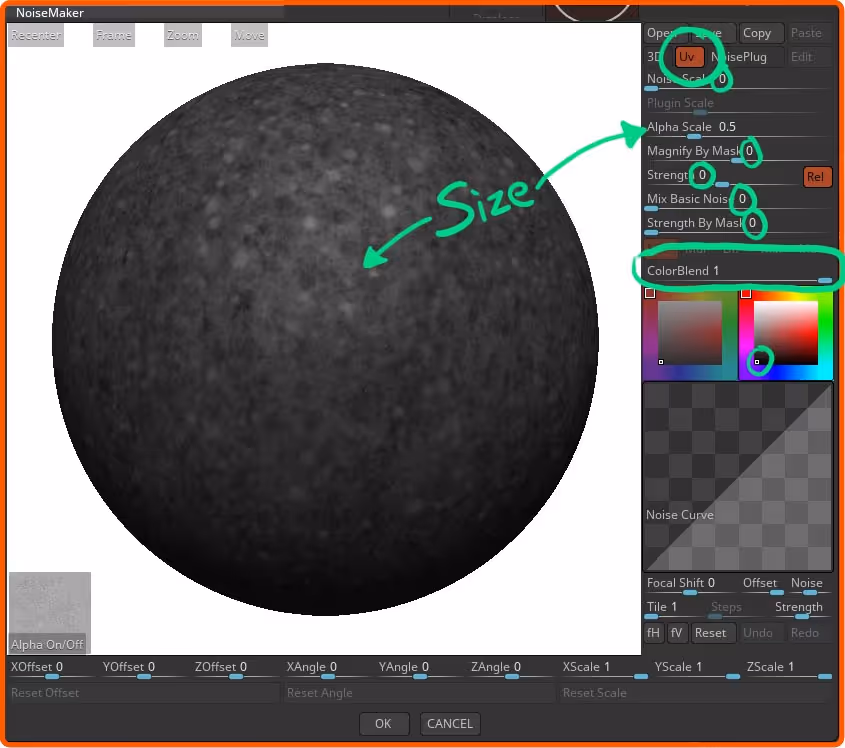
NOTE: the only slider that will affect what we are going to do next, is the scale.
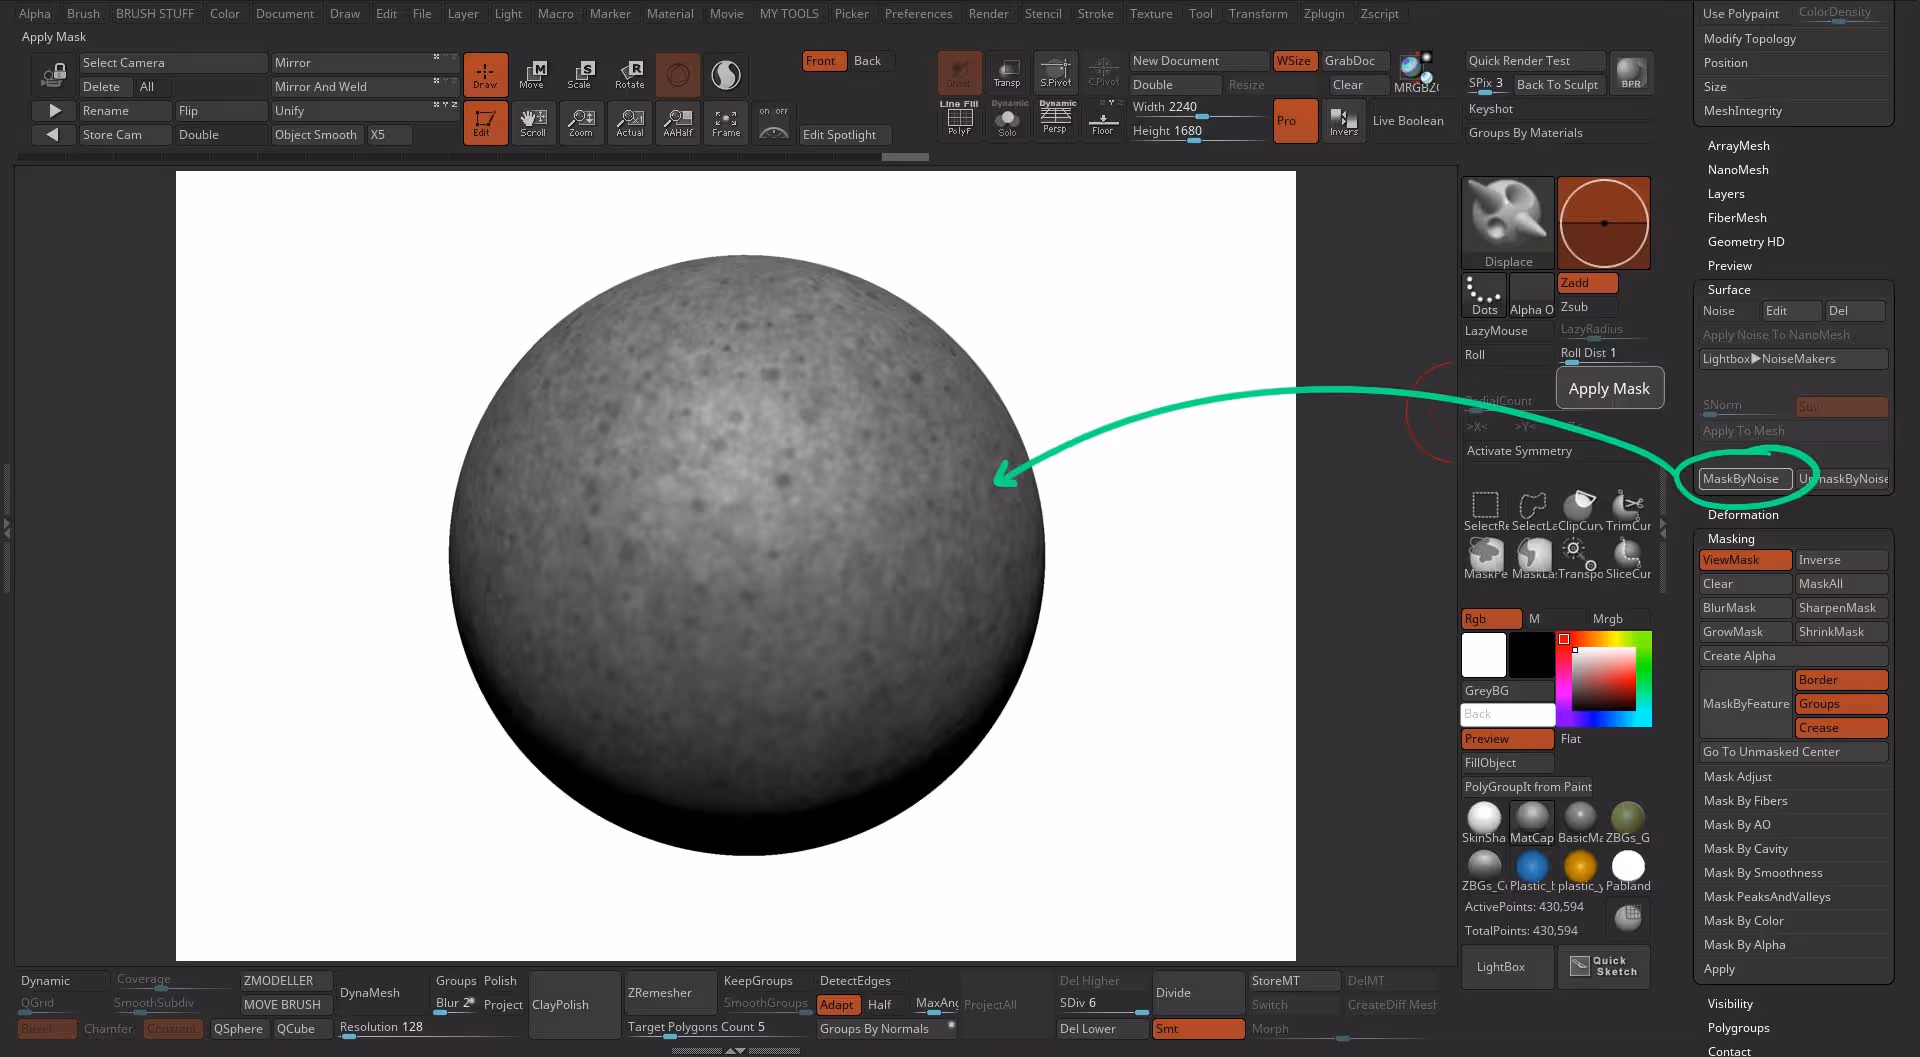
- You should see a preview of the noise but only in color. All we need to do now is change this preview of color into a mask by clicking on the 'Mark by Noise' button in the surface palette.
We'll end up with a mask wrapped around our model based on the values from the alpha we used.
- To finish the setup before we start manually adding details, you can turn off the mask preview so that is easy to judge the effect of the brushes. From the masking palette click the 'View mask' switch. this will hide the mask but keep it active:
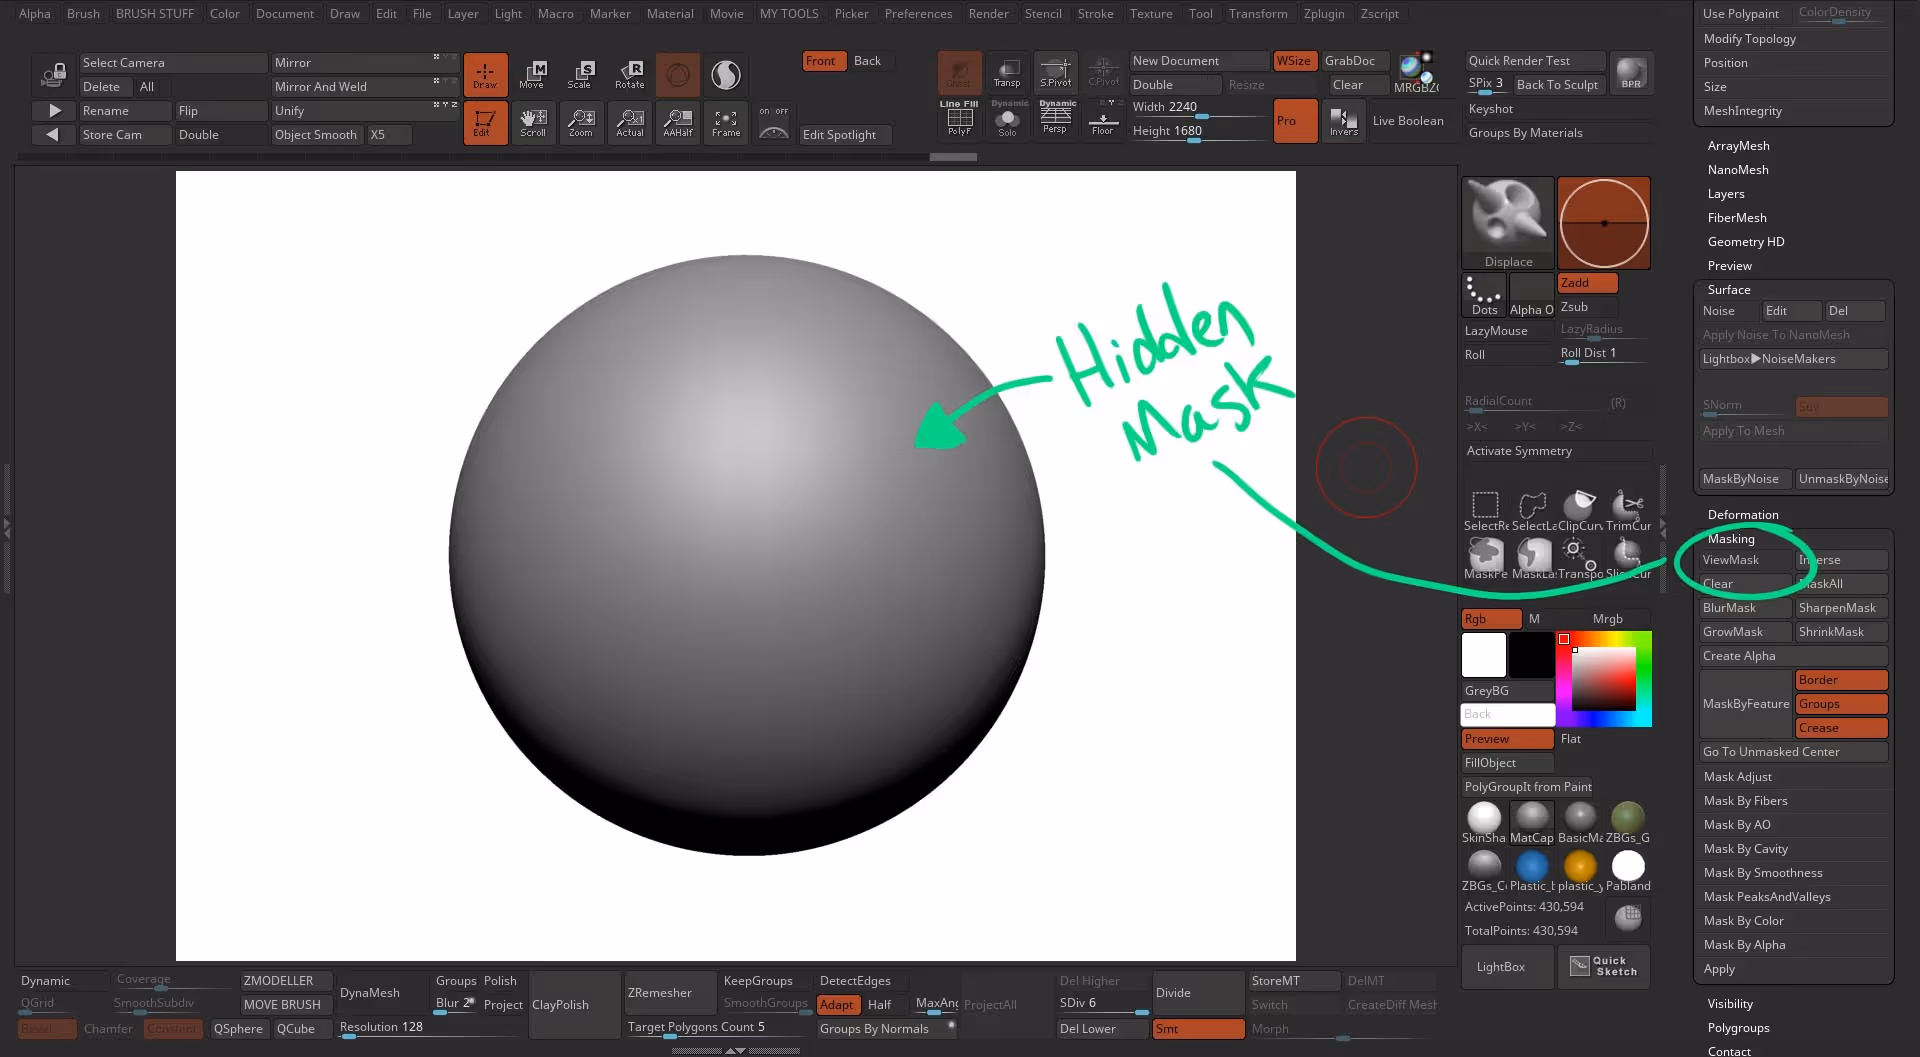
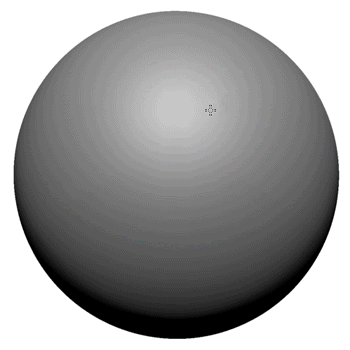
Now, we have a sphere that looks pretty much like the one at the beginning of this process but it has a very detailed mask over the entire surface that we can use to pull and push high-frequency details where we want to:
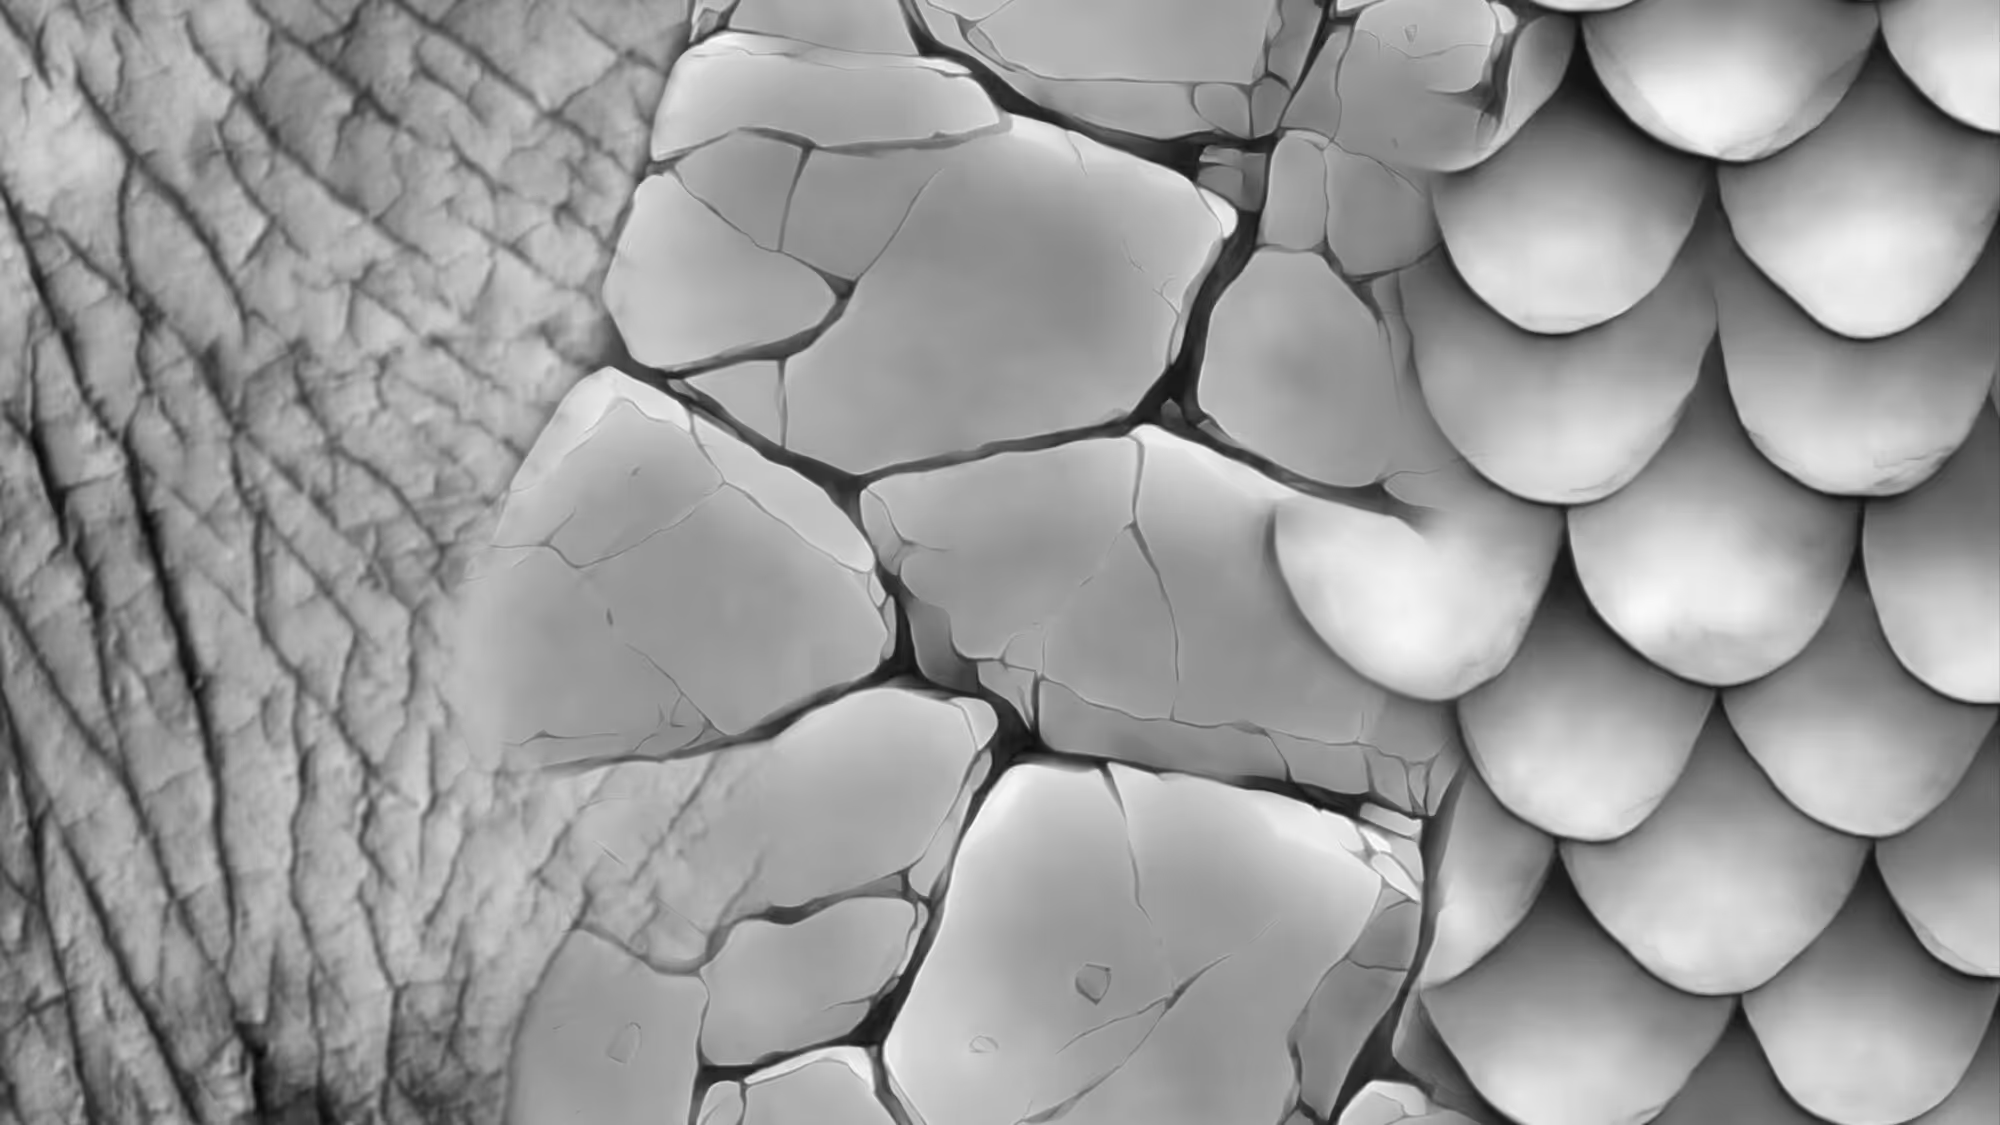
In the GIF below, I'm just using the standard brush with my tablet to go over the areas I want more details and the pattern is given by the mask we created from the alpha:
NOTES:
1. Best brushes to work with this process: FormSoft, Displace, and standard.
2. You can work with sculpting layers and morph target for additional control
3. this process works best for generic details or the base of skin since it uses tileable alphas/textures.


.webp)

.webp)