
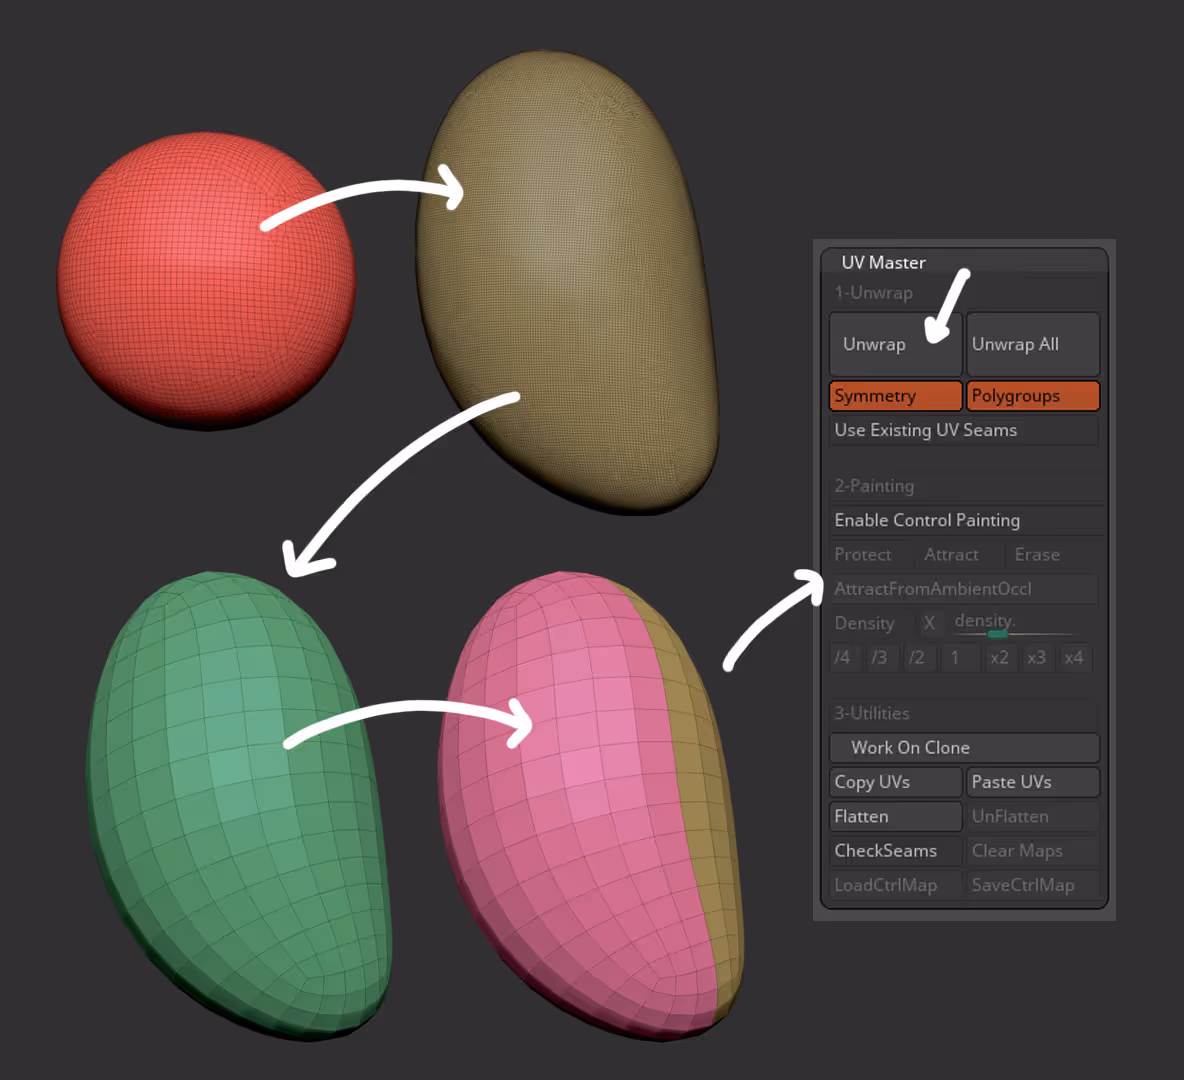
Grab a sphere or similar and run a quick ZRemesher process to simplify the geometry and assign two polygroups to create UVs with the UV Master (it helps if the seam of the UVs is hidden.
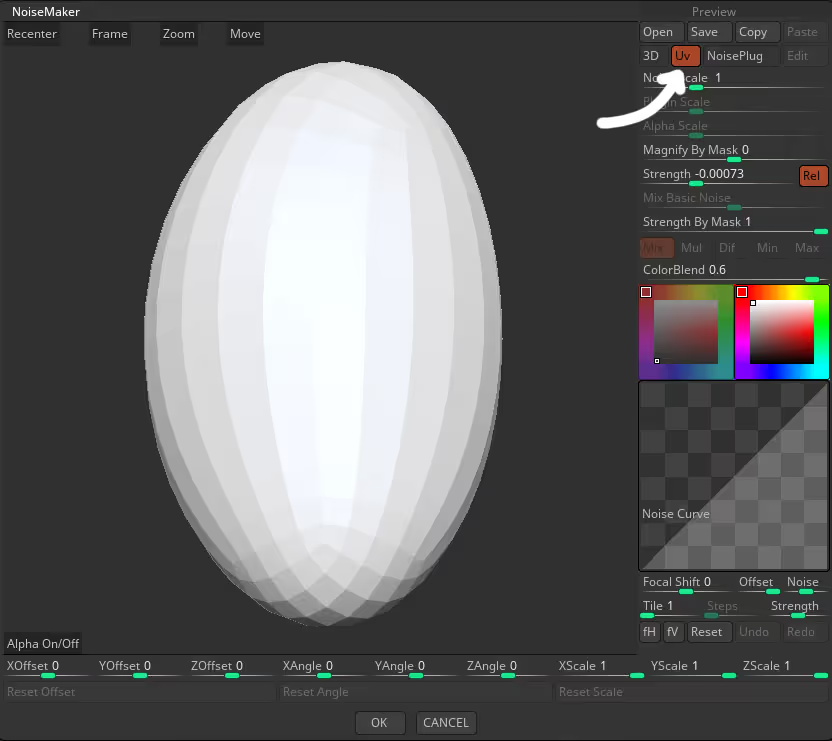
And this should get you 50% there already… To get the hex pattern, go to the Surface subpalette enable ‘Noise’ and from the pop-up window select the UV switch to wrap whatever pattern you use based on the UVs and not the camera projection.
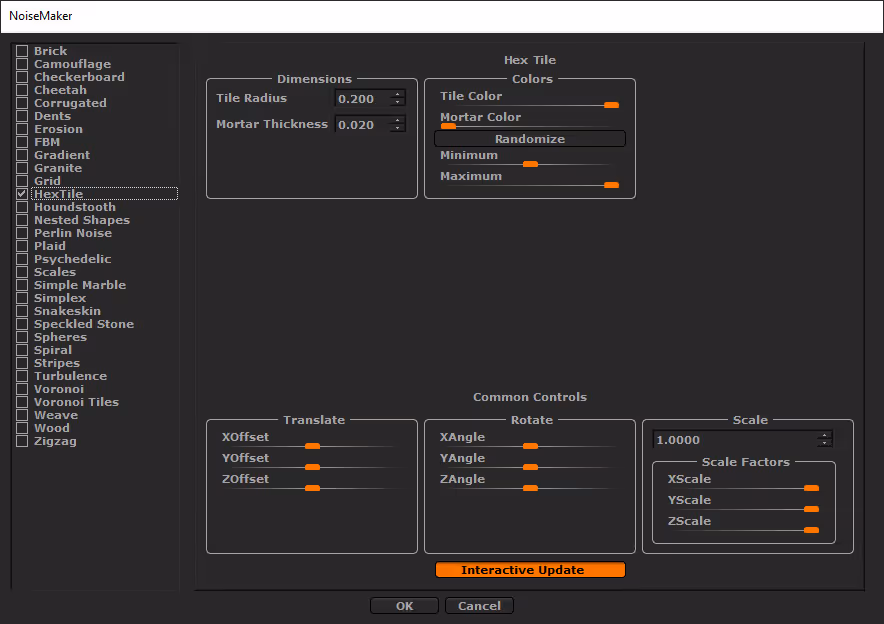
Click on the Noise Plug switch to bring in the ‘noise plug’ settings and here is where you can choose some cool designs. We’ll stick with the hex pattern so tick the HexTiles and click OK.
You might not see the effect of the noise plug on the model straight away… just hit the OK button and then tweak the intensity from the Surface plugin.
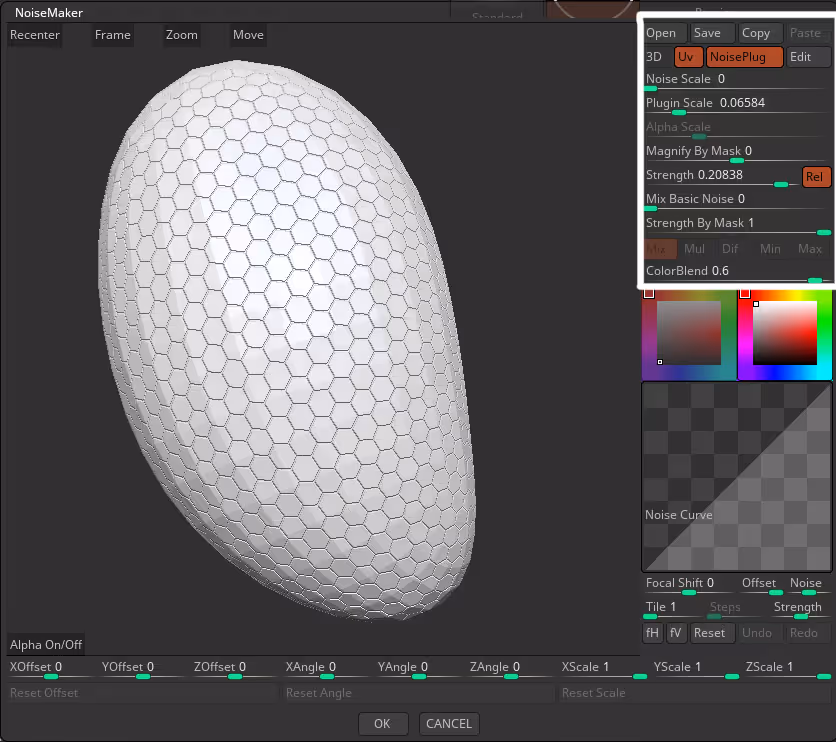
Ok, at this point you can click the ‘OK’ button and you’ll see the surface noise preview on your model. The trick here is that we don’t need to apply the noise but make use of the mask that can be generated from the pattern… so, to keep things simple, subdivide your mesh a few times to have enough resolution and then click on the MaskByNoise button.
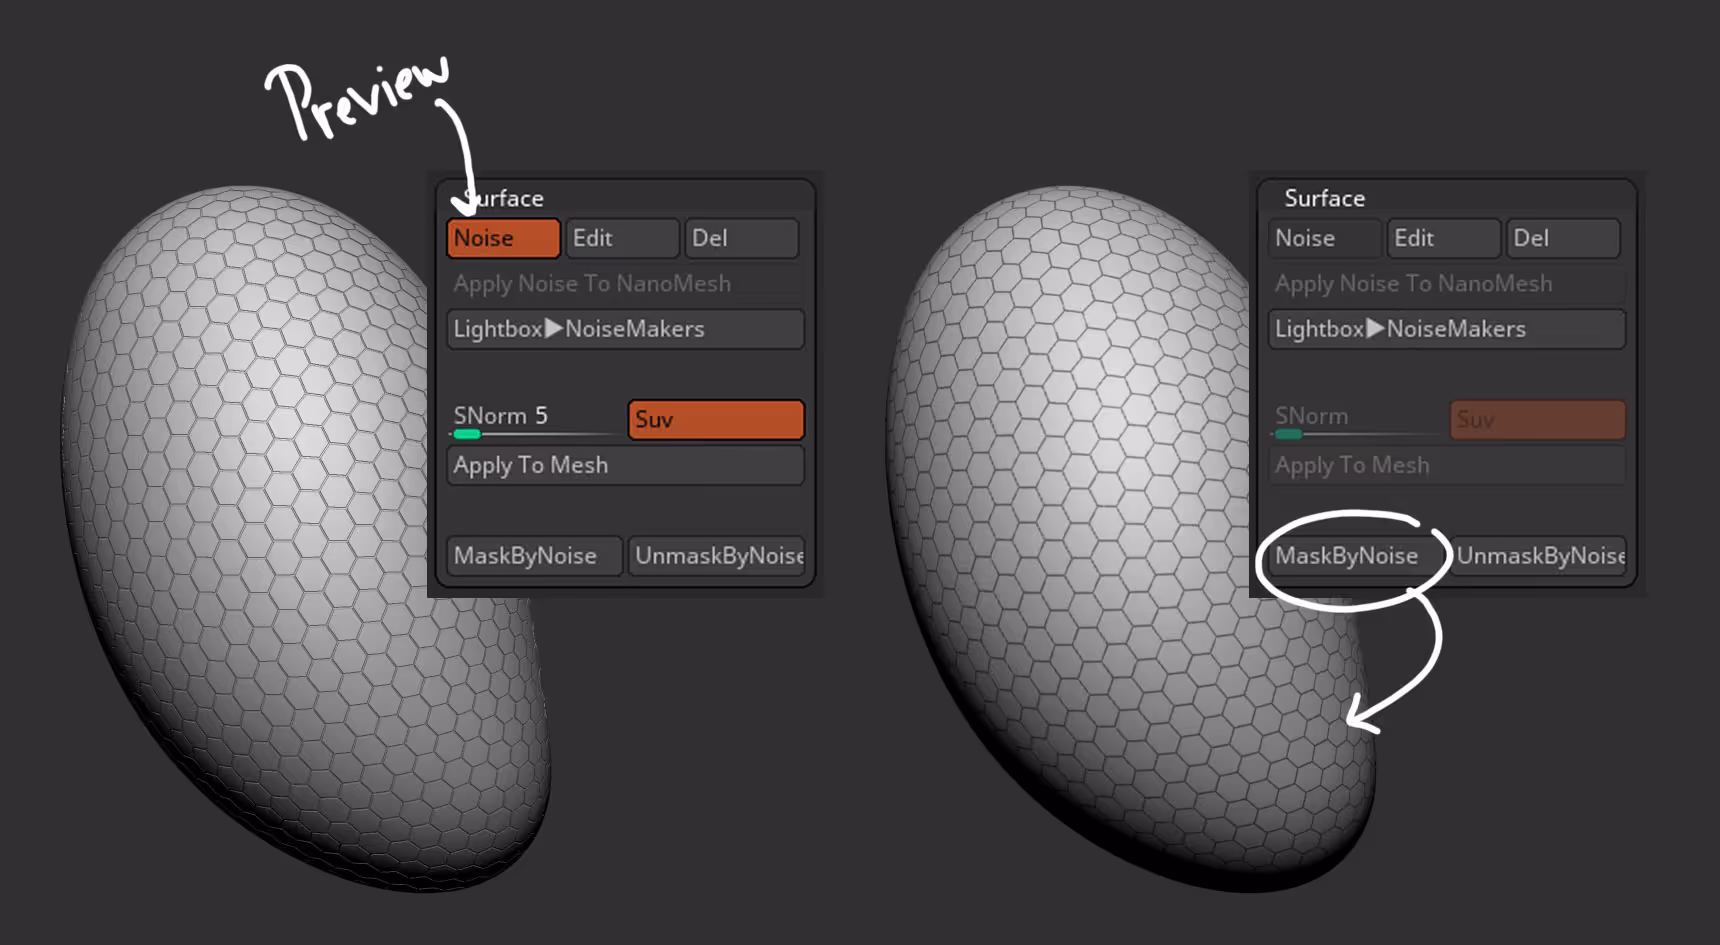
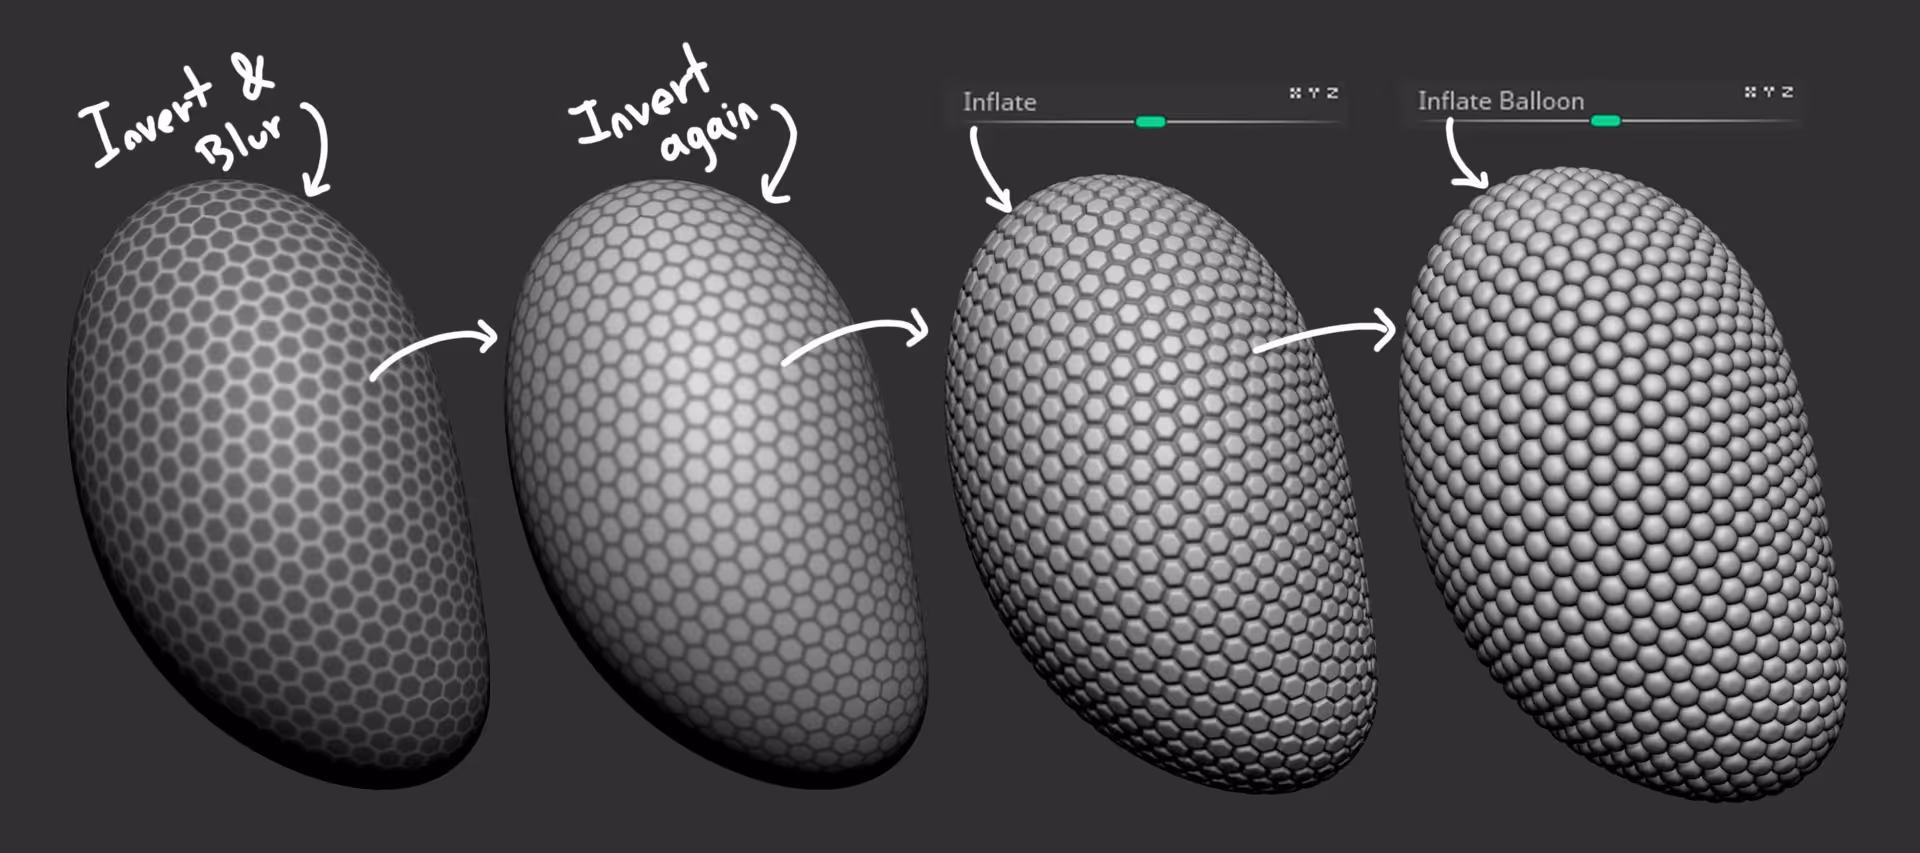
This process will take the noise pattern preview off and create a mask based on the same pattern (if your mask looks ‘fuzzy’ you need more subdivisions or resolution on your mesh). At this point, you can invert the mask and blur it a bit to create a softer transition and then use something like the ‘inflate’ slider to create the 3D Patter:
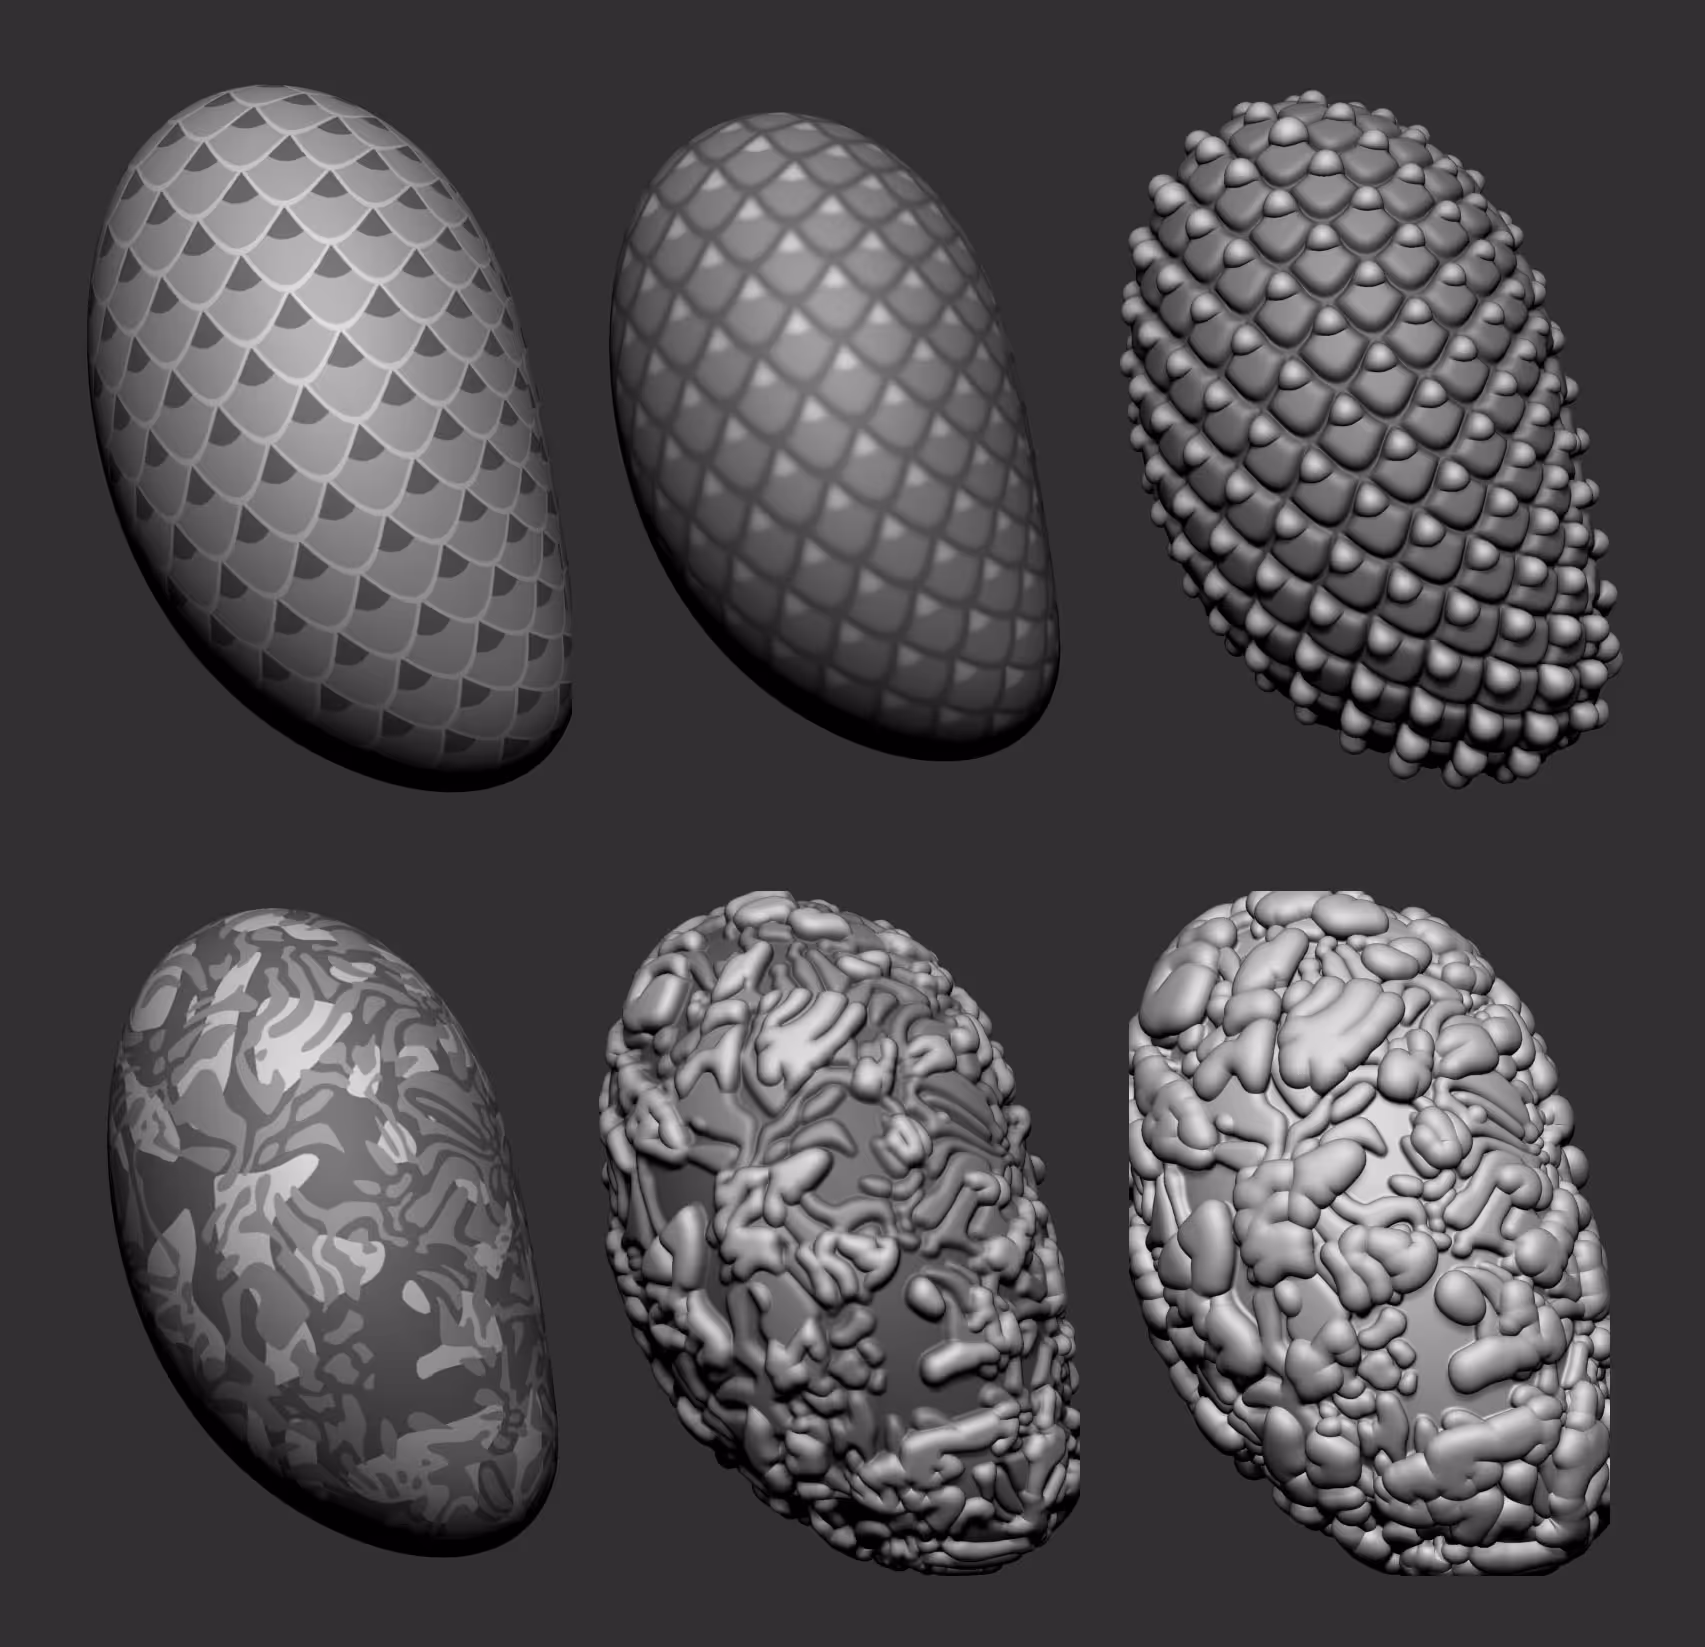
pretty cool right? and you can explore other noise plugging patter to see what you get, like these scales or camouflage patterns:


.webp)

.webp)