The first thing is to have your base mesh ready (character or similar) with subdivisions or high-res Dyanamesh and find a few photographs of geometric/abstract shapes. I’m using some cropped photos from buildings I found on Unsplash.com
Then take the standard brush and tweak it so that the ZAdd and ZSub switches are off and the RGB switch is on. Change the stroke type to DragRect and load the photographs into ZBrush from the Texture palette… The idea is to ‘click and drag’ the textures on the models to project them using polypaint:
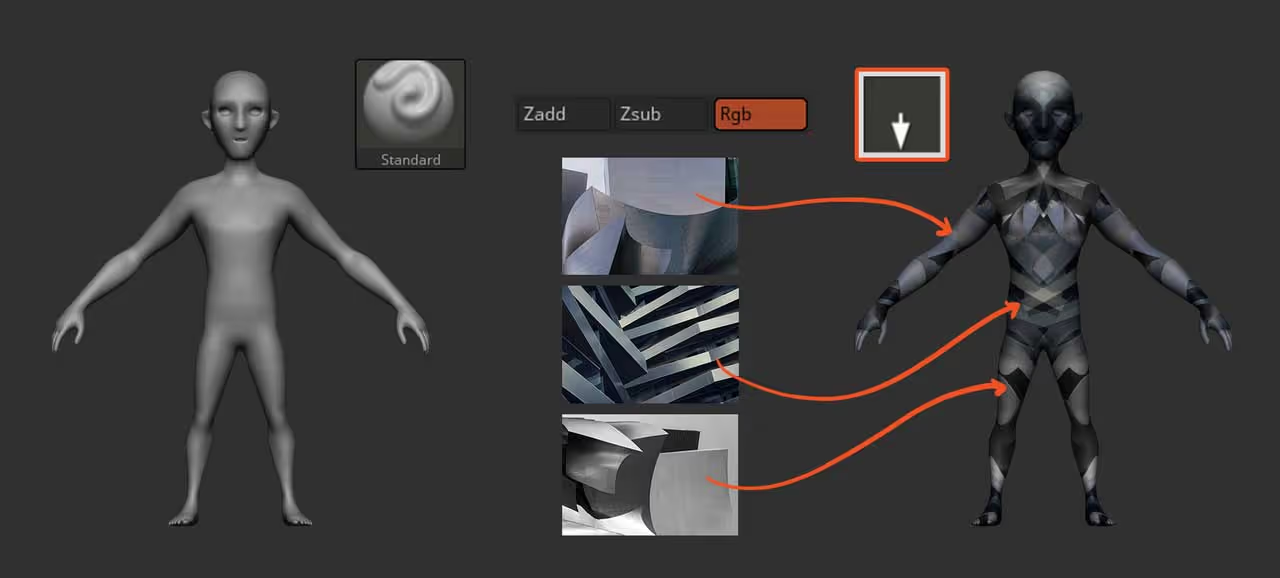
Using Symmetry helps to keep an eye on the patterns and flow of the lines (it helps if the images you choose have high contrast). Here is an example of how quick and easy this first step is:
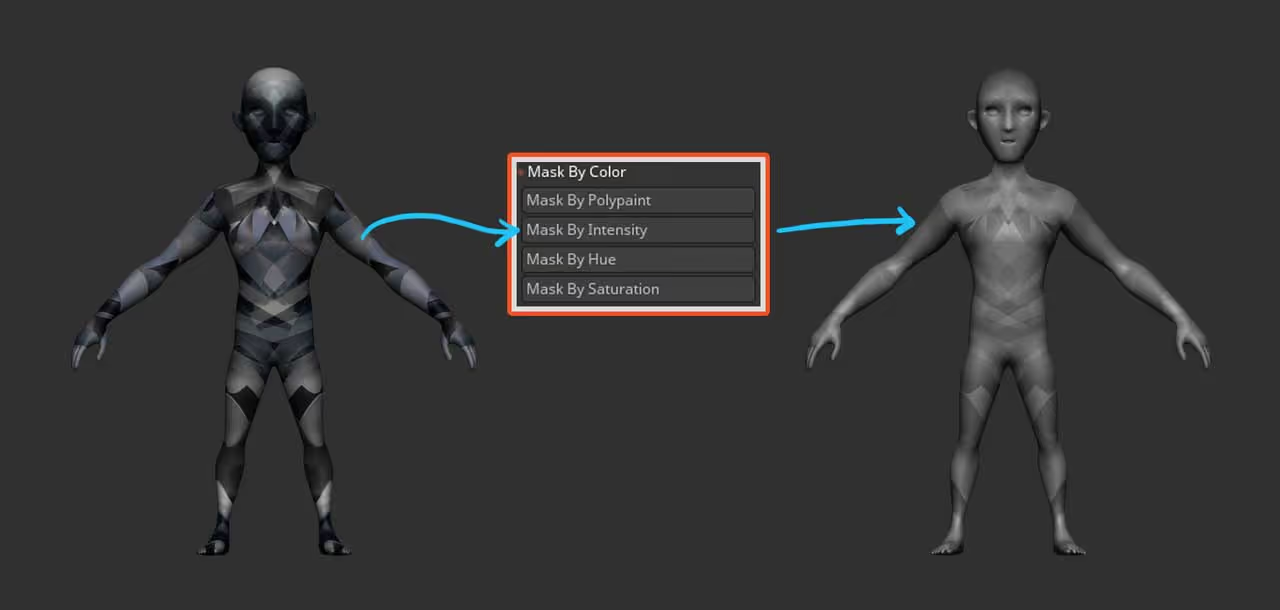
Once you complete your quick polypaint pass with the abstract shapes, you can use the ‘Mask by intensity’ button from the Masking palette to create a mask based on the intensity of the different photos you dragged… After clicking ‘Mask by intensity’ you can hide the polypaint to see the mask a bit better and invert it (optional).
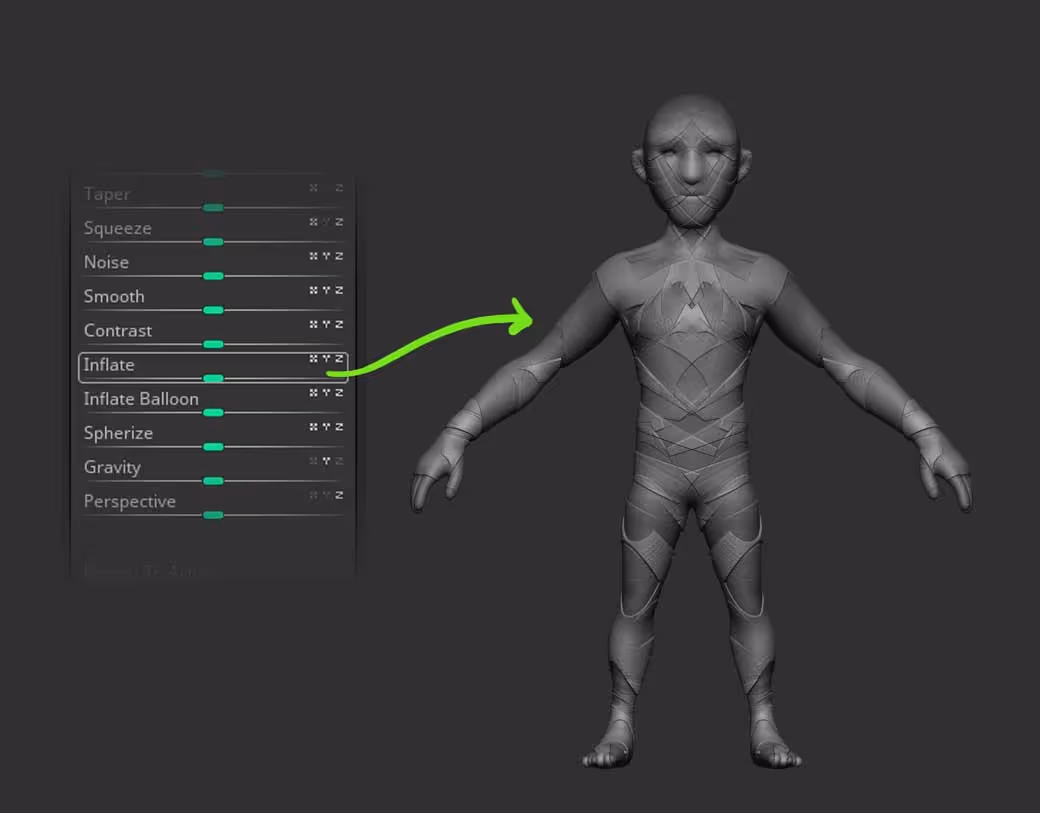
The next step is what gets you 90% closer to a nice concept and what makes you go “Ohhhhhh cool, I’ll be doing a lot of these from now on!”… Since you have the mask generated by the values in the polypaint (from photos), you can use the inflate sliders from the Deformation palette to add a few thickness variations.
This process should give you some interesting shapes and ‘panels’ that you can use to refine the sculpt:
Of course, this is just the base and you can take it as far as you want to. For instance, using the ‘suggestions’ from the inflate process, I accentuated some of the lines in the shoulders to create some kind of fabric padding there and also added some wrinkles with the standard and Dam_Standard brushes.

The final step is to enable polypaint back on and because the Mask and inflate were done based on the values of the polypaint, the actual colour should perfectly match the variations in volumes. So now you can refine the polypaint a bit and adjust the colours:
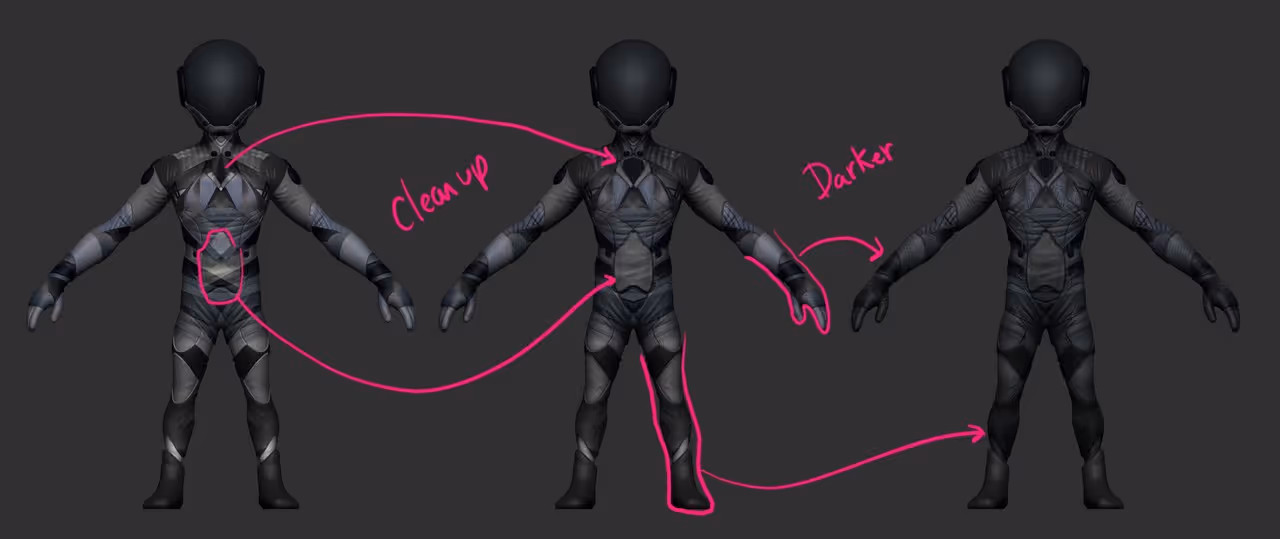
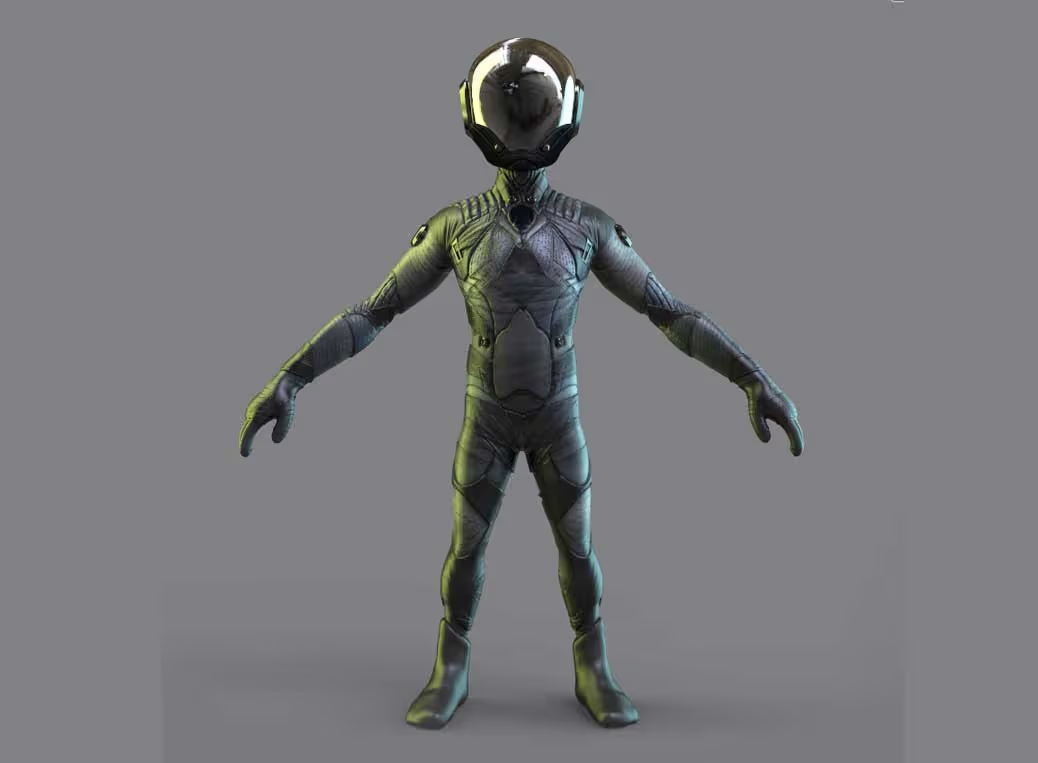
For this quick concept, I also added a sphere for the helmet and clipped the sides a bit. I also use the IMM model Kit brush that comes with ZBrush and added a couple of details on the shoulders, chest and side of the visor to complete the effect:

For the render I sent everything to keyshot, assign a couple of materials and that’s it.
This is a very quick way to create intricate patterns and generate variations on an idea. Hope you find it useful!


.webp)

.webp)