
So here is a quick way to generate an effective ID render pass:
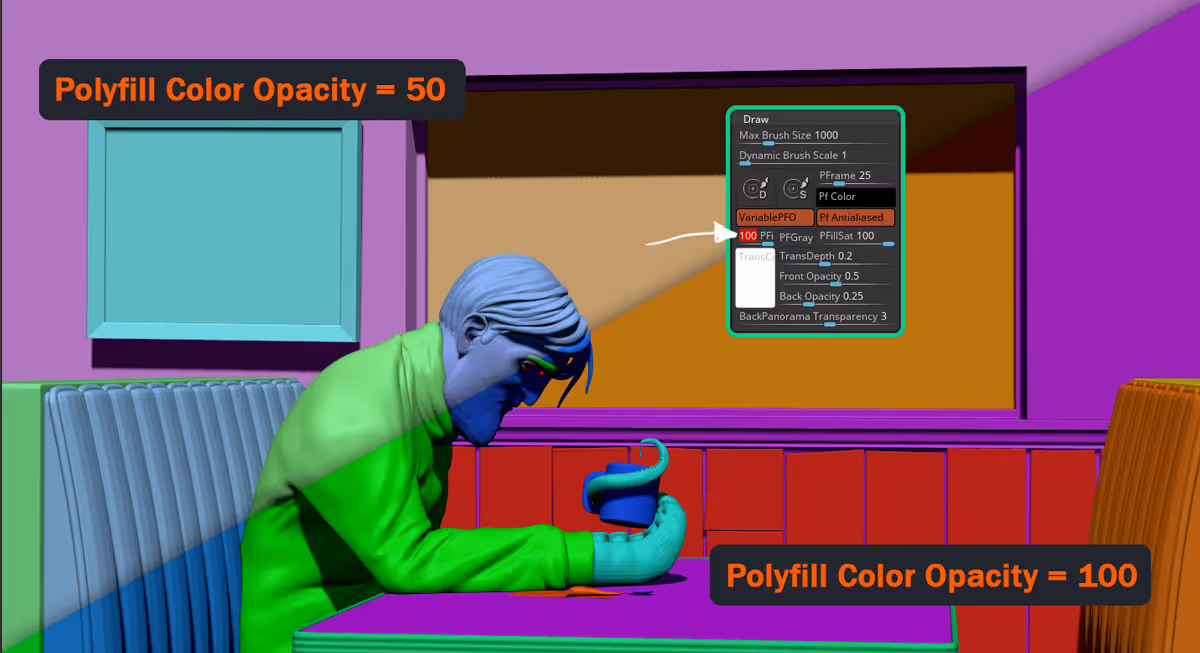
- First, If you have a single mesh with different polygroups, you ccan go to the preference palette and under the 'Draw' subpalette, there is a slider called Polyfill color opacity set to 50 by default. Go ahead and change that to 100 to get a very bright and distinctive set of colors.
- Alternatively, if you have everything separated by subtools, from the ZPlugin palette, expand the Subtool Master plugin (should be there by default) and click on the 'Subtool Master' button. This will open up a new menu with buttons and all you have to do is click on the 'Fill' button
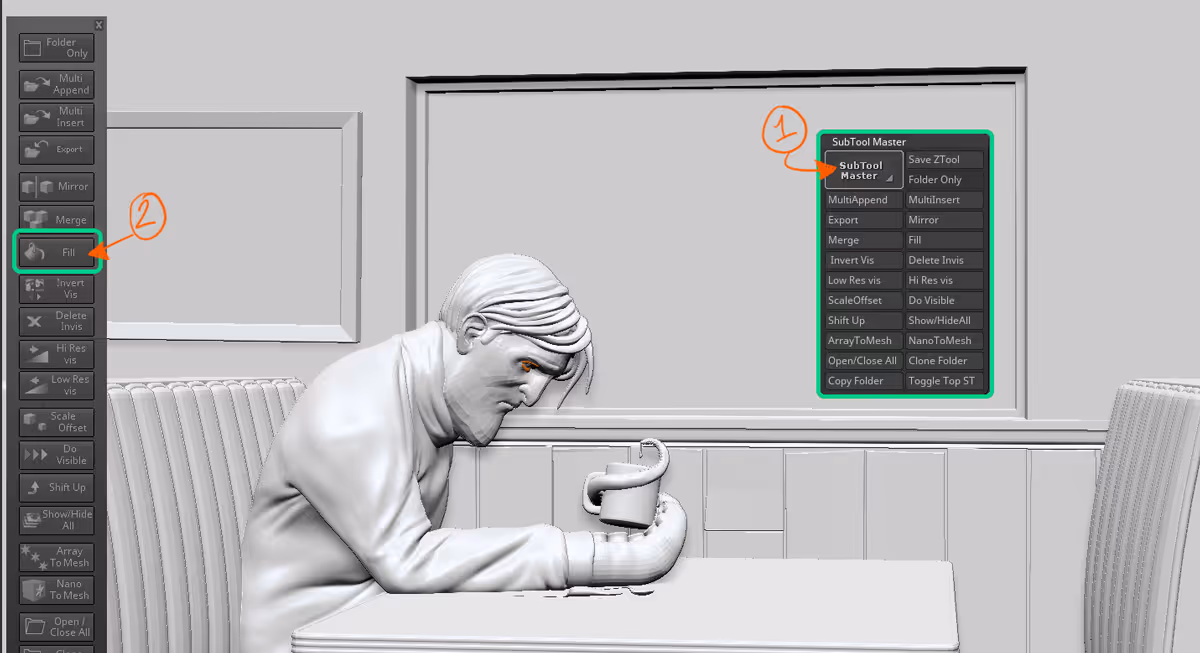
- That's it, from the popup, select the box for just color (unless you also want material) and ZBrush will automatically assign a different bright color to every subtool
Once you have this pass, you can use it to select specific areas and tweak things like color and contrast or simply to mask out textures. Here is the final scene of this personal project I just finished:

Subscribe to our newsletter


.webp)

.webp)