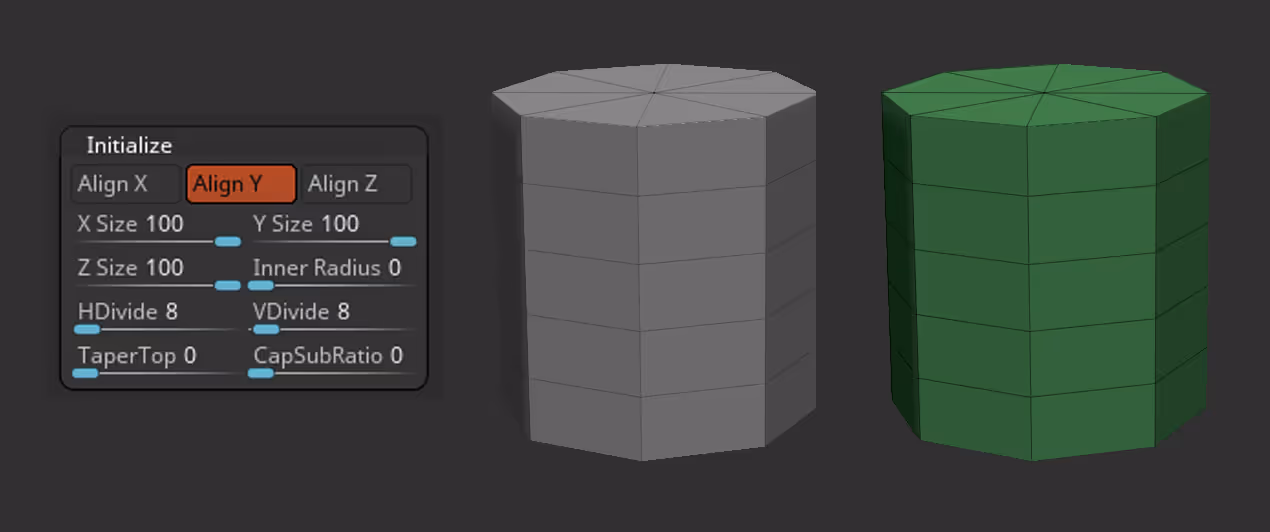
- we'll start with a primitive cylinder and modify the resolution so it is not as heavy (you'll be able to subdivide it later for a smoother look) and convert it to a Polymesh3D
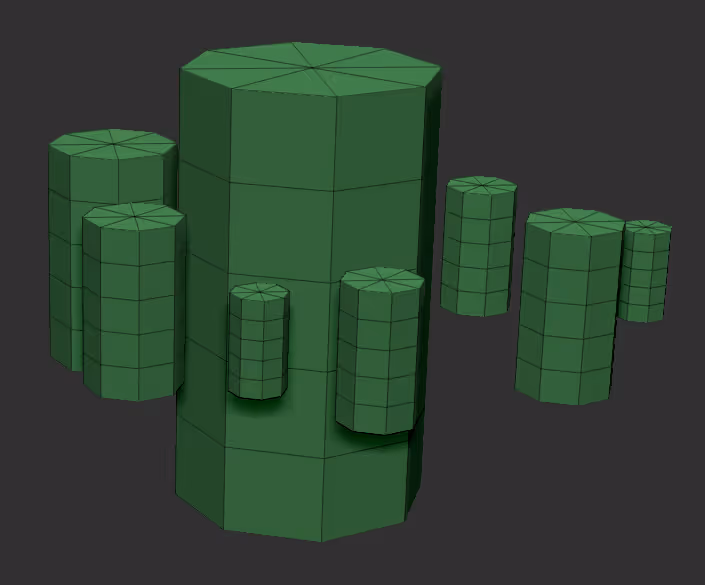
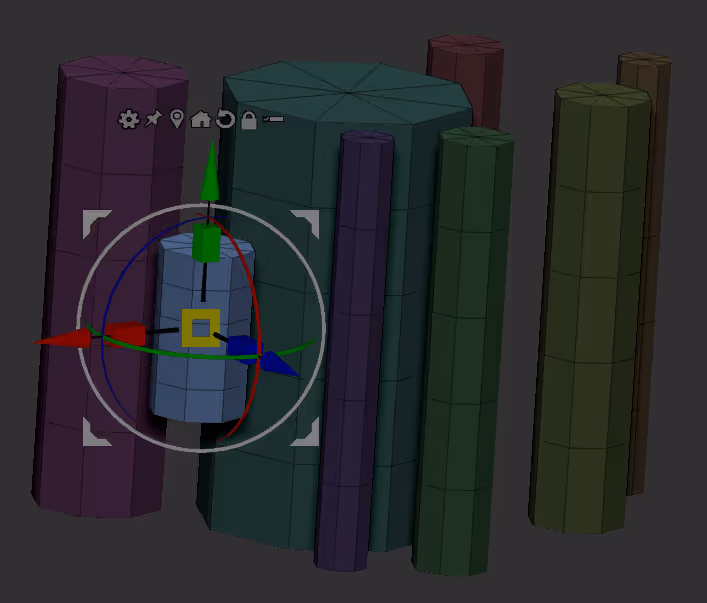
- Then you can use the Gizmo 3D to quickly duplicate the cylinder (Hold Ctrl + drag) and play with different scales (the different sizes will create variation in thickness for the hair clumps). Just make sure they are all within the same subtool.
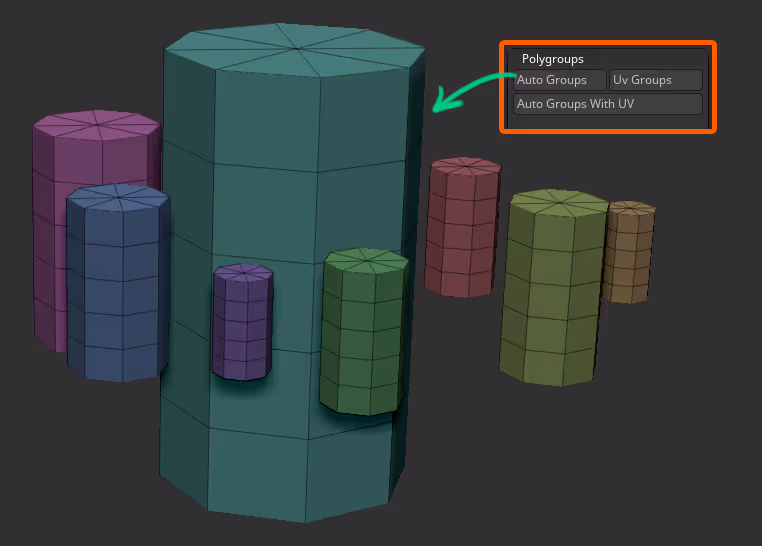
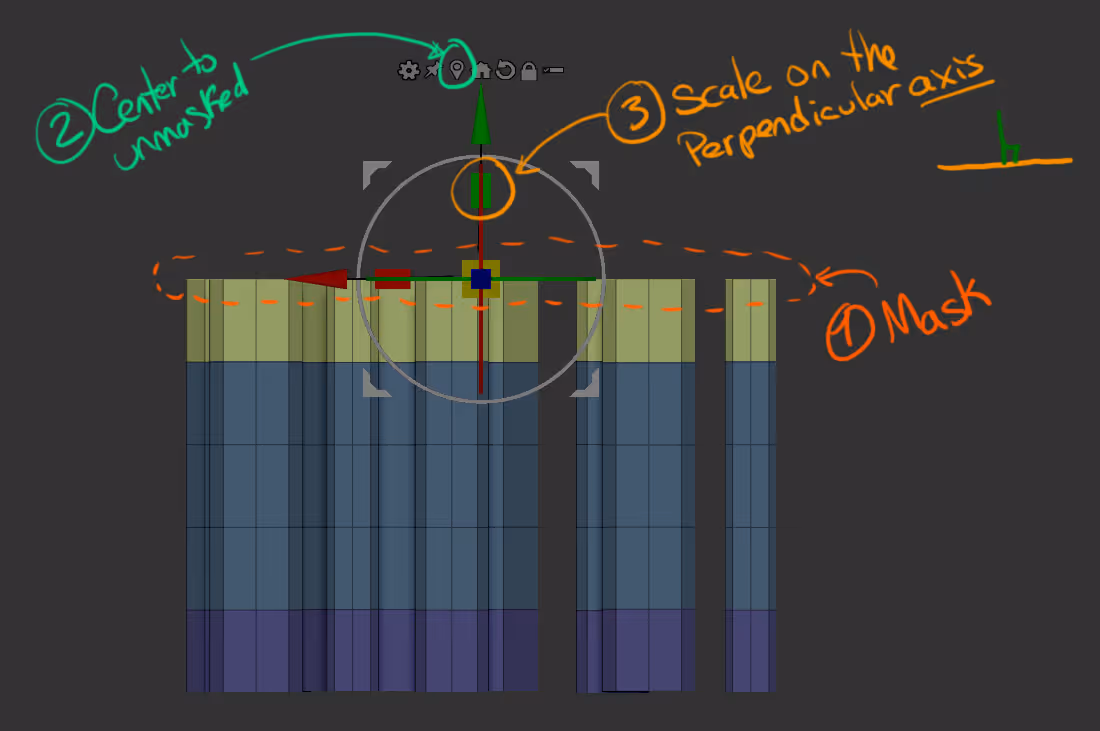
- Now, since all the cylinders are separate geometry or objects, we can use the AutoGroups feature in the Polygroups subpallete to give each cylinder a different ID. This will make it easier to isolate each piece (Ctrl+Shift+click) and mask the rest (Ctrl+Click on canvas) to then scale everything to a similar height.
- You can use the Gizmo to flatten the top and bottom to make sure they are at the same height. Also, assign a single playgroup to the top, middle and end of the cylinders.
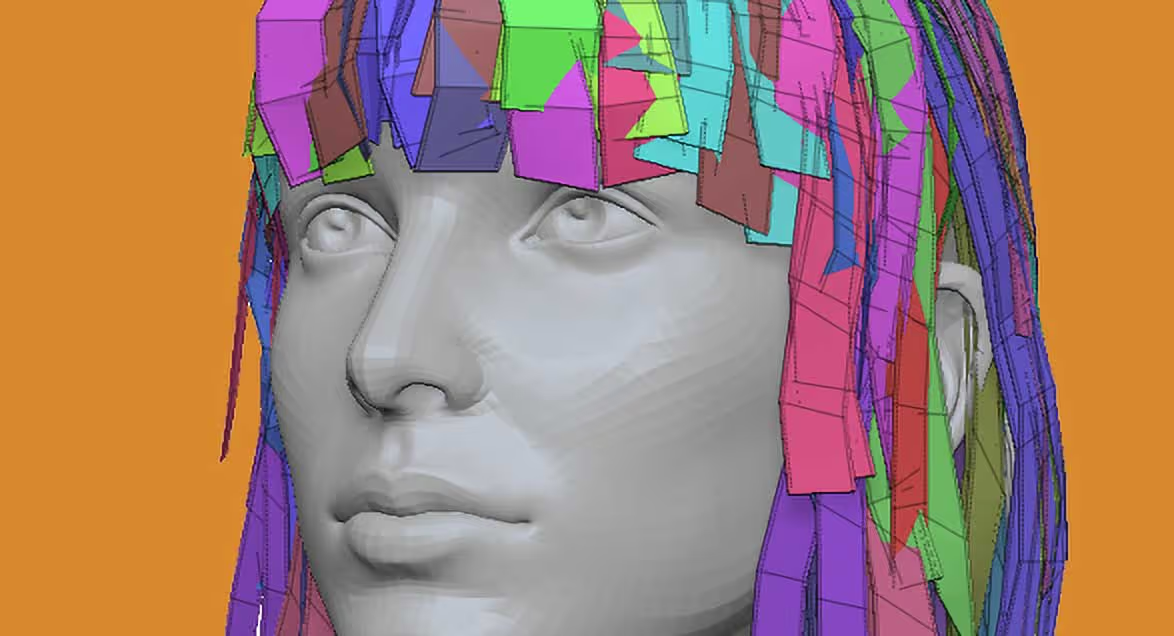
That's it for the setup. Now, all we have to do is create an insert Mesh from the Brush Thumbnail (click on the 'Create InsertMesh' button). And then turn it into a Curve from the stroke palette (enable the 'curve' switch).
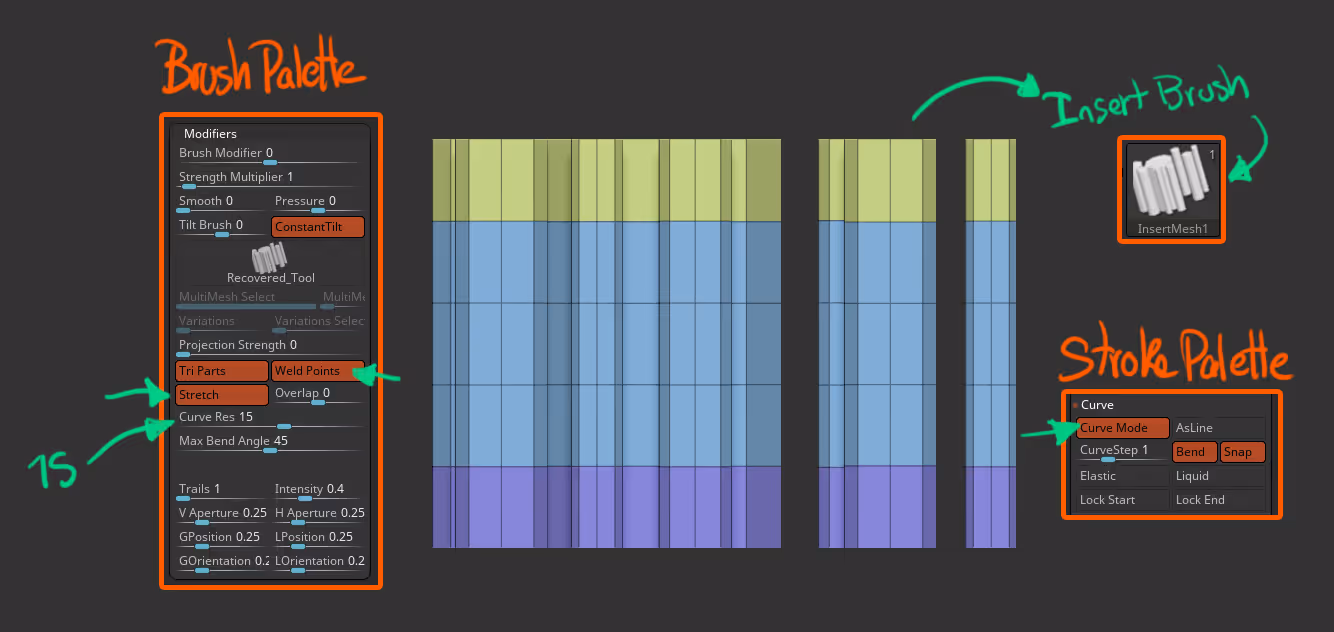
Done! you know have a cool brush for stylized hair. Feel free to use the settings I have in the image above or tweak them to fit your needs. It is important to have the 'TriParts', the 'Weld points' and the 'Stretch' switches on from the brush palette, to get a nice smooth and continuous curve.You can even play with the curve profile from the stroke palette to add a bit of tapering to the curve:
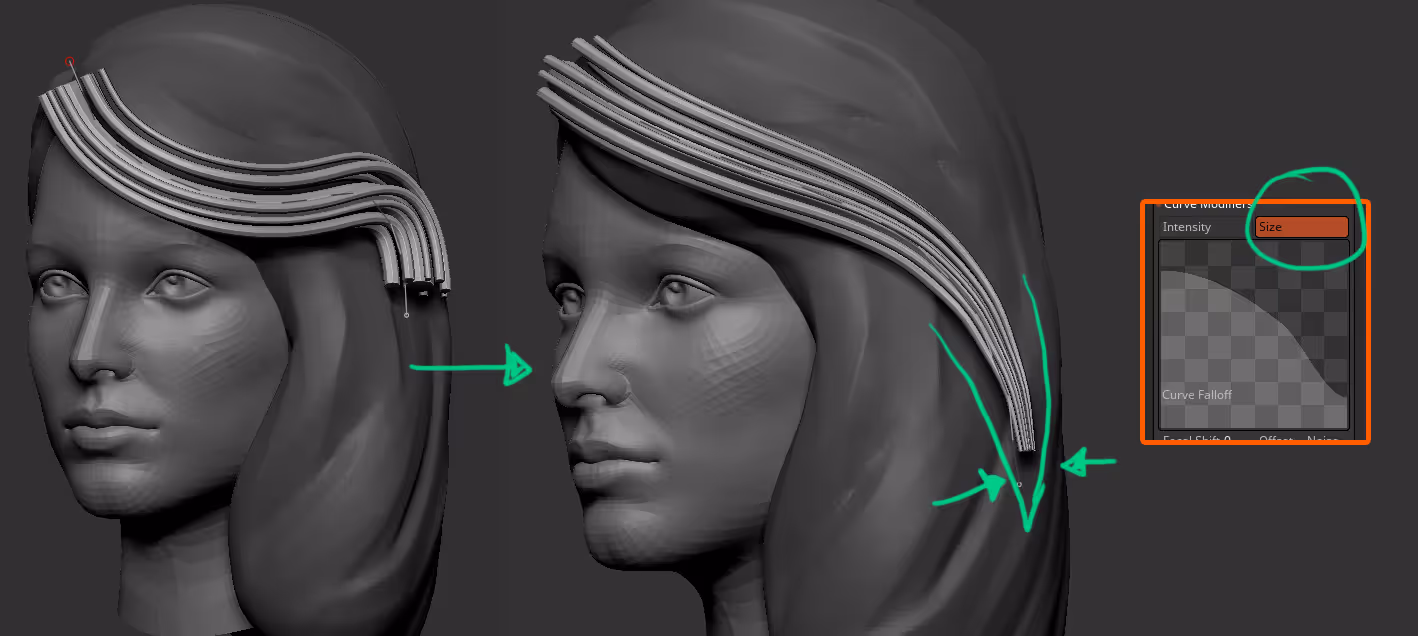
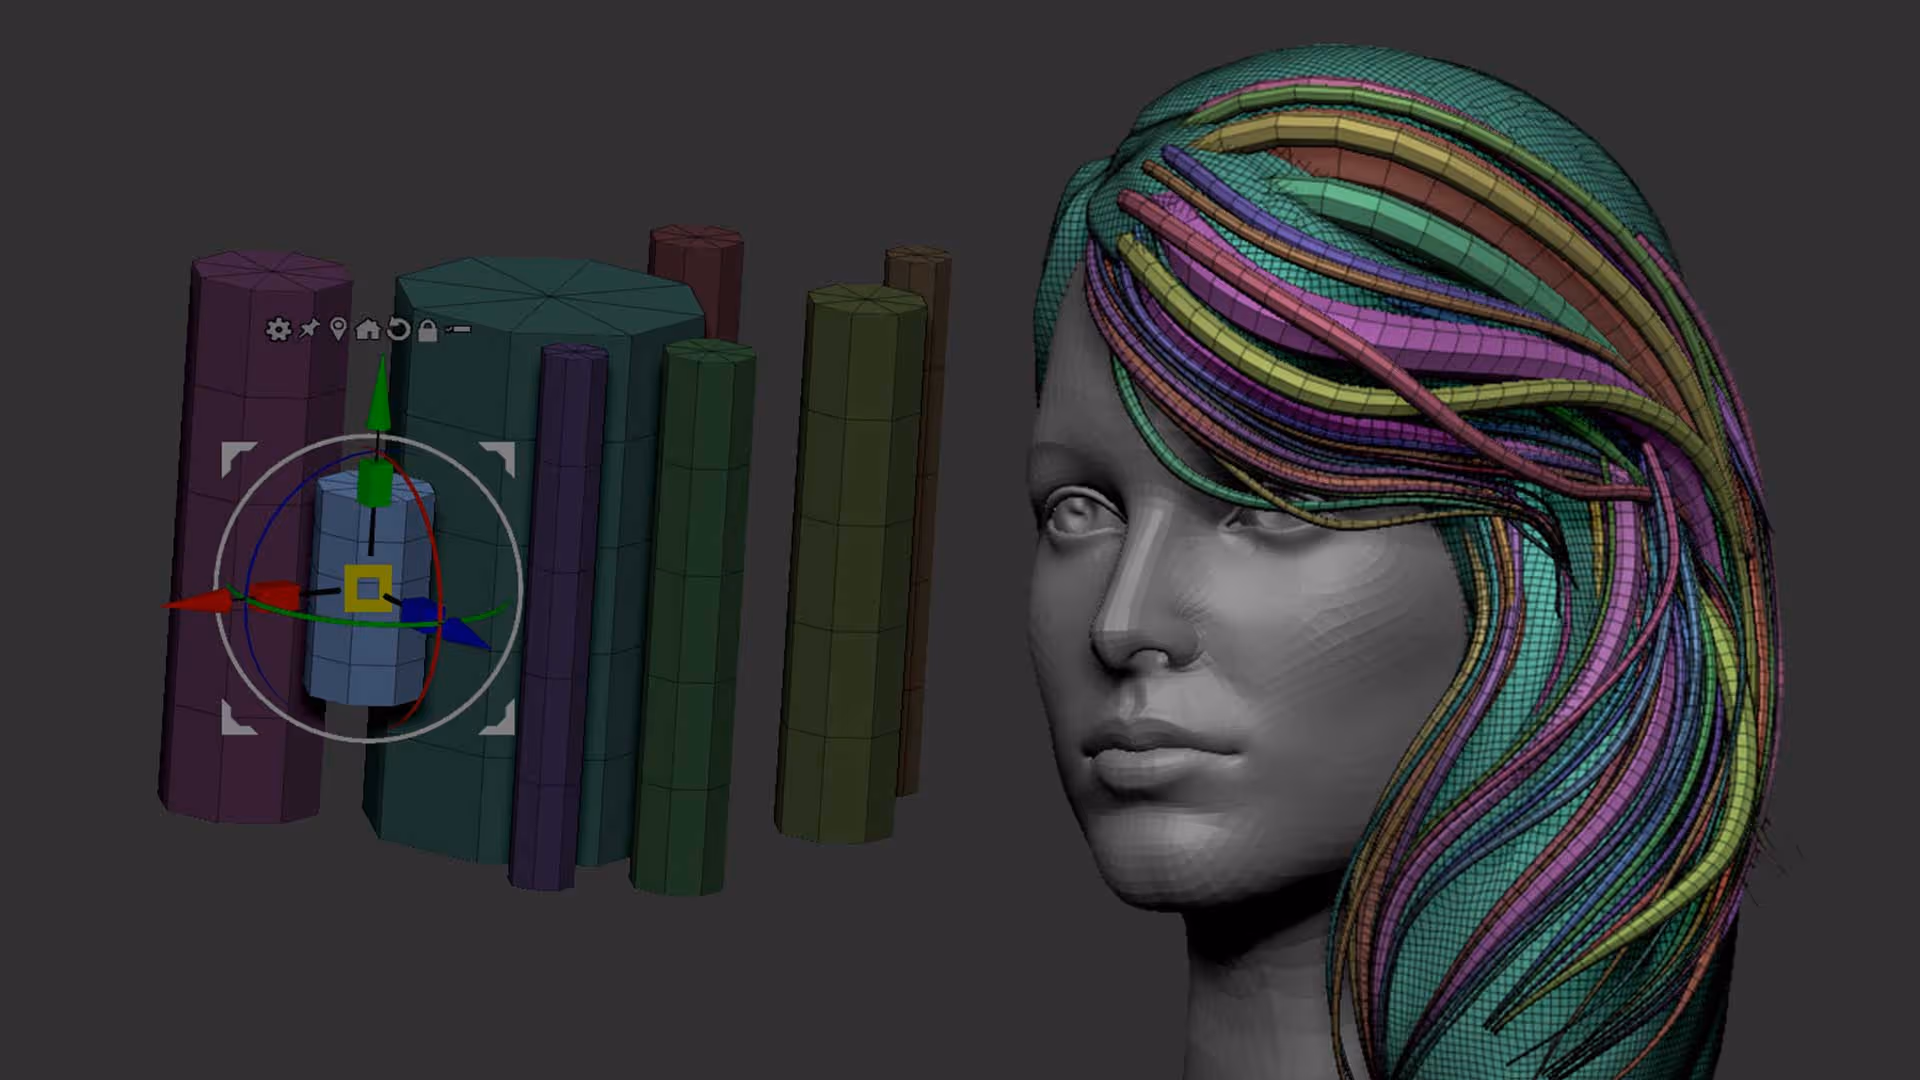
Once you've done a few strokes, you can autogroup everything, since they are separate objects, and use the Move Topological brush to fine-tune the placement ;)

Looking forward to seeing what you do with this technique!


.webp)

.webp)