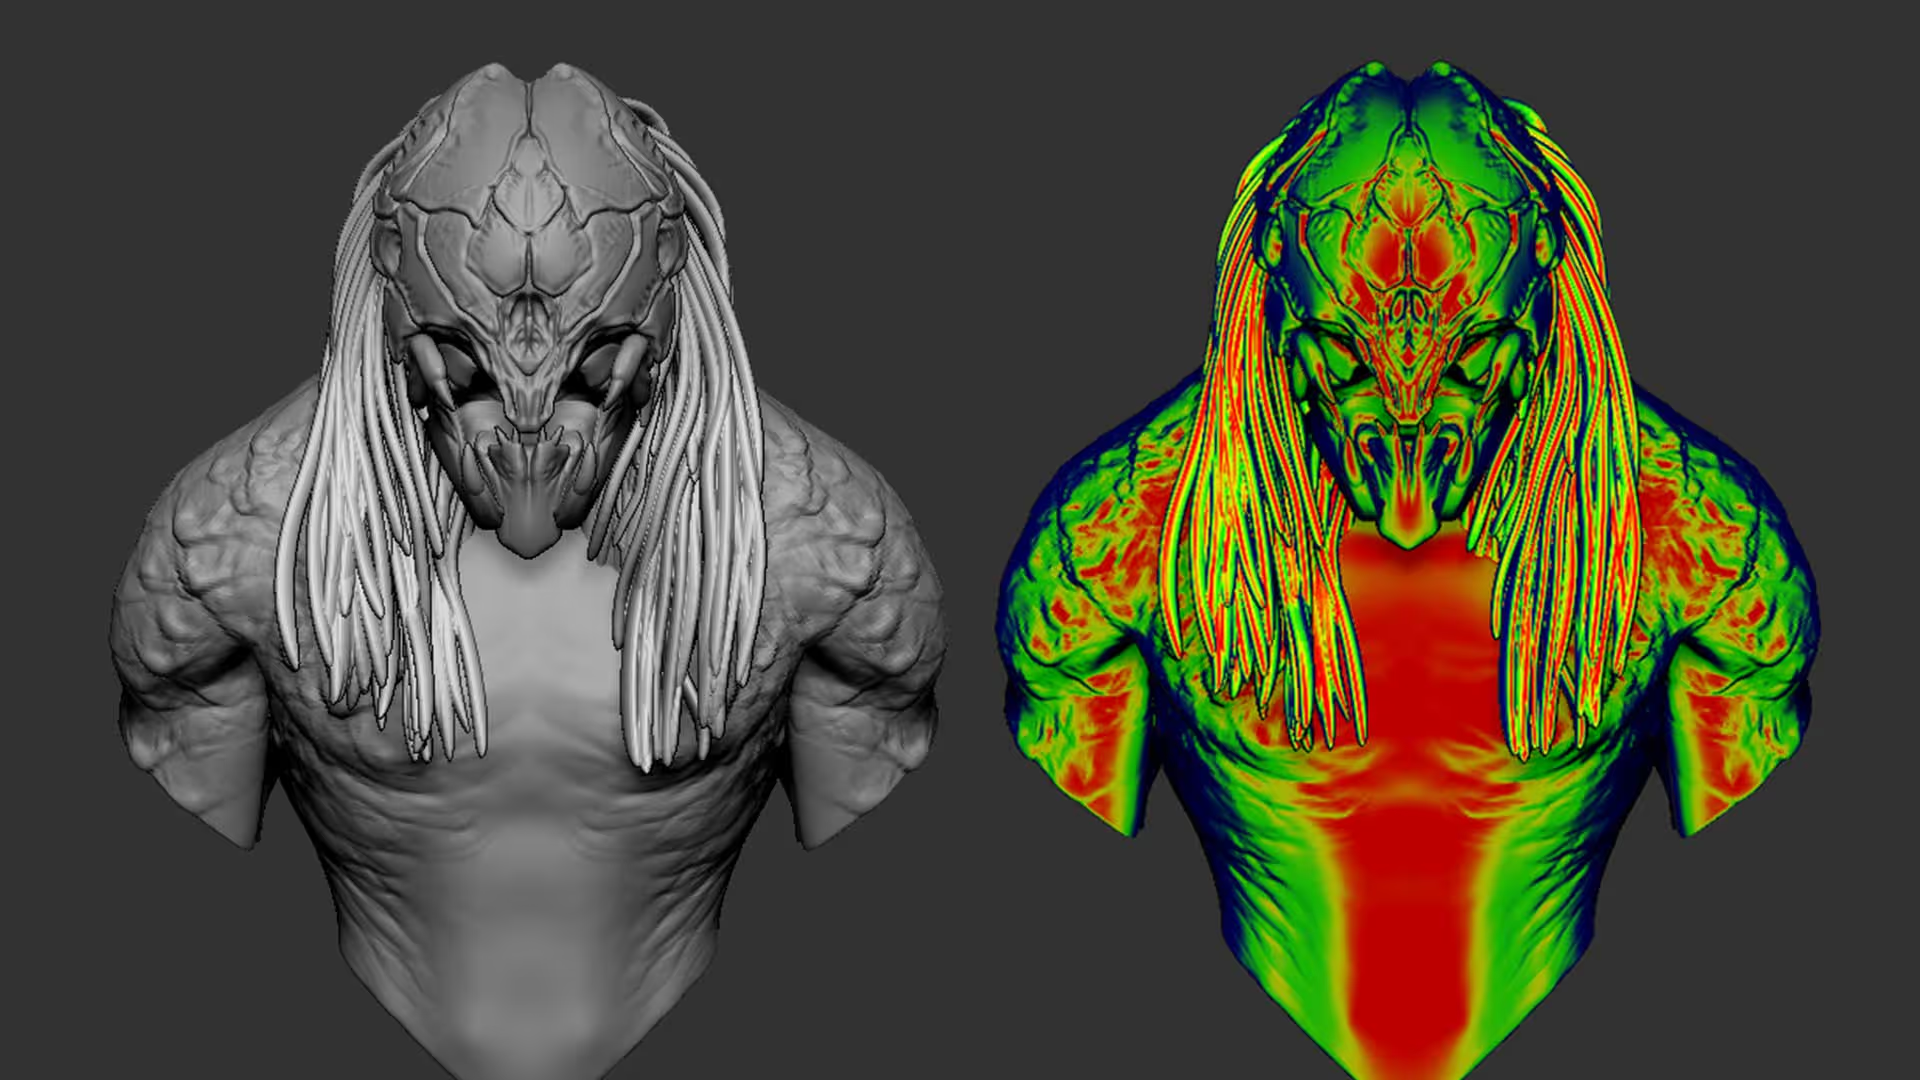
Alright, so I put together this quick sketch (image below) to get something so that I could test the render settings. The first thing we need to do is create a matcap that will get us 90% closer to the final look, so choose a MatCap material like the Red Wax.
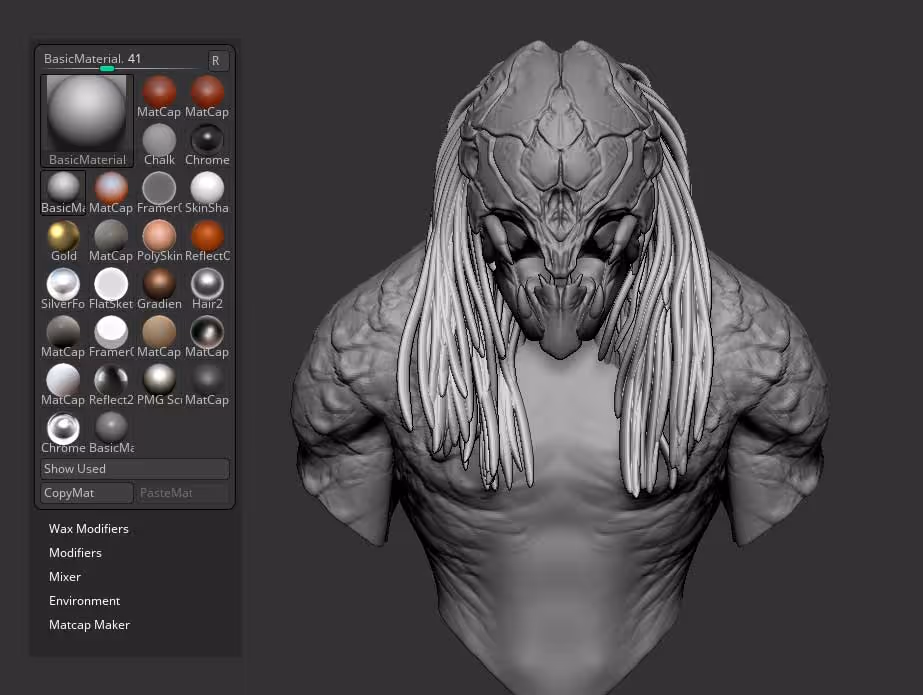
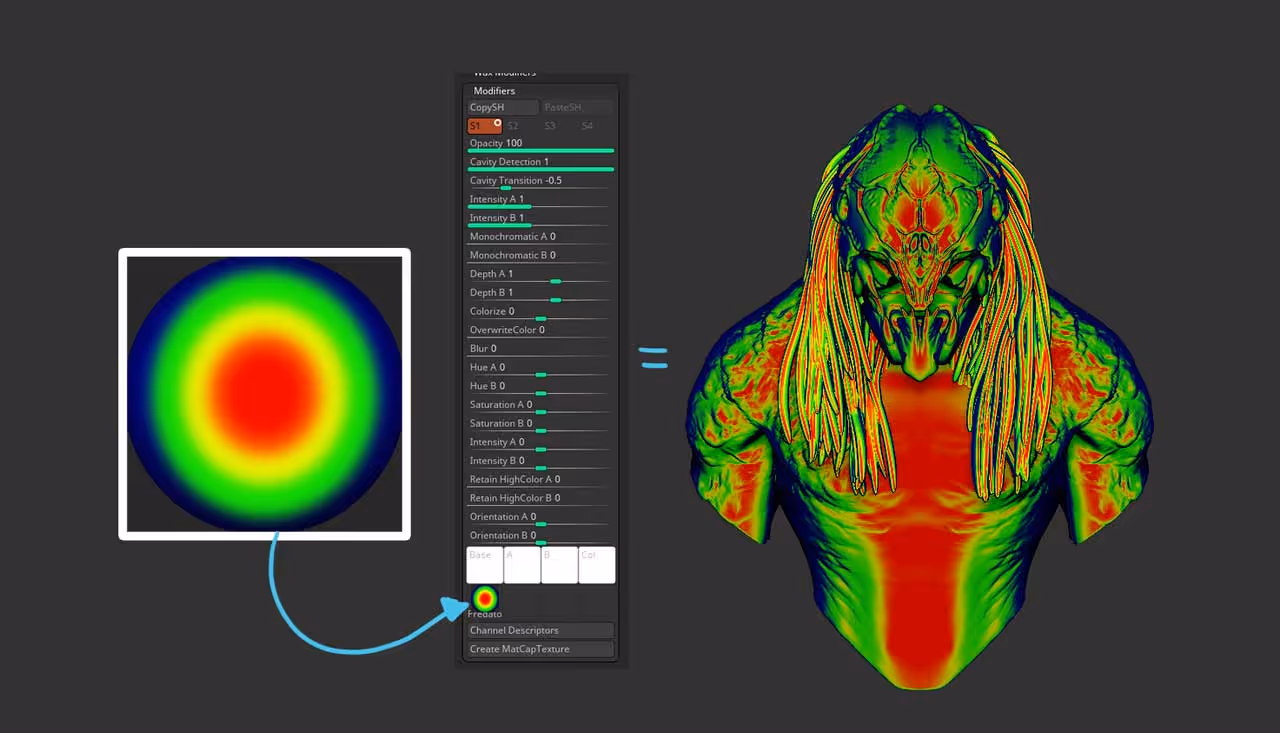
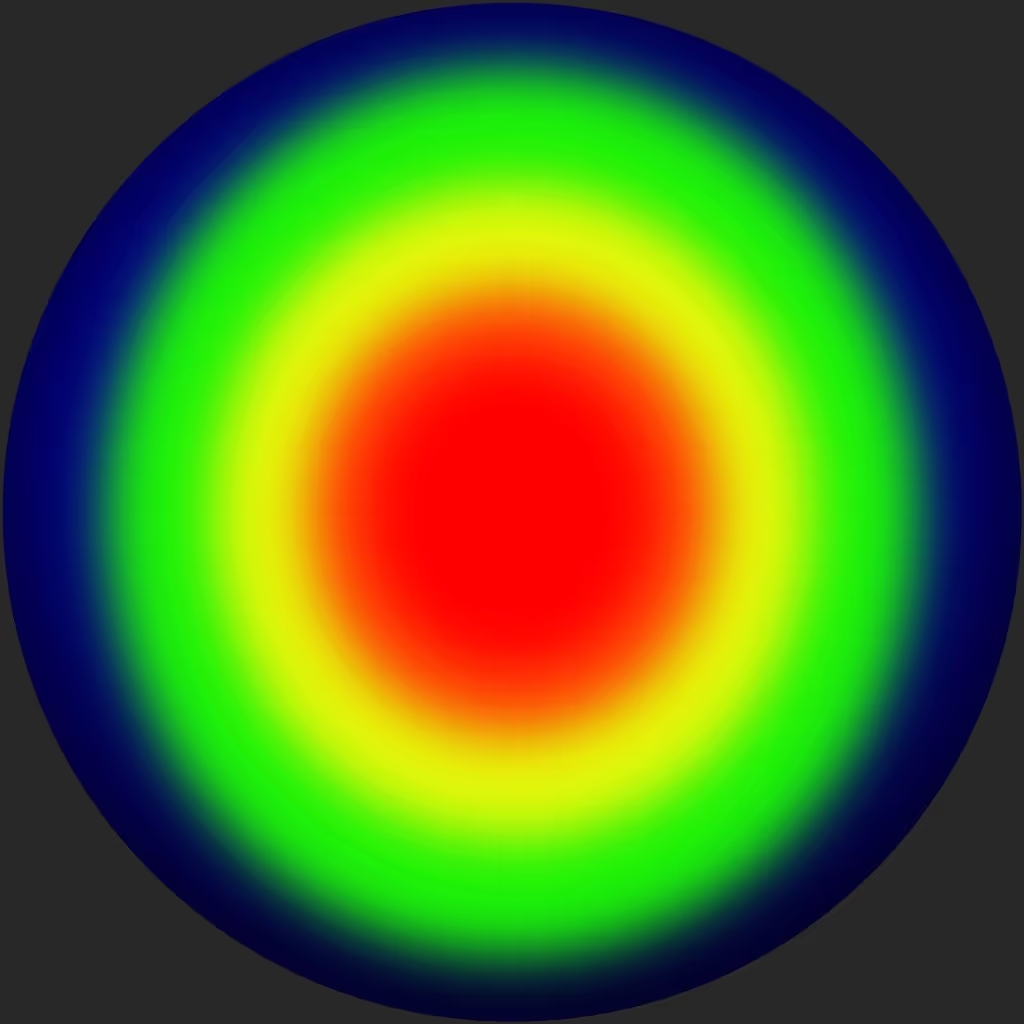
Open up the Modifiers section from the Materials palette, and scroll all the way to the bottom of the section. You’ll see a tiny image which is what the Red Wax material is using to produce the effect. If you click on that image you can import your own image. So, I made a sphere in Photoshop with a gradient that roughly matches the Predator vision:
That is pretty much it… a good image for the MatCap should give you a pretty convincing effect straight away. However we can definitely improve the look using Filters so that everything gets enhanced at render time.
Here is the MatCap image I used. You can right-click and save it so that you can replicate the exact same effect:
Tweaking BPR filters
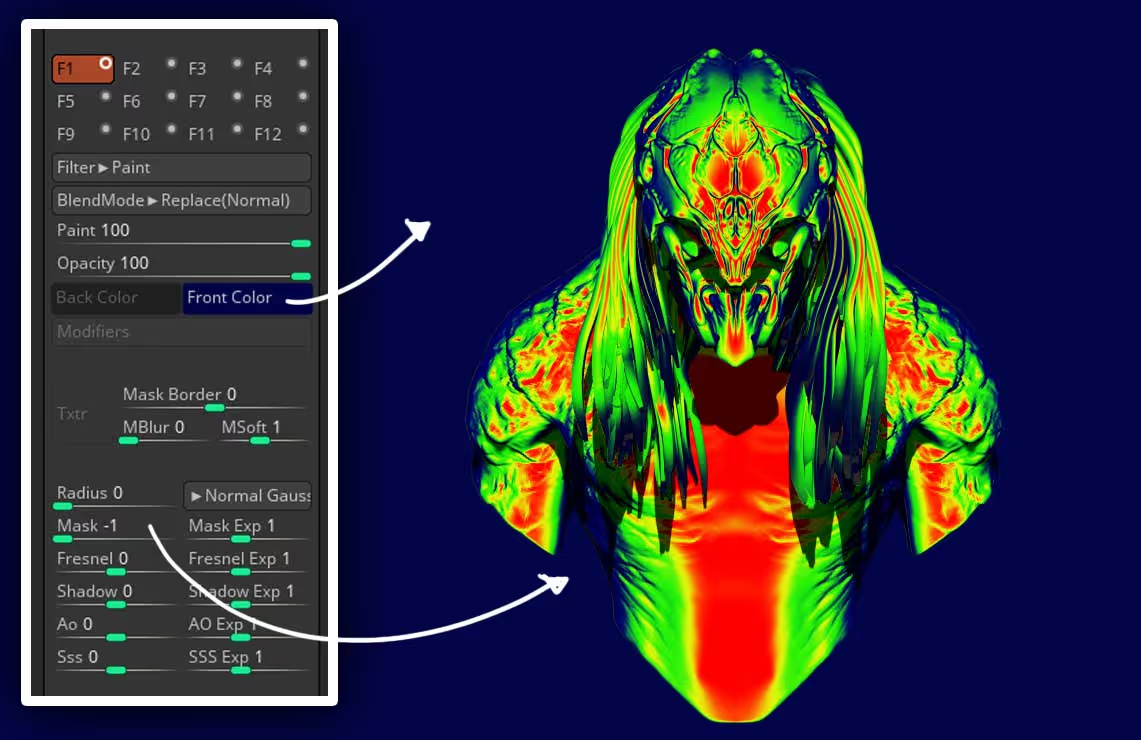
Go ahead and click render from the BPR button using the predator vision matcap. Open up the BPR Filters subpalette and enable the first filter (F1). This filter will be purely to add a dark blue colour to the background:
- Set the filter type to Paint
- Make sure the Paint slider is set to 100 (full opacity)
- Choose a dark blue colour for the ‘front colour’ swatch
- Take the ‘Mask slider’ all the way to -1 (so it doesn’t affect the mesh)
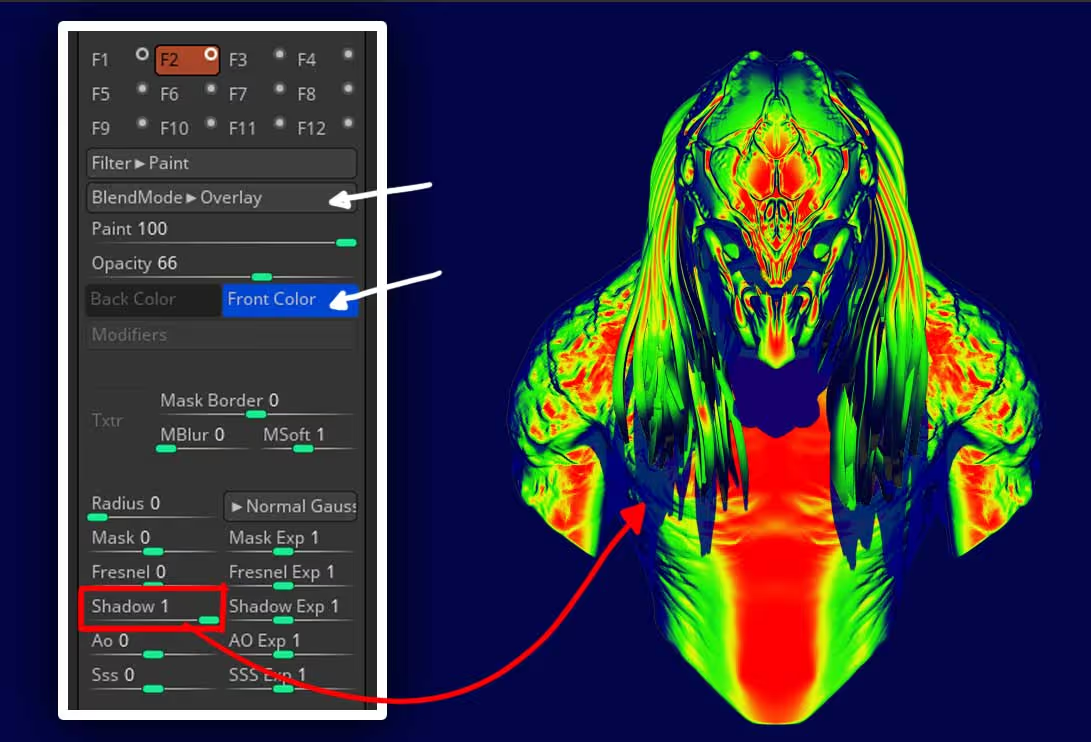
Next, we need to integrate the cast shadow into the look so enable the second filter (F2) and choose the same Paint filter but this time set the BlendMode to Overlay and choose a slightly lighter blue colour.
Also, use the Shadow slider to restrict this filter to only the shadow by setting it to a value of 1. After this quick setup, you can play with the general opacity slider so fine-tune the effect.
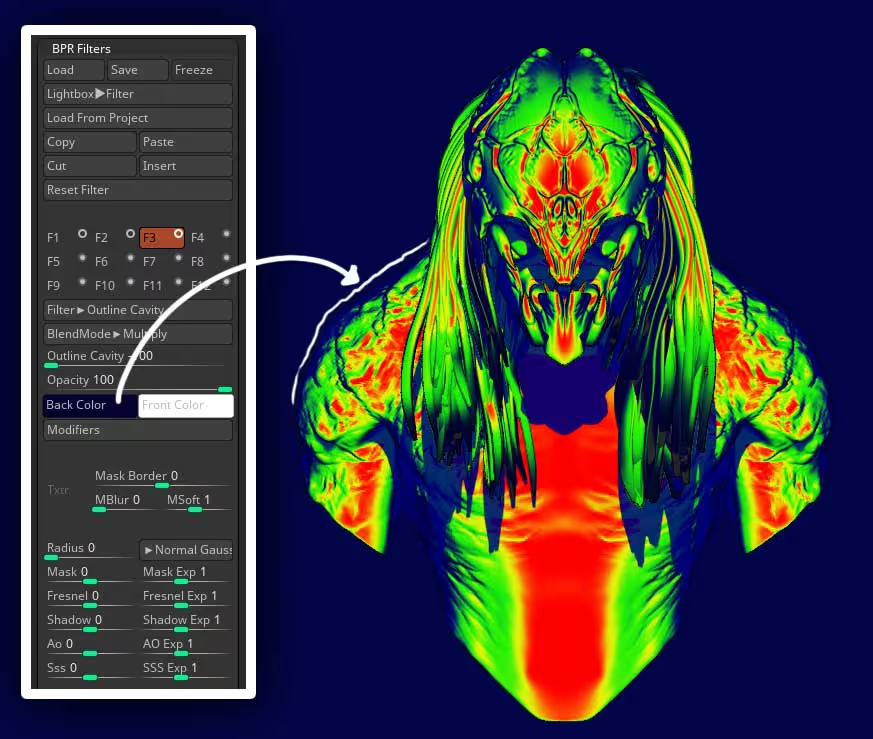
The next filter (F3) is simply to add a subtle definition to the outlines of the render so enable the third filter and choose the Outline Cavity filter. Set the blending mode to Multiply, the Outline Cavity slider to -100 and choose a dark blue colour similar to the background.
That’s it. You can add up to 9 additional filters to this particular effect to improve it even more… perhaps a bit of noise and auto contrast would be nice ;)
An extra cool tip with MatCaps
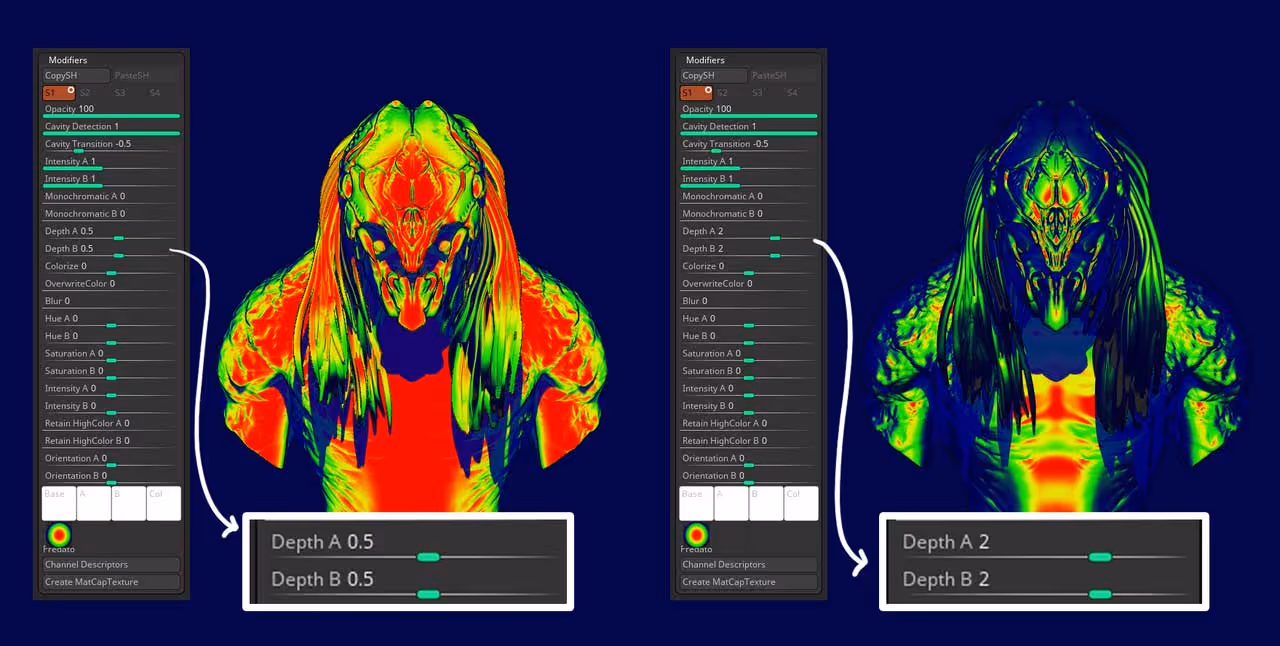
One thing that is really cool about MatCaps is that you can actually control the ‘reach’ of the effect by altering the image directly from the materials modifiers. So if you play around with the ‘Depth A and B’ you can inflate or pinck the centre of the input image and therefore easily change the effect of the MatCap on the mesh.
In more practical terms, you can set the Depth A and B to 0.5 and increase the size of the red colour making it look like the object is warmer in the predator’s vision. alternatively, you can set the depth A and B to a value of 2 and make the object ‘colder’:


.webp)

.webp)