
Dimming:
The first one is subtool Dimming and it is a nice segway from the comic material stuff I mentioned earlier to this series of tips.
When you have more than one subtool, ZBrush automatically makes the selected subtool brighter than the other subtools so that you can easily identify the one you are working on. This is especially obvious with the comic material where the selected subtool looks white and the rest are just a light grey colour.
From the Preference palette, you can expand the ‘Edit’ subpalette and change the ‘Inactive subtool Dimming’ slider (think about it as an opacity slider). The default is ‘0.75’ but you can change it to ‘1’ and all subtools will look the same:
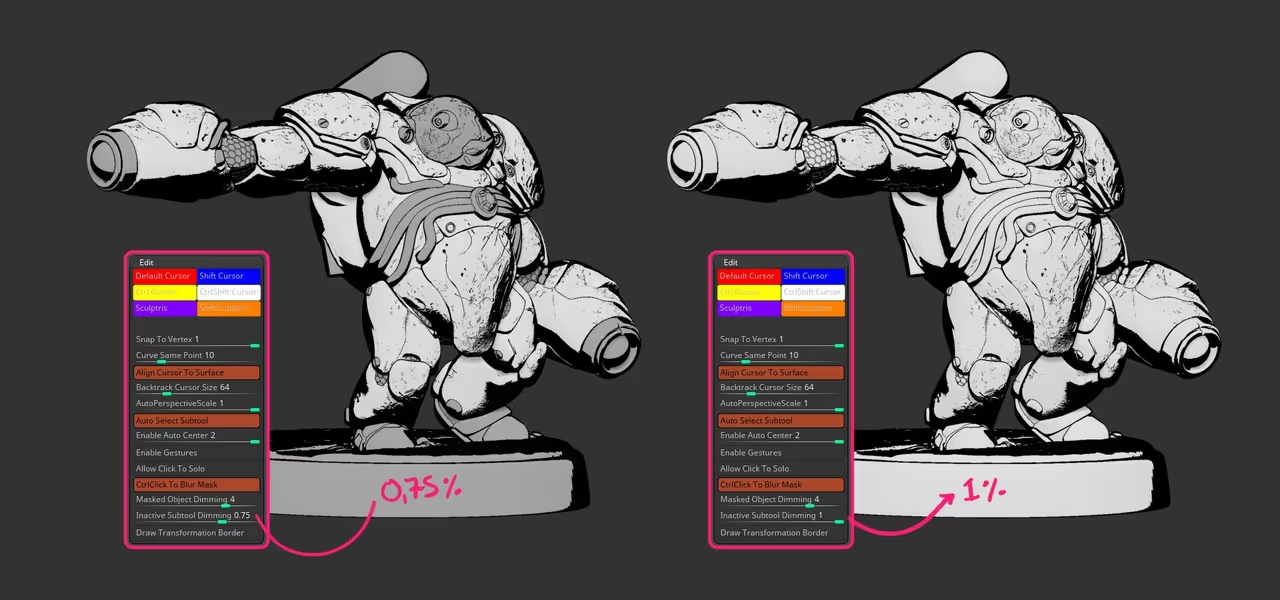
This could be useful in this scenario where you have a comic material applied and want to see how everything works together without the need of doing a render.
Obviously, the slider works both ways... if you set it to a lower value like ‘0.4’, the inactive subtools will be a lot darker:
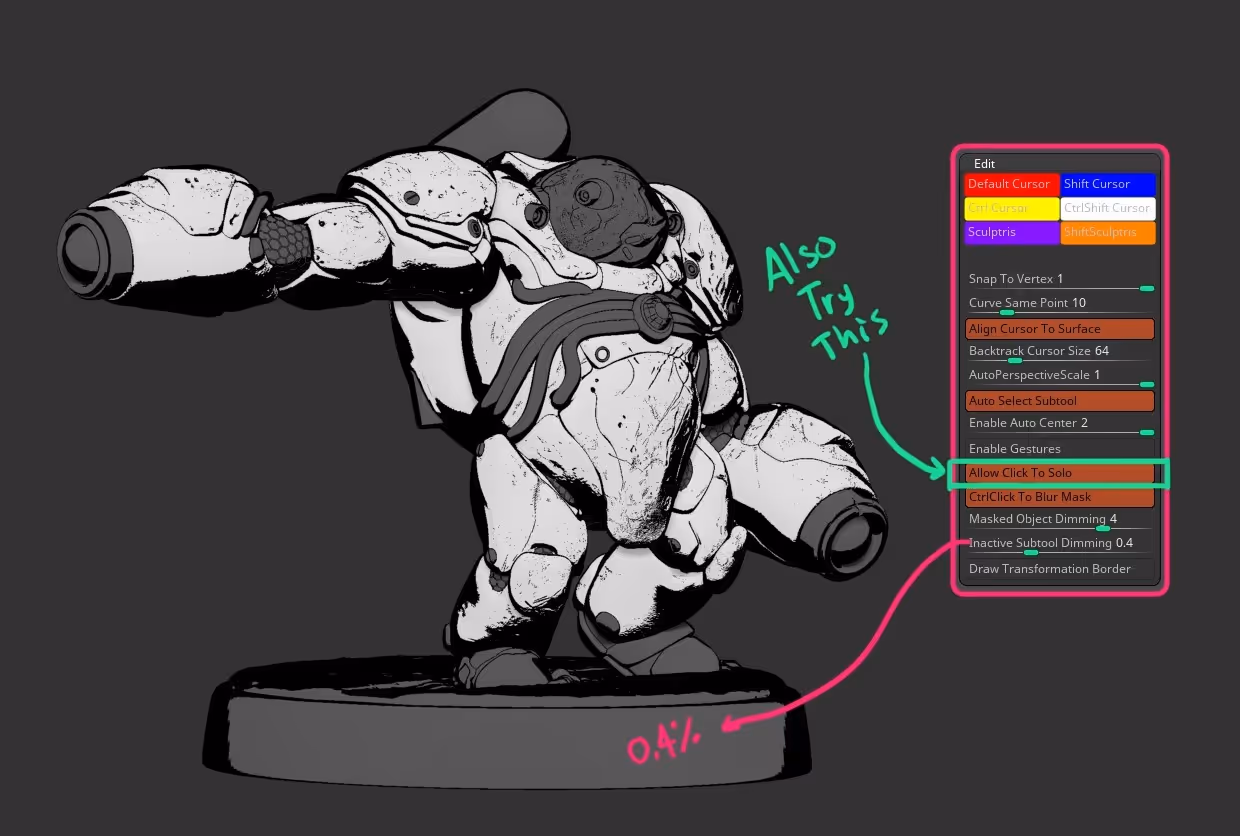
Also since we are in this palette already, try out the ‘Allow click to solo’ switch. If yo unable this switch, you can just click once on the canvas (left click) and ZBrush will go into ‘Solo mode’ with the selected subtool... you can click on the canvas again to bring back the model. Pretty handy stuff...
Visibility Groups:
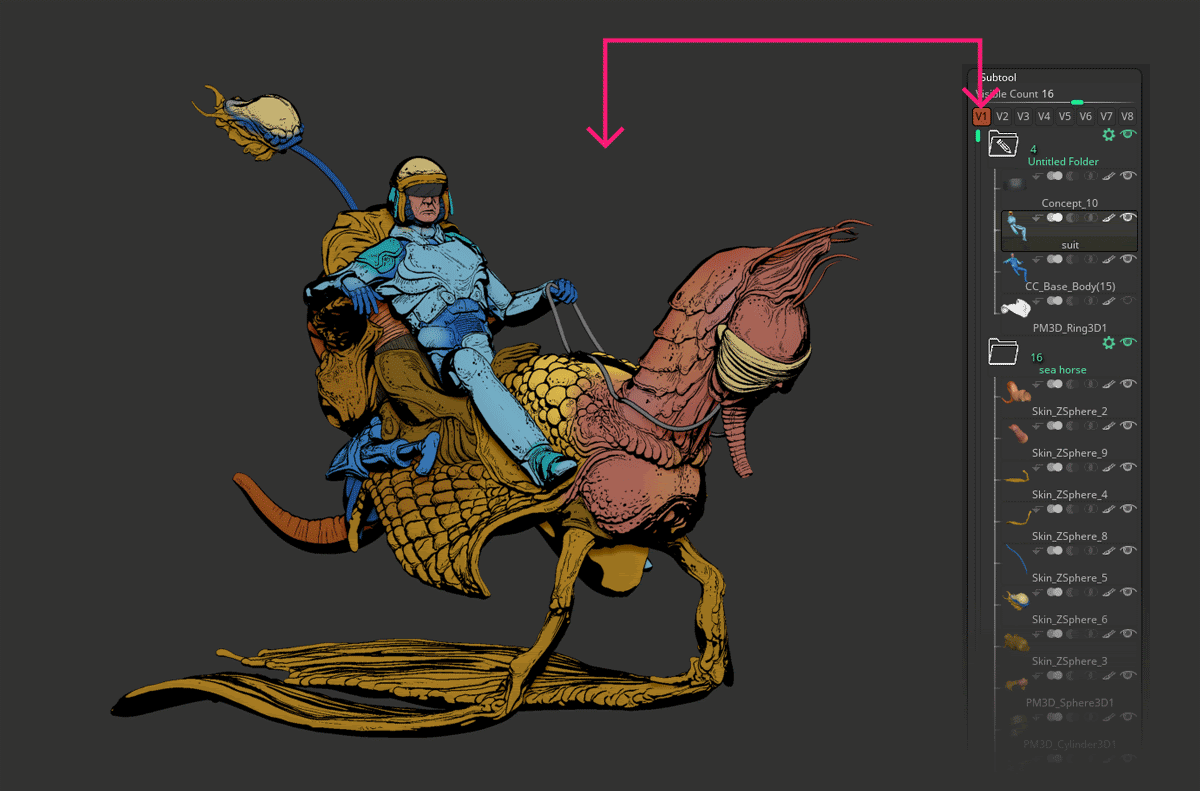
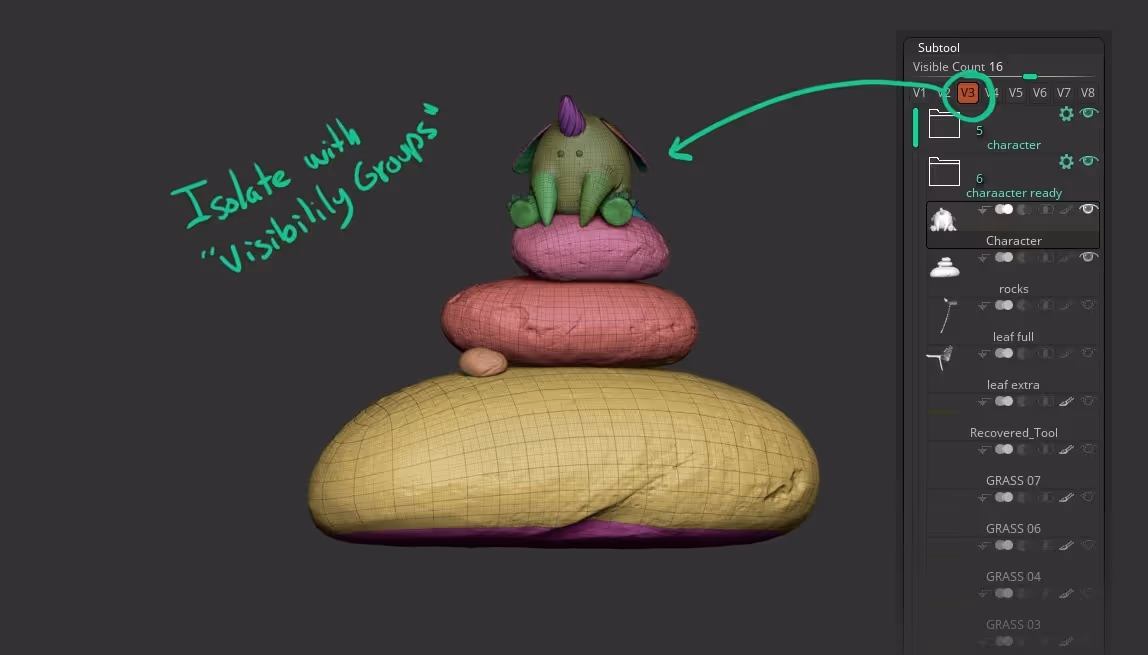
The next tip has to do with the Visibility Groups... those little switches on top of the subtool list. They are awesome, again... not the most exciting tip, but when you work with a large number of subtools they are great. You can simply click on a Visibility Group (V1, or V2, or V5, etc), toggle everything off (shift + click the visibility icon of the selected subtool) and then toggle the visibility back on for any subtool you want to quickly isolate into the group:
All visible high or low
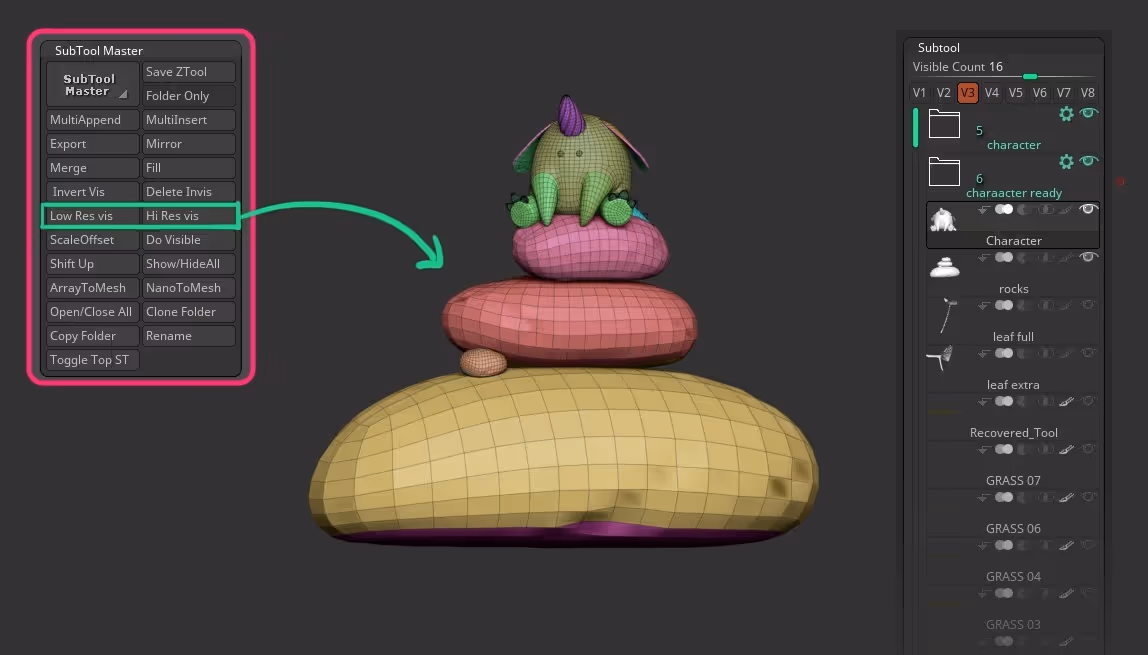
Now for the third little productivity tip, I chose something that I learned recently... someone asked me during one of the ZBrushLive sessions if there was a way to send specific subtools to the lowest or the highest subdivision levels with one button.
Of course, you have your ‘All high’ and ‘All Low’ buttons in the subtool subpalette, but the question was whether or not you can actually do it on specific subtools. I did a little bit of digging and the answer was pretty simple and it fits really nicely with the previous tip on visibility groups:
Let’s say that I want to view just a set of subtools in the lowest subdivision... in this example, the character and the pebbles, but I don’t want to do it manually and want to keep other subtools in the high subdivision levels.
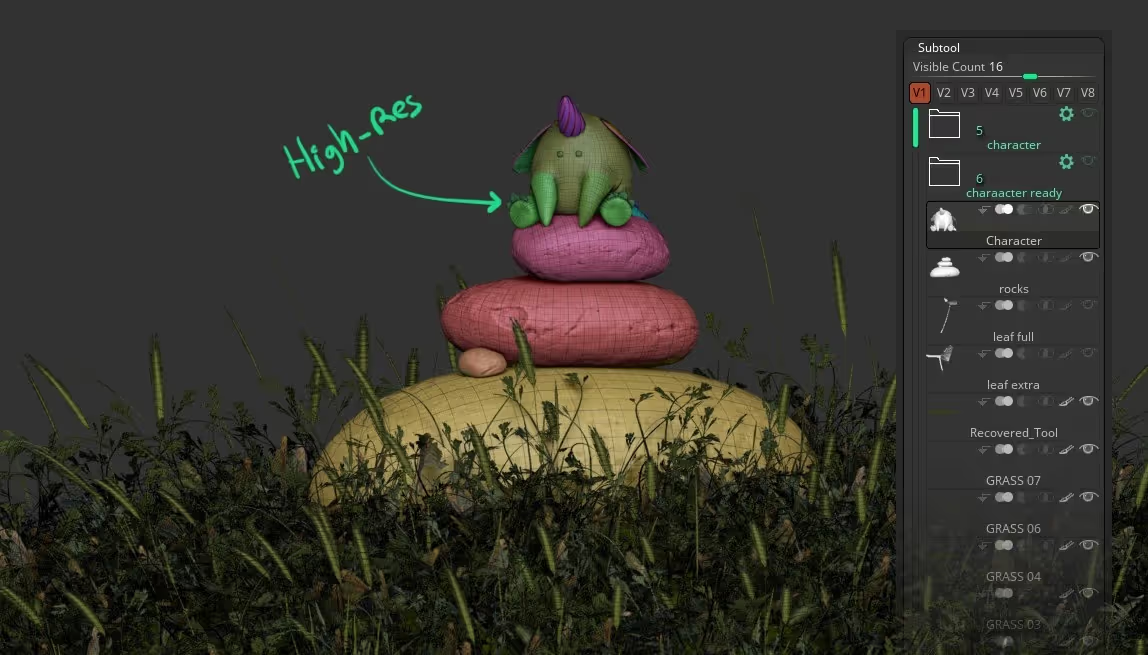
Fortunately, I spent some time sorting out my visibility groups and I have the character and the pebbles in my ‘V3’ switch, so toggling it on, temporarily hides the rest:
And here is the real tip... once you have isolated the group, you can go to the ZPlugin palette and from the Subtool Master you have two buttons called ‘Low Res vis’ and Hi Res Vis’ which allows you to do just that... sending all the visible tools to the highest or lowest subdivision levels:
that’s it! hopefully, you find these productivity tips useful!
New video tutorial (Part 1)
My third video tutorial in collaboration with NVIDIA is now available (part 1 of 2). The tutorial itself has 4 parts but 1 and 2 are in the first video and 3 and 4 are coming in part 2.
In this tutorial I walk you through the process of sketching, blocking, sculpting, cleaning and detailing the 3D scene for my ‘Duff spirit’ creature:


.webp)

.webp)