
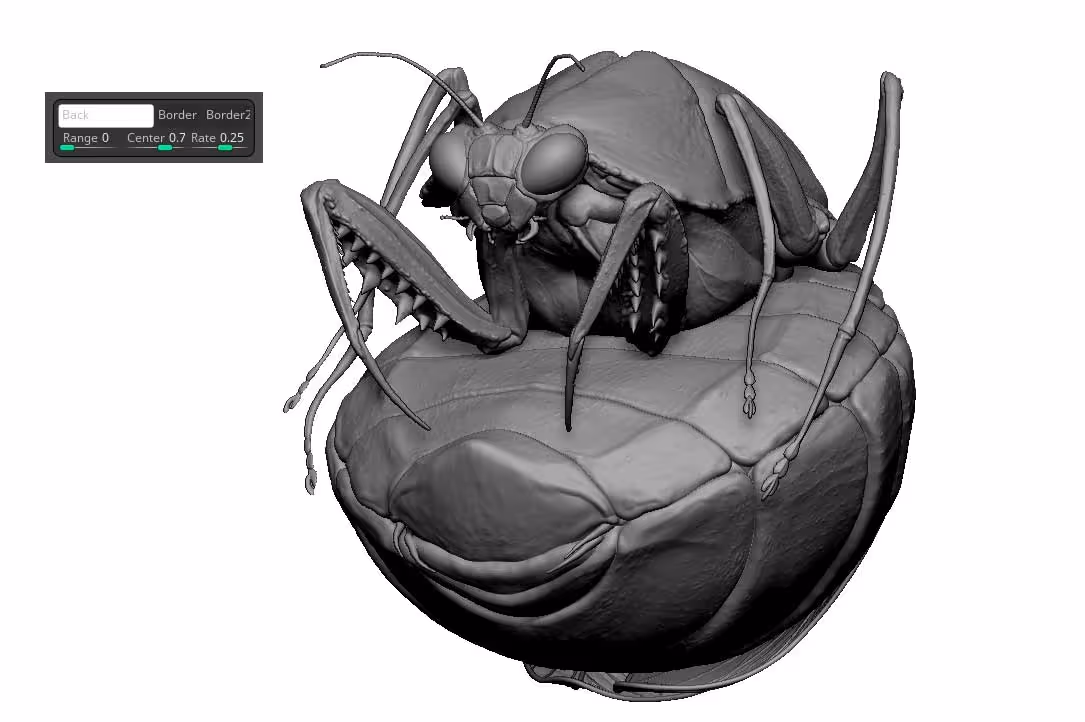
To start with, go ahead and load any model you want. Choose something like the Basic grey material or the MatCap Grey and change the background to white. I’ll keep using my Matis model as a reference so you can also see the level of details in the model:
The next step is simply to click the BPR render to render the canvas and then head over to the BPR filters section to add some filters. Click on the ‘dot’ of the first filter to enable it and from the filter dropdown, choose Flat Shading… this will change things quite a bit.
From the Modifiers button, you can modify the effect to simplify it a bit. I like to keep the numbers of Shades to a value of 2, set the Min Intensity to 1 and then play with the Exponent value to adjust it:
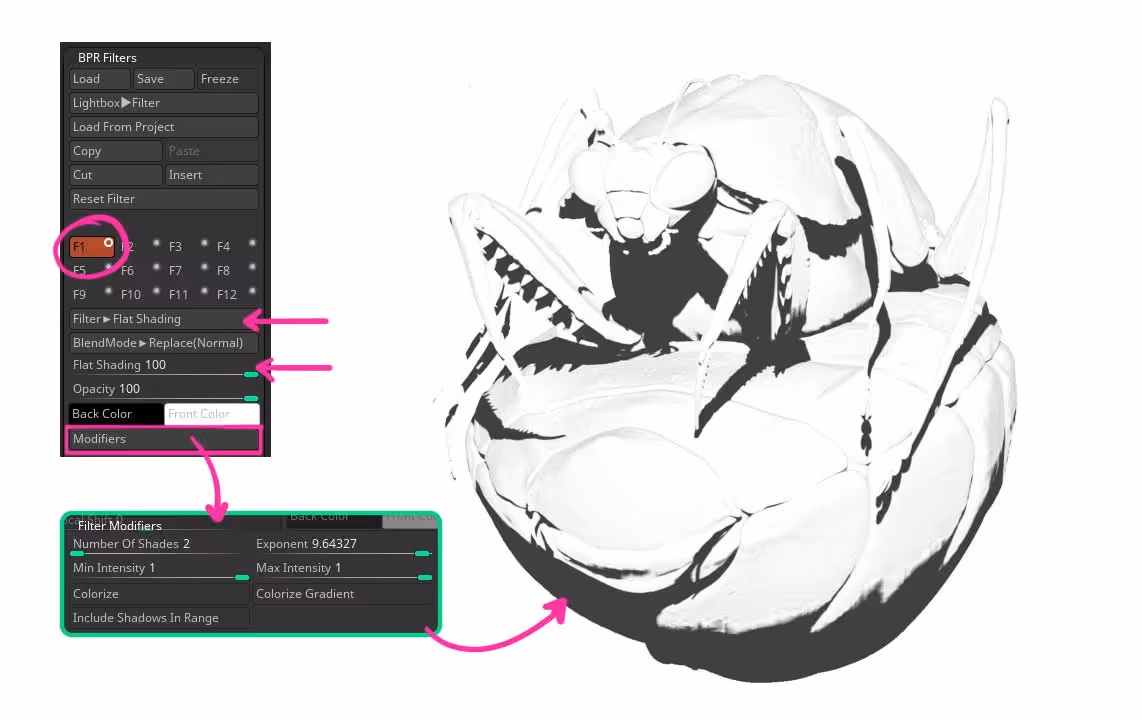
PS: Make sure that the sliders of the filter ‘Flat Shading’ are set to 100 so you can see the full effect.
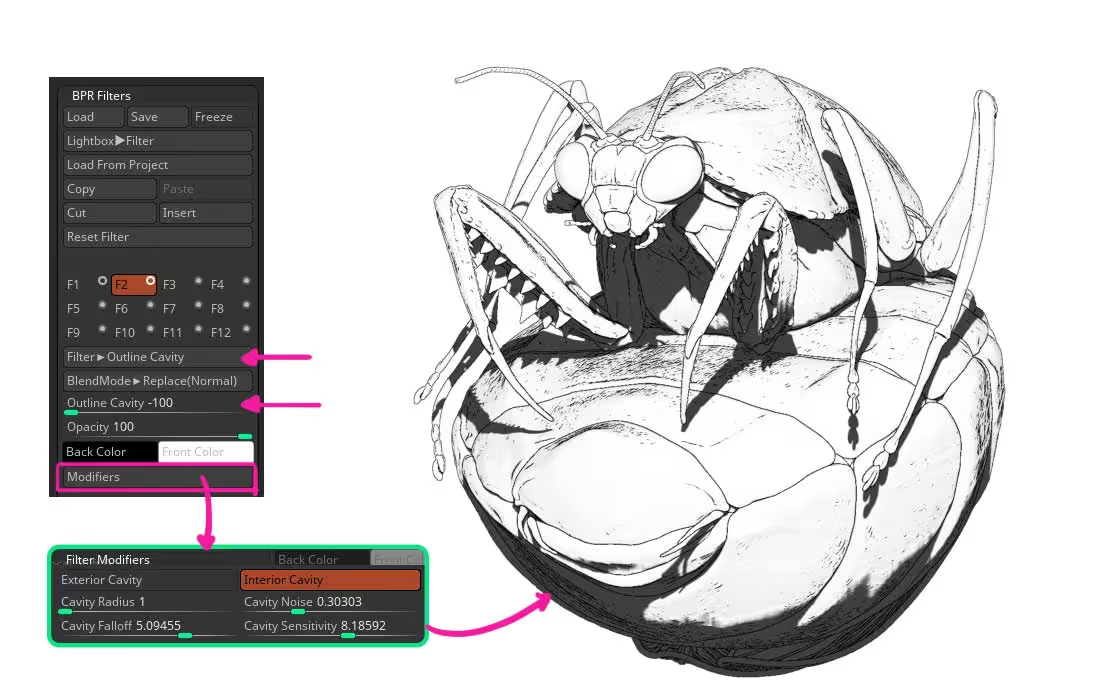
The next step is to add the lines and shading of the sketch. To generate this effect from a filter, you can enable the second filter and choose the ‘Outline Cavity’ filter. Set it to -100 and from the Modifiers button, make sure you have the ‘Interior Cavity’ enabled… the rest is just playing with the fall-off and the sensitivity sliders (this will vary depending on the level of details of your model so it is not an exact science… just play around with it).
Once you are happy with the inner details and overall crevices of the ‘sketch’, you can add a third filter using another ‘Outline cavity’ but this time target the ‘Exterior Cavity’ in the modifiers. This should help you to add thickness to the outline of the model to refine the sketchy look a bit more.
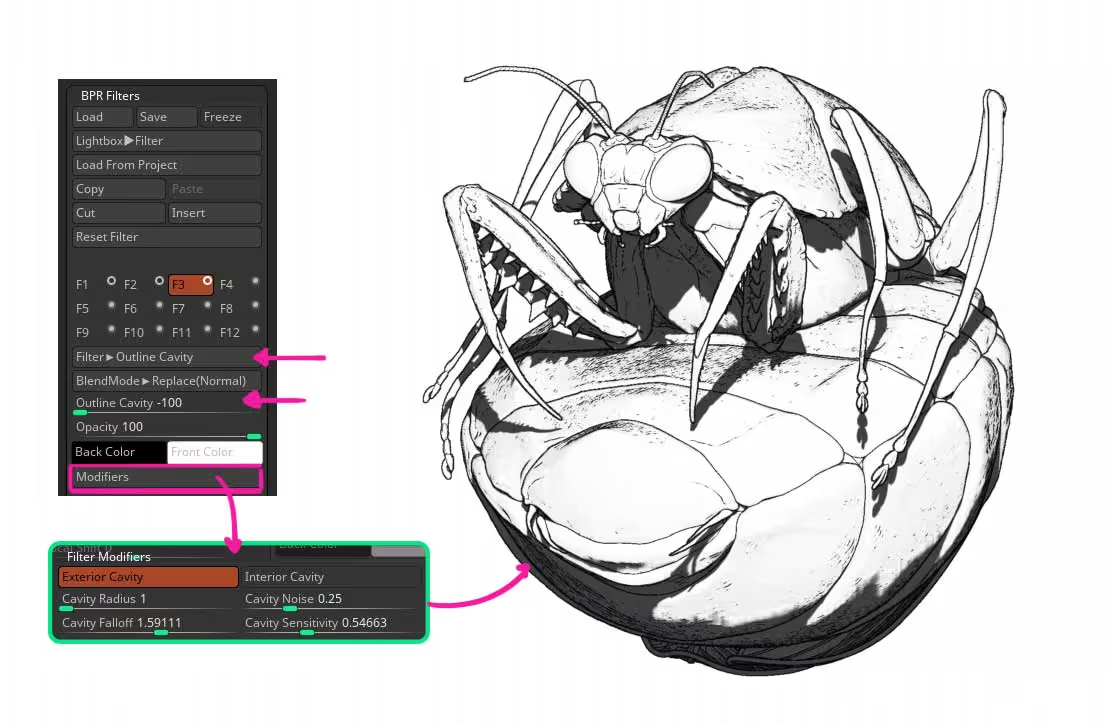
That is pretty much it really… you still have lots of other filters available in case you want to refine the look but the basics are already there with only 3 filters.
By the way, from the ‘Outline Cavity’ folder you can enable both the Exterior and Interior Cavity at the same time. However, keeping them in separate filters gives you a lot more control over the settings of each effect.
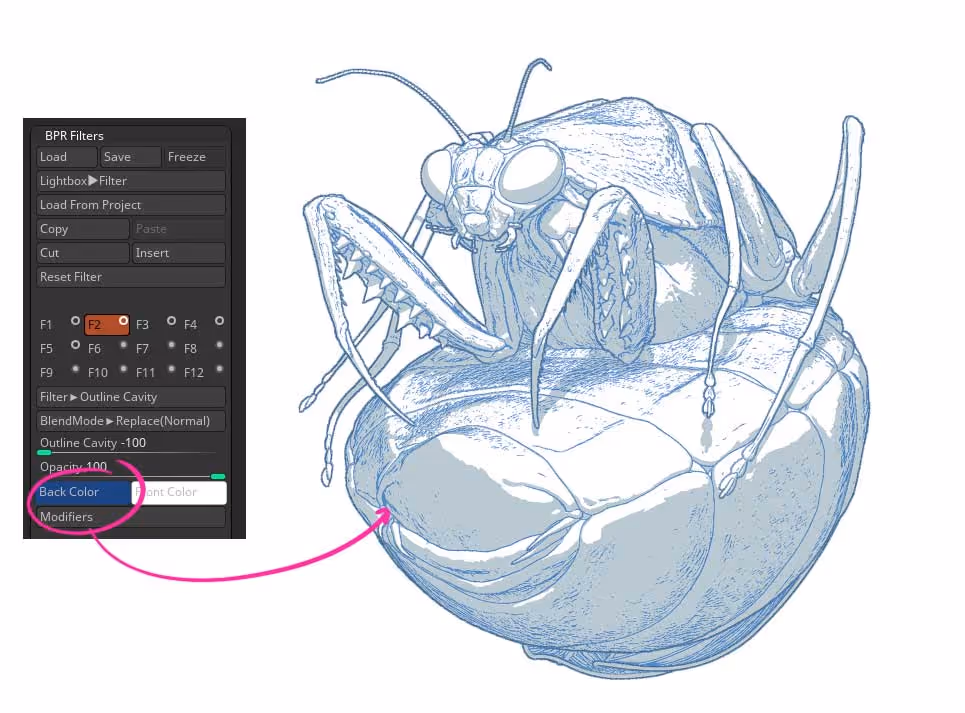
For a similar look to the ‘blue pencil’ sketch look, you can simply colorise the ‘Back colour’ of each cavity filter:
hope this helps. Feel free to tag me on Instagram or Twitter (@Pablander) if you share your version of the filters, I’d love to see it!


.webp)

.webp)