

.jpg)
The setup is pretty straight forward. But if you are familiar with FiberMesh, all you have to do is mask an area of your model (We’ll just focus on a beard for this example) and then create FiberMesh from the masked are. This is what we created:
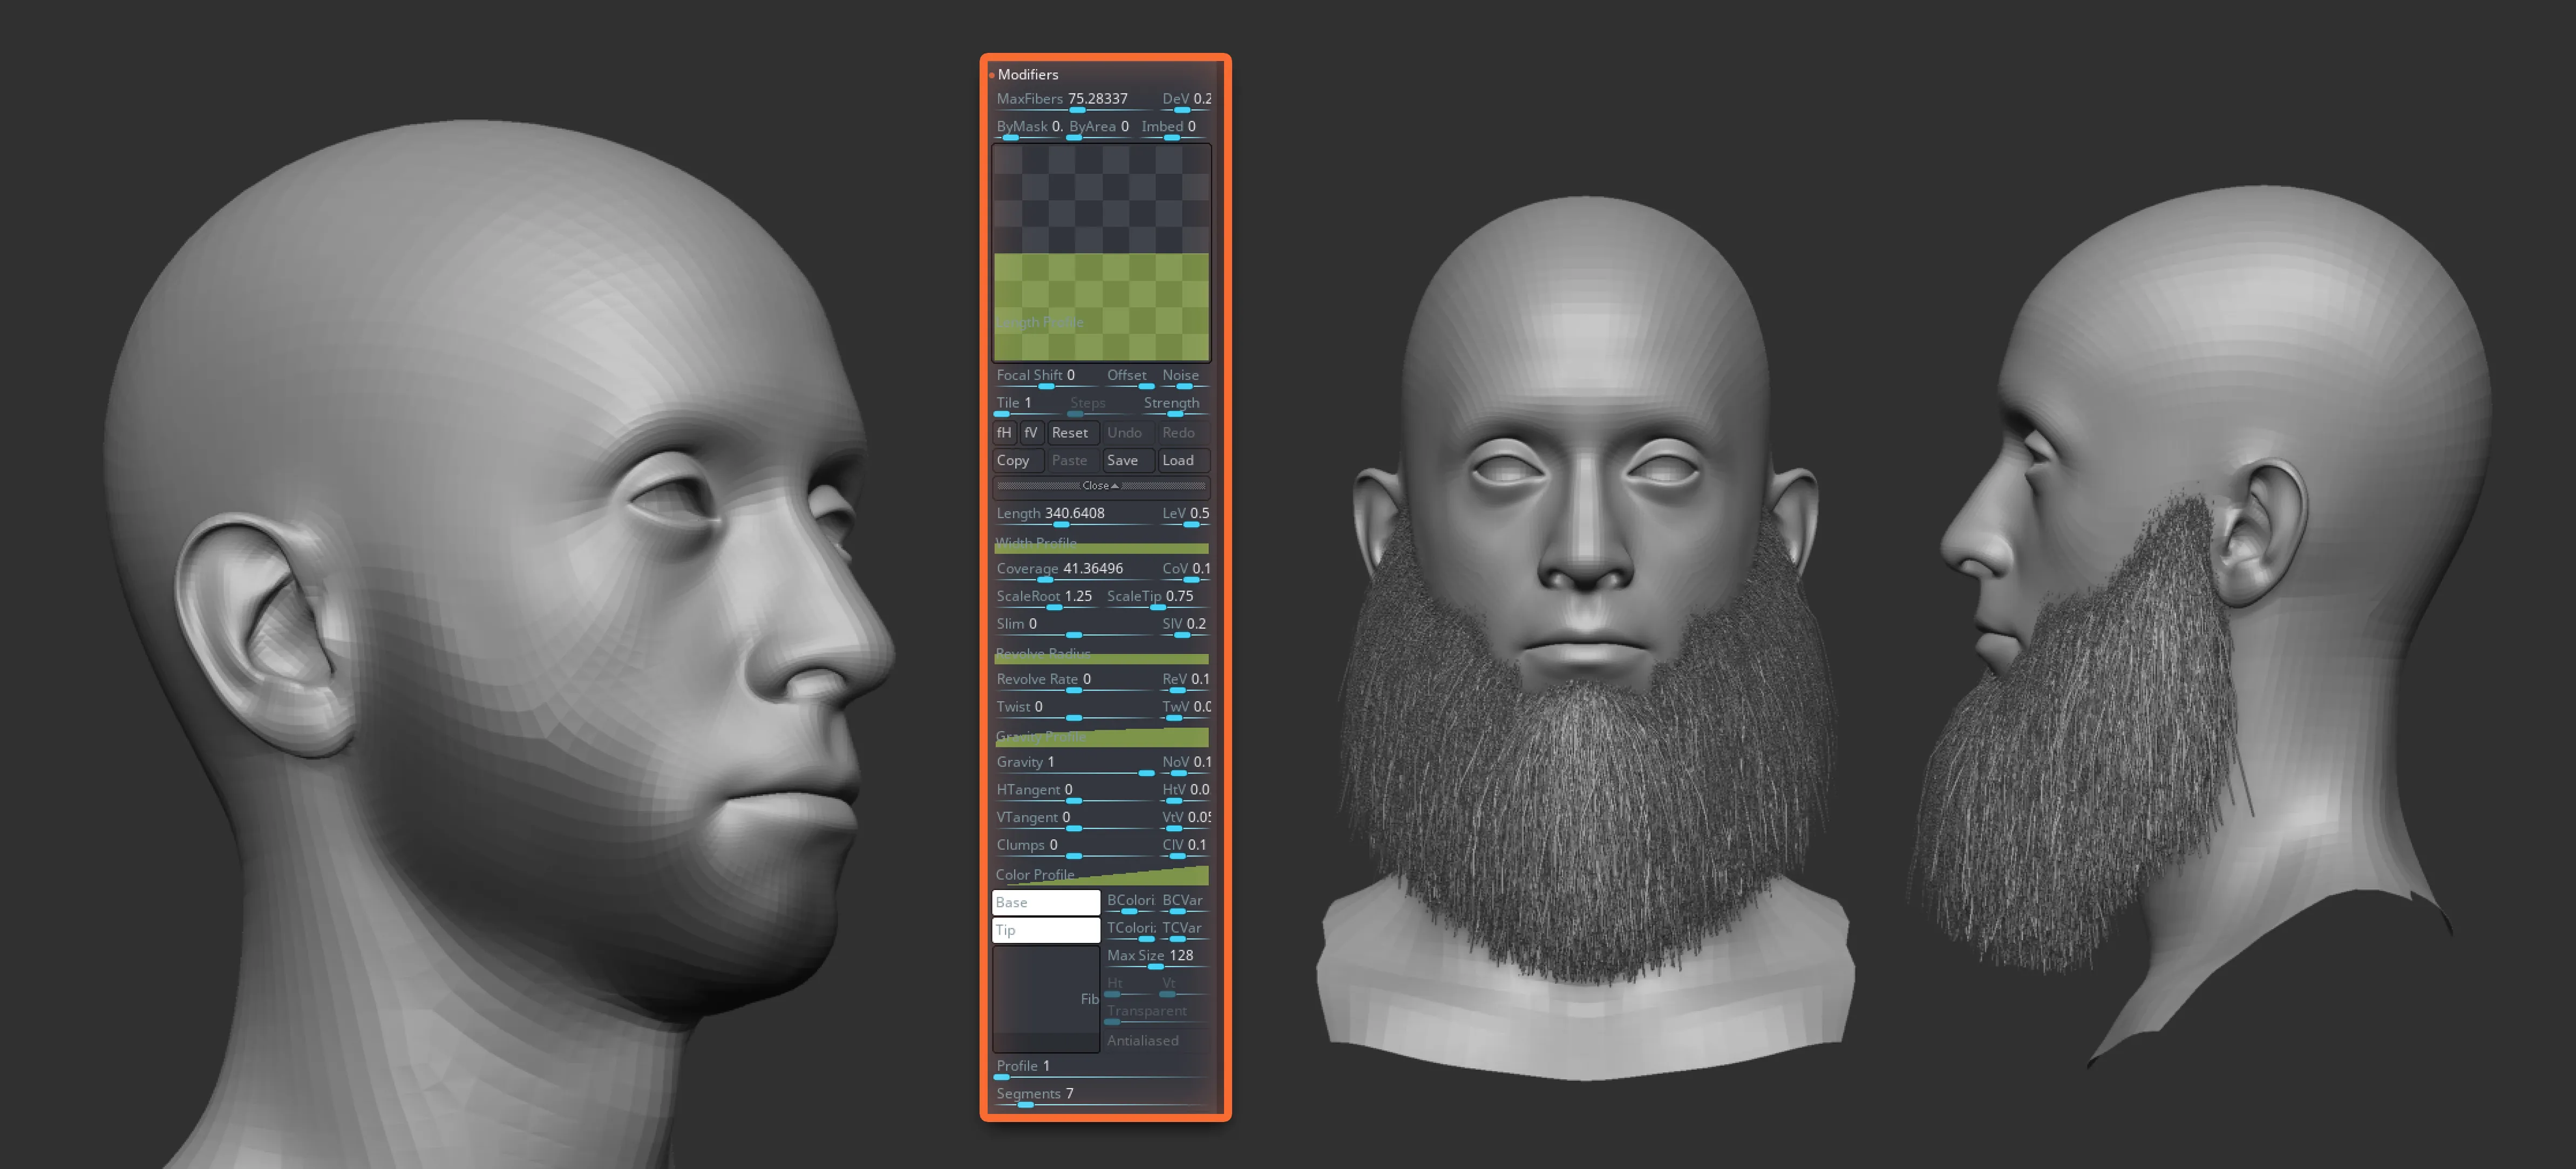
Then you can use your favourite brushes to groom it and give it shape. You can be super precise here if you want, but we wanted to show you the Blender modifiers so we kept the ZBrush side very simple. We just used some of our FriberMesh grooming kit brushes to make it feel more natural:
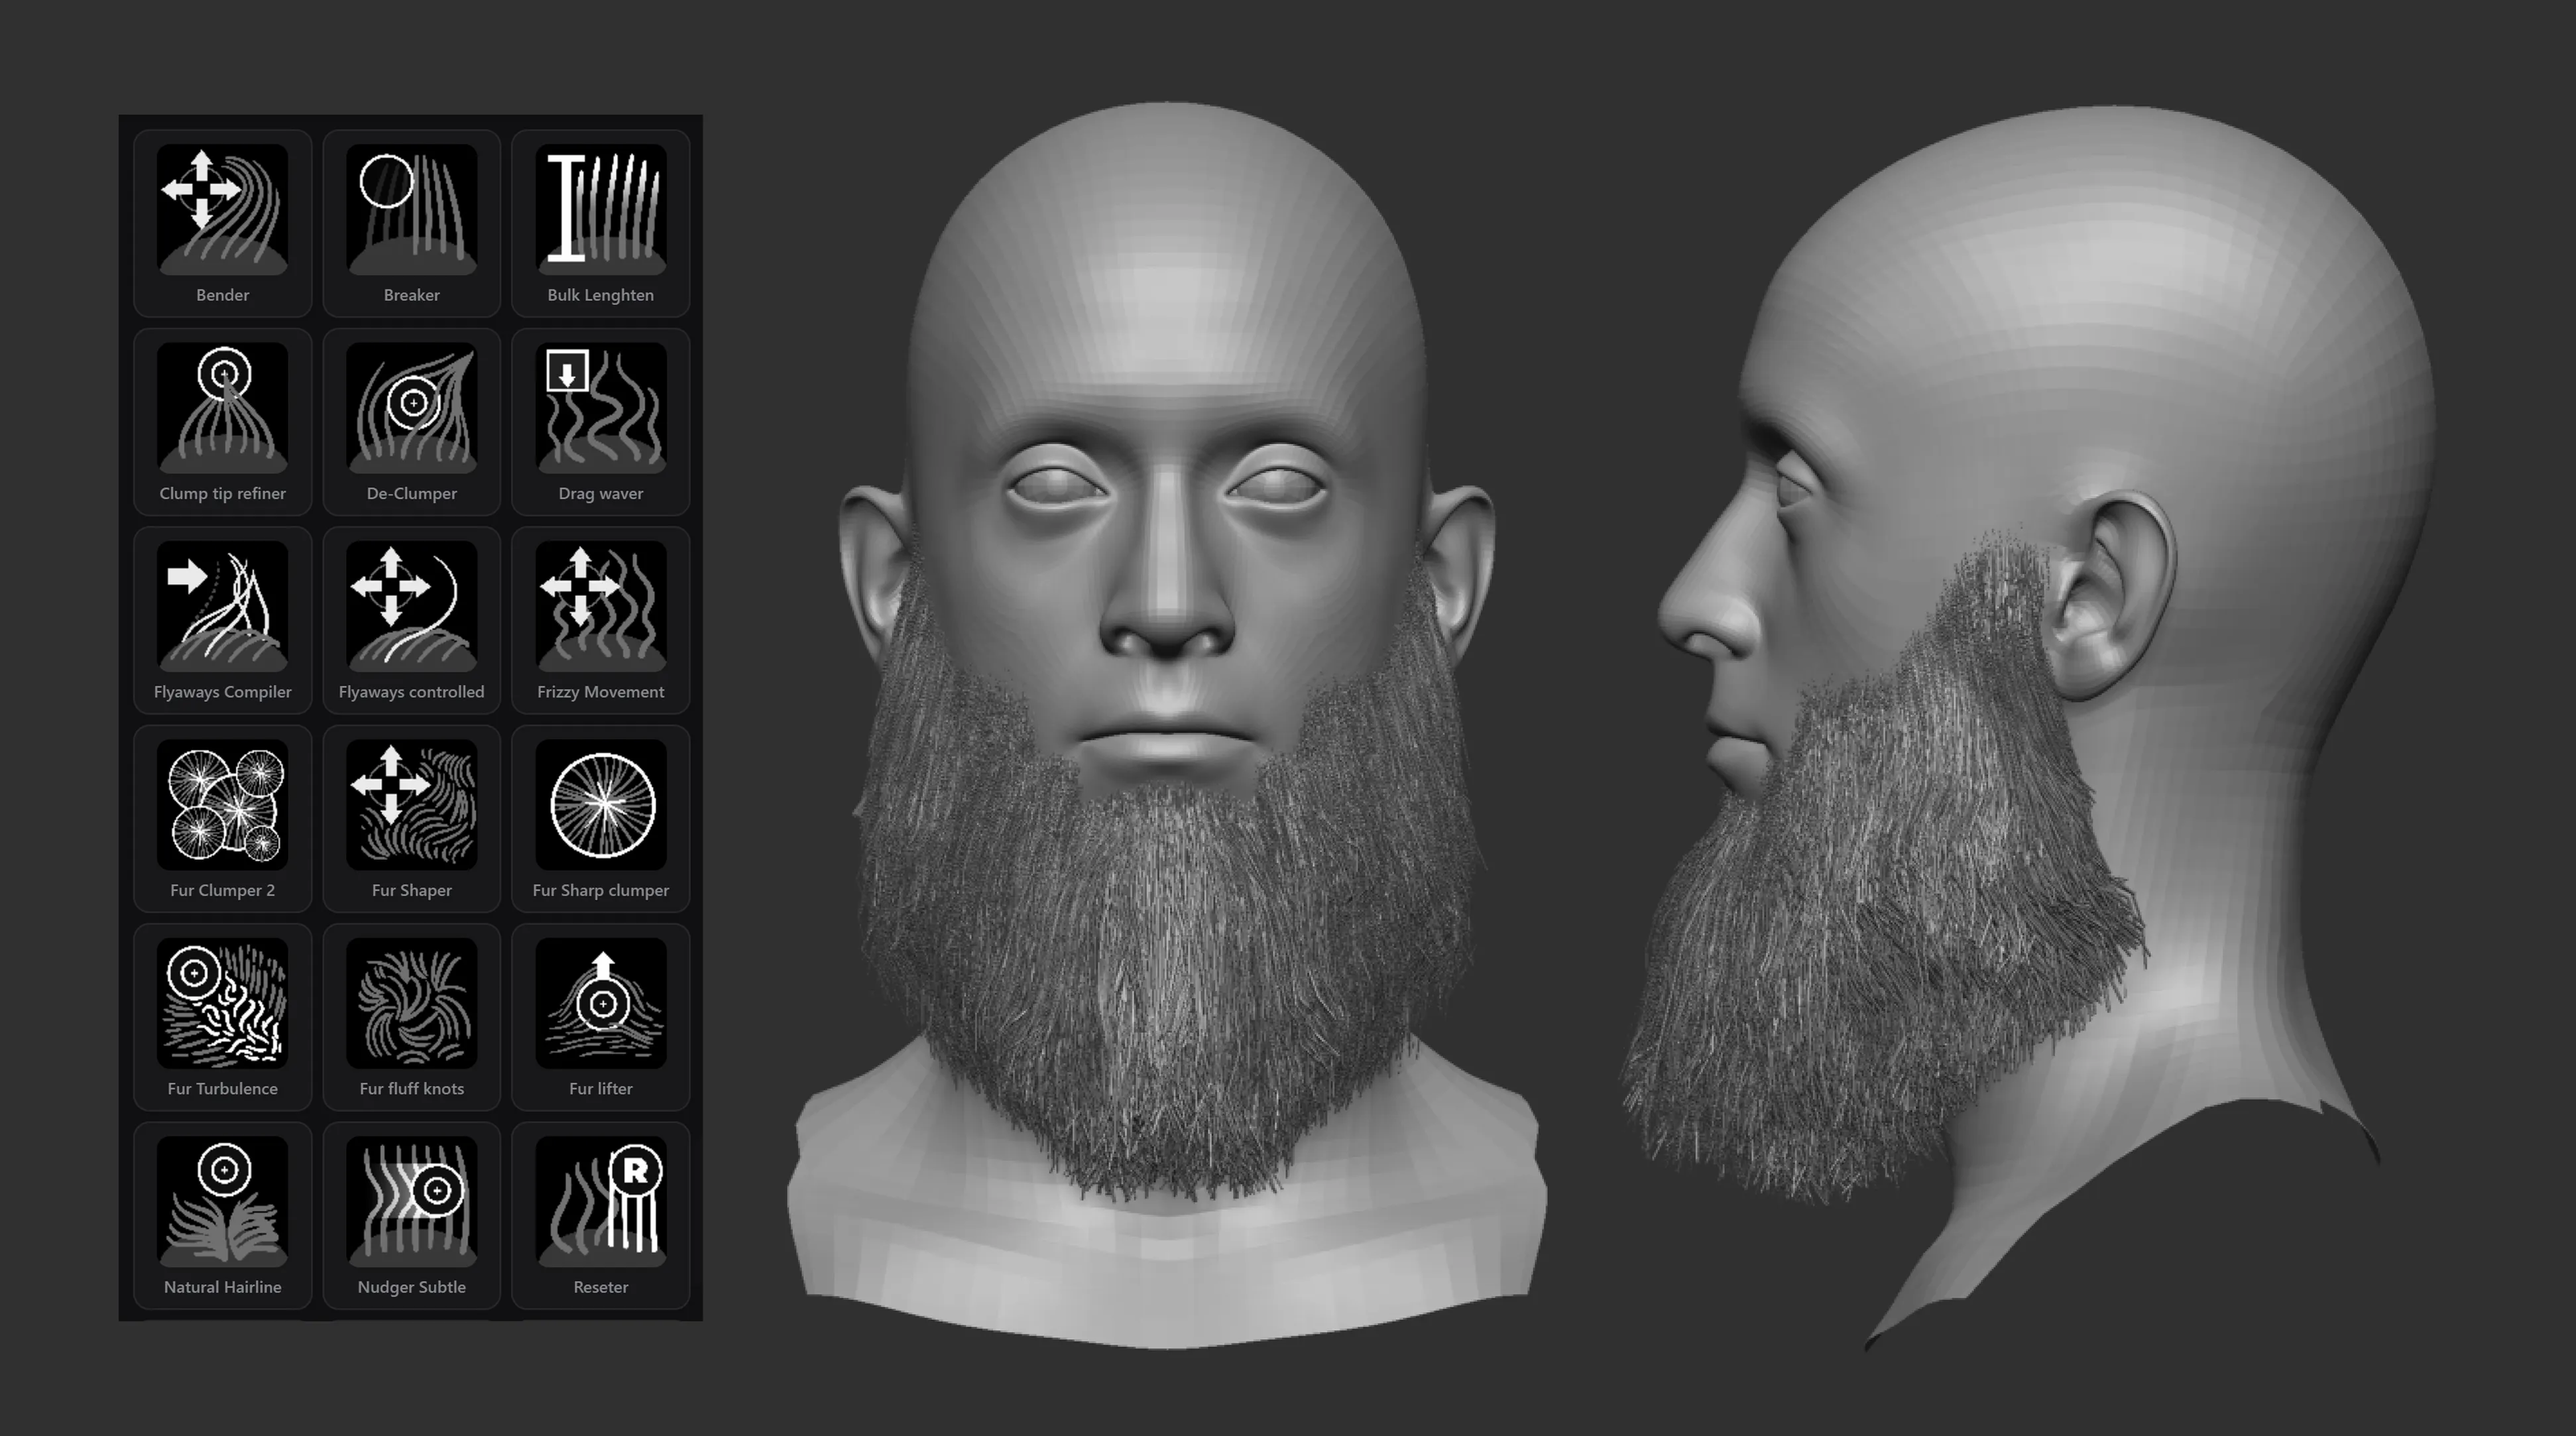
Now, here is the trick and probably the only two things you’ll need to remember from this workflow: From the Preview Setting of the FiberMesh palette, select your FiberMesh object, turn on FastPreview and set the PRE Vis to 0. You can play with this number but 0 is usually what we go for.
Then click on the Export Curves button to export these as obj.
.jpg)
This basically exports the curves from the groomed FiberMesh in ZBrush as guides for Blender.
In Blender, import the objects of your mesh (the head and eyes in my case), and import the OBJ with the curves we exported. Then here is the second bit you need to remember from this workflow:
Select the FiberMesh object, right click it and first convert to > curve (make sure is Curve singular).
Once you this object as a ‘curve’, you can then right click it again and convert to > Curves (plural).
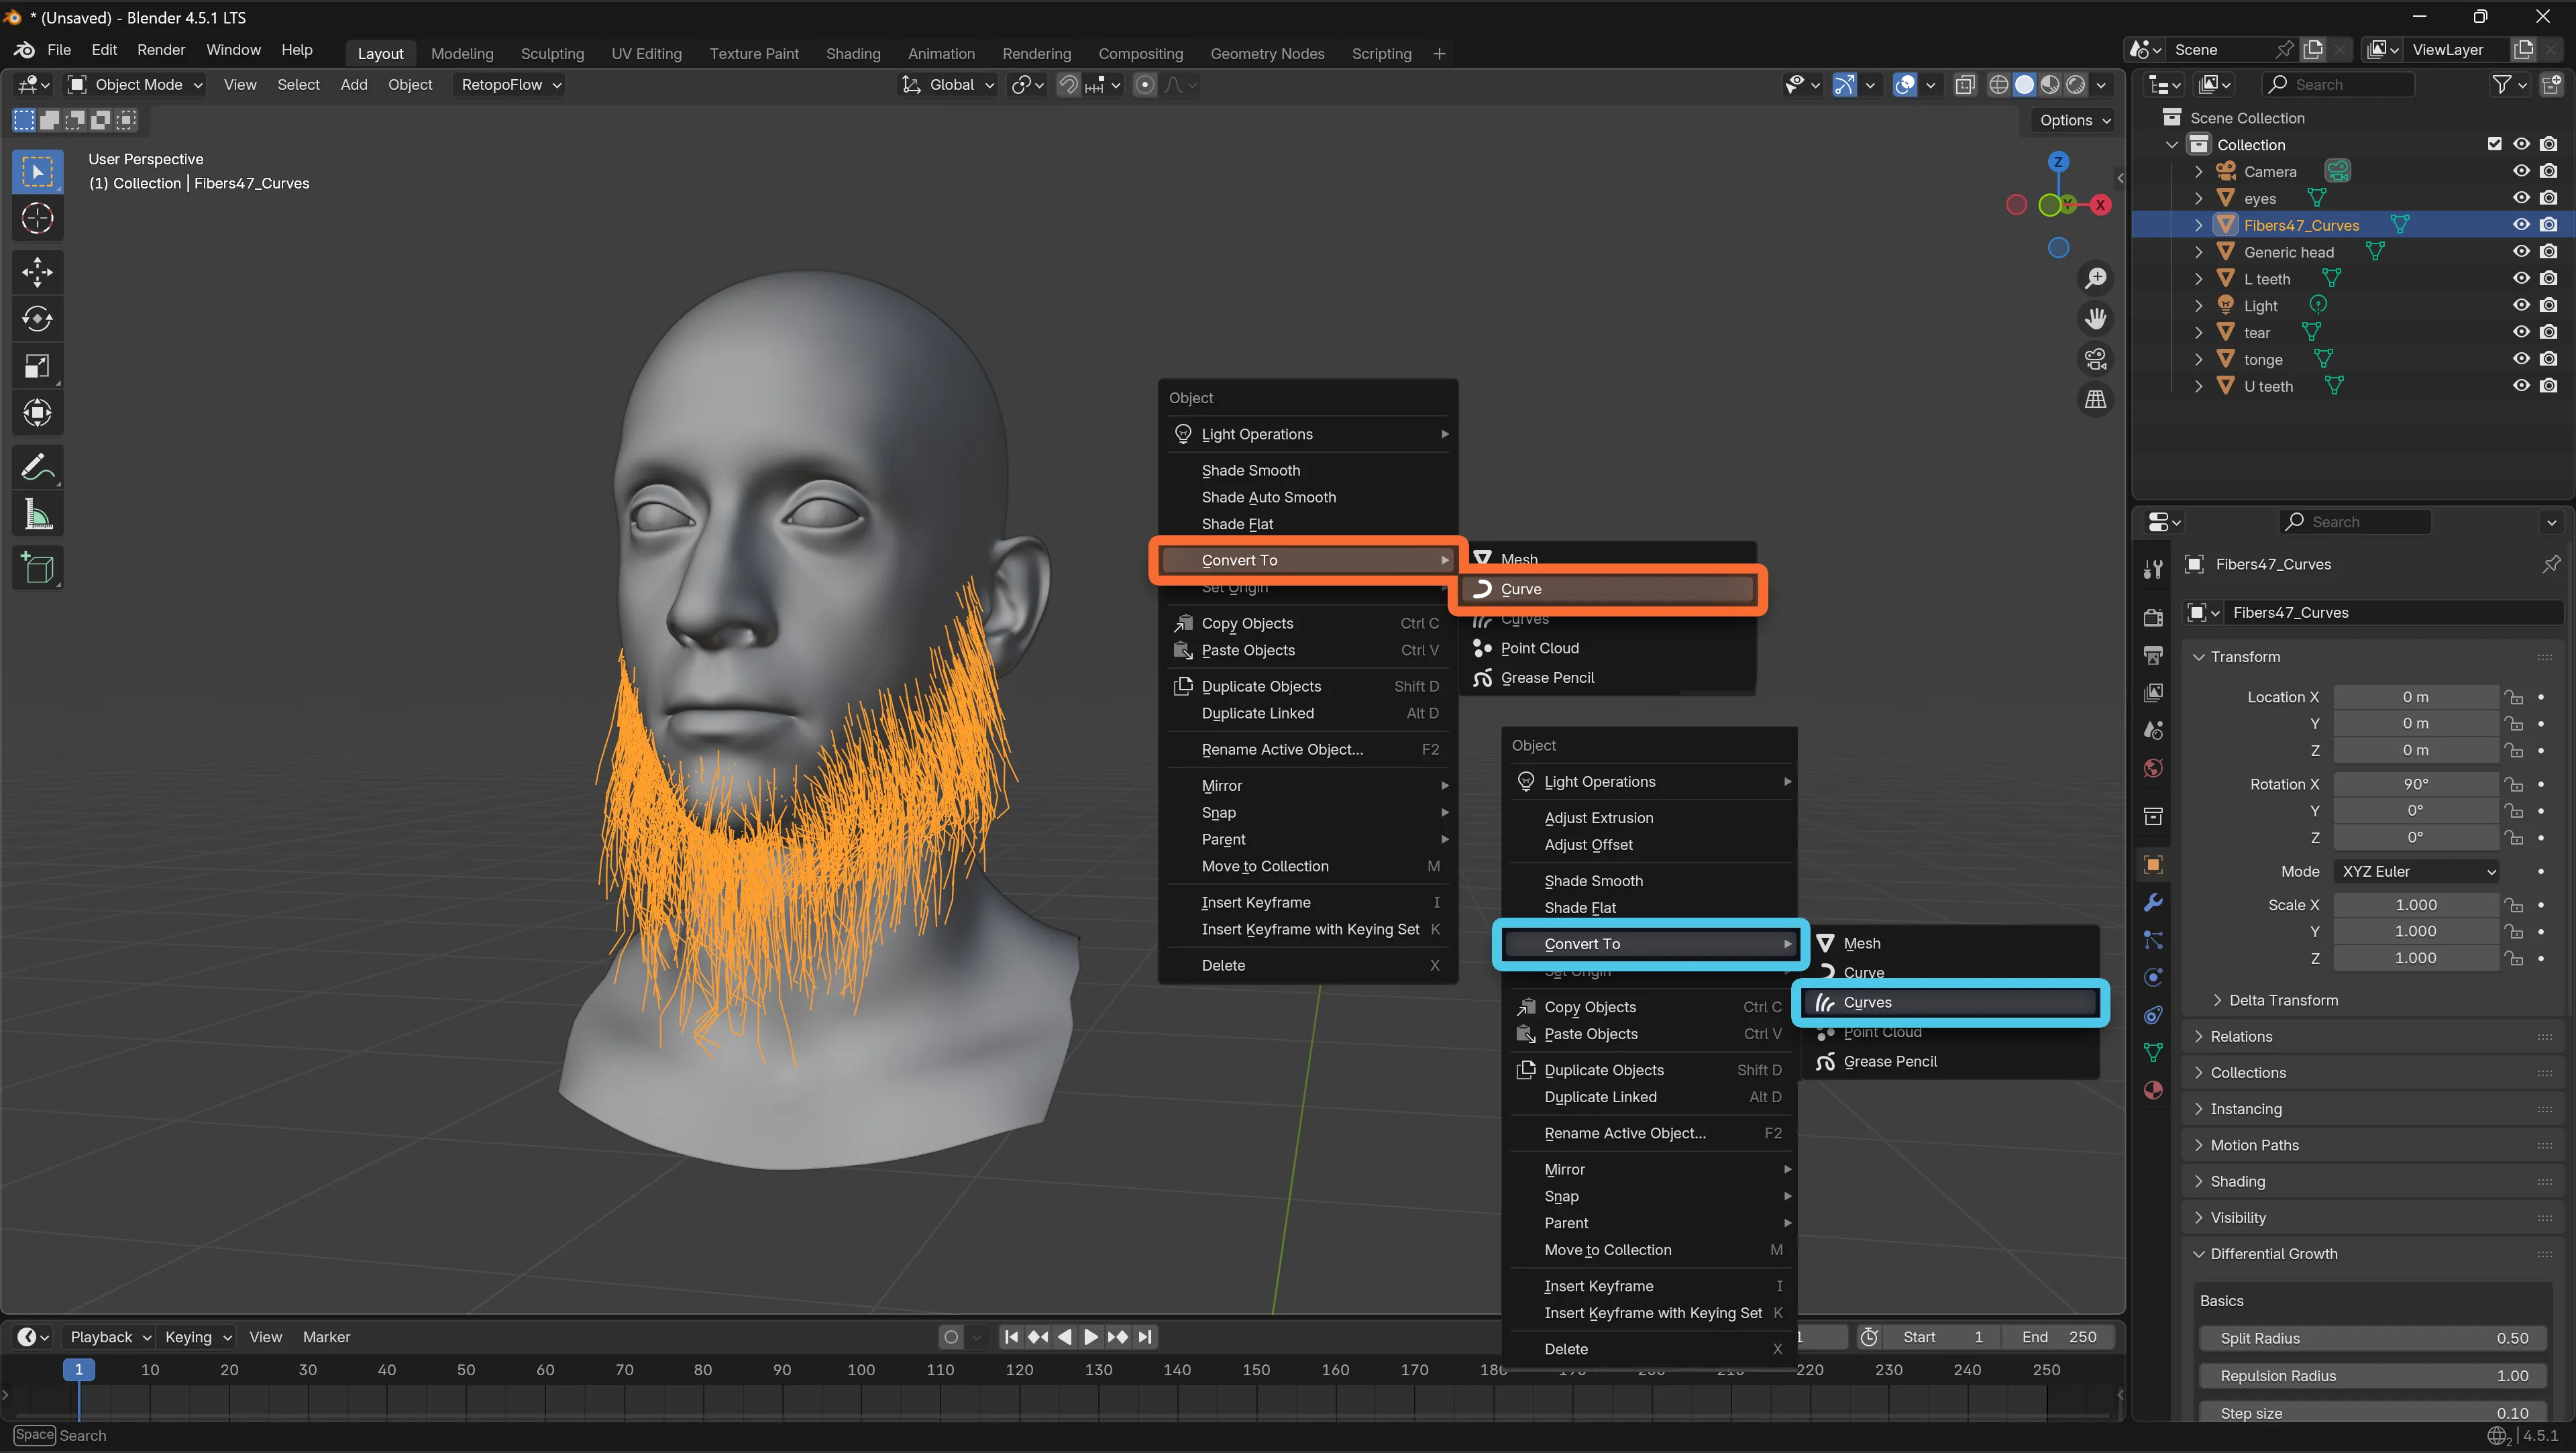
That’s it! You can now go to your asset library, choose ‘hair’ to view the geometry nodes modifiers for the hair and drag and drop them into your curves. We like to start with a Set Hair Curves Profile to define the radius:
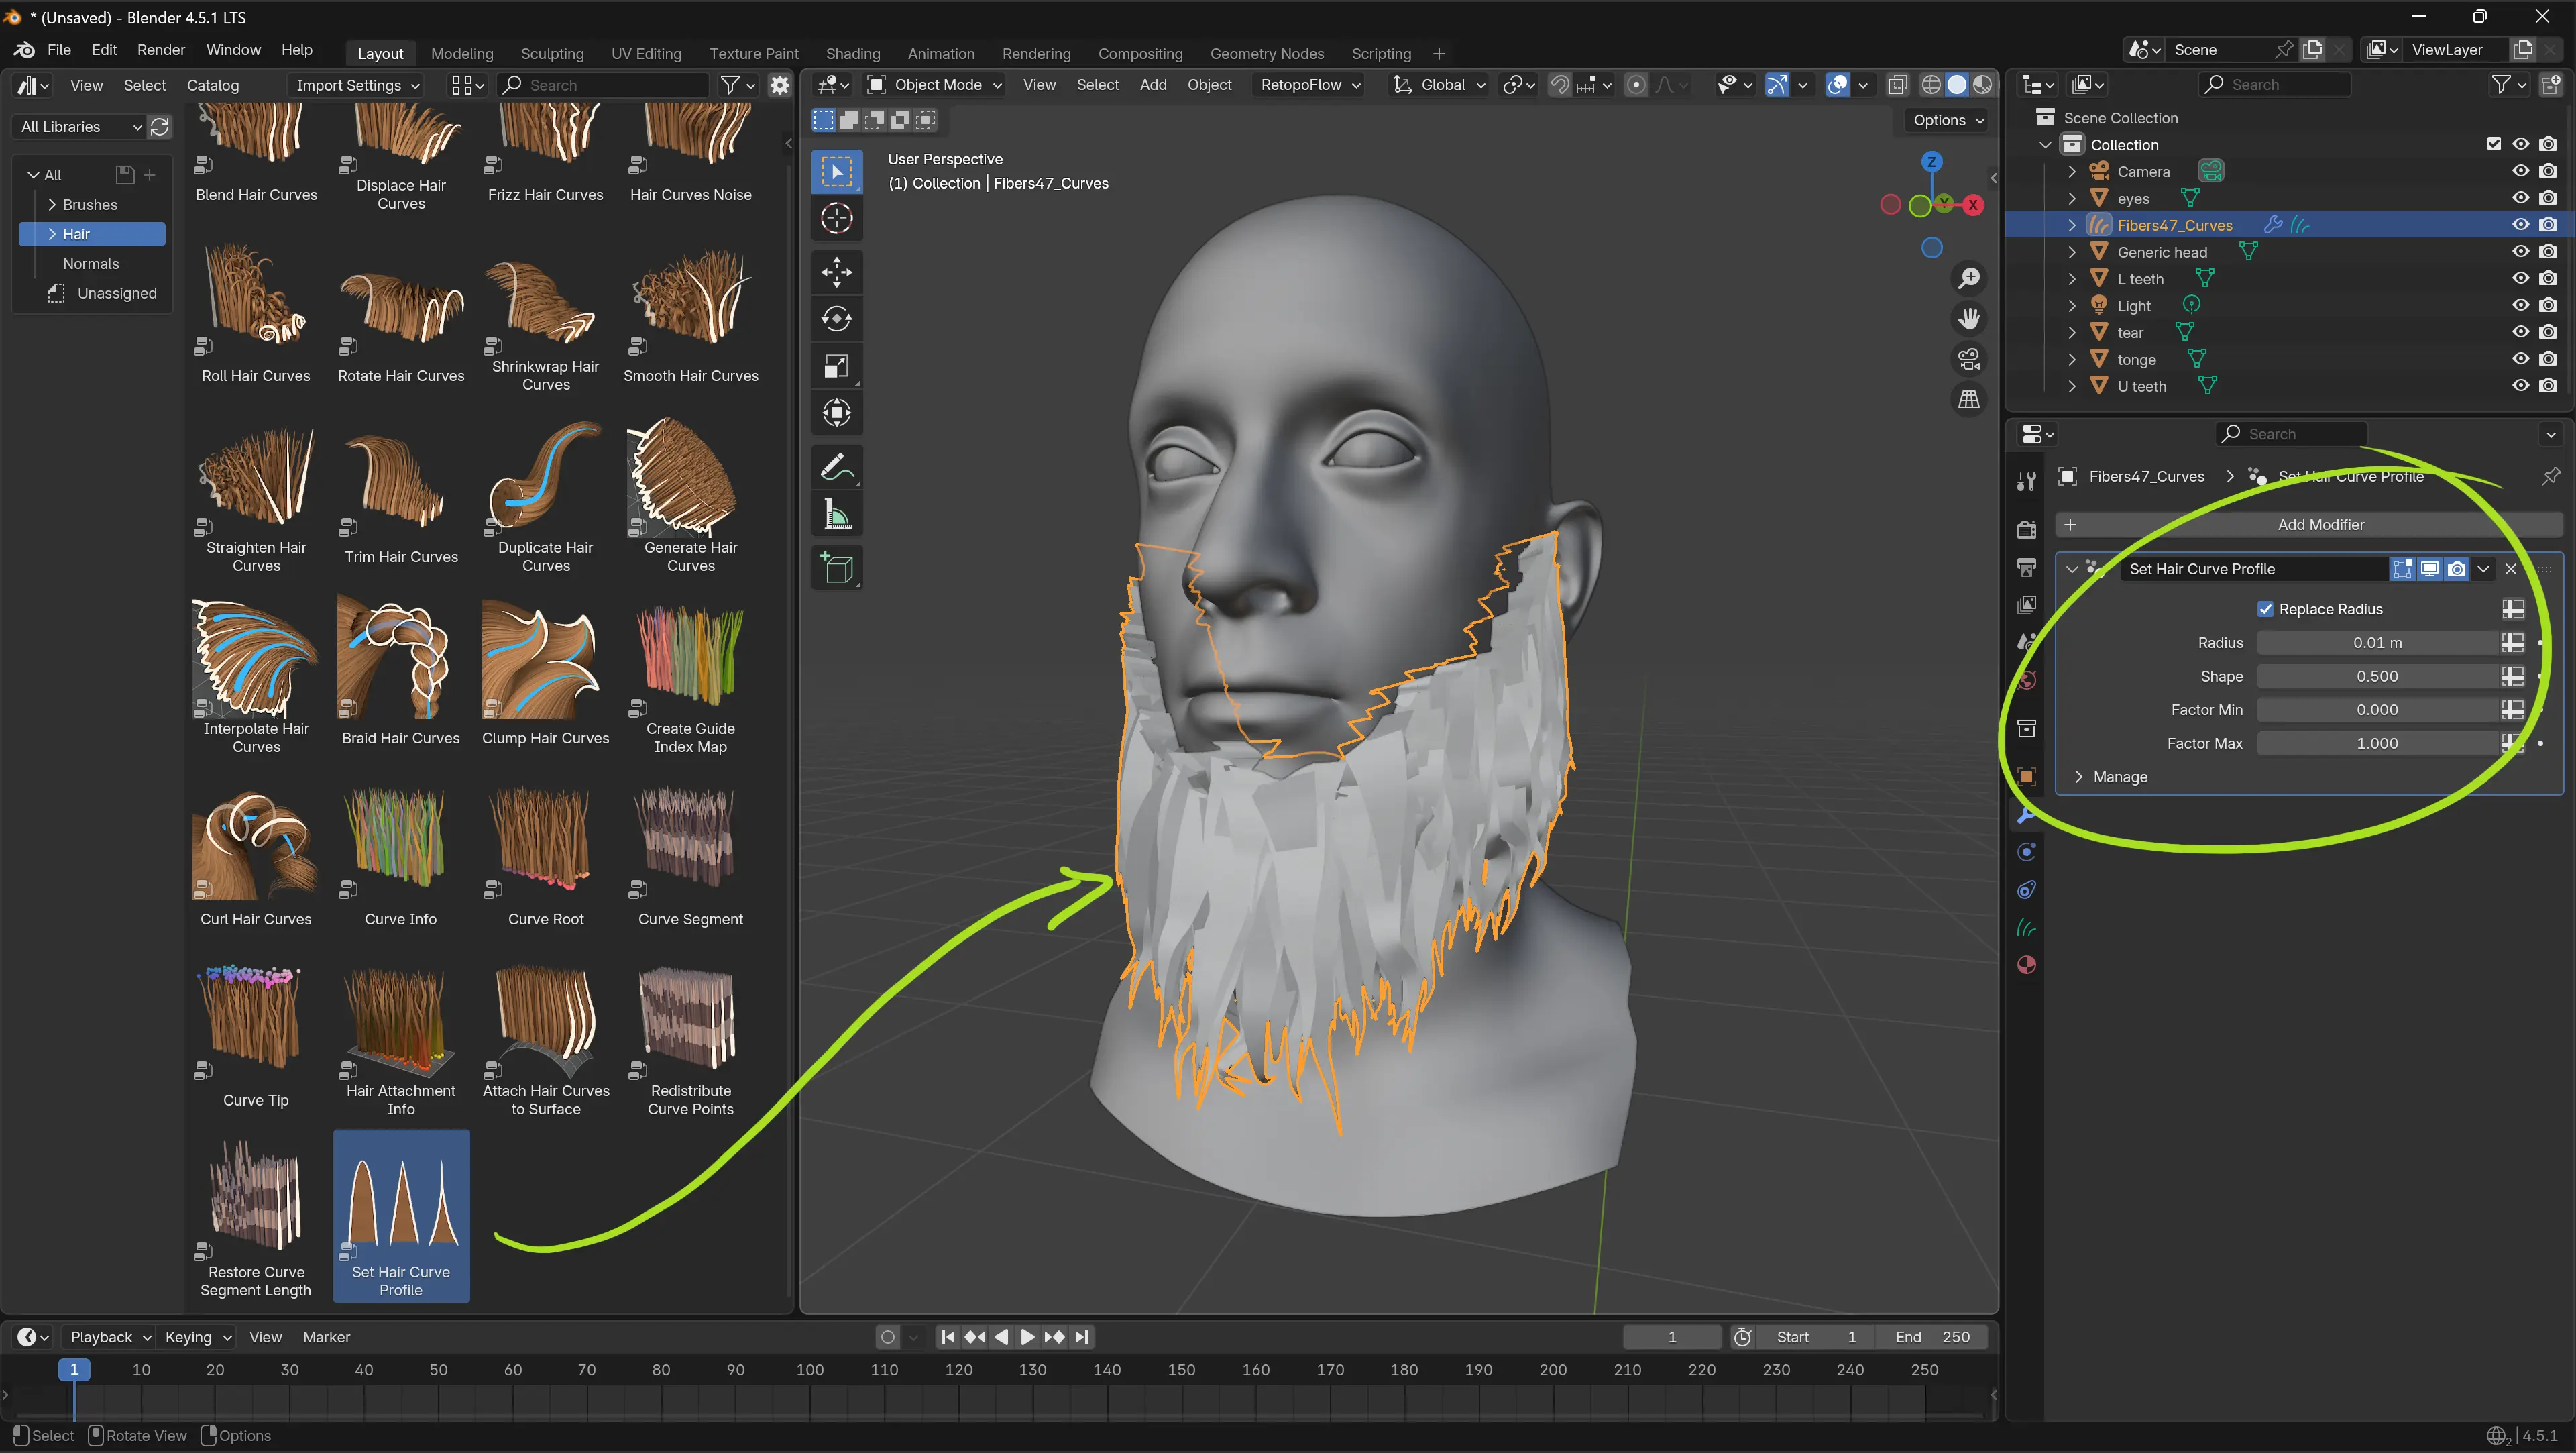
By the way, if you can’t see anything or any chance, make sure that in the Render settings you have Curves set to Shape: Rounded Ribbons (which should be the default in Cycles I think).
Then you can just start to stack the modifiers to adjust the hair to your liking. We added an ‘Interpolate hair Curves’ to add density and interpolate more hairs between the ‘guides’. Then some noise, a bit of curl and another noise with a smaller frequency:
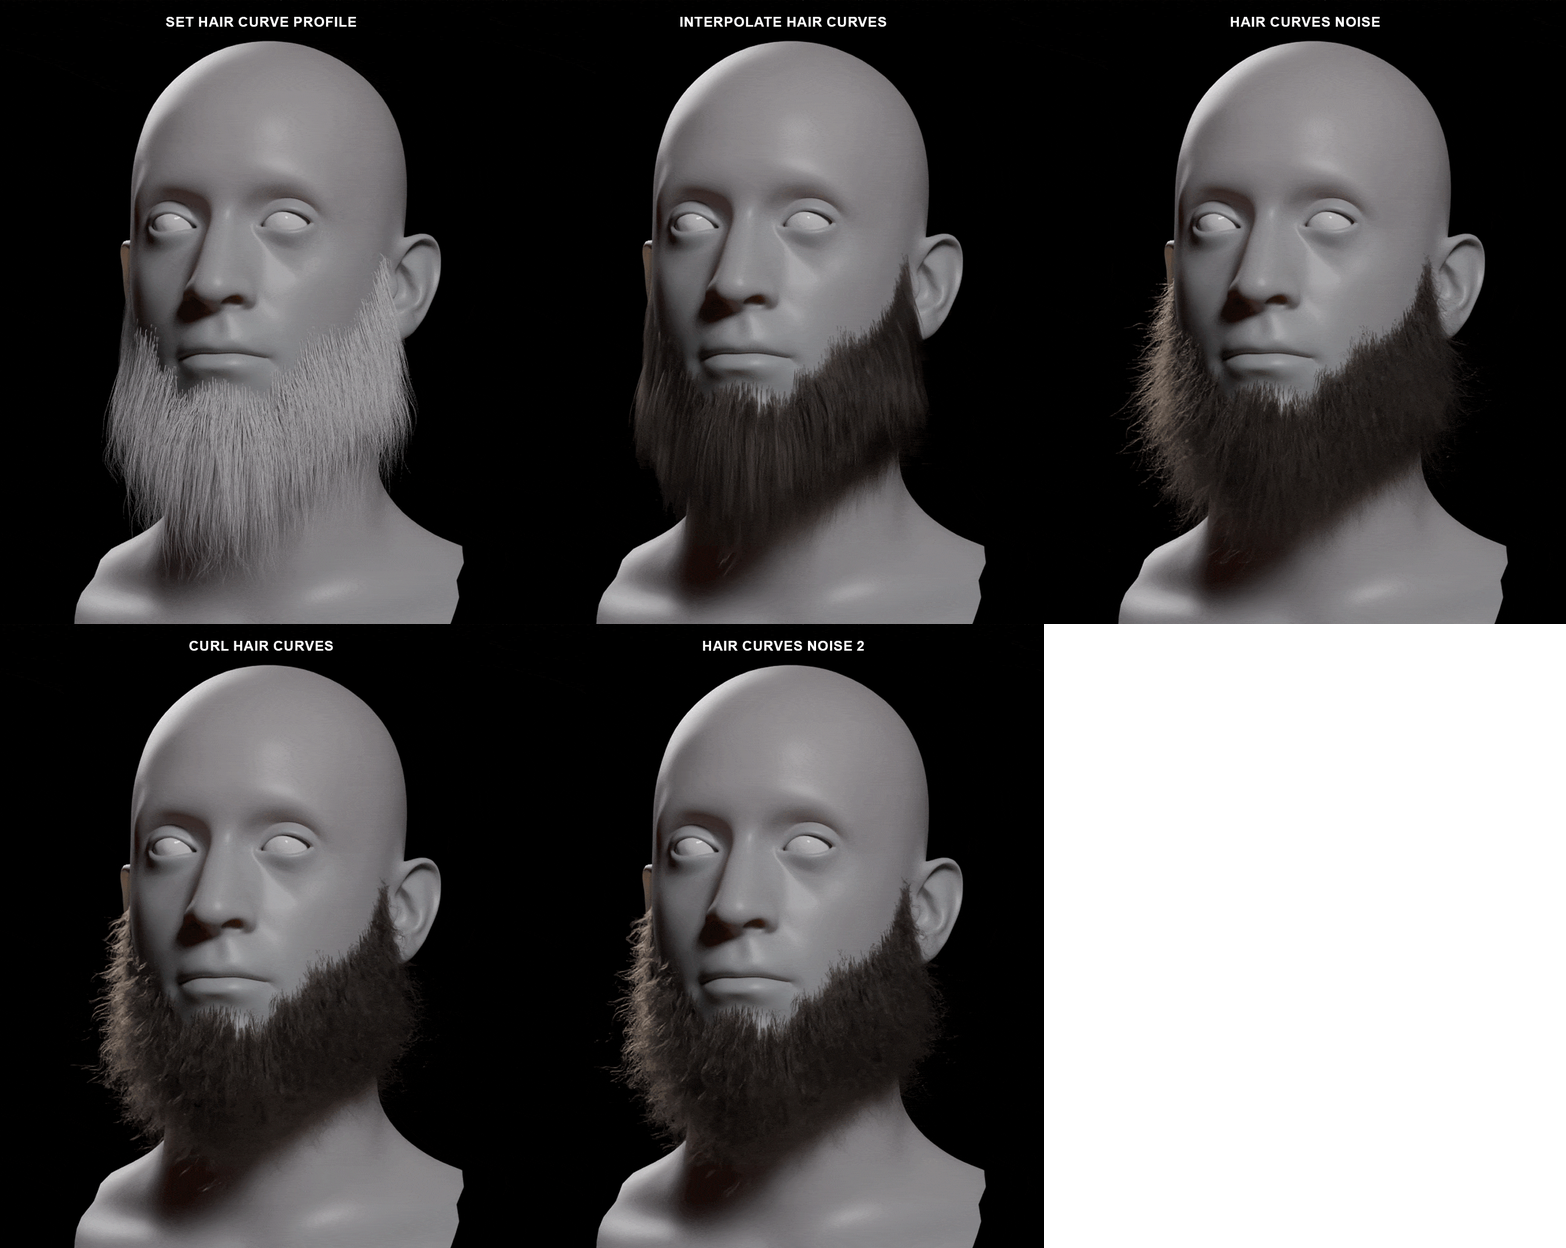
The cool thing is that all of this is not very technical… you can literally drag and drop the hair modifier and adjust the settings.
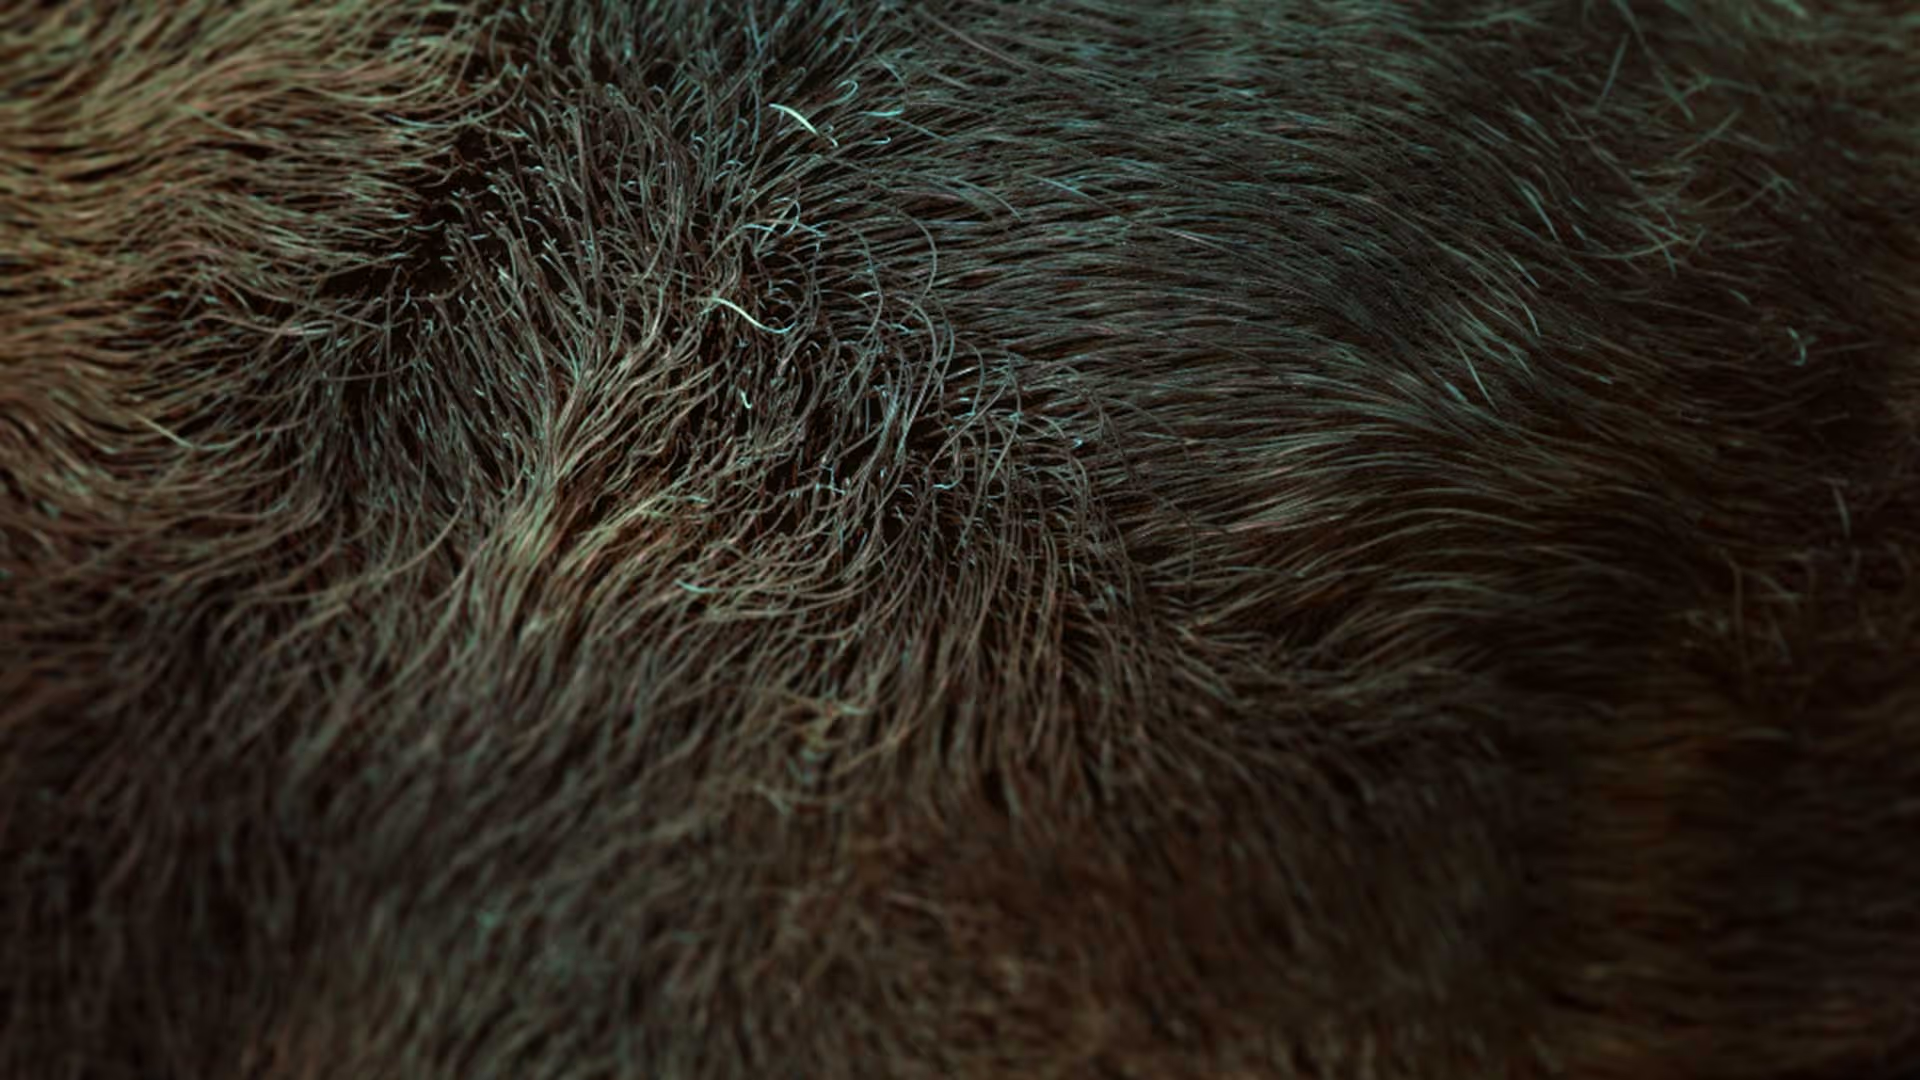
By the way, the shader is just a Cycles Principled Hair BSDF.



.jpg)

.jpg)
.webp)