

.jpg)
She'd already googled it. We were a bit skeptical, so we went and checked ourselves... and she was right. There's surprisingly little out there specifically on painting hair cards in Substance Painter. We'd always assumed this was already covered in lots of videos… but it isn't.
So while we find time to do this properly as a full tutorial, here's the quick reference version.
The setup
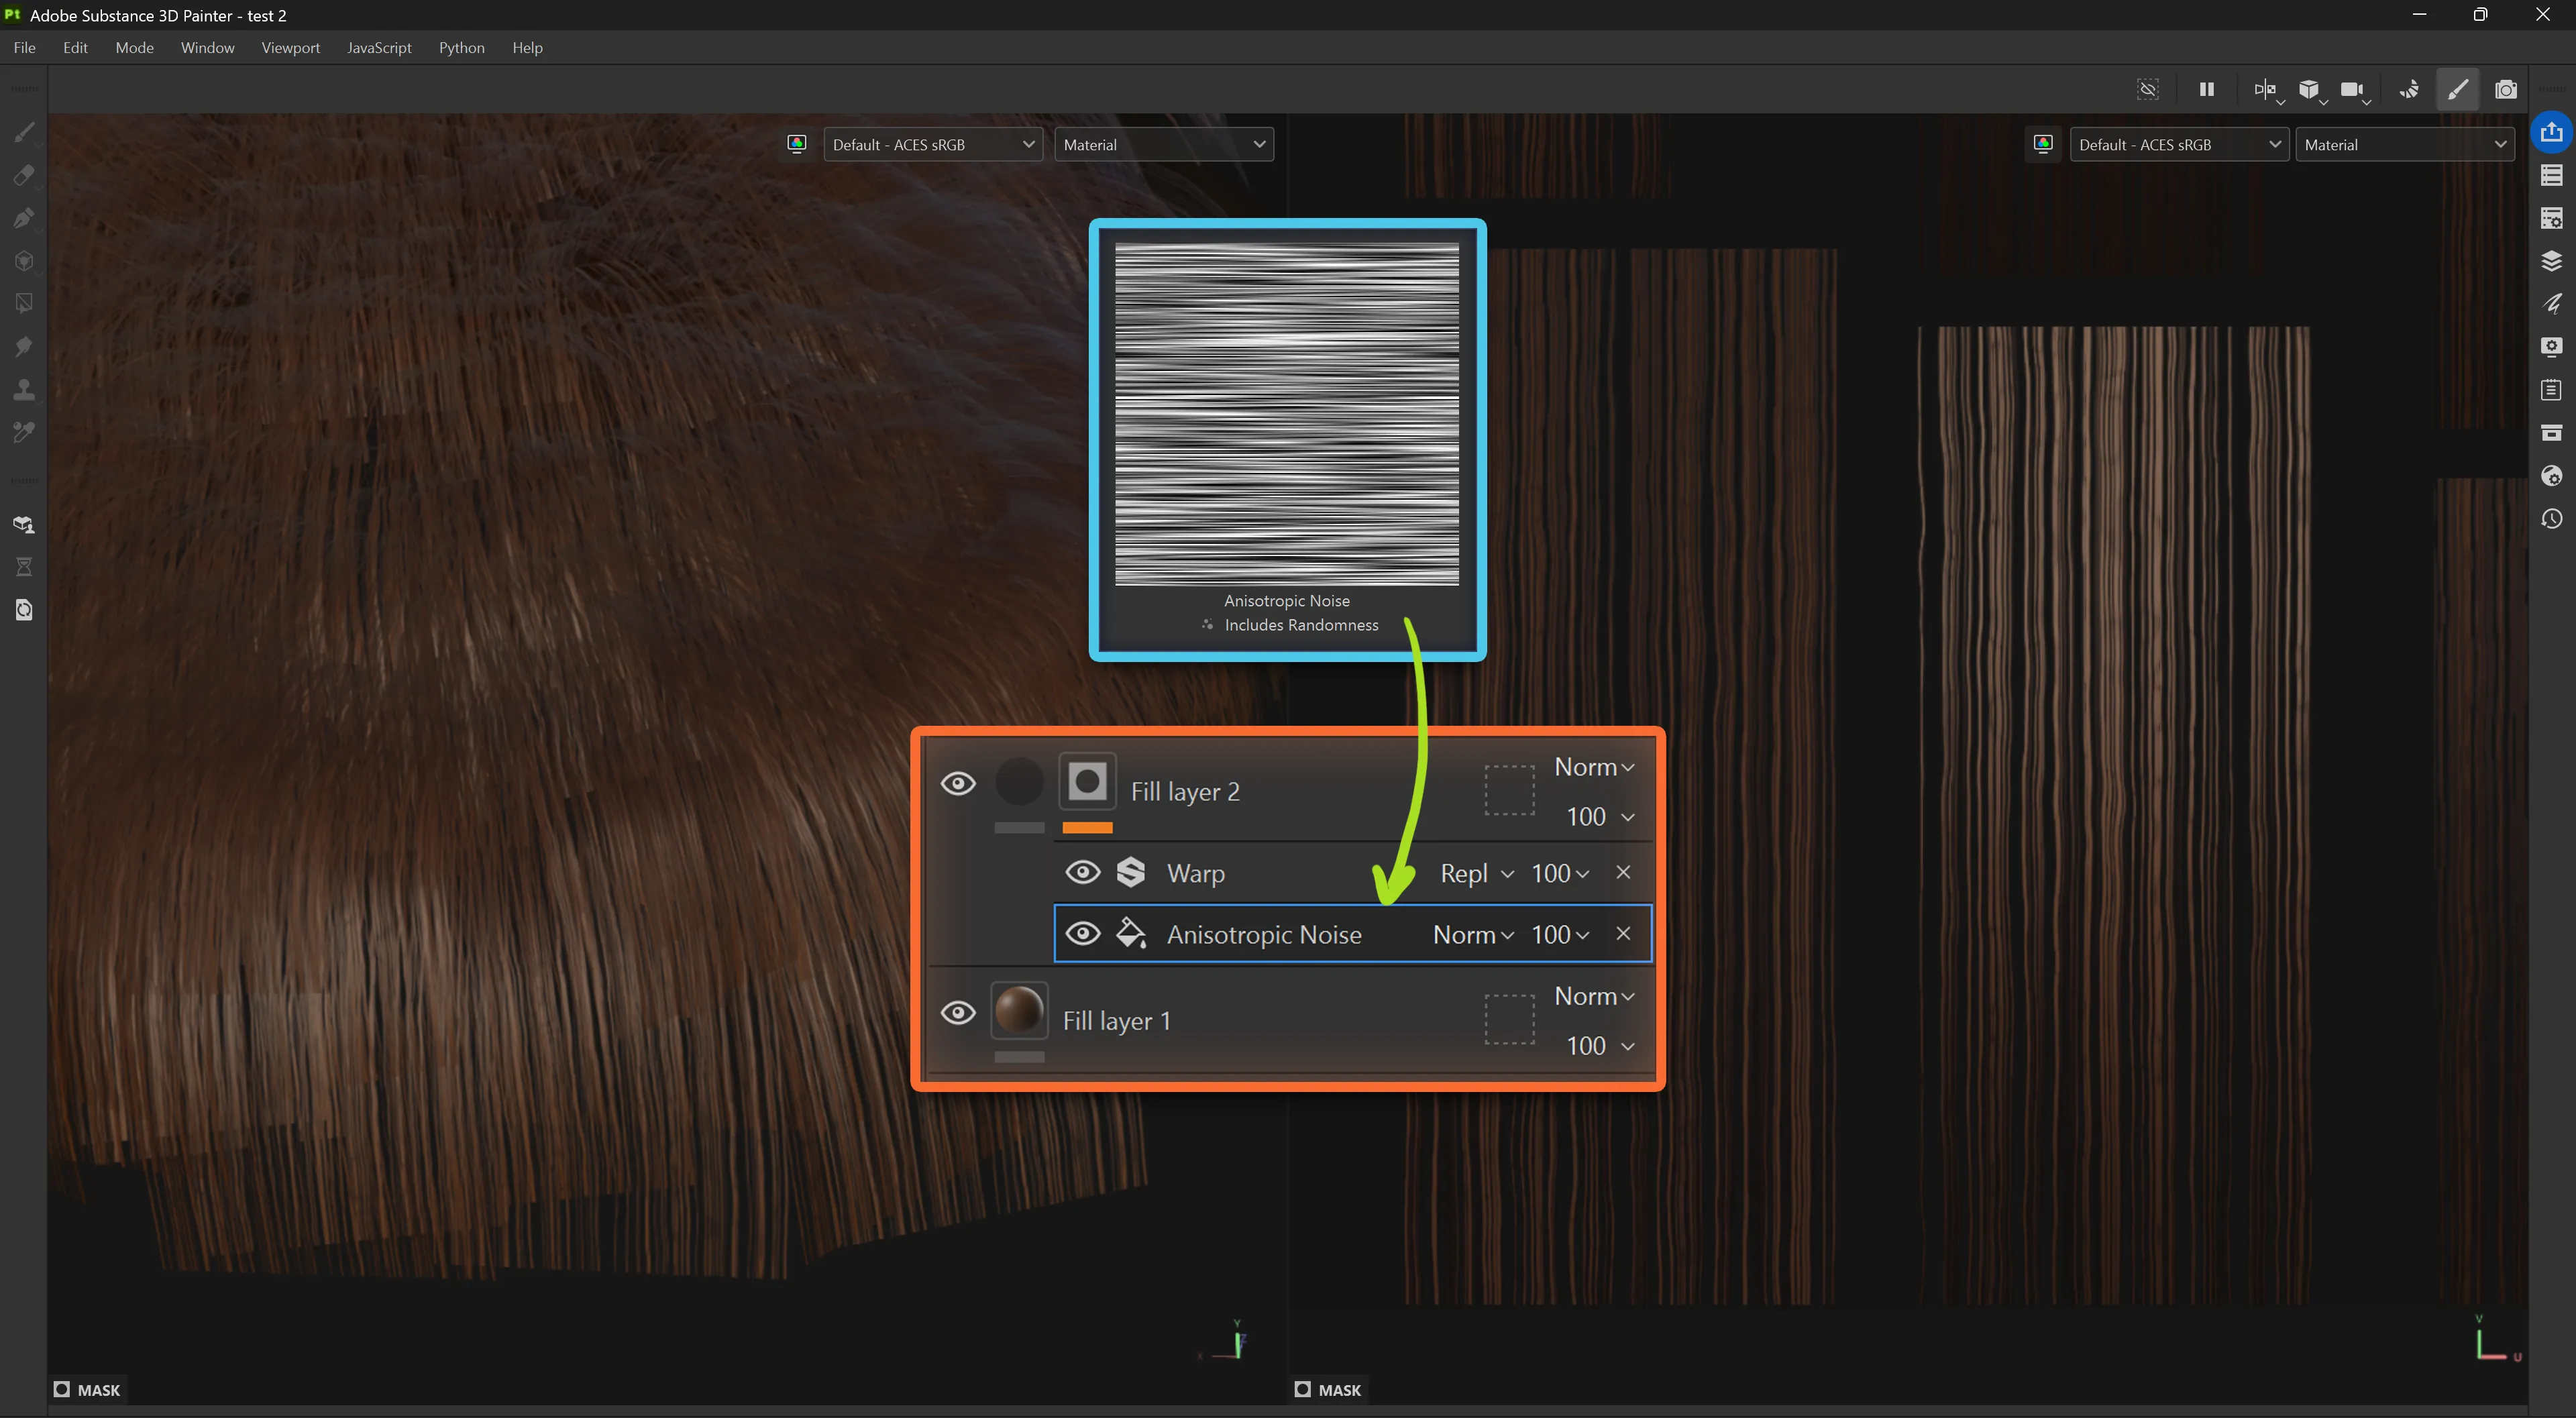
Make sure your material has an opacity channel and that Alpha Blending is enabled. Create a new layer, and on that layer, enable only the opacity channel.
Add a black mask to it, drop something like anisotropic noise into a fill layer inside that mask, and adjust the tiling and scale until you get something resembling hair strands. A touch of warp on top adds variation so the strands don't read as perfectly straight vertical lines.
Painting the strands
Now the fun part. Create another new layer, enable just opacity again, add a black mask, and set the mask to a paint effect. Search for a brush called "Hair Lines" and switch on the side-by-side 3D/2D view.
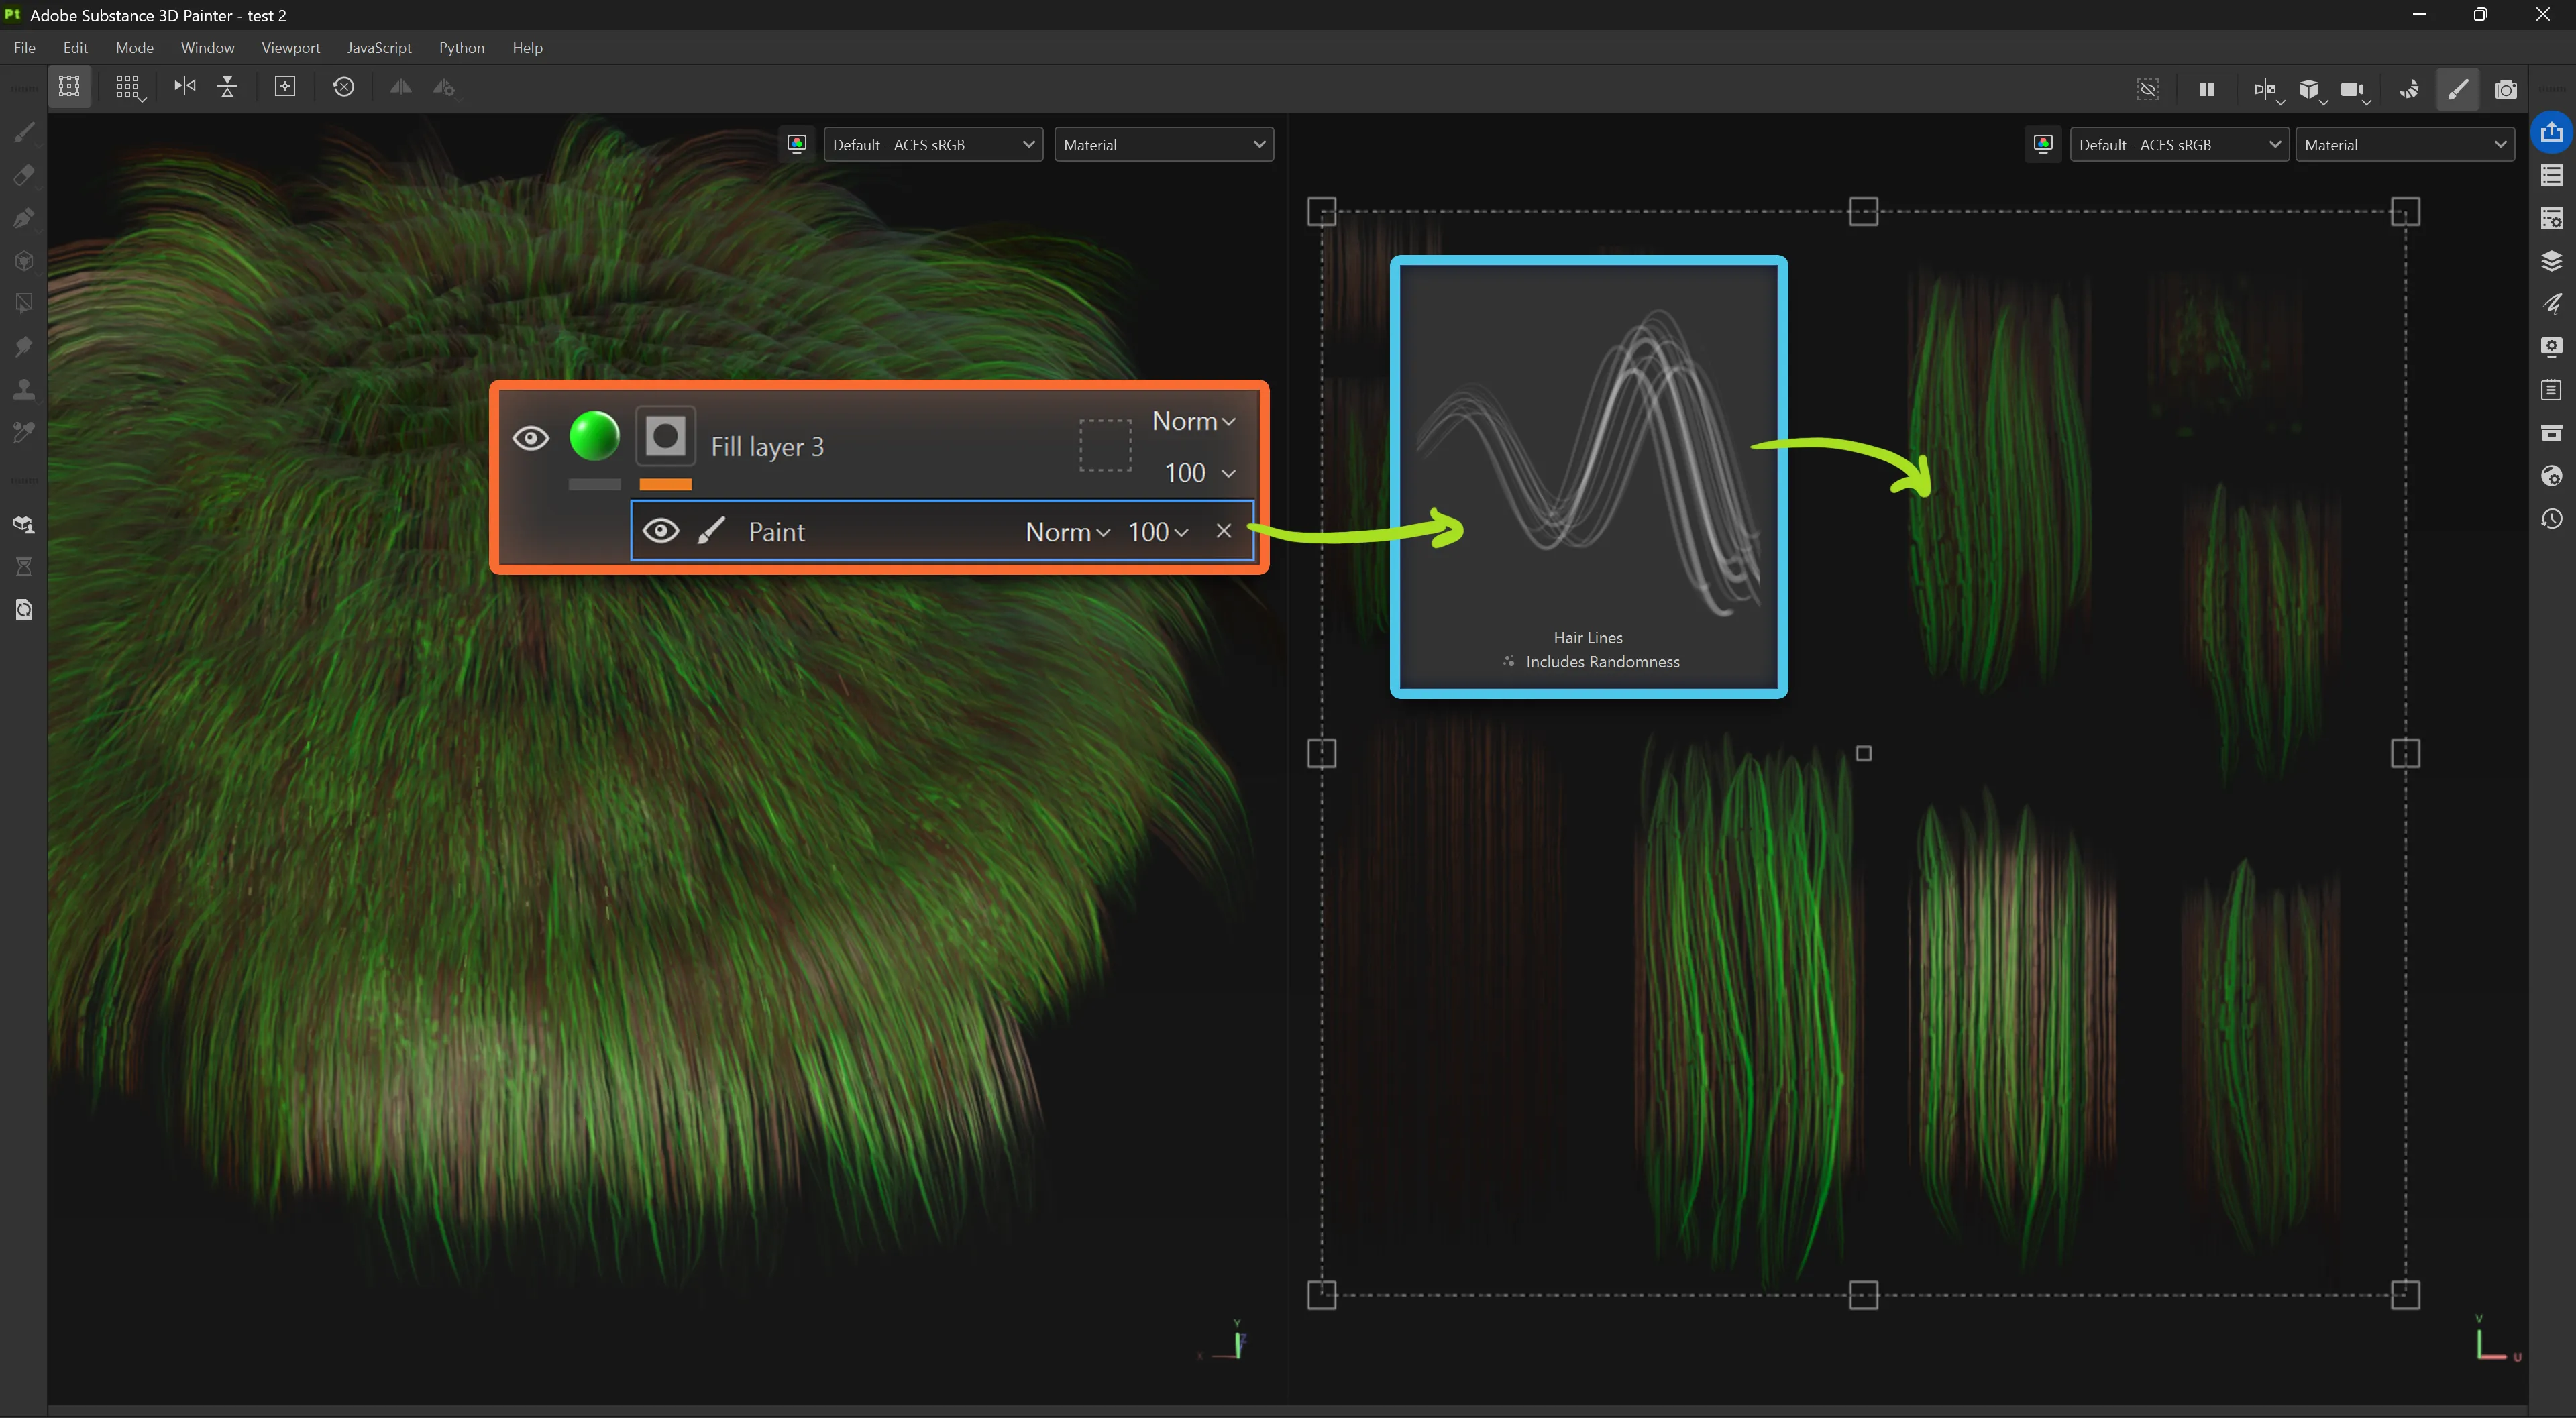
Click and drag over the hair cards and you'll start adding hairs... AND IF you get a tangled mess first. That's not you doing anything wrong. By default, Painter projects your brush strokes based on the mesh's tangent, which is normally exactly what you want, but not here.
Fix: open the brush's projection settings and switch Alignment from Tangent to UV. Now your strokes stay locked to the UV island instead of wrapping around the geometry.
.jpg)
About that original question... flow maps
The term we actually use for this is a Direction Map, not Flow Map, though people mean the same thing. It's a colour map, similar to a normal map but softer and broader, that tells the renderer which way the strands run. The exact hue doesn't matter much (leaning pink or leaning blue is fine), it depends on how your render engine interprets the values.
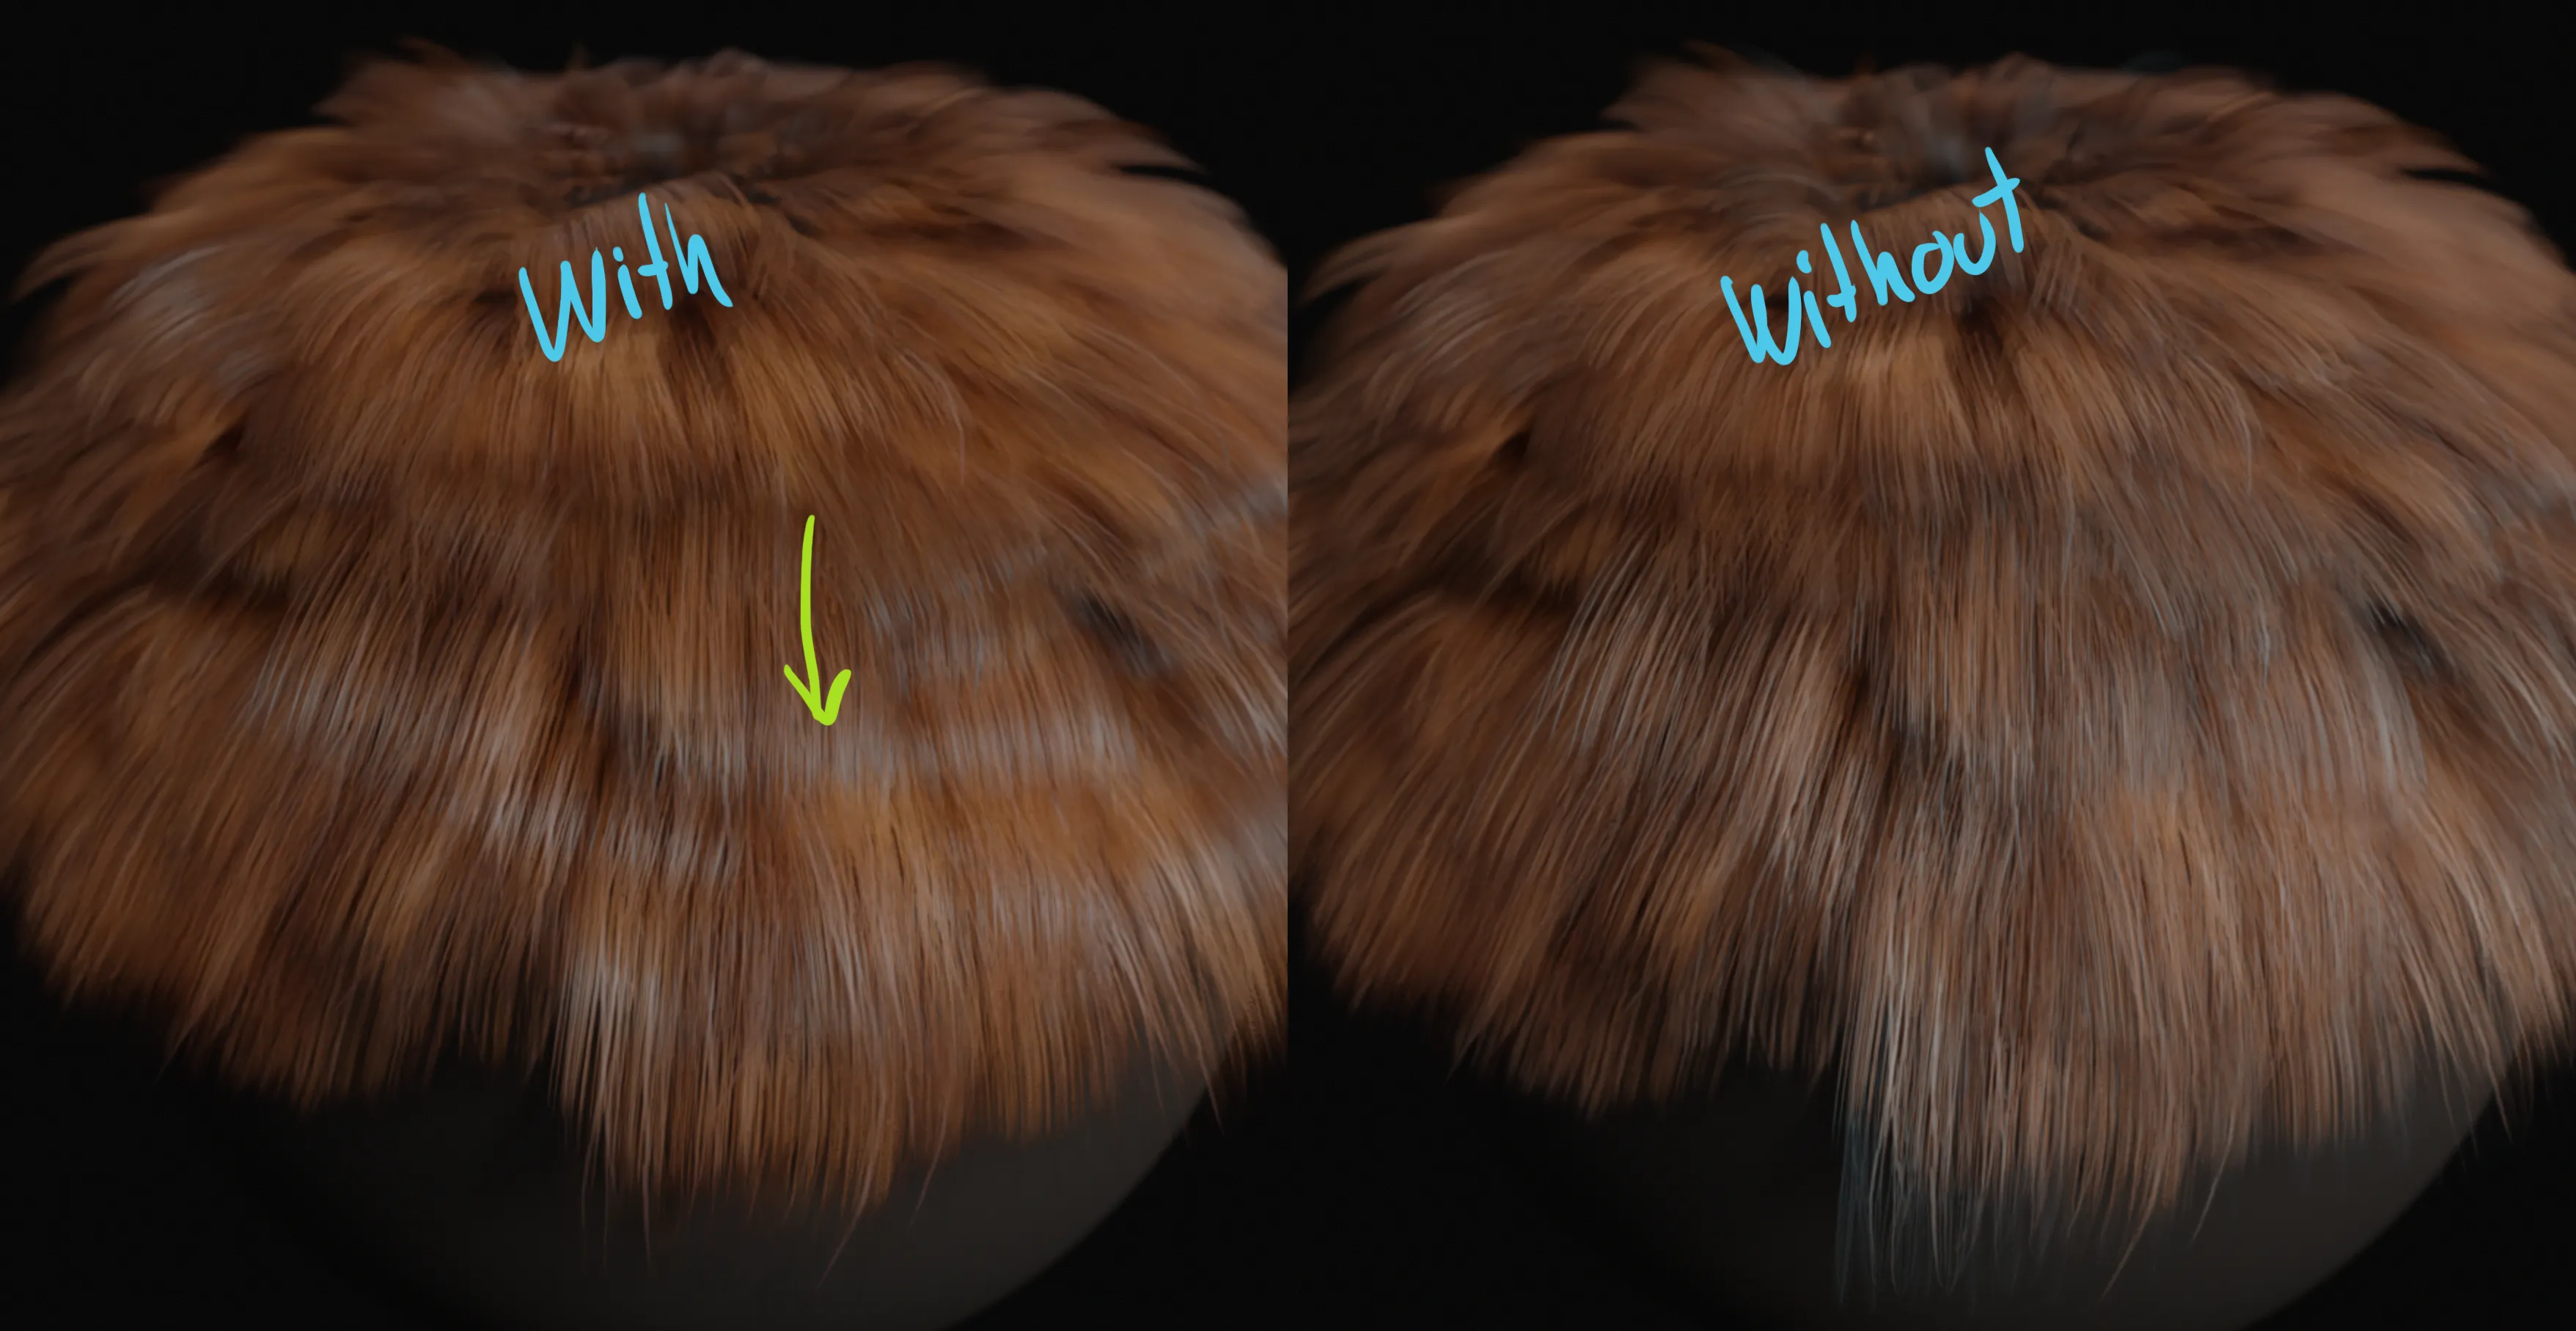
What this map actually does: it guides the anisotropic angle across the hair, which is what gives hair that silky, directional highlight instead of a flat, uniform shine. Here's a comparison with and without one:
Making your own in Painter
Create a new fill layer and enable only the Normal channel as a background colour. On top, add a new paint layer, also on the Normal channel, and set your colour swatch to #80FF80. Switch your viewport to the Normal channel view and paint rough lines following the direction your hair cards flow (usually vertical).
.jpg)
It'll look strange in the viewport at this point, since you're technically distorting the normal map. Here's the trick: add a blur effect on top of your painted strokes and push the amount up until you get a soft transition between the green and blue.
.jpg)
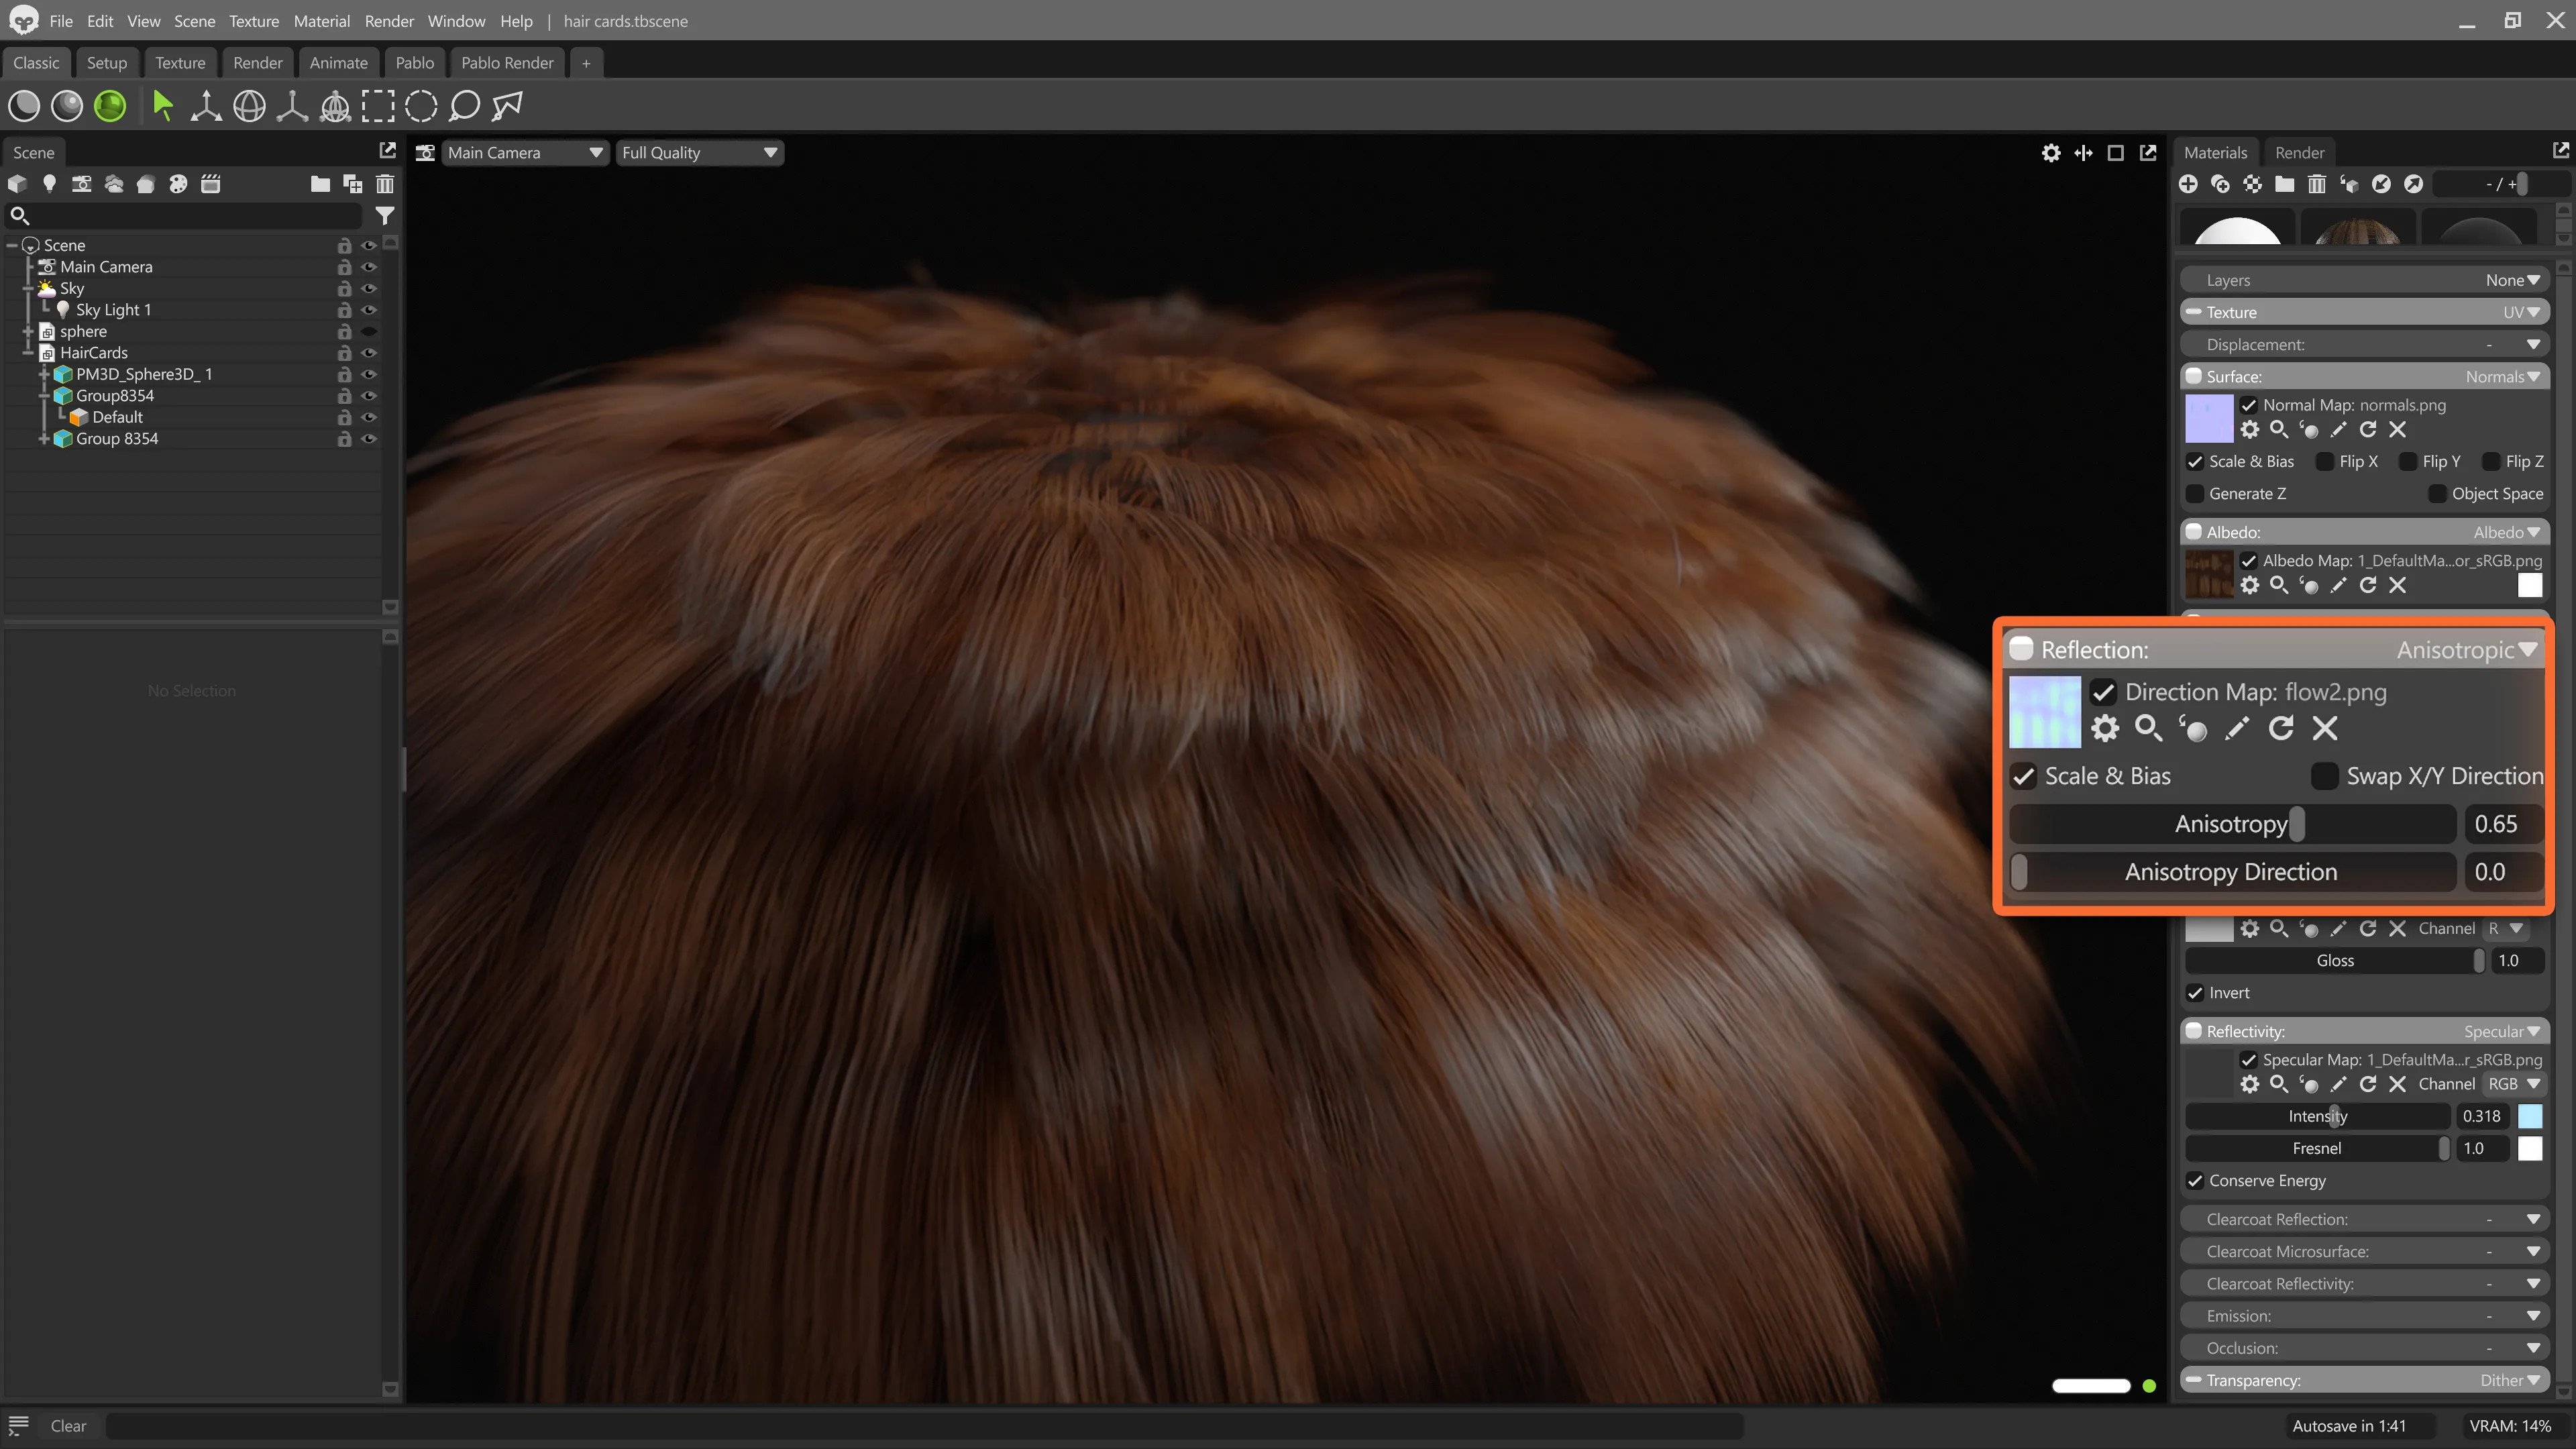
That's it. A simple direction map, and it's enough to produce believable anisotropic highlights on hair cards. Here's a quick render in Marmoset Toolbag 5 (the direction map goes into the Reflection property set to Anisitropic):



.jpg)

.jpg)
.webp)