
I’m going to use my new version of Poe with a quick polypaint pass to show you what I mean… so I did a quick polypaint pass to establish the main hues and colour of the skin.
I used a flat pink colour to start and then use masking tools like Mask by AO, Mask by Cavity and Mask by Smoothness to add subtle variations to the hue… trying to target the areas of the nose, ears and cheeks with reddish tones and more ‘bony’ surfaces with a paler yellow:
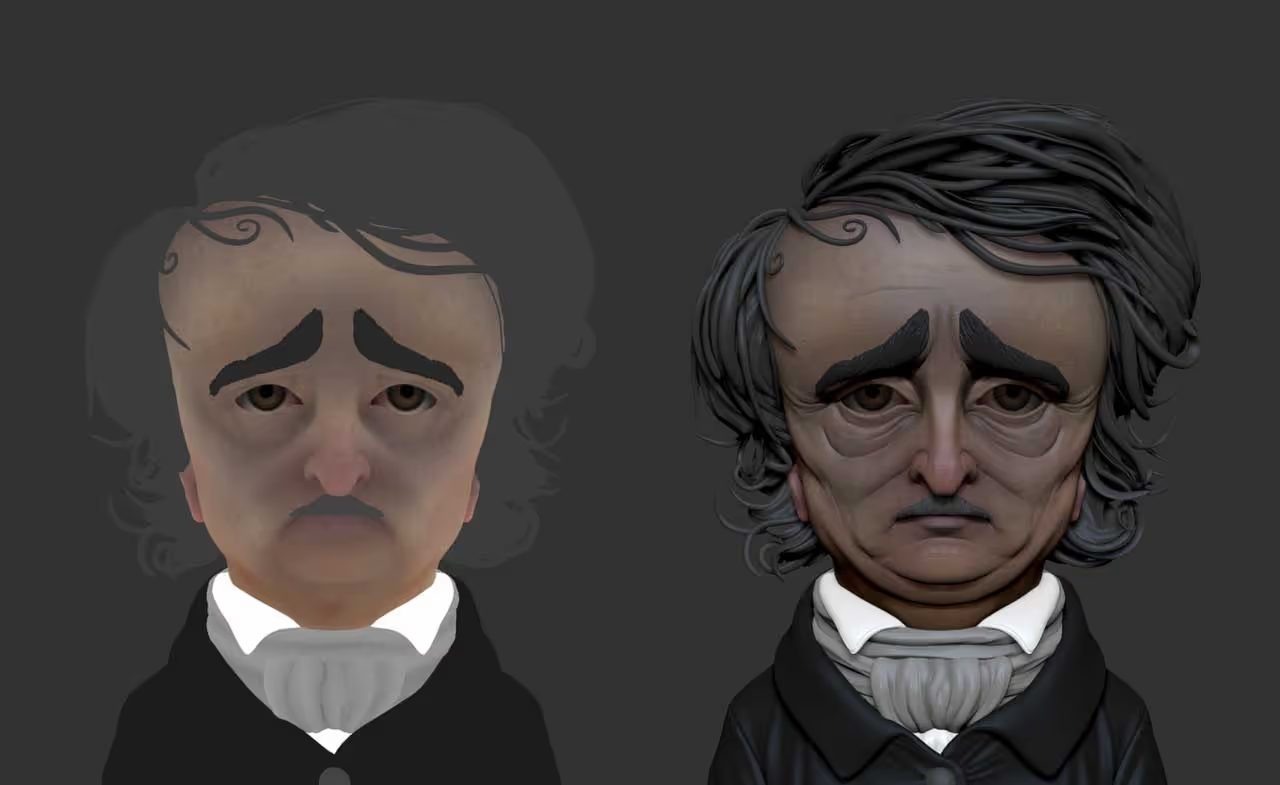
The variations at this point are pretty subtle but I wanted to add a lot more contrast, spots, and some skin damage. So, in terms of the setup, this is all you need… just a relatively simple base texture (polypaint pass) with some subtle variations.
The next step is to bring the Adjust Color window from the Polypaint palette and use the sliders to add contrast and add saturation to the colours… go for something rather strong:

Ok, obviously this doesn’t look great right now but here is where the trick comes in… Make sure you follow these specific steps because it might be confusing at first. We are going to ‘record a point in the present, go back in time, and move into the future overriding the previous step… confused already? haha
Alright, once you accepted the changes of the colour changes you did with the Adjust colour window, you need to do this:
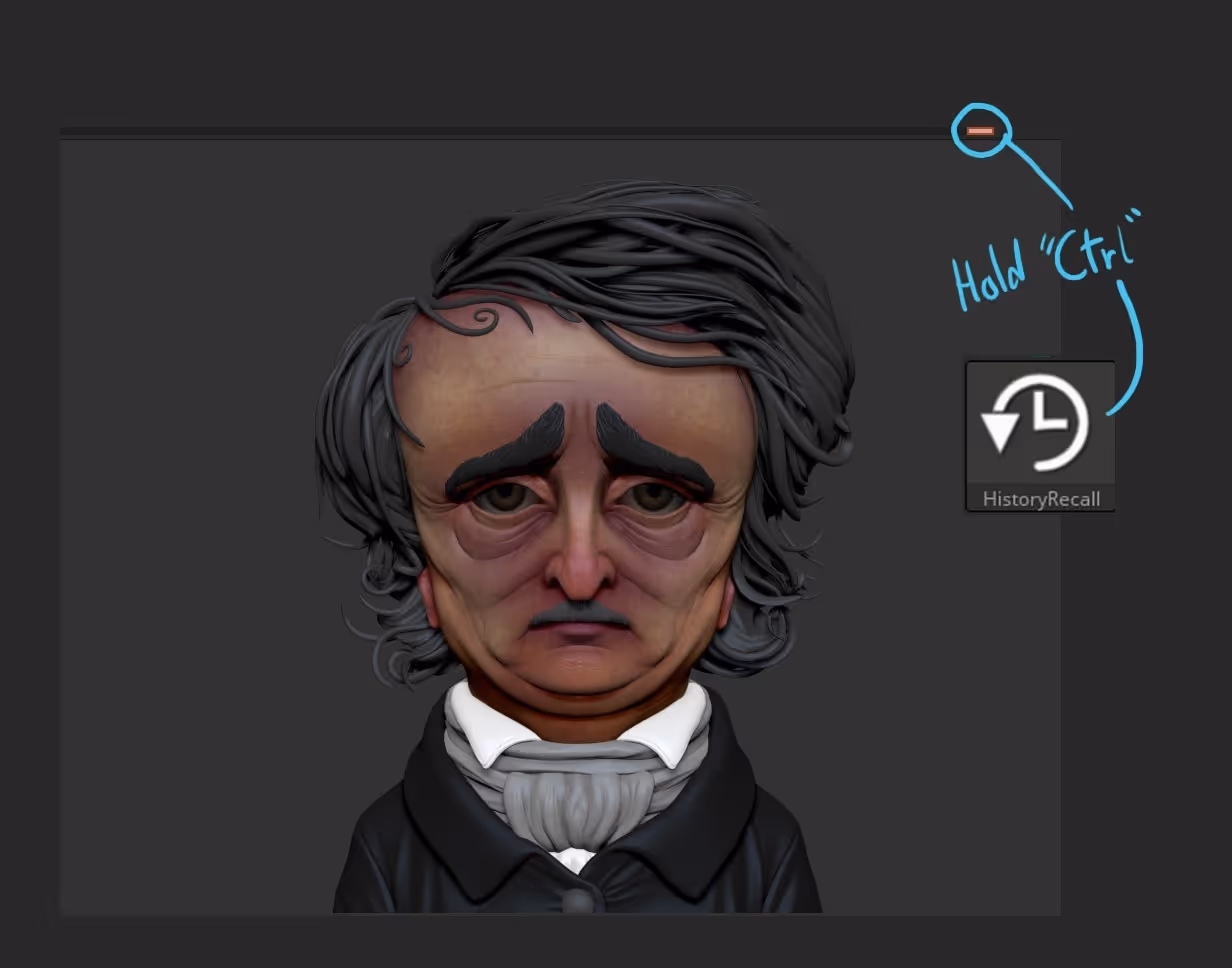
- Select the history recall brush (B>H>R).
- With the brush selected, hold the Ctrl Key and click once on the most recent undo history point (where you are currently or ‘the present’).
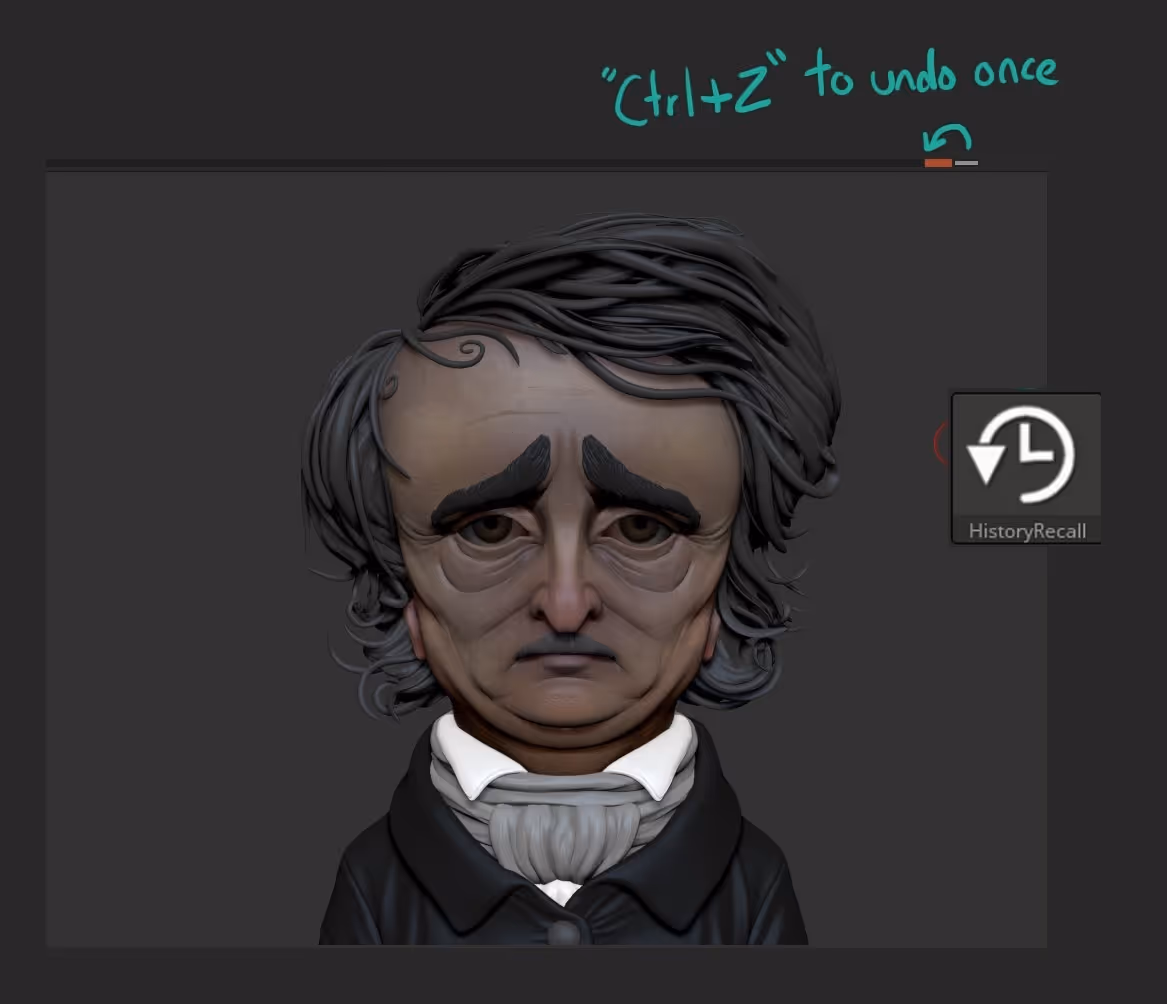
Once you save the current state (indicated by the white line in the undo history), simply press Ctrl + Z to undo the changes in colour and go back to the plain palette you had before
- Now, with the history brush selected, turn off ZAdd and ZSubb set the focal shift to ‘0’ and enabled RGB
- Finally, make sure that Symmetry is disabled (this brush uses projection so you cannot use it with symmetry). Start painting targeting areas that should be redder than others:
You are now literally projecting the ‘stored’ state of the polypaint (the more contrasted version) so you can maintain the general palette and placement you did with your colours but add the variation.
Once you get into the flow of how this works, it becomes second nature… For instance I just repeated the steps for a darker version and targeted the eyelids and eyebags:
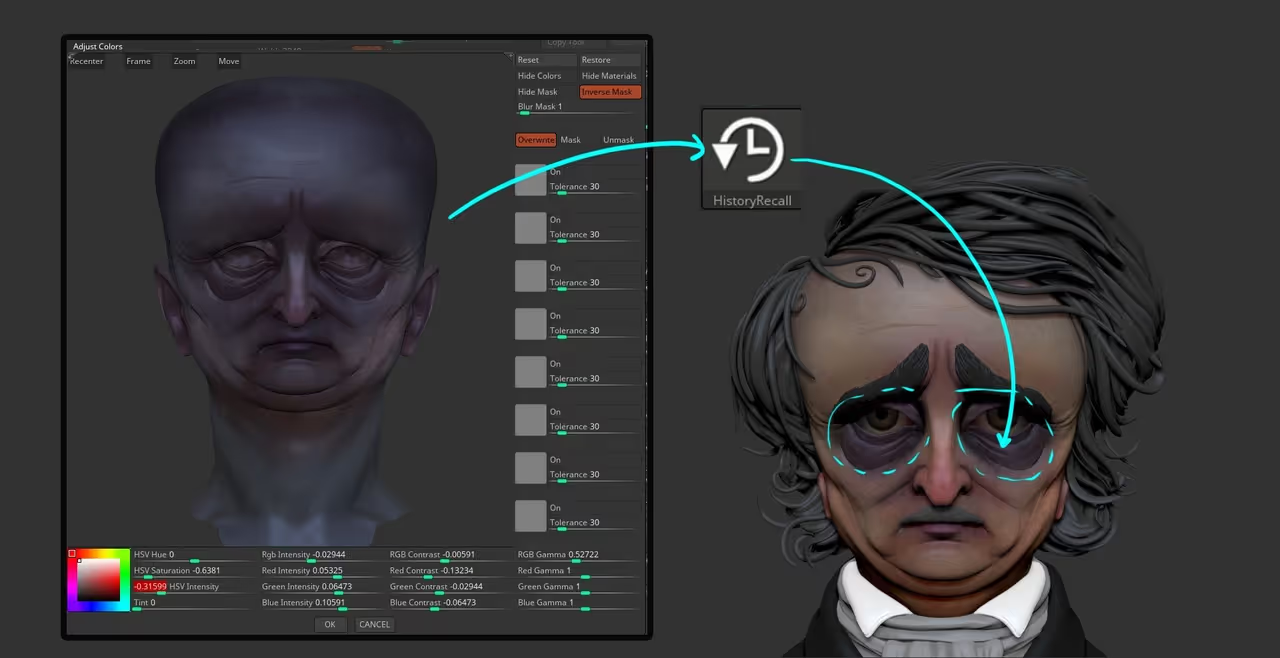
That’s about it really. You can improve this workflow and actually save each change on a layer so you can control the influence or if you want to keep the saturated version as a reference you can use the HistoryRecall brush on a completely separate tool and it works just fine (as long as they live in the same space and occupy the same volume).
You can create very complex textures just by using this technique… in fact, you can change the alphas and stroke types of the HistoryRecall to add even more variations.


.webp)

.webp)