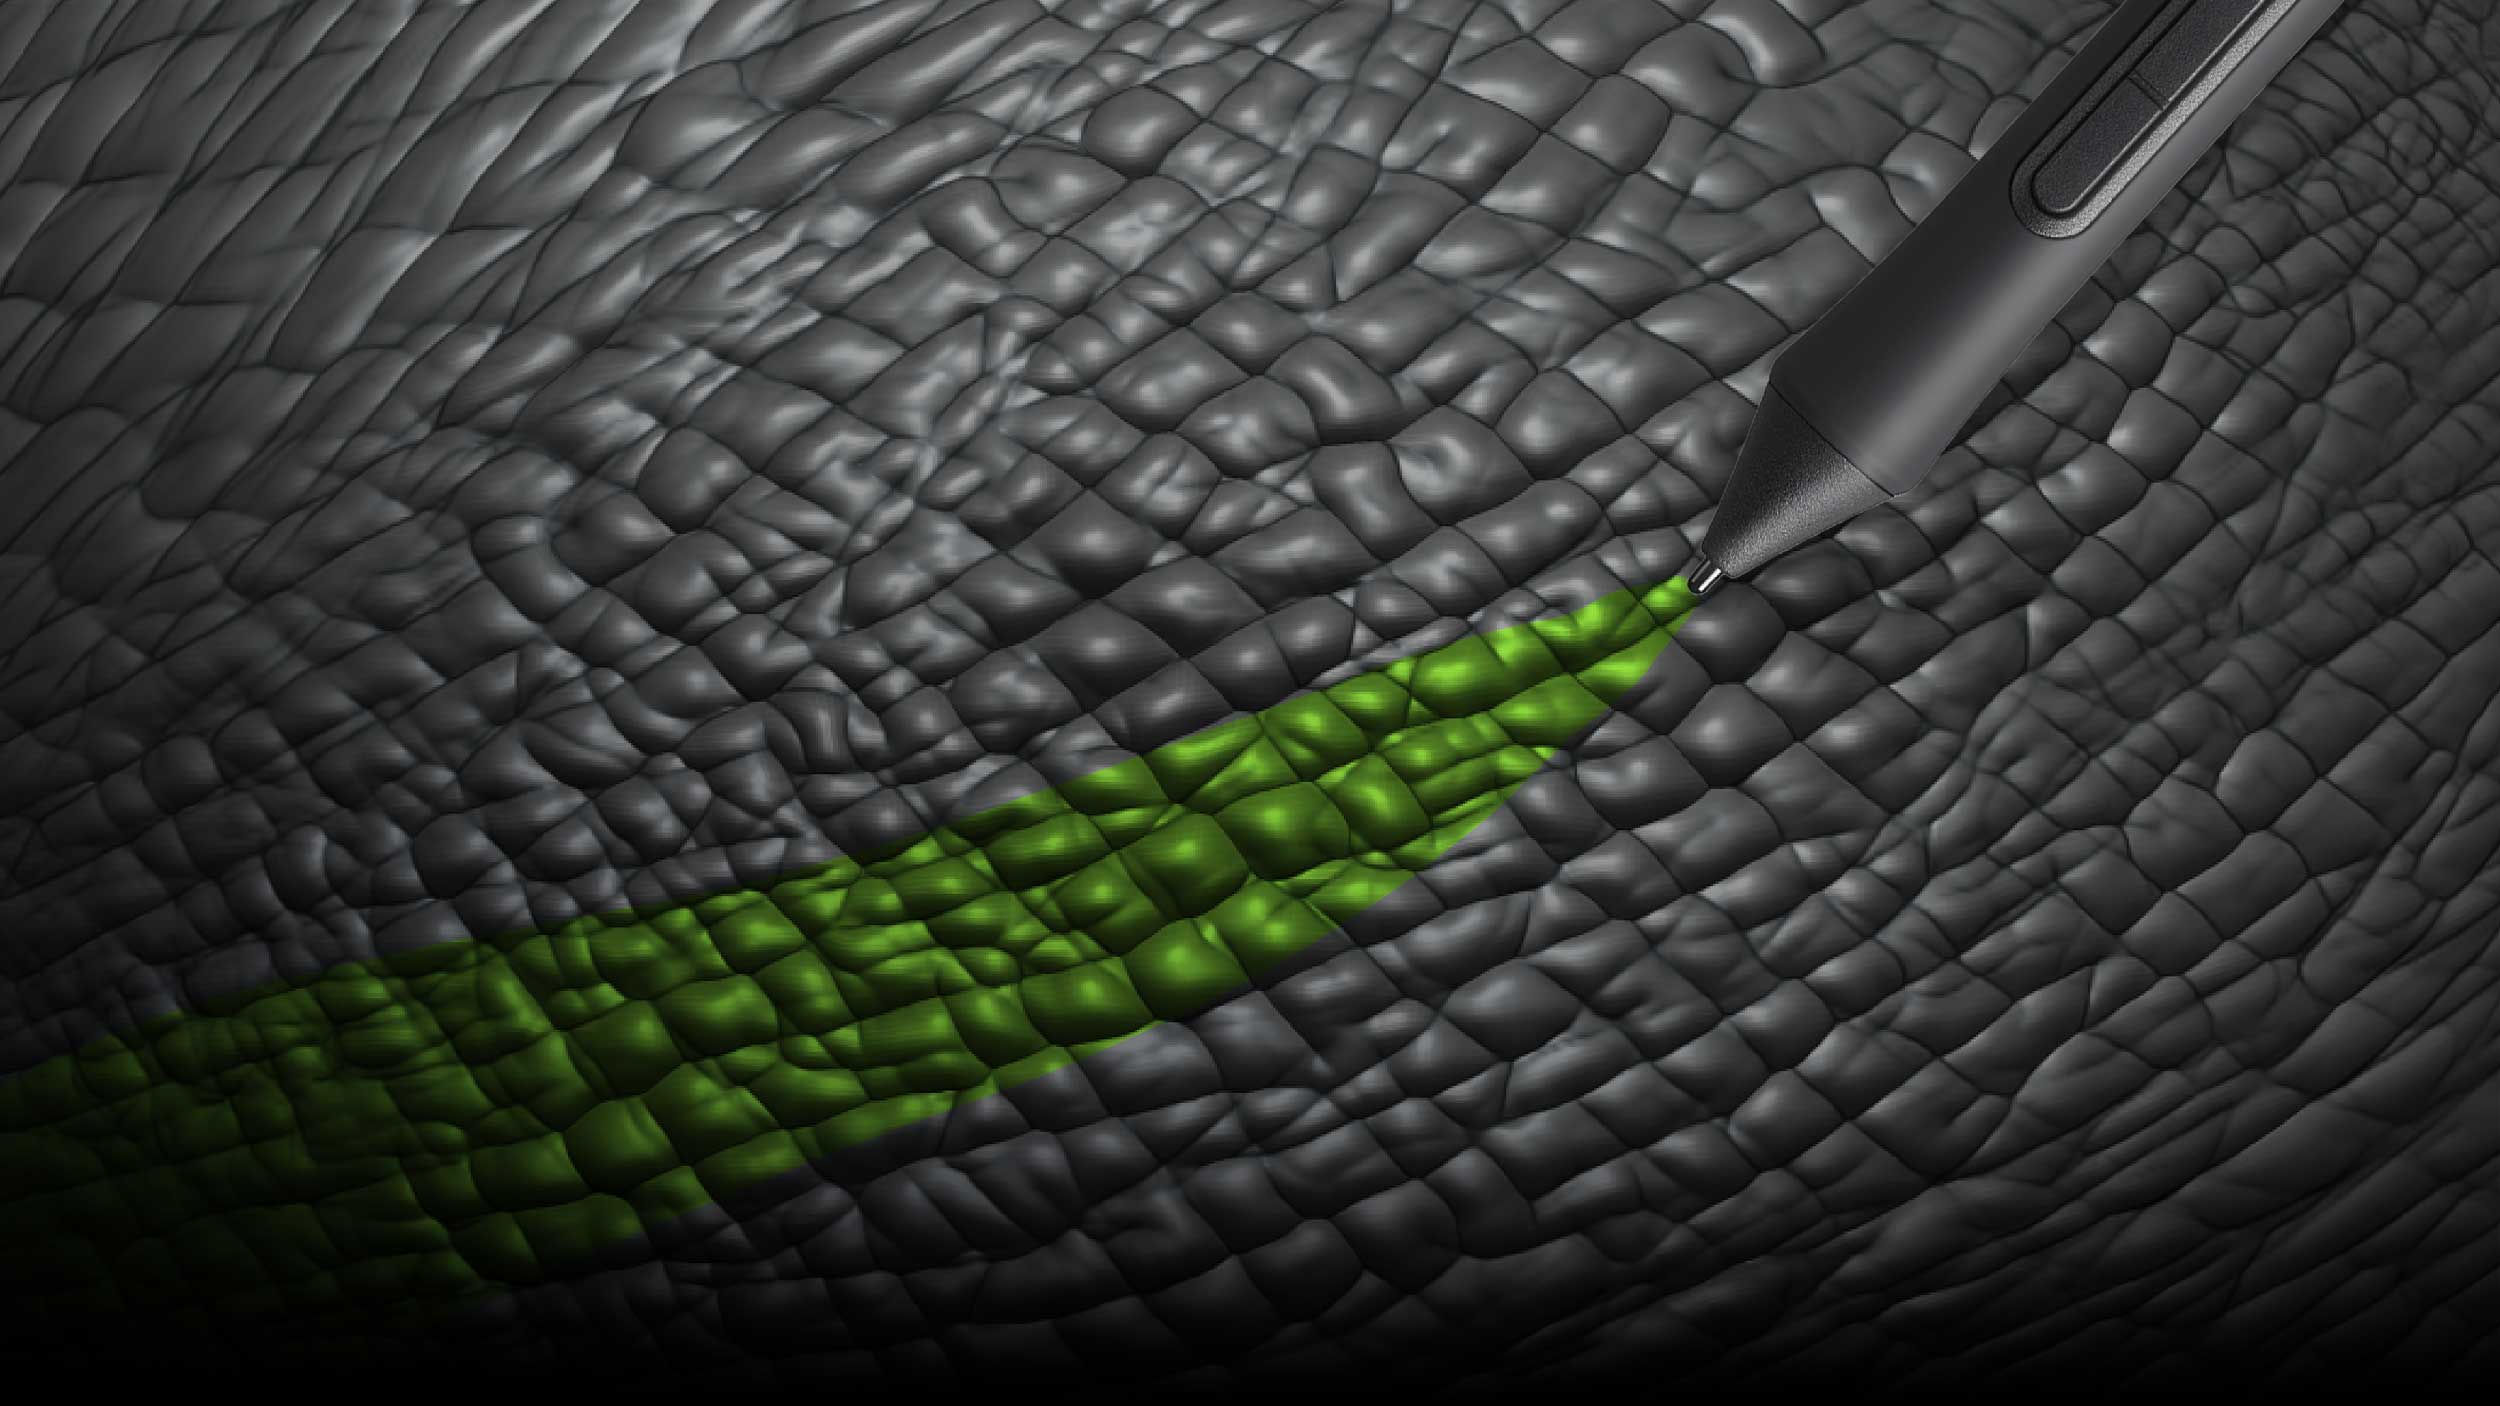





This workflow starts with an elephant-skin reference, builds the pattern as a tileable sculpt, and extracts it as an alpha. From there, a few adjustments turn it into a directional detailing brush. The same principles can be used for bark, wood, creature skin, and other repeating organic surfaces.
You do not need a custom interface or a brush-management plugin to follow along. The important controls are available in ZBrush’s standard palettes.
What you’ll need:
- ZBrush for sculpting the pattern, extracting the alpha, and configuring the brush.
- A clear reference image with readable folds or repeating surface features.
- PureRef for organizing references, and Photoshop for analyzing the pattern, if desired.
- Standard ZBrush brushes such as Standard, DamStandard, ClayBuildup, and Smooth.
- Optional custom sculpting brushes, such as the Clean Builder brush available through Pablander Academy.
The workflow at a glance:
- Break down the reference into its main directional features.
- Create a reusable plane setup for tileable sculpting.
- Project the reference as PolyPaint without displacing the mesh.
- Sculpt the cuts, build the volumes, and refine the folds.
- Extract the sculpt as a tileable alpha.
- Configure Roll, Roll Distance, and other modifiers.
- Test alternative brush types and create useful variations.
Step 1: Analyze the Reference Before Sculpting
A convincing brush starts with a pattern that makes sense. Rather than immediately copying every wrinkle, look for the relationships between the larger features.
Elephant skin is a useful example because its apparent complexity can be broken down into a few simple groups:
- Primary folds: The longest, most prominent lines. In this example, they run diagonally from the bottom left toward the top right.
- Secondary folds: Lines running along the opposite diagonal. These are generally shorter, less straight, and fewer in number.
- Small interruptions: Broken lines and smaller folds within the larger forms.
- Distinctive features: Unusual lines that do not follow the dominant pattern, such as an almost horizontal fold cutting through the diagonals.
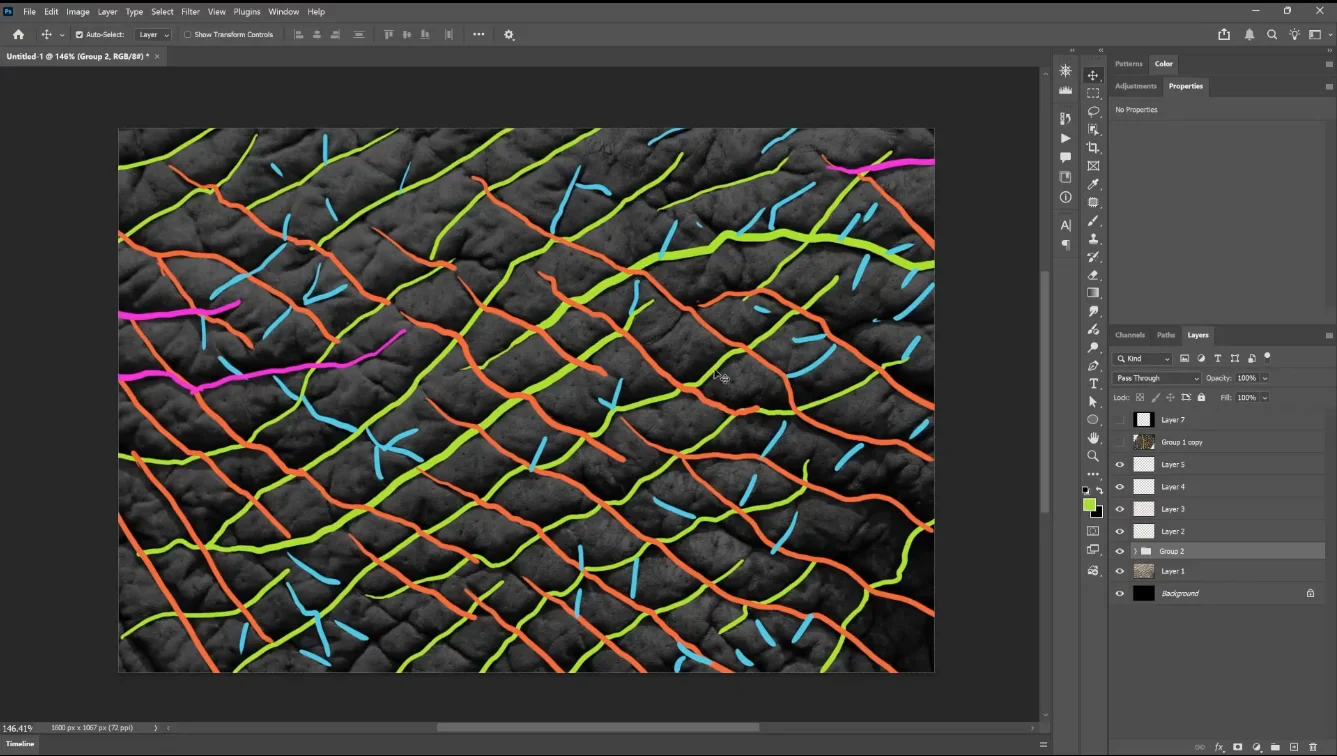
The intersections between the main folds create the compressed, roughly diamond-shaped volumes of the skin. Those relationships are more useful than any individual wrinkle.
Distinctive features need particular care. An unusual fold may look interesting in the reference, but copying it exactly into a repeating alpha can make the repetition easy to spot. A more generic base pattern gives the brush greater flexibility. Recognizable feature details can be added separately when sculpting the final asset.
Step 2: Align the Main Folds With the Tile Direction
Before building the alpha, rotate the reference so the dominant folds run vertically. Horizontal alignment can also work, but a vertical arrangement makes this workflow easier to follow.
The secondary lines do not need to become perfectly horizontal. They can remain diagonal or irregular. The important part is giving the strongest features a clear direction that can continue from one tile to the next.
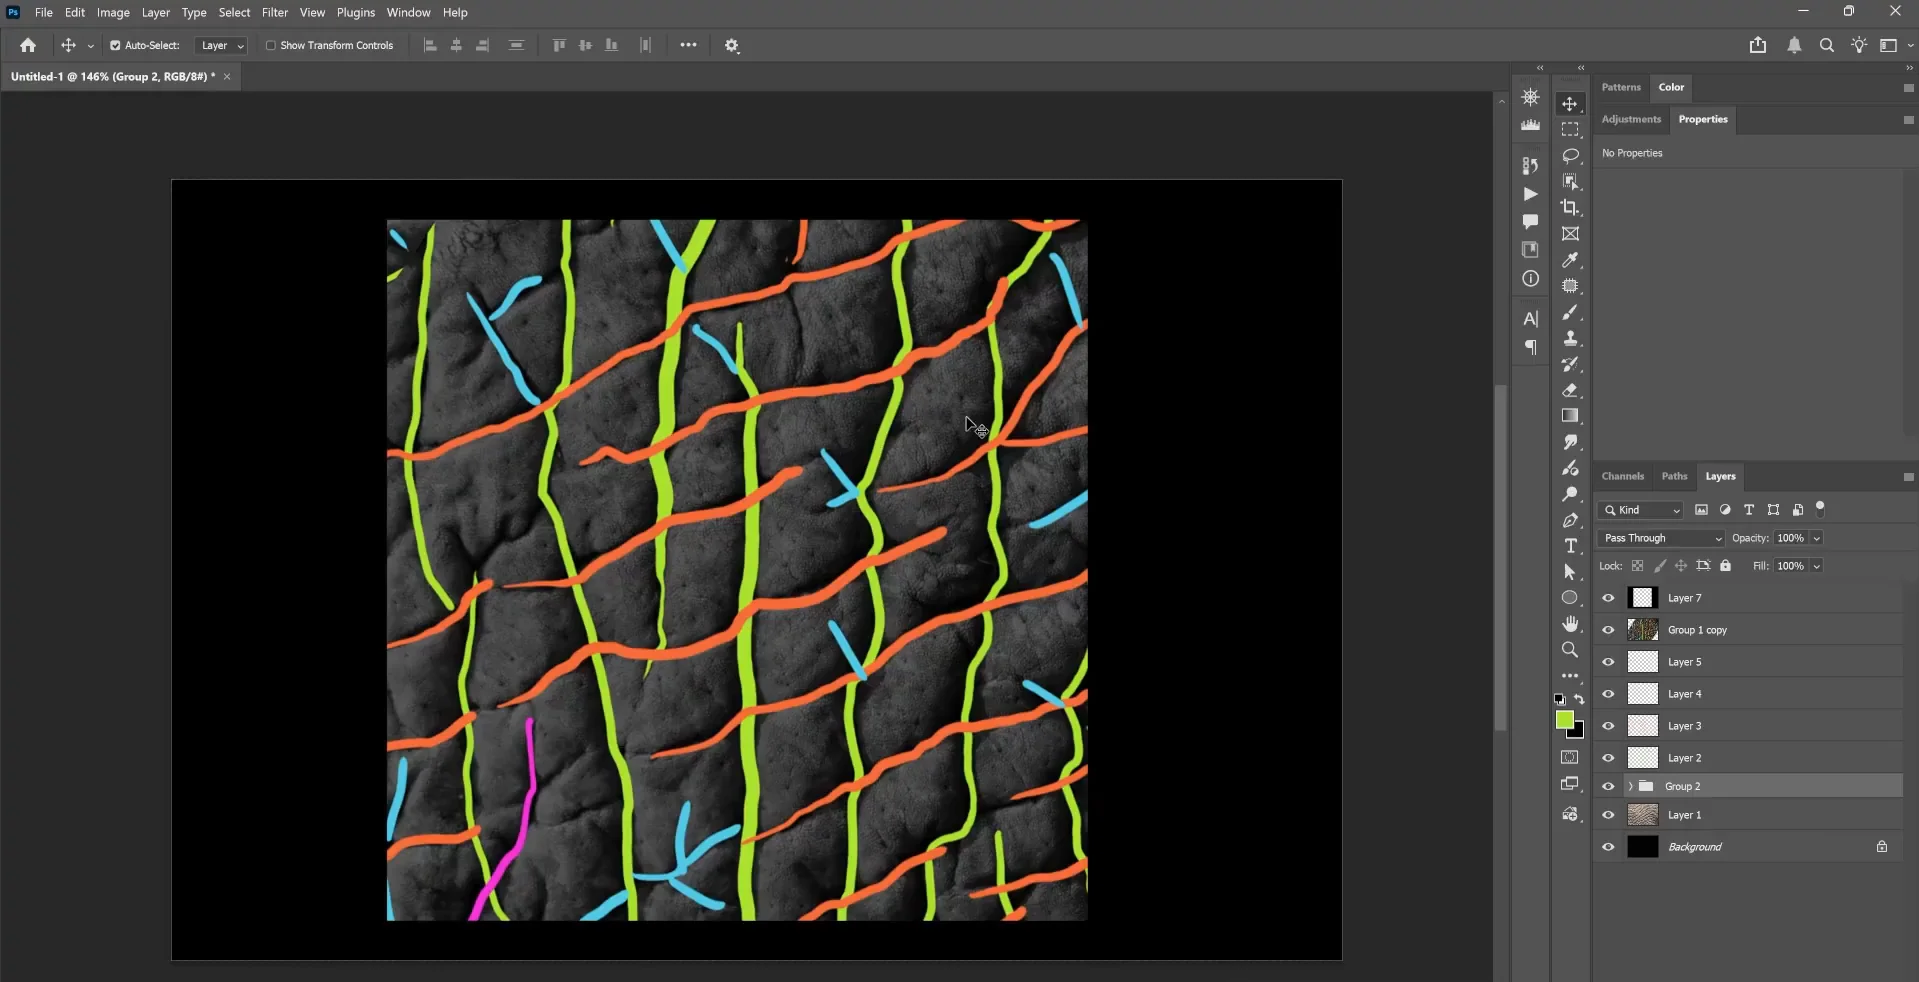
This becomes especially useful when the alpha is rolled along a sculpting stroke. Instead of behaving like an isolated stamp, the pattern needs to continue naturally as the brush moves.
It is still worth making the pattern tile in both directions. That extra care allows the alpha to be rotated later without losing continuity.
Step 3: Build a Reusable Frame and Sculpt Plane
The tileable sculpting setup uses two planes: a smaller plane to establish the capture area, and a larger plane to hold the actual sculpt.
- Open the Document palette and turn off Pro (proportional) so the width and height can be edited independently.
- Set a square document size, such as 2048 × 2048, then click Resize and confirm.
- Press Ctrl + N to clear the canvas.
- Set the document background to black so the working area is easier to distinguish.
- Select Plane3D from the Tool palette, draw it on the canvas, and press T to enter Edit mode.
- Click Make PolyMesh3D so the plane can be sculpted.
- Use Document > Zoom to pull back until the square document boundary is visible.
Duplicate the plane in the SubTool palette. Rename one copy Frame and the other Sculpt. Select Frame, choose a red color, and use Color > FillObject to make it easy to identify. Return the selected color to white afterward.
Next, select Sculpt and use the Gizmo’s uniform scale control to make it exactly twice the size of Frame. Hold Shift while scaling to snap the scale value to 2.
Subdivide Sculpt through Tool > Geometry > Divide. Around a quarter of a million to a million points is enough to begin establishing the pattern, and further subdivisions can be added when needed. This mesh is a source for an image, not the final production asset, so its polygon count is not the main concern.
The distinction between the two planes is important: Frame defines the central tile that will be captured. Sculpt provides the surrounding space needed for wrapped strokes.
Step 4: Lock the Capture Area and Enable WrapMode
With the planes prepared, establish a precise front-facing view before sculpting.
- Select Frame and enable Solo so only that plane is visible.
- Turn off Draw > Perspective.
- Rotate the plane and hold Shift to snap directly to its front.
- Press F to frame the plane.
- Enable Lock Camera in the Draw palette.
- Hide Frame and return to Sculpt without changing the camera.
Now select a sculpting brush and open Brush > Curve > WrapMode. Set it to 1.
In this setup, WrapMode repeats the sculpting operation so that a stroke reaching one side continues on the opposite side. The same applies to the top and bottom. The larger Sculpt plane accommodates the repetitions, while the locked view isolates the central tile.
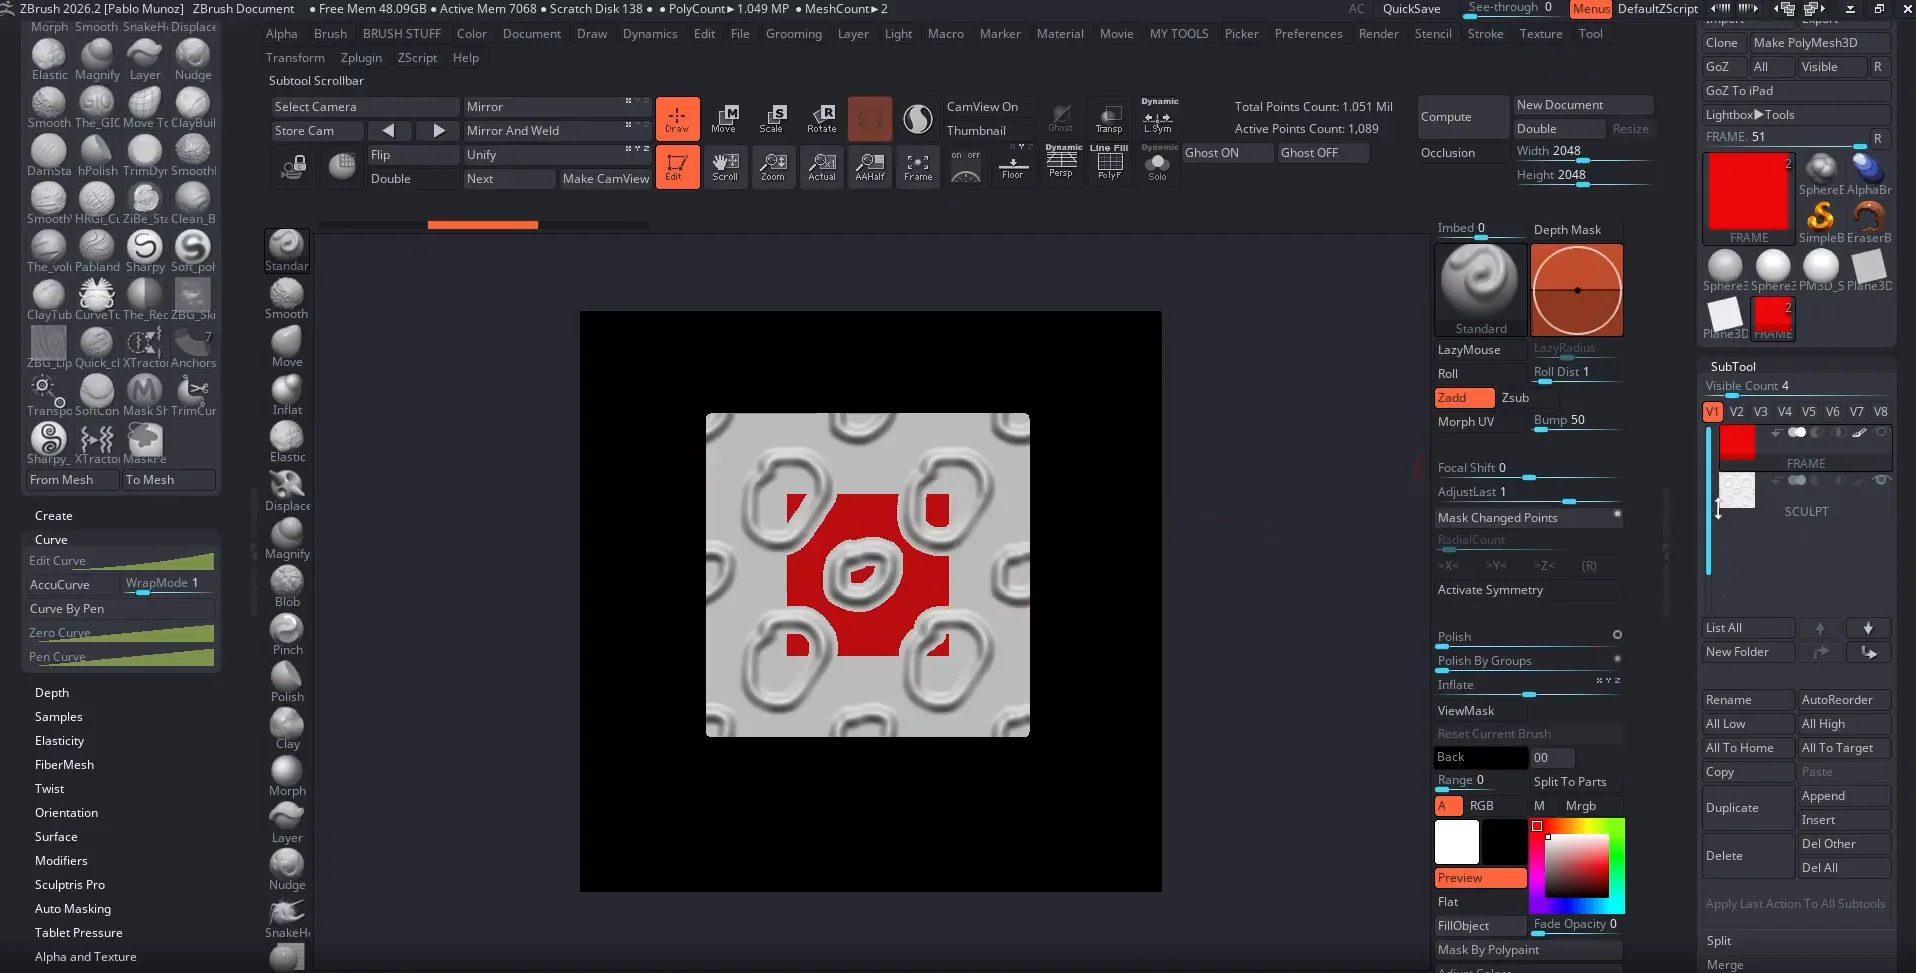
Make a few temporary strokes across the edges to confirm the continuity, then undo them. Save the clean two-plane setup as a Tool so it can be reused for the next alpha.
WrapMode is a per-brush setting. Enabling it on Standard does not enable it on DamStandard, ClayBuildup, Smooth, or masking brushes. Every brush used near a tile boundary needs the appropriate setting.
If the camera moves accidentally, restore it using the same sequence: select Frame, enable Solo, snap to the front with Shift, press F, and lock the camera again.
Step 5: Project the Reference as PolyPaint Only
The reference can remain beside the canvas in PureRef, but projecting it onto the plane makes the main folds easier to trace. The goal is to transfer a guide, not to generate the sculpted detail from the photograph.
- Import the reference through the Texture palette and add it to Spotlight.
- Press Z to display the Spotlight controls.
- Rotate the image until the primary folds run vertically.
- Scale and reposition the image over the working area.
- Select Spotlight’s paint control and press Z again to hide its controls.
Before painting, select Standard, turn ZAdd off, and enable RGB in the Draw controls. This prevents the image values from distorting the plane.
Paint the reference onto Sculpt, then press Shift + Z to hide Spotlight. The result should be a flat plane with the reference transferred as PolyPaint.
If the image appears low resolution, subdivide the plane further. PolyPaint resolution depends on the number of points available on the mesh.
Use Render > Fade Opacity to make the color reference faint enough that it does not distract from the sculpted surface. Keep just enough visibility to follow the main folds.
If brushes were reset during preparation, remember that their WrapMode settings will also need to be checked again.
Step 6: Block Out the Main Cuts and Connections
Switch back to sculpting with RGB disabled and the appropriate depth mode enabled. Select DamStandard, reduce the brush size, and set its WrapMode to 1.
Start by tracing the primary vertical folds. Treat this like blocking out a character: establish the major structure before worrying about smaller surface details.
Do not force the lines to be perfectly straight or equally strong. Follow the reference where it is useful, then manually continue the folds where the image ends or where the tile needs a better connection.
Once the primary folds work, add the shorter crossing lines. These define the smaller skin volumes between the main creases.
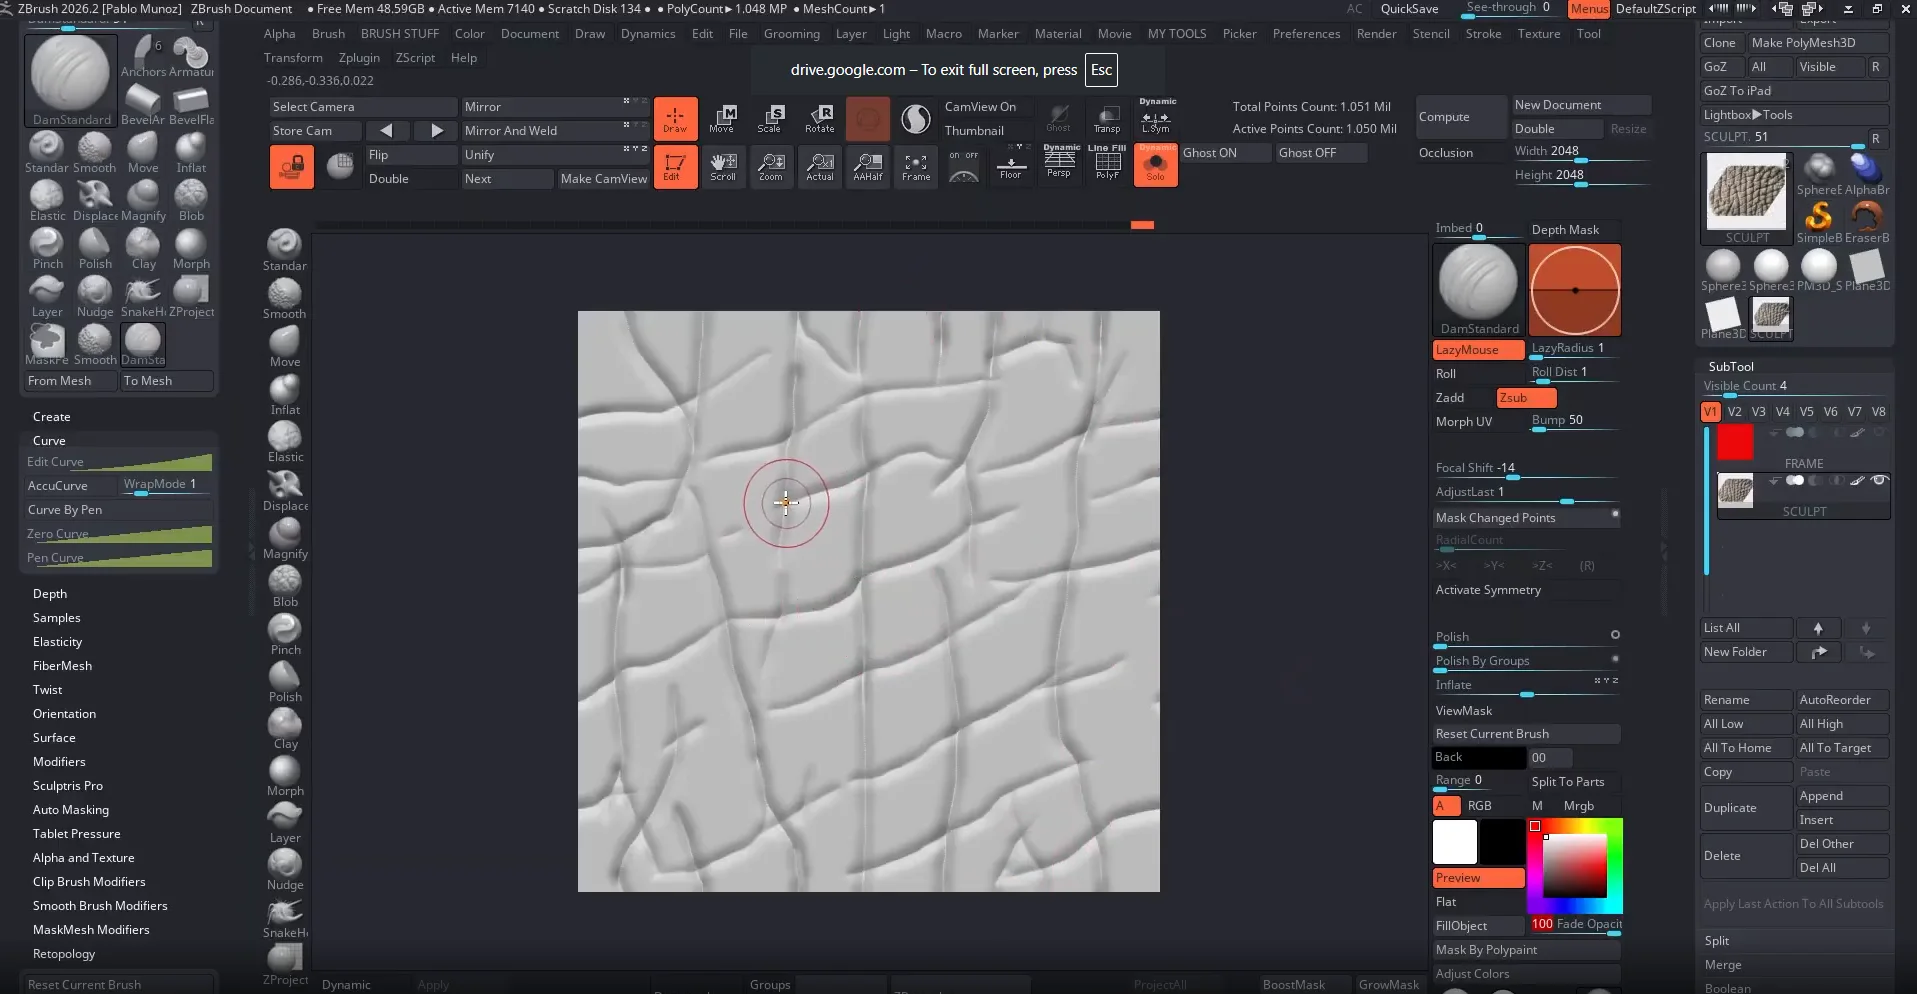
Pay particular attention to the boundaries. A fold leaving the right edge should continue naturally at the left; folds reaching the top should reconnect at the bottom.
The vertical continuity is the priority for this brush, but checking every side makes the alpha more versatile. Once the structure is established, set Fade Opacity to 100 to hide the reference and inspect the sculpt on its own.
If a crease contains small artifacts that need smoothing, hold Shift to access Smooth and set that brush’s WrapMode to 1 as well. Otherwise, smoothing one edge can introduce a seam even when the original cut tiles correctly.
Step 7: Build the Skin Volumes and Refine the Folds
The cuts establish the pattern, but the raised forms give it character. Use ClayBuildup, a standard Clay brush, or a cleaner buildup brush to add volume between the creases.
Build the forms gradually. Work along the dominant direction first, then use horizontal or diagonal strokes to refine the transitions. The aim is not to create a grid of identical bumps, but a connected surface with varied compression and volume.
A cleaner buildup brush can reduce visible stroke marks. The optional Clean Buildup brush serves this purpose, while ClayBuildup remains a usable starting point.
Once the volumes are established, smooth away distracting ridges. Smooth Peaks is an option when more of the crevice structure needs to be preserved. Standard smoothing also works, especially if the folds will be sharpened again afterward.
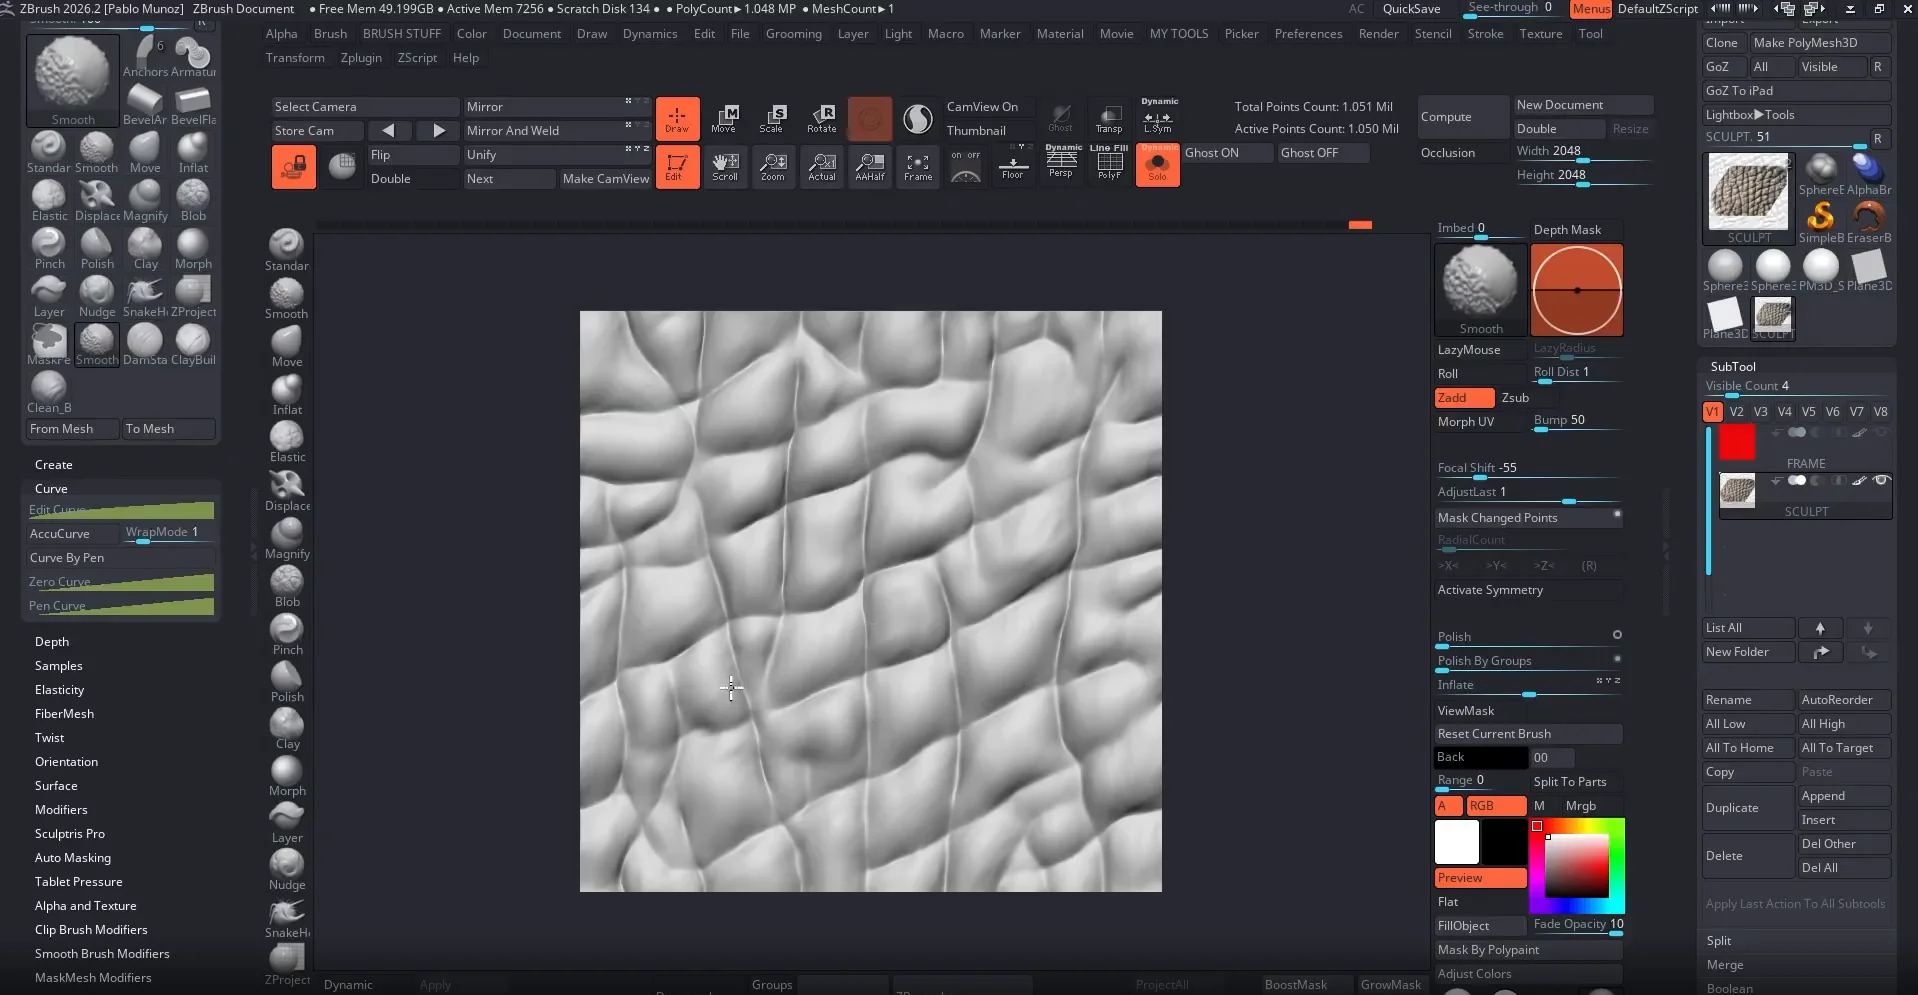
The refinement process is a short cycle:
- Sharpen a fold with a crevice-defining brush.
- Smooth the surrounding volume.
- Add more clay where a form feels too flat.
- Reconnect or soften the crease where needed.
A custom brush that combines cutting with pinching can make this faster, but the underlying task remains the same: create readable folds with natural transitions.
Check WrapMode whenever switching brushes. When the tile sculpting is complete, return those brushes to WrapMode 0 so the setting does not interfere with unrelated sculpting work.
Step 8: Keep the Base Alpha Clean and Extract It
It is tempting to cover the tile with pores, bumps, and secondary noise. For a reusable detailing brush, a cleaner alpha is often more useful.
The pattern will usually be applied at a smaller scale than the source sculpt. Tiny details may become unnecessary noise, while a clean arrangement of folds remains readable and can be combined with other brushes.
If a more detailed variation is worth testing, save a separate version of the sculpt first. That makes it possible to compare the clean and detailed versions without losing the original.
To extract the alpha:
- Select Standard and set WrapMode to 0.
- Use Brush > Clone to create an independent copy.
- Turn RGB off and ZAdd on to restore normal sculpting behavior.
- Keep the prepared capture view locked, with Frame hidden and Sculpt visible.
- Choose Document > Actual to inspect the document at its actual size.
- If the surface appears faceted, add another subdivision through Geometry.
- Open Alpha > Transfer and click GrabDoc.
GrabDoc captures the document’s depth information as an alpha. Because the central tile was carefully framed and sculpted with wrapping enabled, the extracted pattern has matching boundaries.
The new alpha is also assigned to the active brush, ready for testing.
Step 9: Test the Alpha and Understand Its Three Main Controls
Choose Document > AAHalf for an antialiased working view, unlock the camera, and switch to a sphere. Convert it to a PolyMesh3D if necessary and subdivide it enough to support the detail.
A sphere is useful because its curvature shows how the brush behaves on a surface that is less forgiving than a flat plane.
Three components determine the result:
- Brush type: Defines how the vertices are moved.
- Alpha: Defines the pattern used by the brush.
- Stroke: Defines how that pattern is applied as the cursor moves.
The same alpha can therefore produce very different effects. Before adjusting the final stroke, it helps to understand the available brush behaviors:
- Standard: A straightforward base for the detailing brush built here.
- Smooth, based on Blur: Softens the surface.
- Move: Provides the foundation for variations such as Move Topological and Move Elastic.
- Inflate: Swells the surface along its normals.
- Elastic: Produces an elastic deformation while retaining more of the original form.
- Displace: Offers a Standard-like alternative that preserves existing surface detail more strongly.
- Magnify: Pushes vertices away from the cursor rather than simply inflating along their normals.
- Blob: Based on Sphere, it creates rounded forms and can be useful with Sculptris Pro.
- Pinch: Pulls vertices together to sharpen creases.
- Polish: The most obvious brush is the Flatten brush used to level the area beneath the brush.
- Clay: Builds forms using an alpha, but can strongly overwrite existing details.
- Morph: Works with a stored morph target to restore the saved surface.
- Layer: Raises or lowers the surface toward a defined depth.
- Nudge: Moves vertices along the surface.
- SnakeHook and ZProject: Provide additional specialized behaviors.
Hovering over a brush reveals its base type in the information pop-up. For now, keep the cloned Standard brush active so the next adjustments are easy to compare.
Step 10: Choose a Stroke and Establish the Falloff
Open the Stroke palette and test how the alpha behaves with different application methods.
- Dots: Repeats instances of the alpha along the stroke.
- DragRect: Places an alpha by clicking and dragging to control its size.
- DragDot: Allows the alpha to be positioned while maintaining a consistent size, which is useful for details such as pores.
- FreeHand: Provides another continuous drawing option.
- Spray: Distributes the pattern in a sprayed arrangement.
Focal Shift also changes how much of the alpha is visible within the brush footprint. A strongly positive value concentrates the effect toward the center; moving toward the negative end exposes more of the full alpha.
Return Focal Shift to 0 for a clean starting point, then select Dots. The next adjustment turns those repeated impressions into a rolling pattern.
Step 11: Enable Roll and Balance the Surface Depth
Open Stroke > Modifiers and enable Roll.
Think of the alpha as the surface of a paint roller. As the stroke travels, ZBrush rolls the pattern along the mesh. This is where the tileable boundaries become important: each repetition needs to continue into the next without an obvious break.
The initial result may push the surface outward too much. For a detailing brush, that can change the underlying form more than intended.
Open Alpha > Modify and click Surface. This calculates a mid-value for the alpha, allowing its depth to act both inward and outward rather than only building above the original surface.
In this example, the calculated mid-value is around 55. That is specific to the alpha; it is not a number that needs to be copied into every brush.
Surface does not remove the need to control strength. Reduce Z Intensity to around 12 as a starting point, then test again. Inspect both the front and profile of the sphere to judge whether the pattern is adding detail or excessively changing the silhouette.
Rotate the alpha in 90-degree increments to explore another direction of the same pattern. Because the tile was built to work horizontally and vertically, those rotations remain usable and can be mixed for variation.
Step 12: Use Roll Distance to Create Different Brushes
Roll Distance, also in Stroke > Modifiers, changes how stretched or compressed the rolled pattern becomes along the stroke.
This is one of the most useful controls in the entire workflow. The alpha does not need to change for the brush to take on a different purpose.
- Roll Distance around 1: Provides a useful baseline for the original pattern.
- Roll Distance around 1.5–2: Stretches the forms into a more elongated skin pattern.
- Roll Distance around 7: Pulls the pattern into long folds or wrinkles, useful for areas such as a creature’s neck.
- Roll Distance around 0.3: Compresses the pattern into a tighter arrangement that can suggest a reptilian surface.
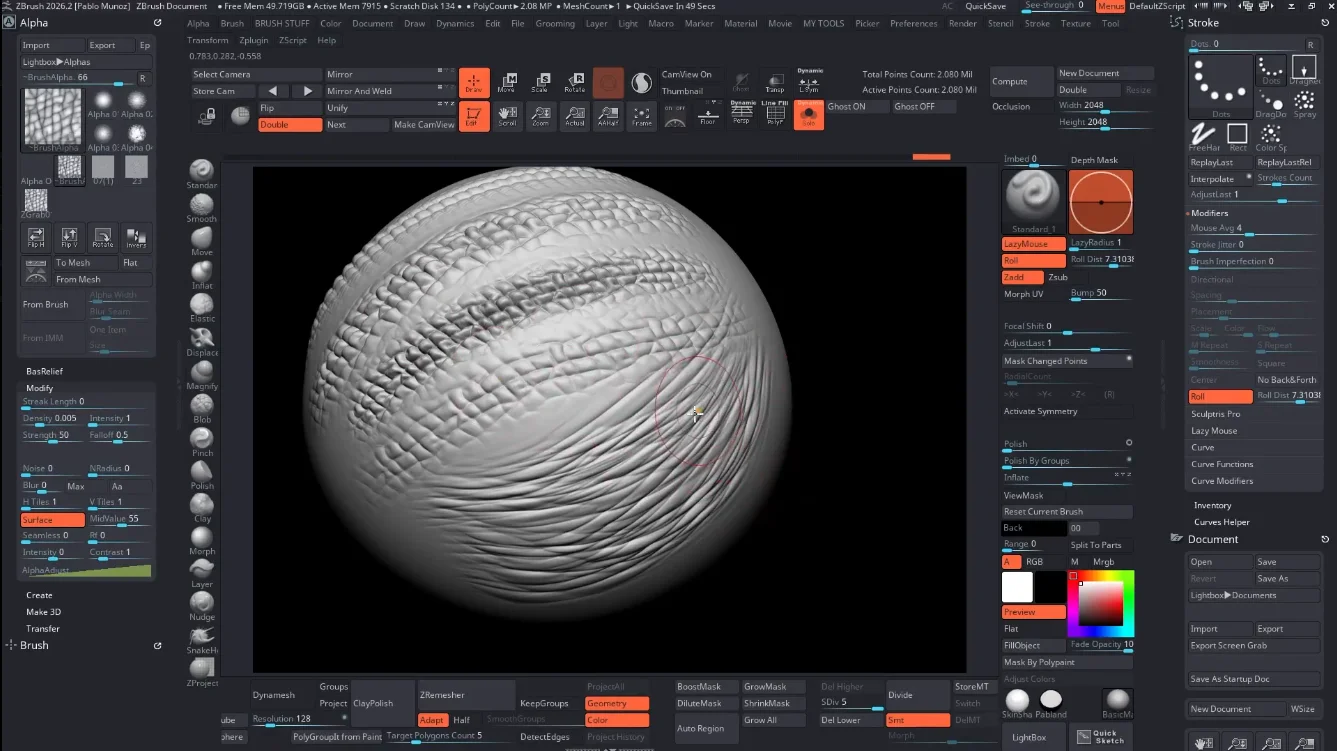
The important distinction is directionality. A rolled brush lets the folds follow the gesture of the stroke rather than remaining a single rectangular stamp.
Useful settings can become separate brush variations: one for neck wrinkles, another for stretched skin, and another for a compressed pattern. A carefully sculpted alpha can support several tools without requiring several separate source sculpts.
Step 13: Refine Brush Modifier, LazyMouse, and Trails
With the main pattern working, a few additional controls can refine its character.
For a Standard-based brush, open Brush > Modifiers and experiment with Brush Modifier. Positive values push the behavior toward a more inflated result, while negative values pull it toward a pinched result.
A small positive value, such as 15, can gently inflate the detail. A negative value, such as -48, can tighten it. Extreme values make the difference obvious, but are not necessarily useful for the finished brush. For this skin pattern, 0 remains a good neutral choice.
LazyMouse can help control long strokes. Increasing Lazy Radius gives the stroke more stabilization, which is useful when drawing long directional folds.
Trails require more caution. They strengthen the effect by applying additional, precisely aligned passes along the stroke. A Trails value of 10 can produce a much stronger result than a single pass, even when the other settings remain unchanged.
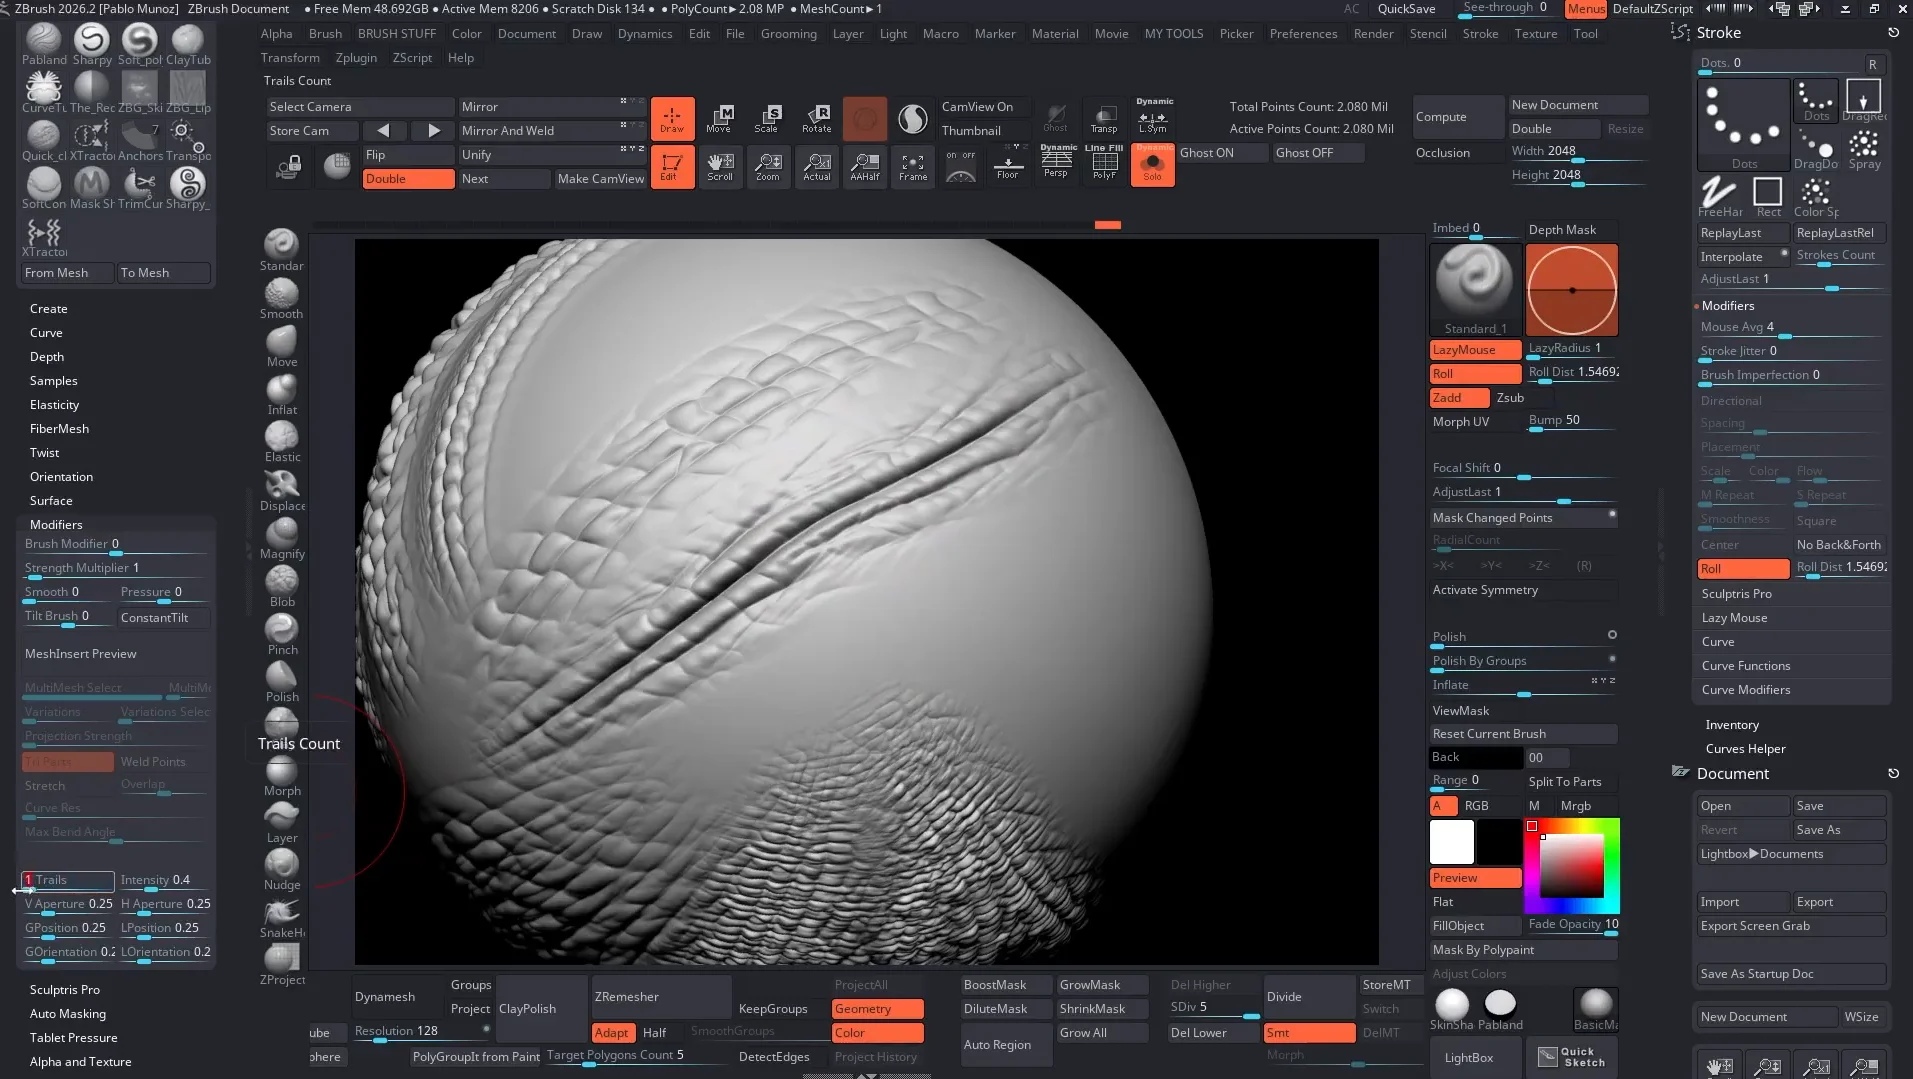
This can be useful for the long-wrinkle variation. With Roll Distance around 7, a Trails value around 6 can create a strong fold in one gesture instead of requiring repeated manual passes.
Adjust strength deliberately. Increasing Trails is not simply stretching the alpha further; it is intensifying the sculpting effect.
Step 14: Try Elastic, Clay, and Layer-Based Variations
Once the Standard version works, clone another base brush and assign the same alpha. Cloning keeps the original available and makes experimentation easier to manage.
Elastic produces a different deformation from Standard. With the alpha assigned, Roll enabled, and light pressure, it can create a more crocodile-like surface from the same source pattern.
Clay produces a chunkier result. It tends to flatten or overwrite existing details more strongly, which may be useful for building broad forms but less suitable when preserving a delicate surface.
Layer offers another useful option, particularly when combined with a morph target. Without a stable reference, overlapping applications can become noisy. A stored morph target gives the Layer brush a surface from which to establish its depth.
- Start with a clean sphere or the surface state that should act as the baseline.
- Open Tool > Morph Target and click StoreMT.
- Select the Layer-based brush and assign the custom alpha.
- Set Focal Shift to 0, enable Roll, and choose an appropriate intensity.
- Apply overlapping strokes and compare how they fill the surrounding gaps without endlessly building the same areas upward.
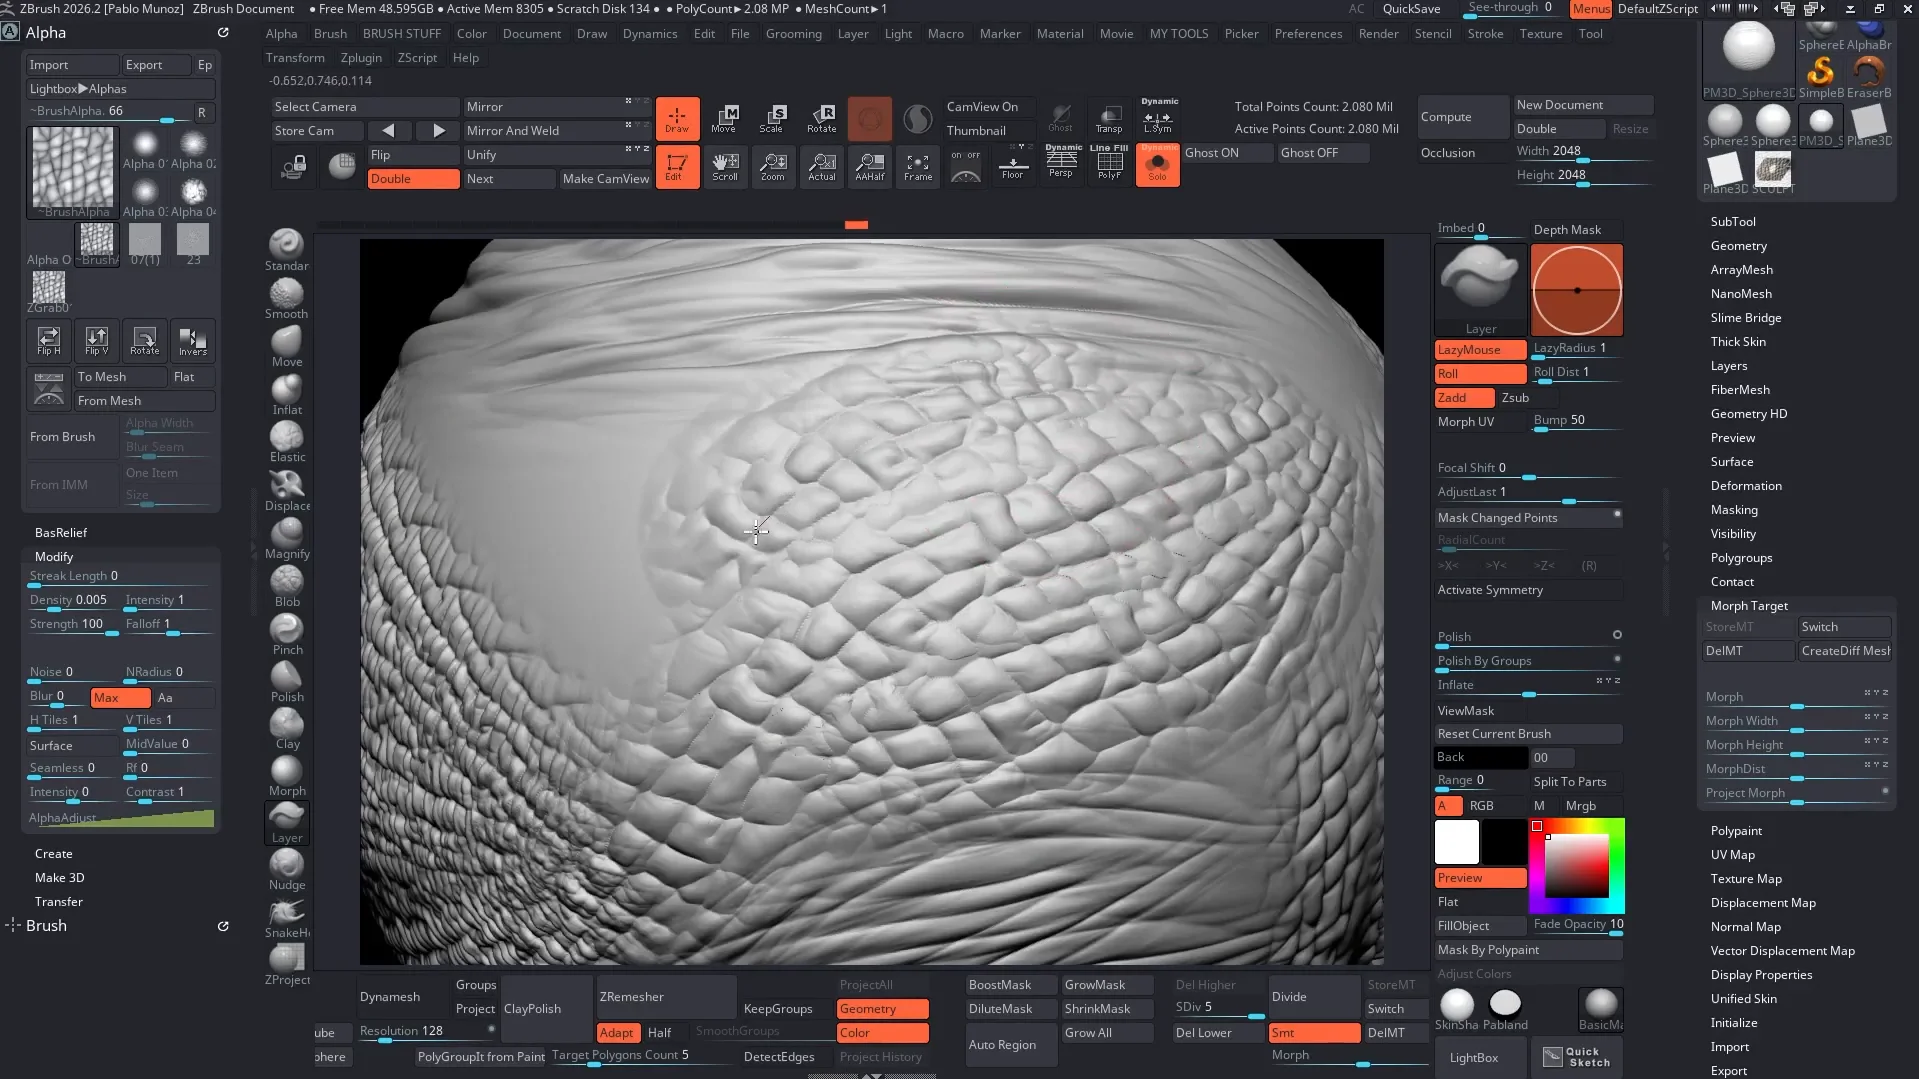
The stored state matters. If the intention is to texture a clean surface, store the morph target before adding the pattern rather than after several noisy applications.
This same process—sculpt a clean alpha, choose a base brush, and adjust its stroke behavior—can be applied to bark, wood, and other creature textures. The pattern provides the visual structure; the brush type and modifiers determine how that structure interacts with the model.
For organizing a growing collection, RadialZ is an optional resource-management tool for accessing brushes, alphas, textures, and materials through a library and radial menus. It is not required to create any of these brushes.
The most valuable part of the workflow is the time spent on the source alpha. A clean, readable pattern with reliable tiling gives every later adjustment more room to work. Start with the main folds, keep the base simple, and test one setting at a time. Once those foundations are in place, creating useful variations becomes a much smaller task.
Creature Texture and Skin Brushes Pack
This collection of custom ZBrush brushes is designed to help you add surface textures and fine details to your creatures. The brushes include a variety of tools for sculpting organically and for placing pre-sculpted alphas with precision using the DragRect stroke.
Get resource
Creating a Custom ZBrush UI that works
In this video, I'm going to show you how to customise your ZBrush UI with a purpose.
Check it out