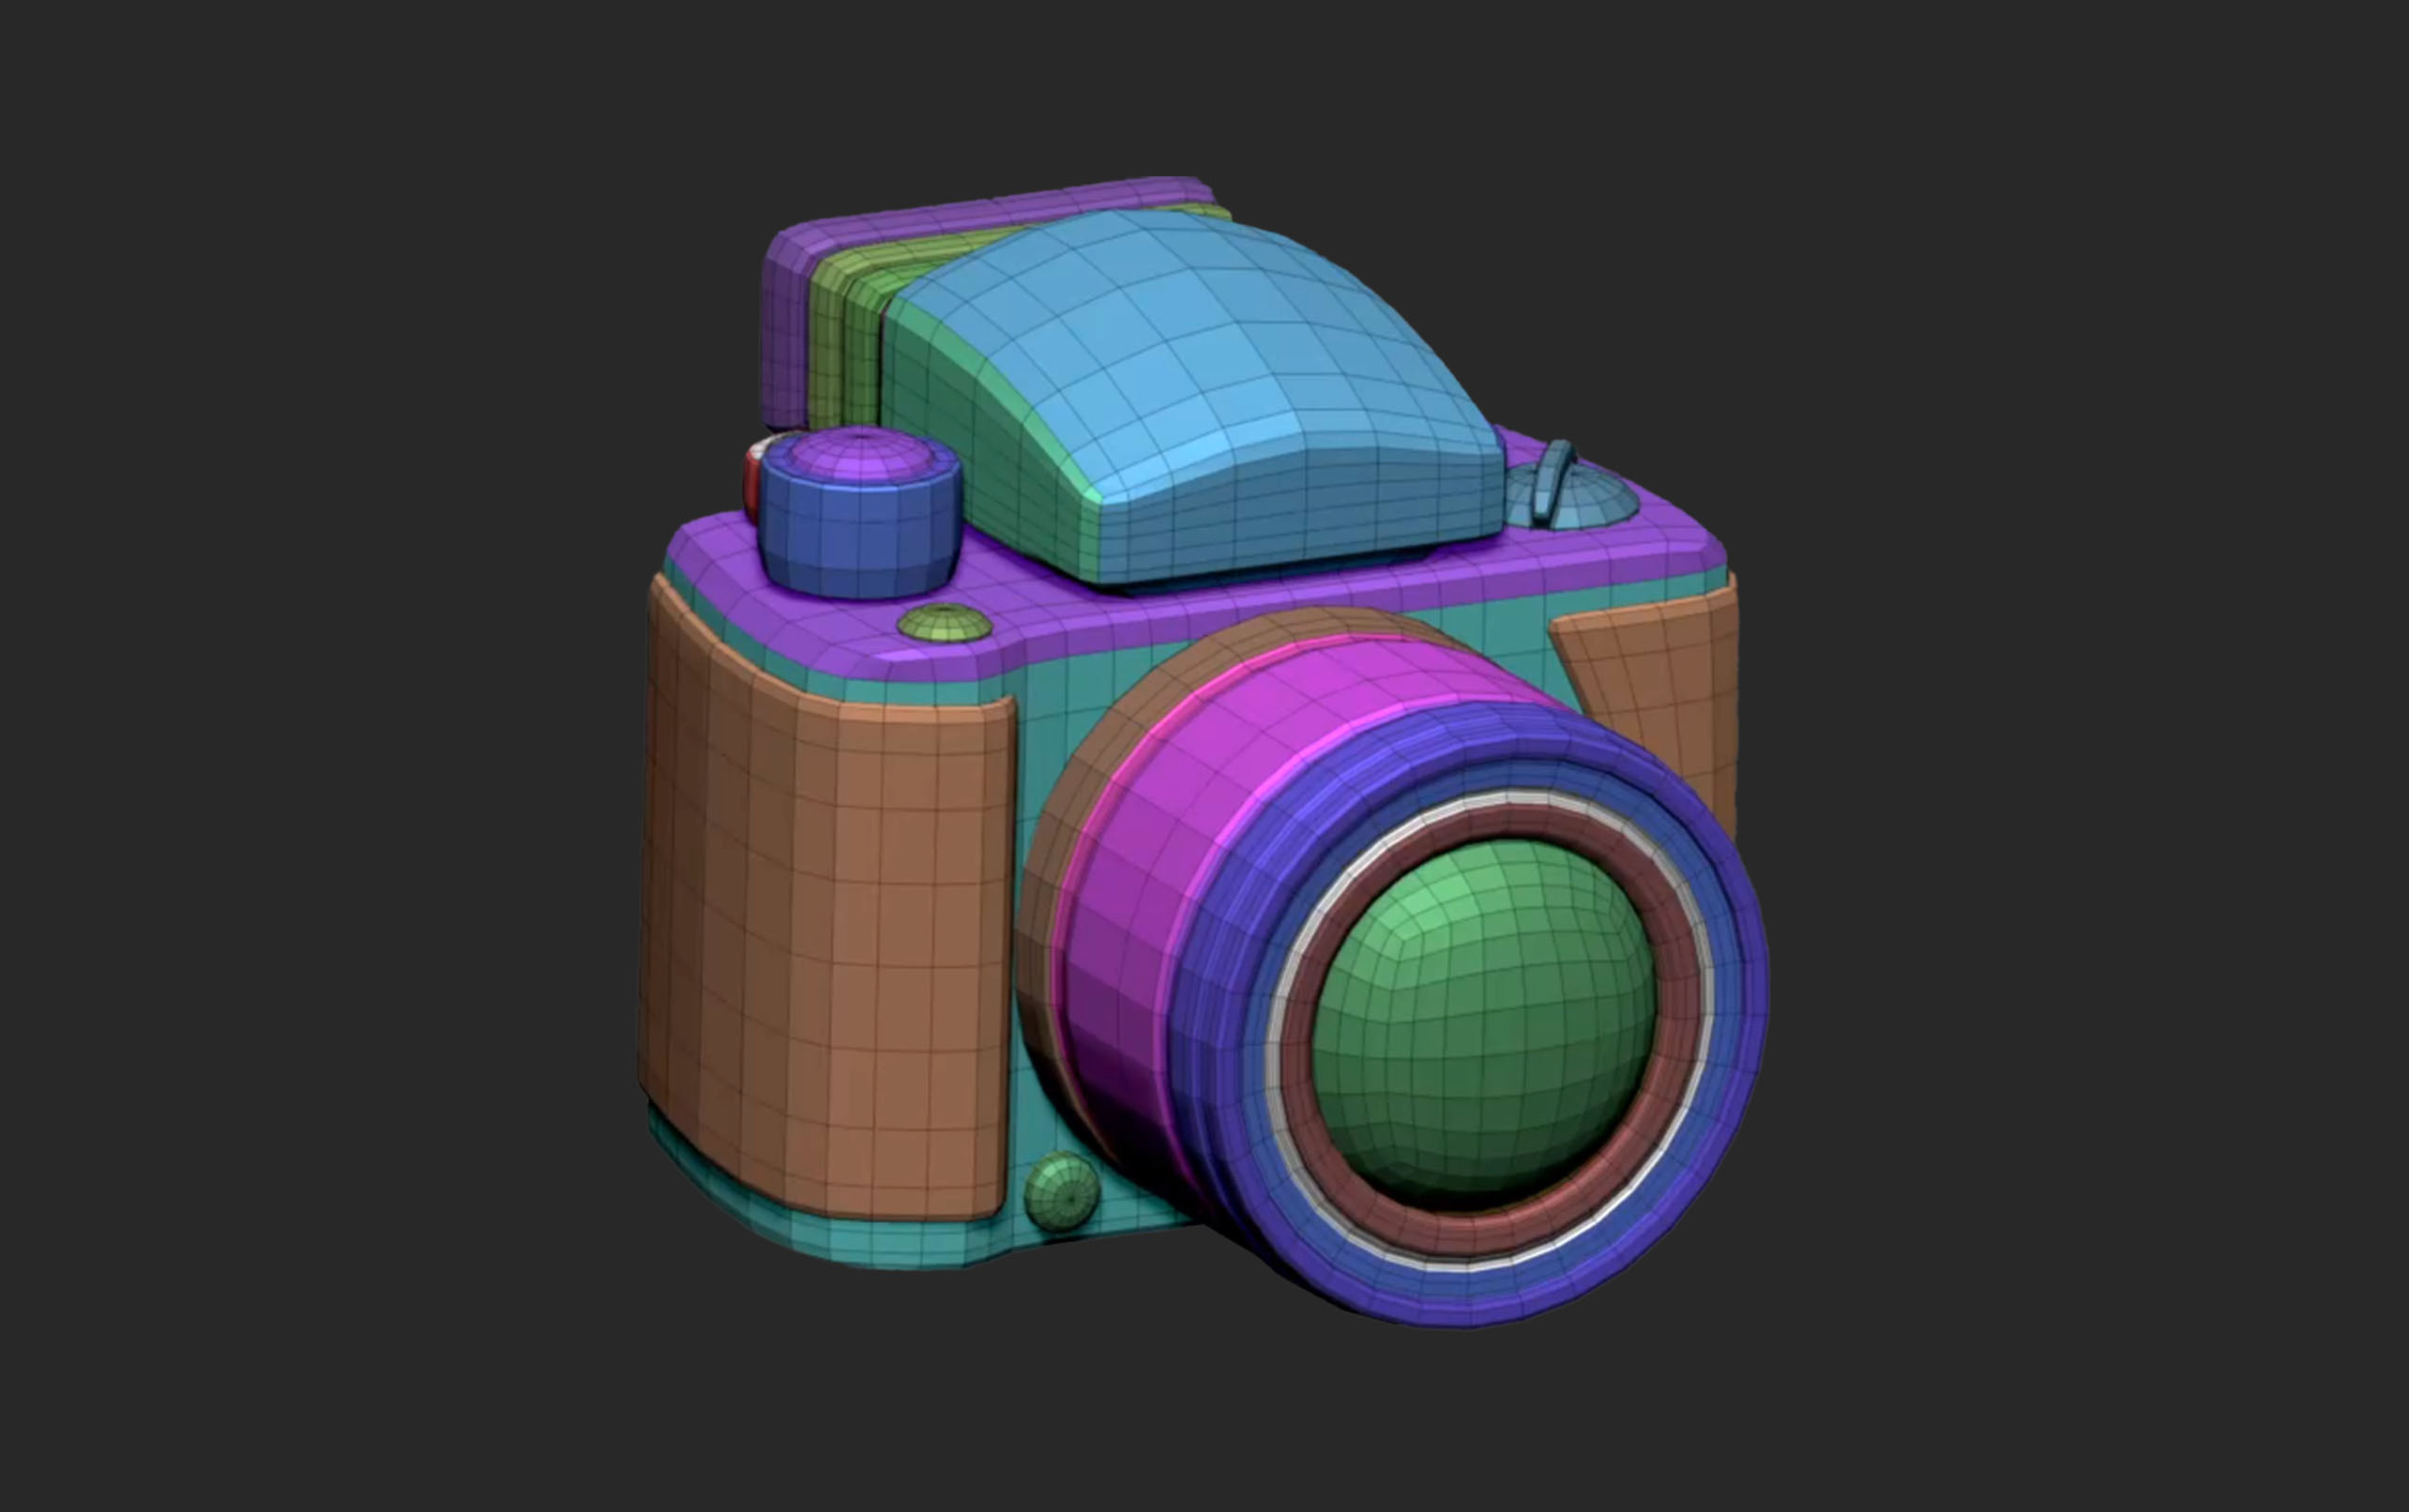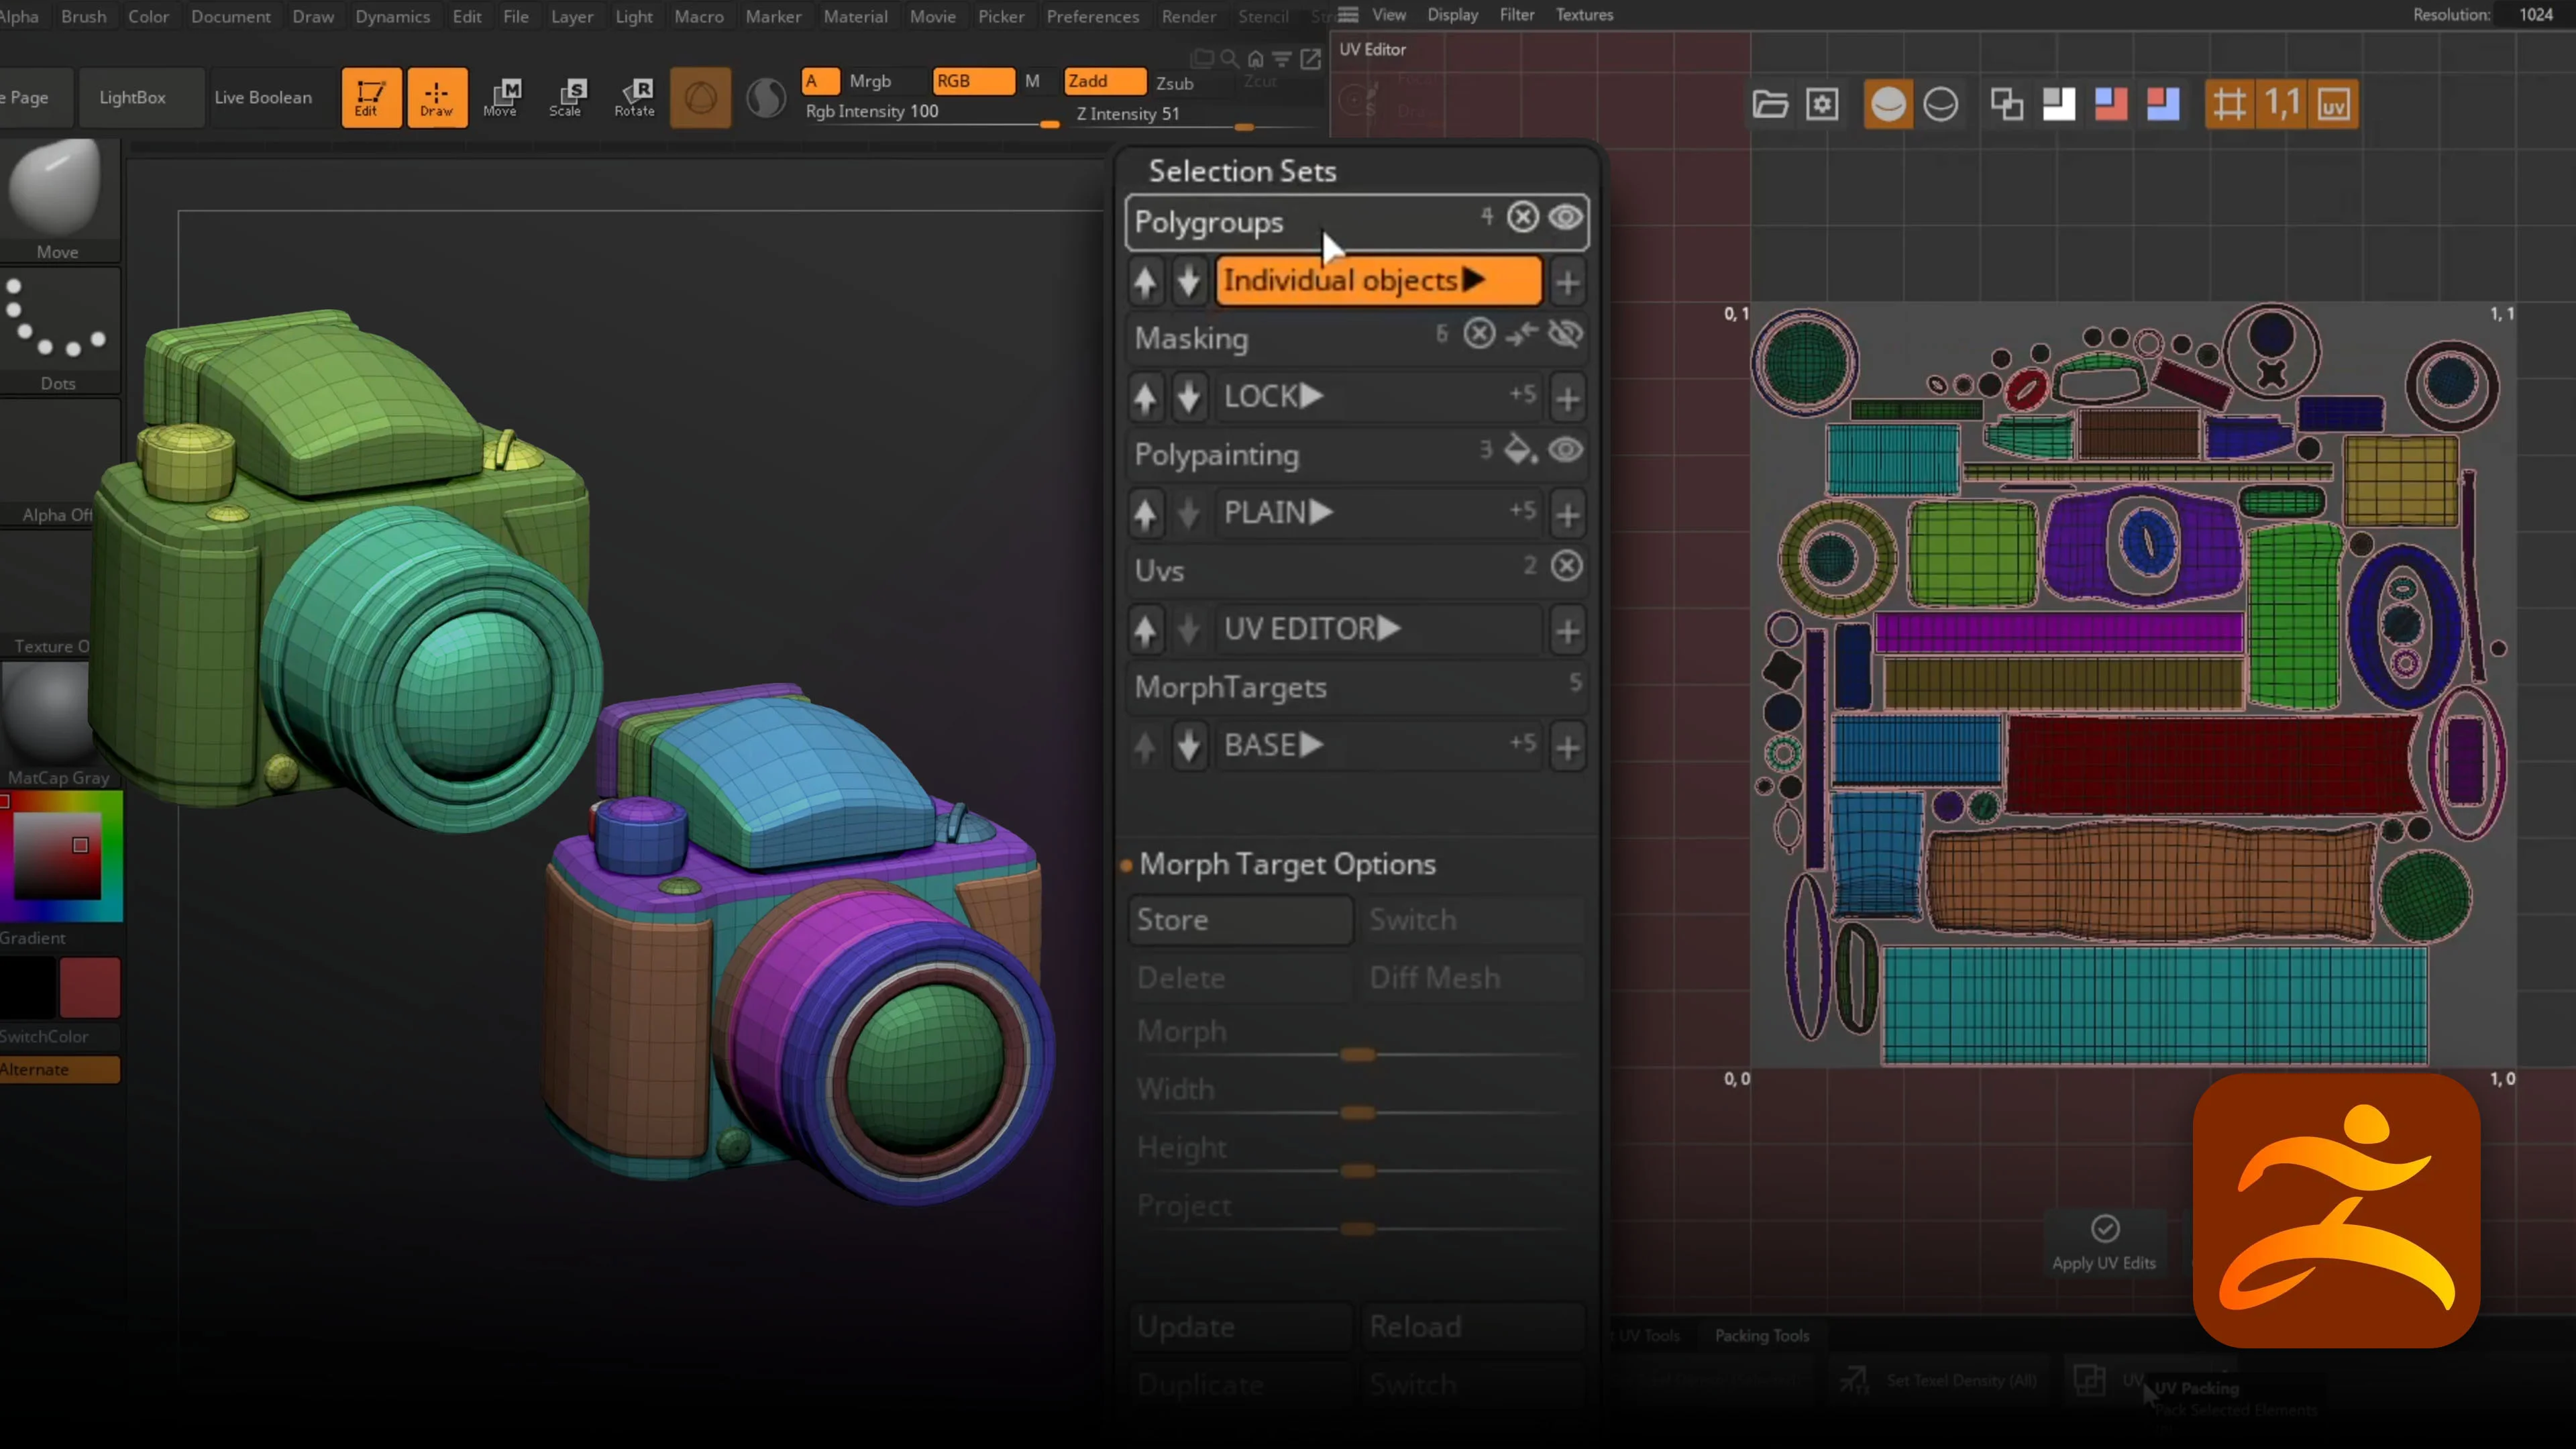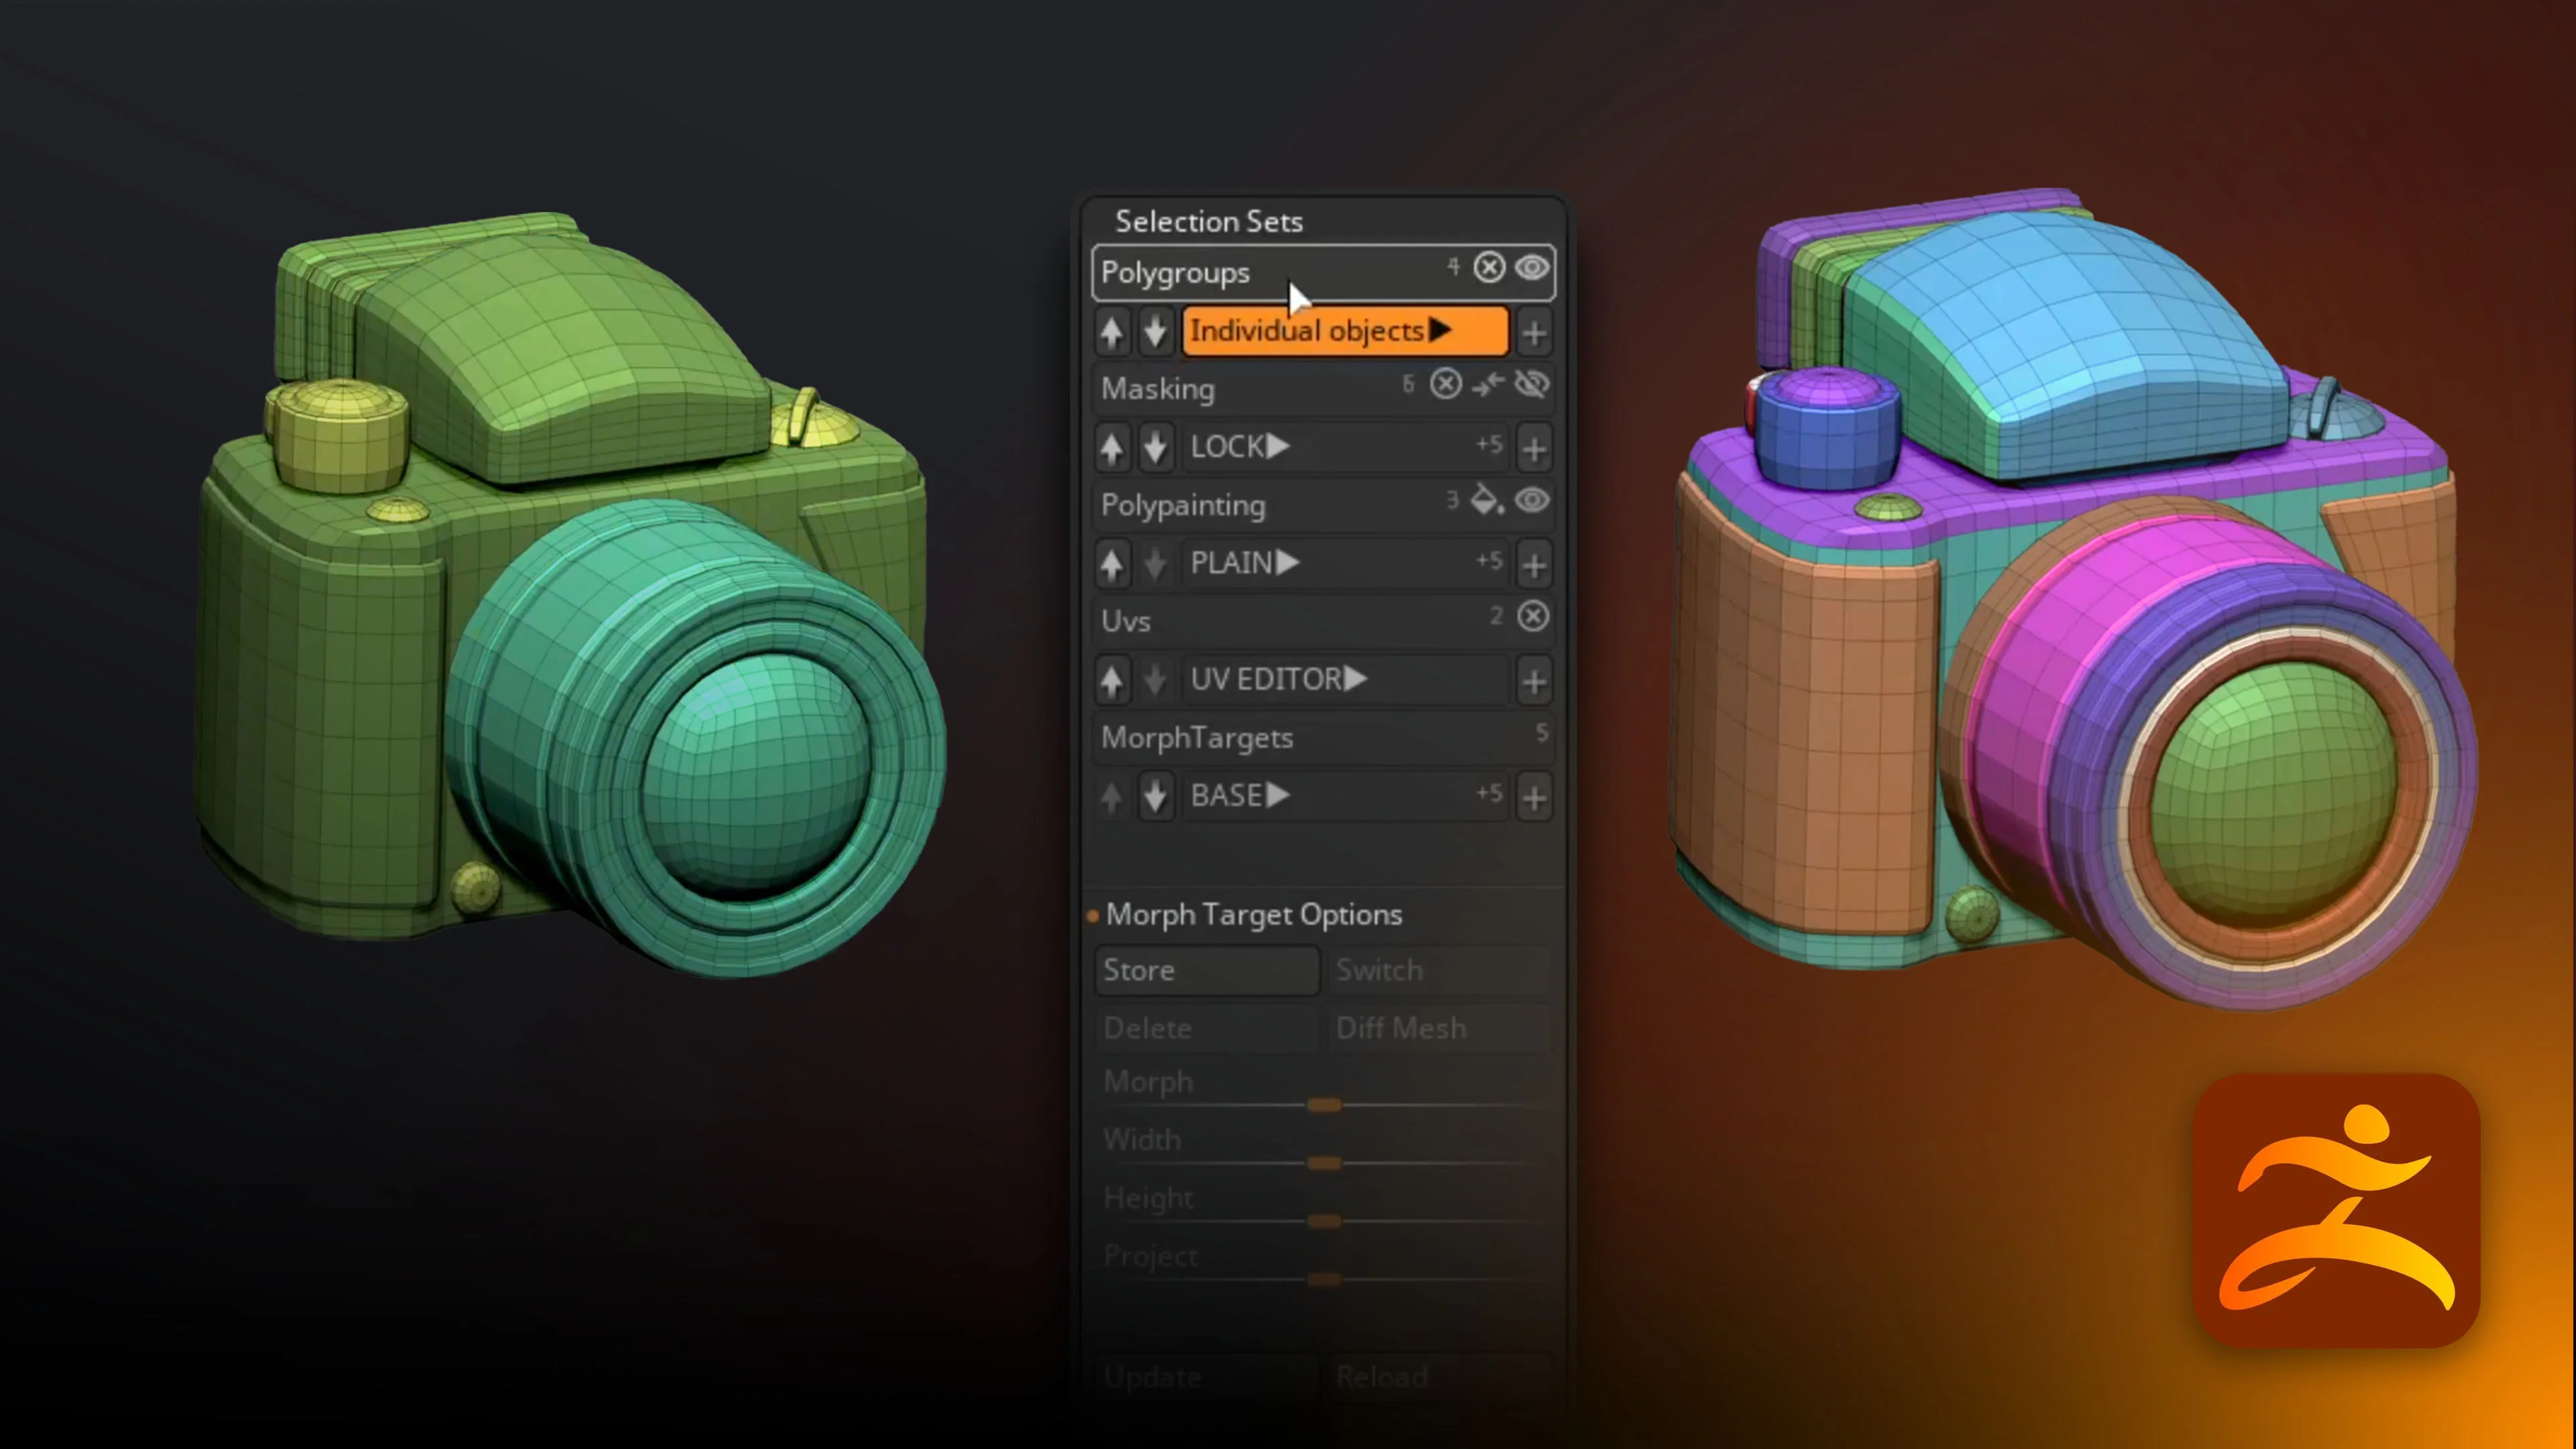





The real benefit is flexibility. You can organise the same model for selection, detailing, painting and UVs, then switch between those setups as the work demands. For this workflow, we’ll use a simple toy camera to build practical sets from scratch and explore how they help with everything from button details to preparing an exploded mesh for baking.
What you’ll need:
- ZBrush 2027. This workflow uses version 2027.0.1 with the default interface.
- A model with separate connected pieces, such as a camera body, lens and buttons, kept within one subtool.
- Enough subdivision levels for the surface details and PolyPaint you want to create.
- A few icon alphas, or any suitable alphas included with ZBrush.
The example camera has six subdivision levels and roughly 11 million polygons at the highest level. You don’t need that exact resolution… the important thing is to work at a level appropriate for each task.
Step 1: Open Selection Sets and understand what you’re saving
Go to Tool > Selection Sets. This is where you store and recall the different data types for the active subtool:
- Polygroups: alternative grouping layouts for selecting parts, posing or preparing UVs.
- Masking: reusable selections, patterns and generated masks.
- PolyPaint: colour passes, ID colours and palette variations.
- UVs: different unwraps that you can compare and restore.
- Morph targets: different point positions, sculpted details and model arrangements.
These categories serve different purposes. Loading a polygroup layout changes how the model is grouped; loading a PolyPaint set changes its stored colour data. You can use them together without treating each variation as a completely separate asset.
The basic pattern is simple: create the state you want, click the plus icon in the relevant category, and give it a useful name. Use Update to replace an existing entry with your revised state, or Reload to restore the selected entry.
One useful detail: the demonstrated polygroup layouts remain available through the camera’s subdivision levels. You can organise the mesh at low resolution and still use those groups when working on the high-resolution surface.
Step 2: Save an individual-object polygroup layout
Start with the camera showing a single polygroup. Enable PolyFrame, then go to Tool > Polygroups > Auto Groups. This gives the separate connected pieces their own groups.
In Selection Sets, open the Polygroups category, click the plus icon and name this layout Objects.
This is your practical selection layout. Hold Ctrl + Shift and click a group to isolate a piece, such as the lens housing or a button. Instead of hiding several smaller sections to reach the part you need, you can select that connected object directly.
Keep this version even if you plan to make more detailed groups later. A layout that is excellent for UV seams can be unnecessarily complicated for everyday selection.
Step 3: Create broad blocks and a more detailed UV layout
Next, organise the camera into three larger sections: lens, body, and buttons/dials.
- Use Ctrl + Shift to isolate the pieces belonging to the lens.
- Press Ctrl + W to assign one polygroup to the visible geometry.
- Repeat for the body and the remaining controls.
- Restore visibility and save this layout as Blocks.
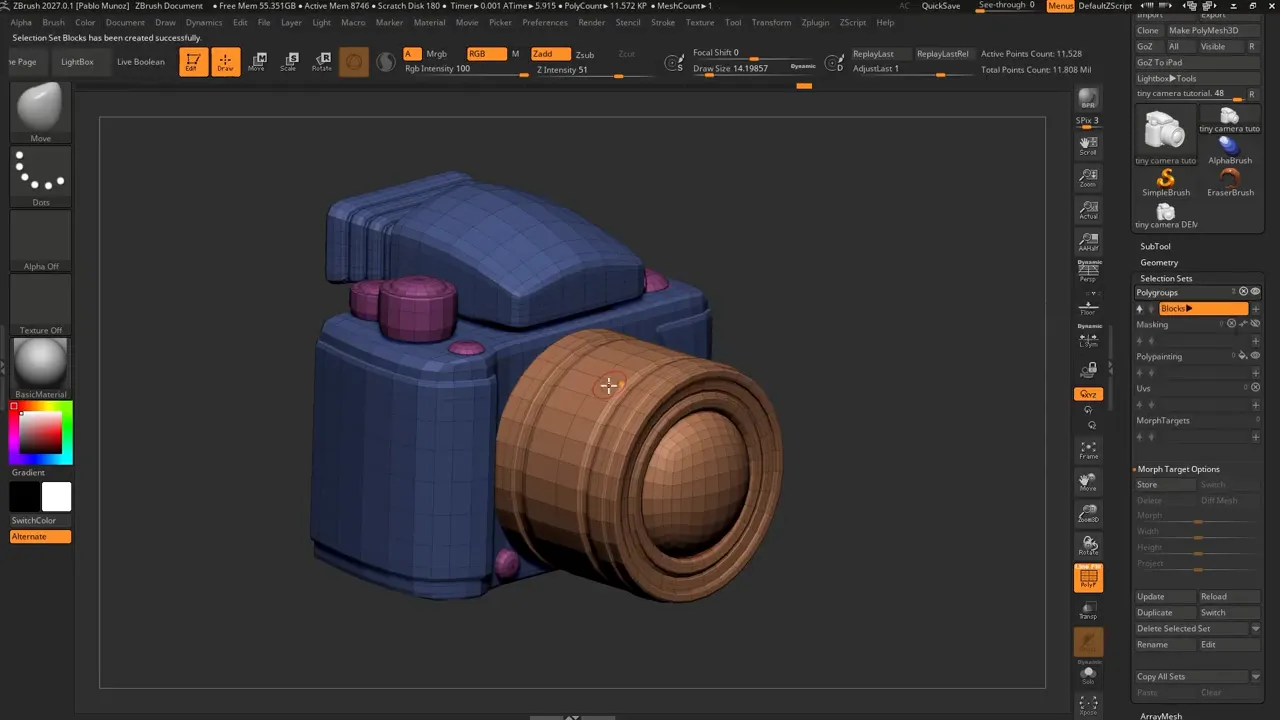
Now return to Objects and build a more specific layout for UV work. Split the lens into useful sections, including rings and strips that may need separate UV islands.
For tighter selections, switch from Select Rect to Select Lasso. Hold Ctrl + Shift, click the brush thumbnail and choose the selection brush. On the lens ring, the lasso is useful for selecting complete loops before assigning another group.
Save this detailed layout as For UVs. If you later decide the body needs another split, make the change and click Update while that entry is selected. You don’t need to create another set for every small revision.
You now have three useful ways to work with the same subtool: individual objects, broad building blocks, and detailed sections for unwrapping.
Step 4: Build reusable icon masks
Move to a high subdivision level and hide PolyFrame. Rather than stamping button icons directly into the geometry, create masks first. This separates the placement of each symbol from the deformation or colour you’ll apply later.
- Hold Ctrl to access the masking brush.
- Clone the masking brush if you want to preserve the original setup.
- While accessing the masking brush, set its stroke to DragRect.
- Choose an icon alpha and Ctrl-drag it onto the appropriate button.
If the mask fades too much around the symbol, adjust the masking brush’s Focal Shift. In this example, moving from around -40 to -100 produces a cleaner result.
Place the directional symbols, then save the mask as Arrows. Clear it, create a settings symbol and save that as Gear. Repeat for Record.
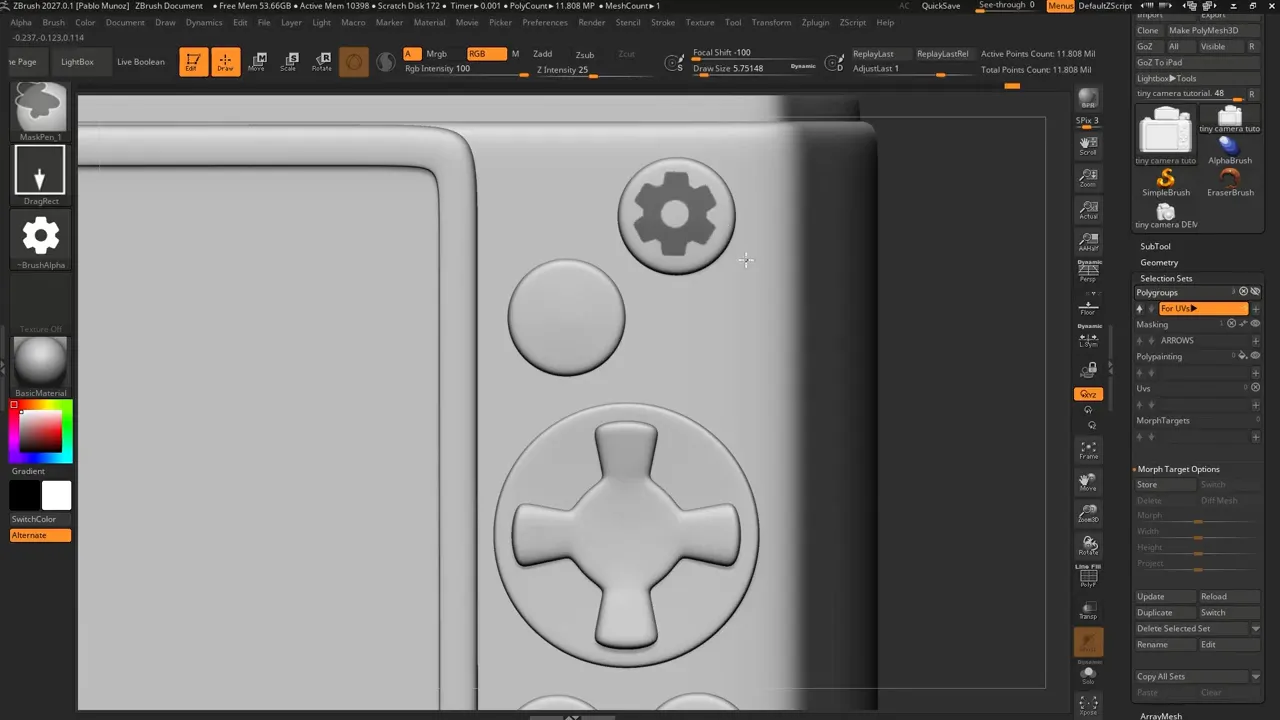
Keep an eye on the alpha itself. If the artwork is off-centre within its square, placement will be less predictable. Spend a little time getting the size and alignment consistent before saving the final masks.
Once stored, each mask can be recovered after clearing it. That is the key advantage… you only need to solve the placement once.
Step 5: Turn the masks into separate morph targets
Before deforming anything, add a morph-target entry named Base. This is your clean checkpoint.
Load Gear, then Ctrl-click the empty canvas to invert the mask so the symbol becomes the editable area. Open Tool > Deformation and apply:
- Inflate: -1 for a subtle recessed icon.
- Polish: 5 to clean up the result.
These are the values used on this camera, not universal settings. A stronger negative Inflate value was too deep here… subtlety gives a cleaner button detail.
Clear the mask and save a new morph target called Gear. Return to Base before creating Record, then repeat the process for Arrows.
That return to Base matters. It keeps the individual variations separate instead of accidentally carrying the previous symbol into the next target.
You can also use morph targets for broader shape experiments. A bulging lens gives this camera a more cartoony silhouette, while a different target can hold sculpted grip texture. Save detailed surface variations at the subdivision level where you create them, and return to the appropriate level to inspect them.
Step 6: Save a combined detail version
Separate morph targets are useful for testing, but you’ll probably want a version with all the button details together.
Start from Base again. Load Record, invert the mask, apply the deformation and clear the mask. Repeat with Arrows and Gear, keeping the changes on the current mesh. Save the finished state as Buttons.
This is not automatic blending of the saved detail entries. You’re reusing the stored masks to build a combined geometry state, then saving that state as another morph target.
The result is a tidy set of options:
- Base: clean buttons without the added symbols.
- Gear, Record and Arrows: individual detail variations.
- Buttons: all symbols applied together.
For shape experiments, Morph Target Options also provides the familiar Store and morph adjustment controls. Store the reference state, load a variation and use the morph slider to adjust the change.
Step 7: Keep an exploded version for baking
Morph targets are useful beyond sculpting. On this camera, several pieces intersect the body. Those intersections can cause unwanted baking artefacts, so an exploded arrangement is a handy export state.
Keep the assembled model as Base, then save a separated arrangement as X-ploded. The pieces are moved apart so neighbouring geometry does not interfere with the intended bake.
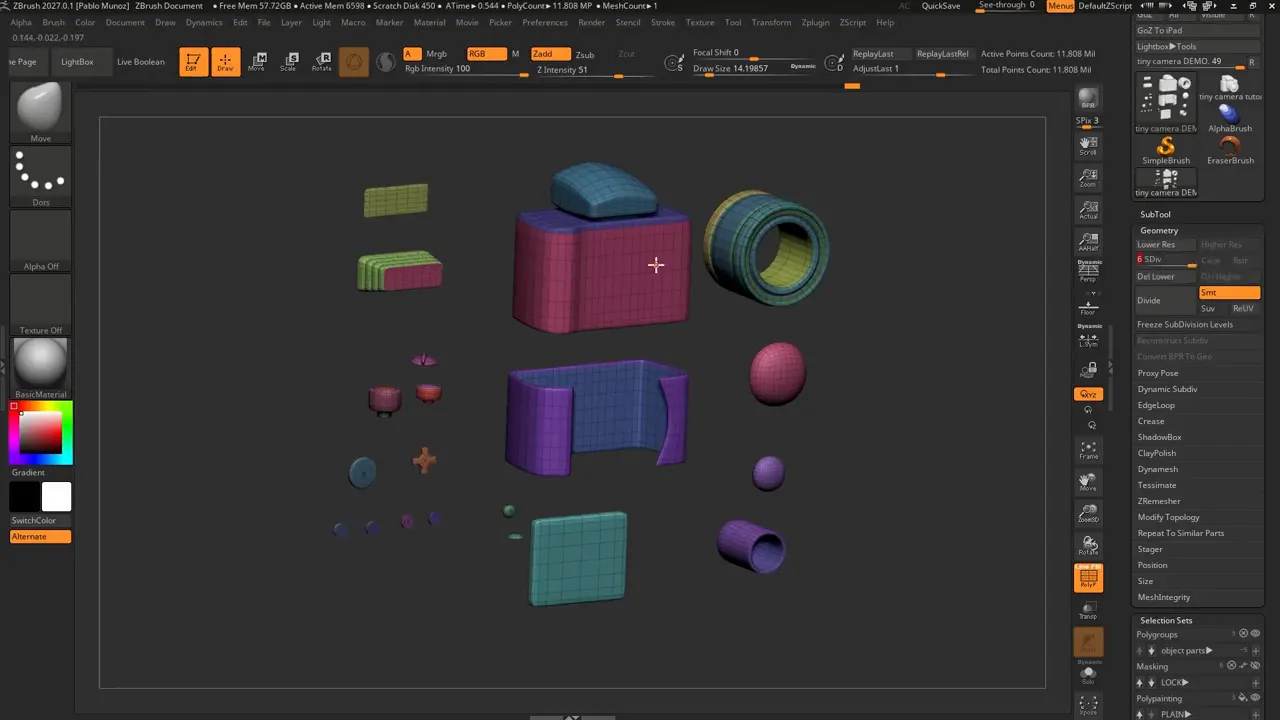
The particularly useful part is that this arrangement works through the subdivision levels:
- Load X-ploded.
- Go to subdivision level one and export the low-resolution mesh as FBX.
- Move to the highest subdivision level and export the high-resolution mesh.
- Return to Base to restore the assembled camera.
Both exports use the same separated positions. You don’t need to manually recreate the exploded layout for the high-resolution version, and you can return to the assembled model when you’re finished.
Step 8: Reuse the masks for PolyPaint
Switch to SkinShade4 so the colours are easier to evaluate. Choose a body colour and use Color > Fill Object. Isolate the grip, screens and buttons with your polygroups, then fill those sections with their own colours.
Now reuse the icon masks:
- Load Gear, invert the mask and fill the symbol white.
- Repeat for Arrows.
- Load Record, invert it and fill the symbol red.
Clear the mask and load the Buttons morph target. You now have the painted symbols and recessed geometry working together. Save the colour state in the PolyPaint category as First Pass.
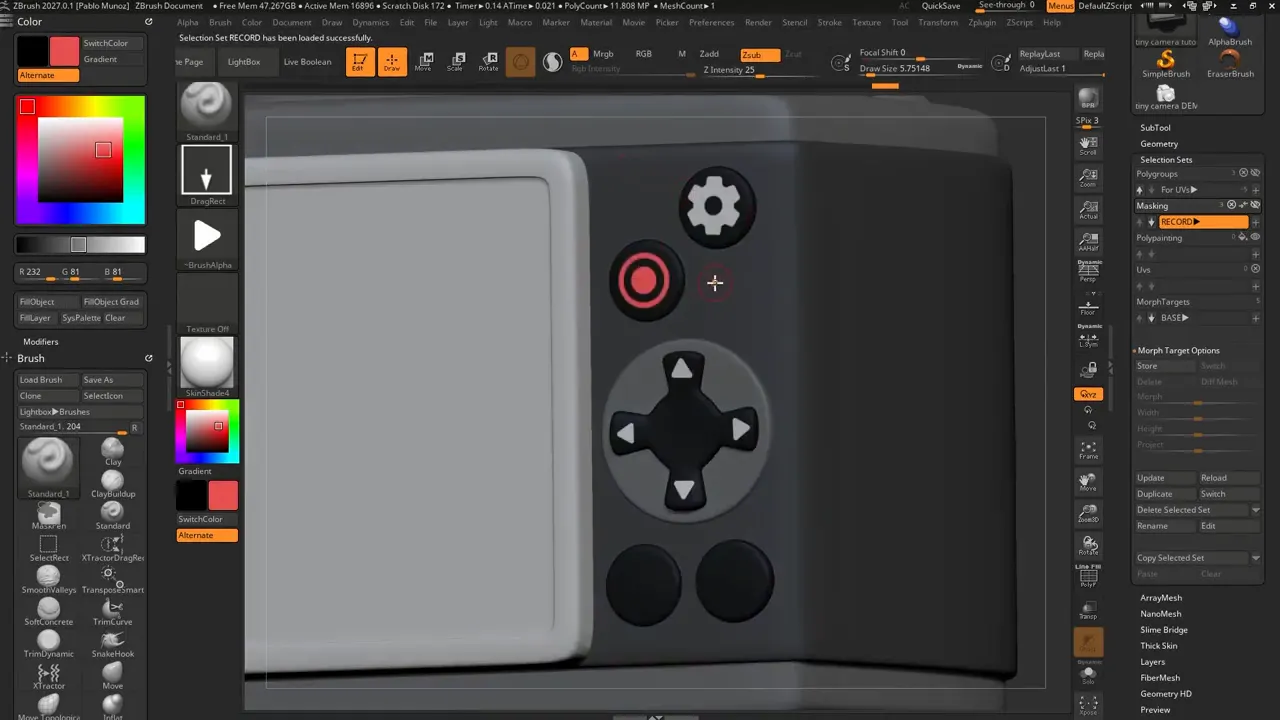
You can store alternative palettes in the same way. Another useful option is an ID pass: assign distinct colours to individual objects, then transfer those colours to a texture map once UVs are available for use in Substance 3D Painter.
Keep an unpainted or plain version too. It makes it easy to return to a neutral starting point without losing the colour experiments.
Step 9: Save an AO mask and an AO-painted variation
For a quick colour enhancement, reduce the subdivision level to make the calculation faster, then open the Ambient Occlusion plugin in ZPlugin and click Compute.
The result is a mask. Save it immediately in Selection Sets as AO so you can reuse it without computing it again.
To turn that information into painted shading:
- Invert the AO mask.
- Open Tool > PolyPaint > Adjust Color.
- Use Hide Mask to judge the colour without the mask overlay.
- Reduce the HSV intensity to darken the affected areas.
- Confirm, clear the mask and save the PolyPaint state as AO Paint.
This is colour applied through the AO mask, not simply an AO display effect. You can switch back to First Pass to compare the untreated colours.
For another variation, reload AO and use the Masking palette’s Sharpen and Boost controls. Add a little manual randomness for dirt, or explore Peaks and Valleys masking as another starting point.
One handy shortcut: if AO is already selected but you cleared the active mask, click Reload. There’s no need to switch to a different entry and back again.
Step 10: Store and compare different UV layouts
Return to the lowest subdivision level and enable PolyFrame. Load Blocks as the starting polygroup layout, then open ZPlugin > UV Master.
- Enable Symmetry and Polygroups.
- Click Unwrap.
- Use Tool > UV Map > Morph UV to inspect the result.
- Exit Morph UV and save the UV selection set as UV Master.
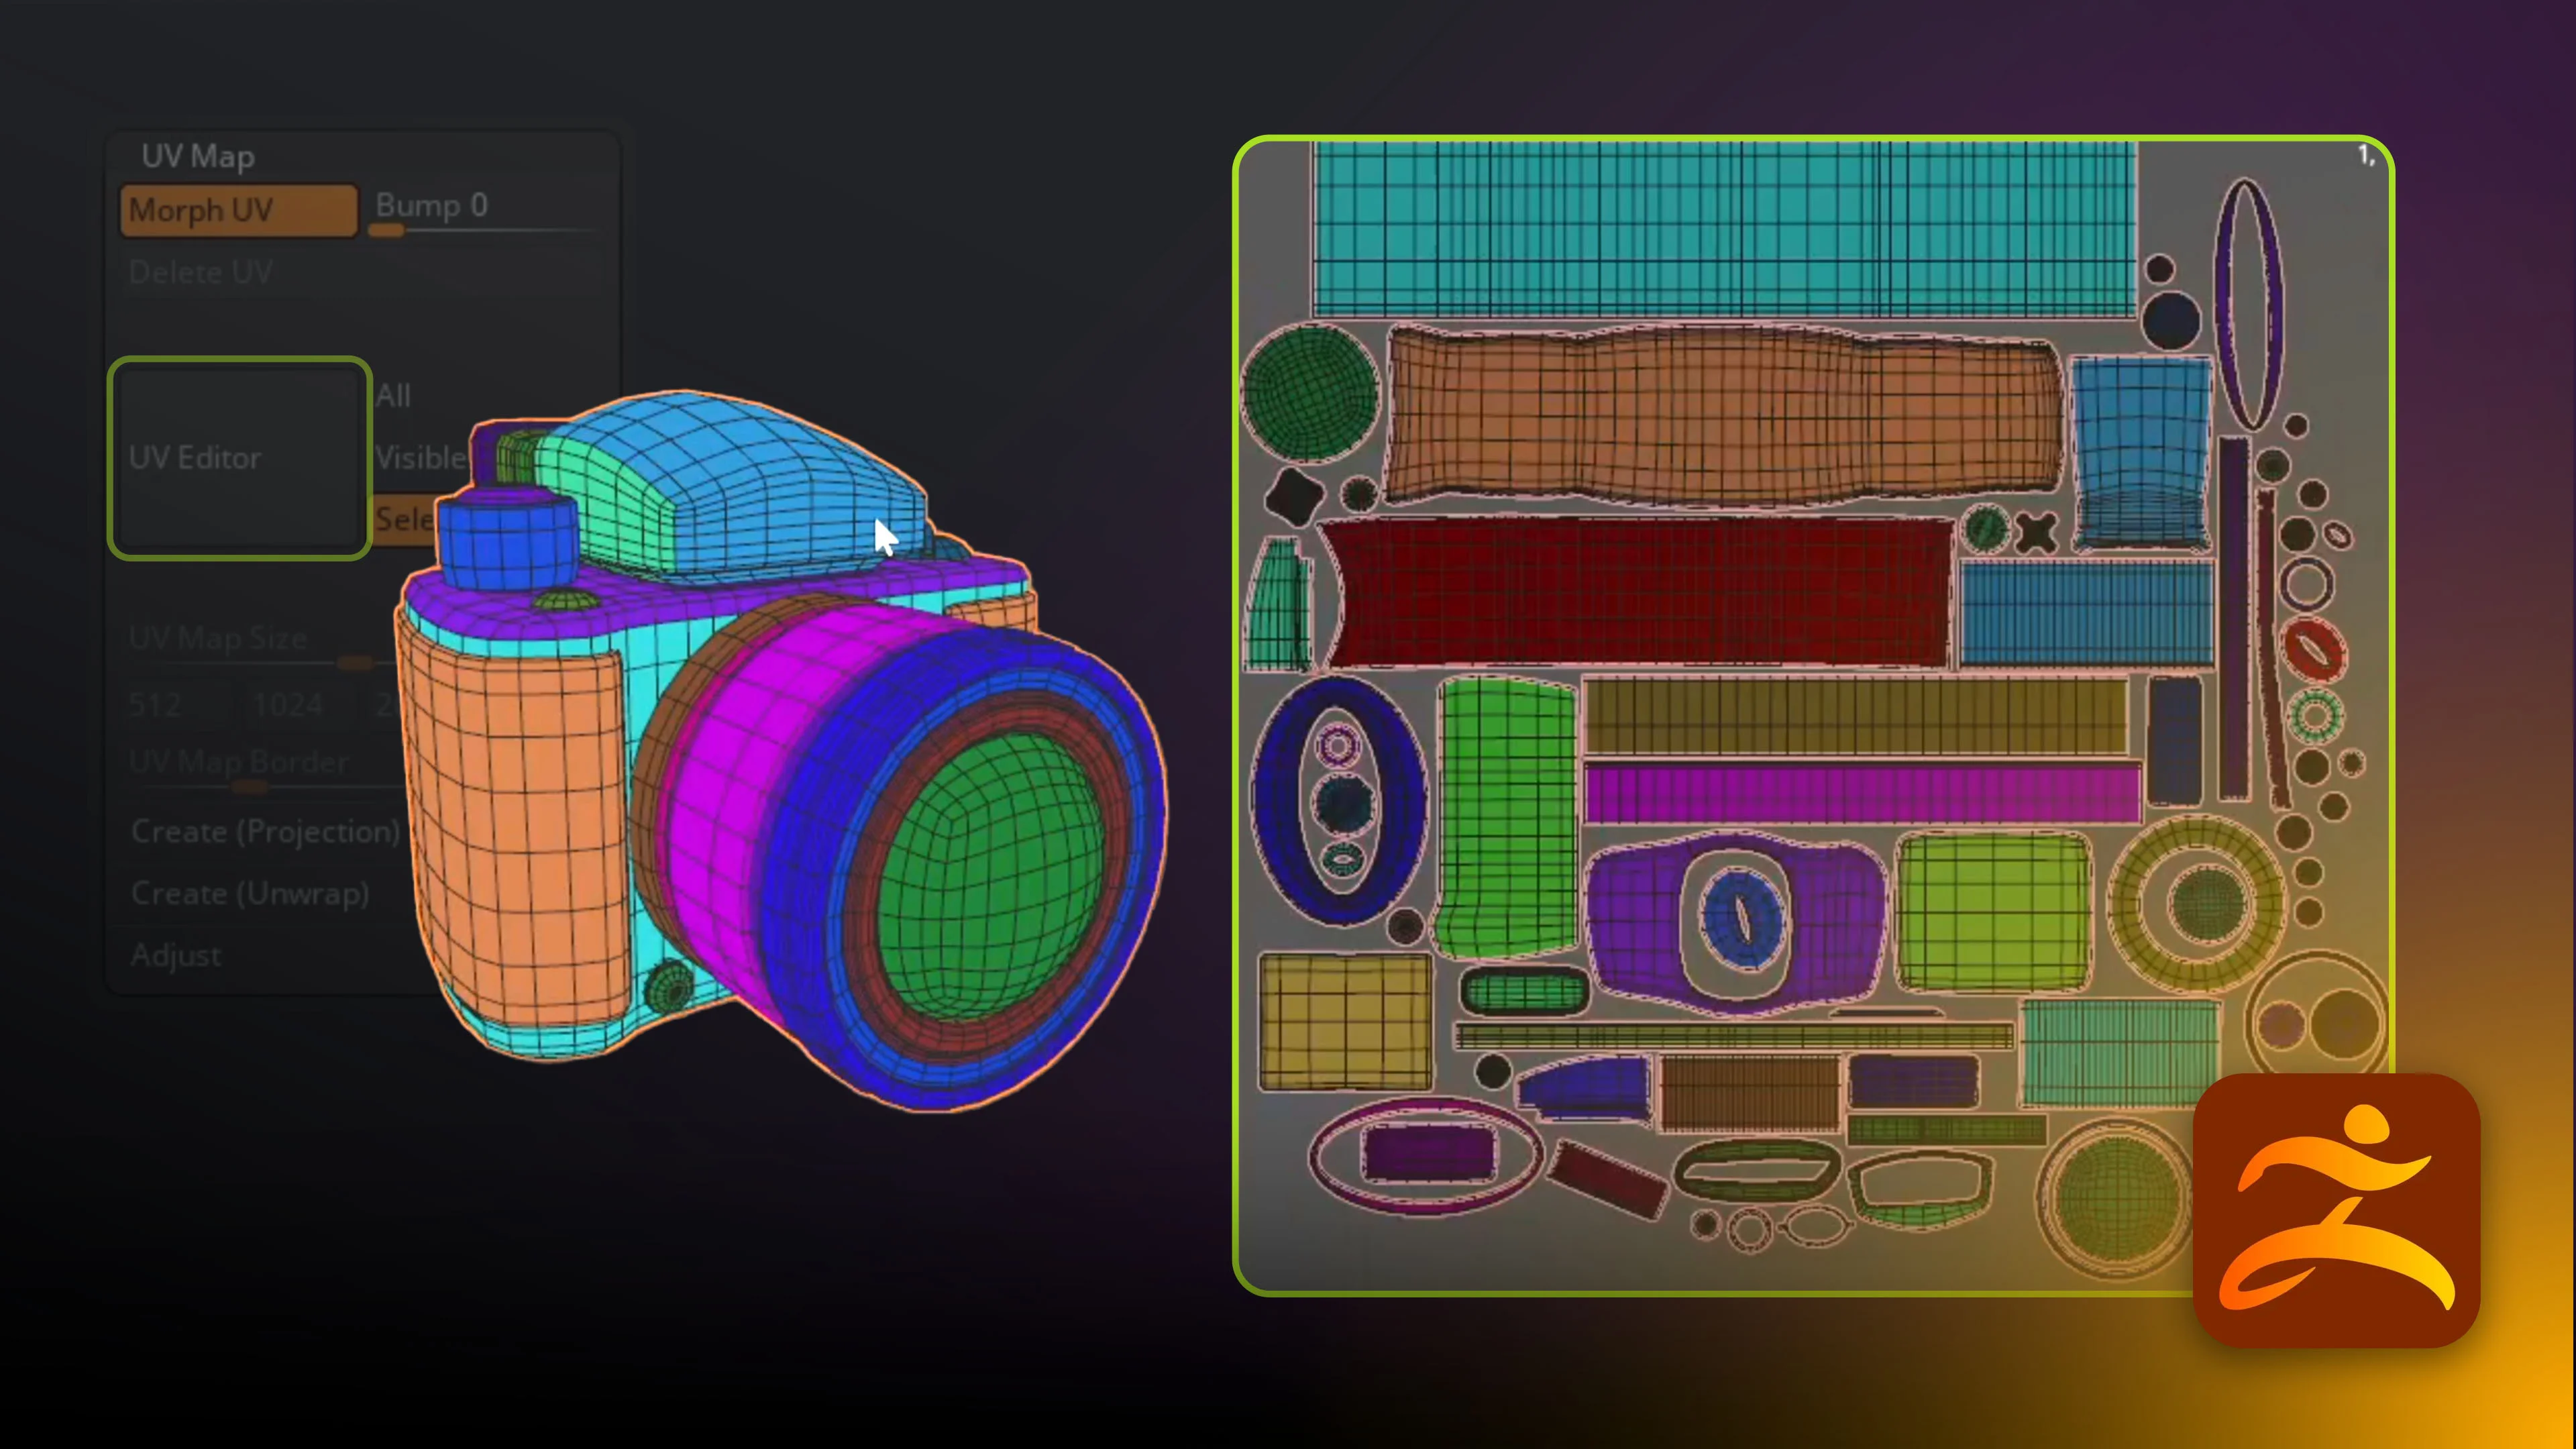
Next, load For UVs and run Unwrap again. The more specific polygroup boundaries produce a different layout. Inspect it, exit Morph UV and save this alternative as Better UVs.
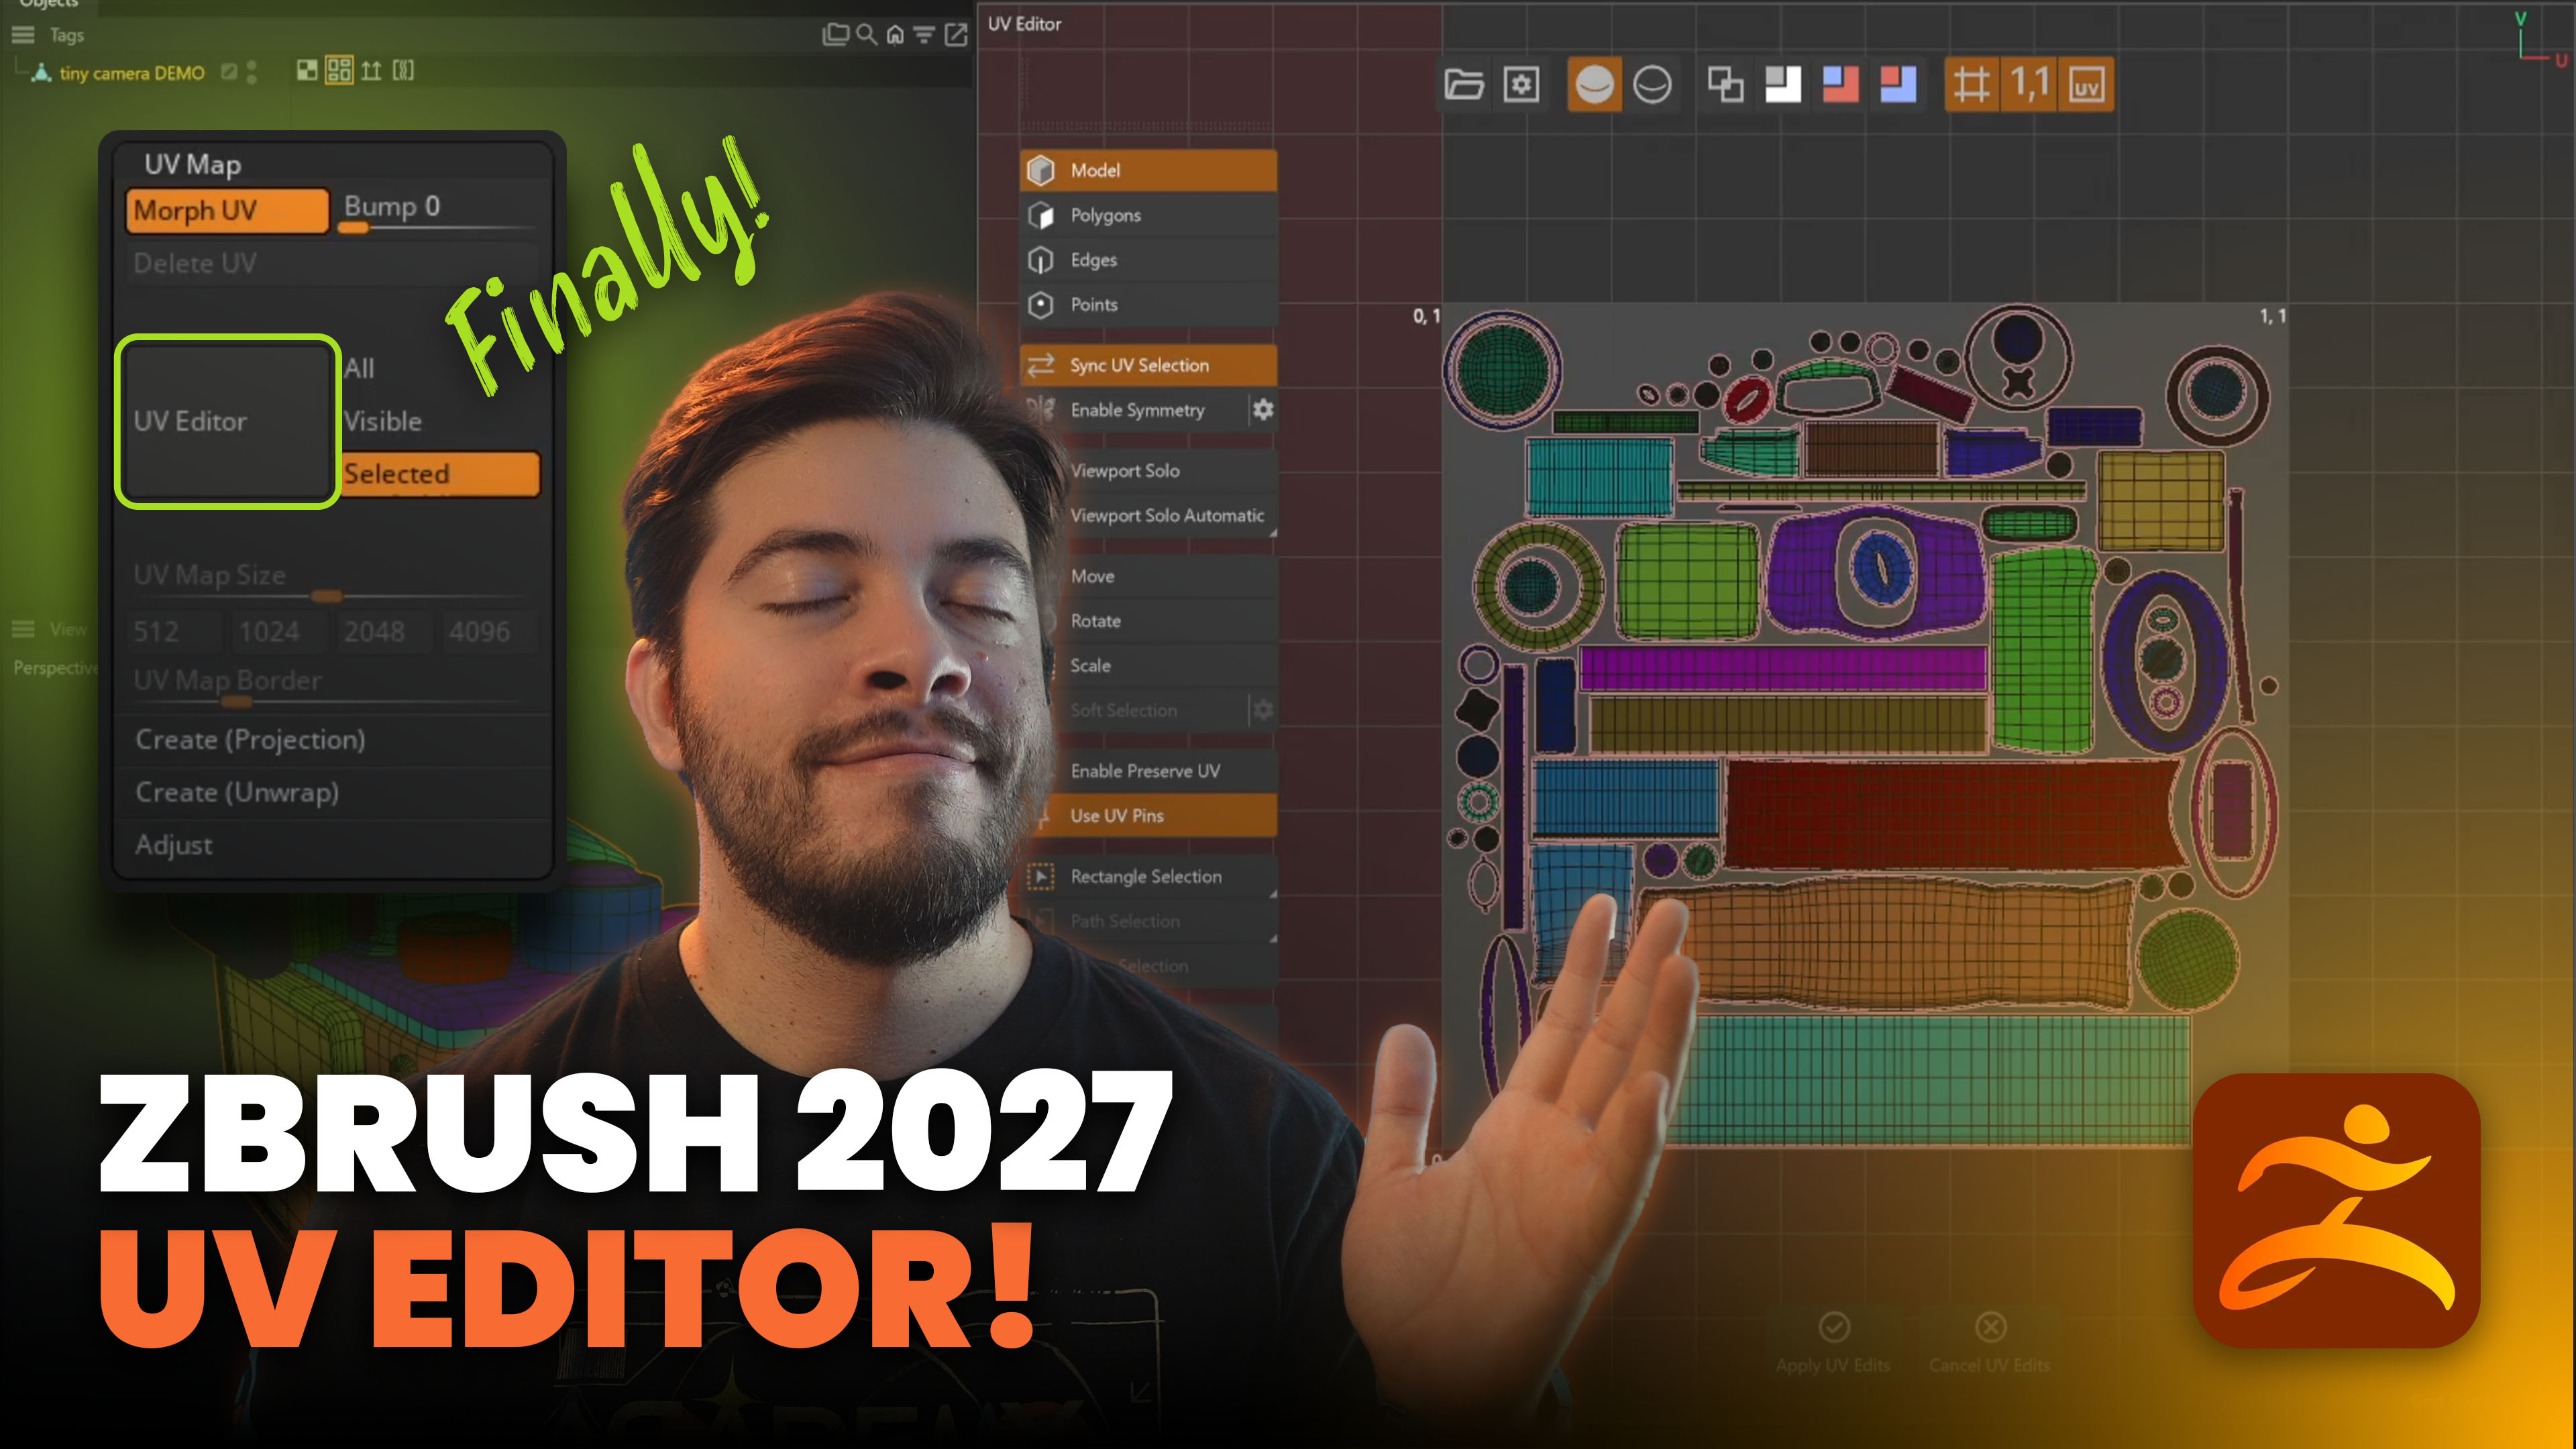
For more precise arrangement, you can create another version with the ZBrush 2027 UV Editor and store that separately. In the camera example, this produces a tidier layout with straighter rectangular islands for cylindrical sections.
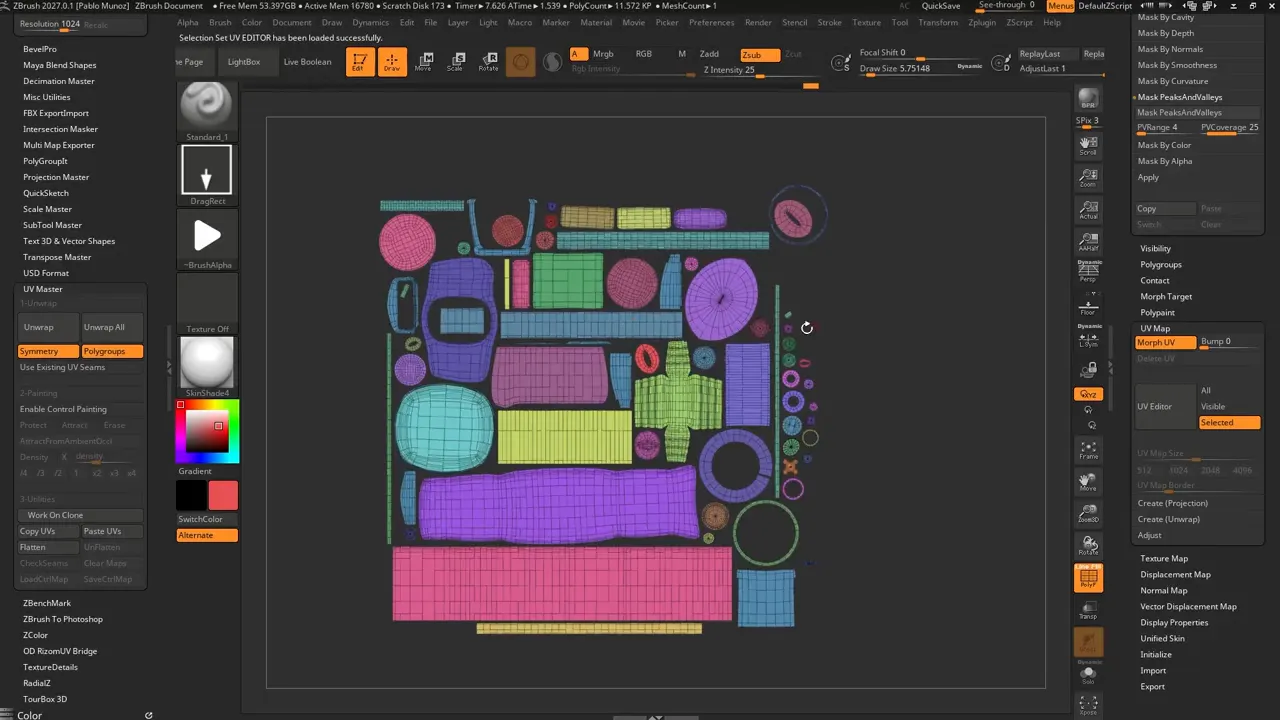
Switching UV entries may not visibly change the assembled model. Use Morph UV to inspect the actual layout, then return to the model before switching again.
Quick checks before you finish:
- Revised a saved layout? Use Update to preserve the changes.
- Cleared a mask you still need? Select its entry and use Reload.
- Detail seems missing? Check the subdivision level used to create it.
- Need independent geometry variations? Return to Base before building each one.
This workflow works because it keeps useful decisions available. Broad groups for selection, detailed groups for UVs, masks for symbols, morph targets for geometry and PolyPaint sets for colour… each has a clear job. Start with a few well-named entries and build only the variations you need.
If your next step is baking and texturing, SP101 covers Substance 3D Painter from scratch through project-based lessons, including why an exploded model can be useful.
RadialZ - Radial Menus for ZBrush
RadialZ puts your whole ZBrush library one gesture away. Press a hotkey and your brushes, alphas, textures and materials appear at your cursor. Click, hover or flick to pick, and stay in the flow.
Get resource