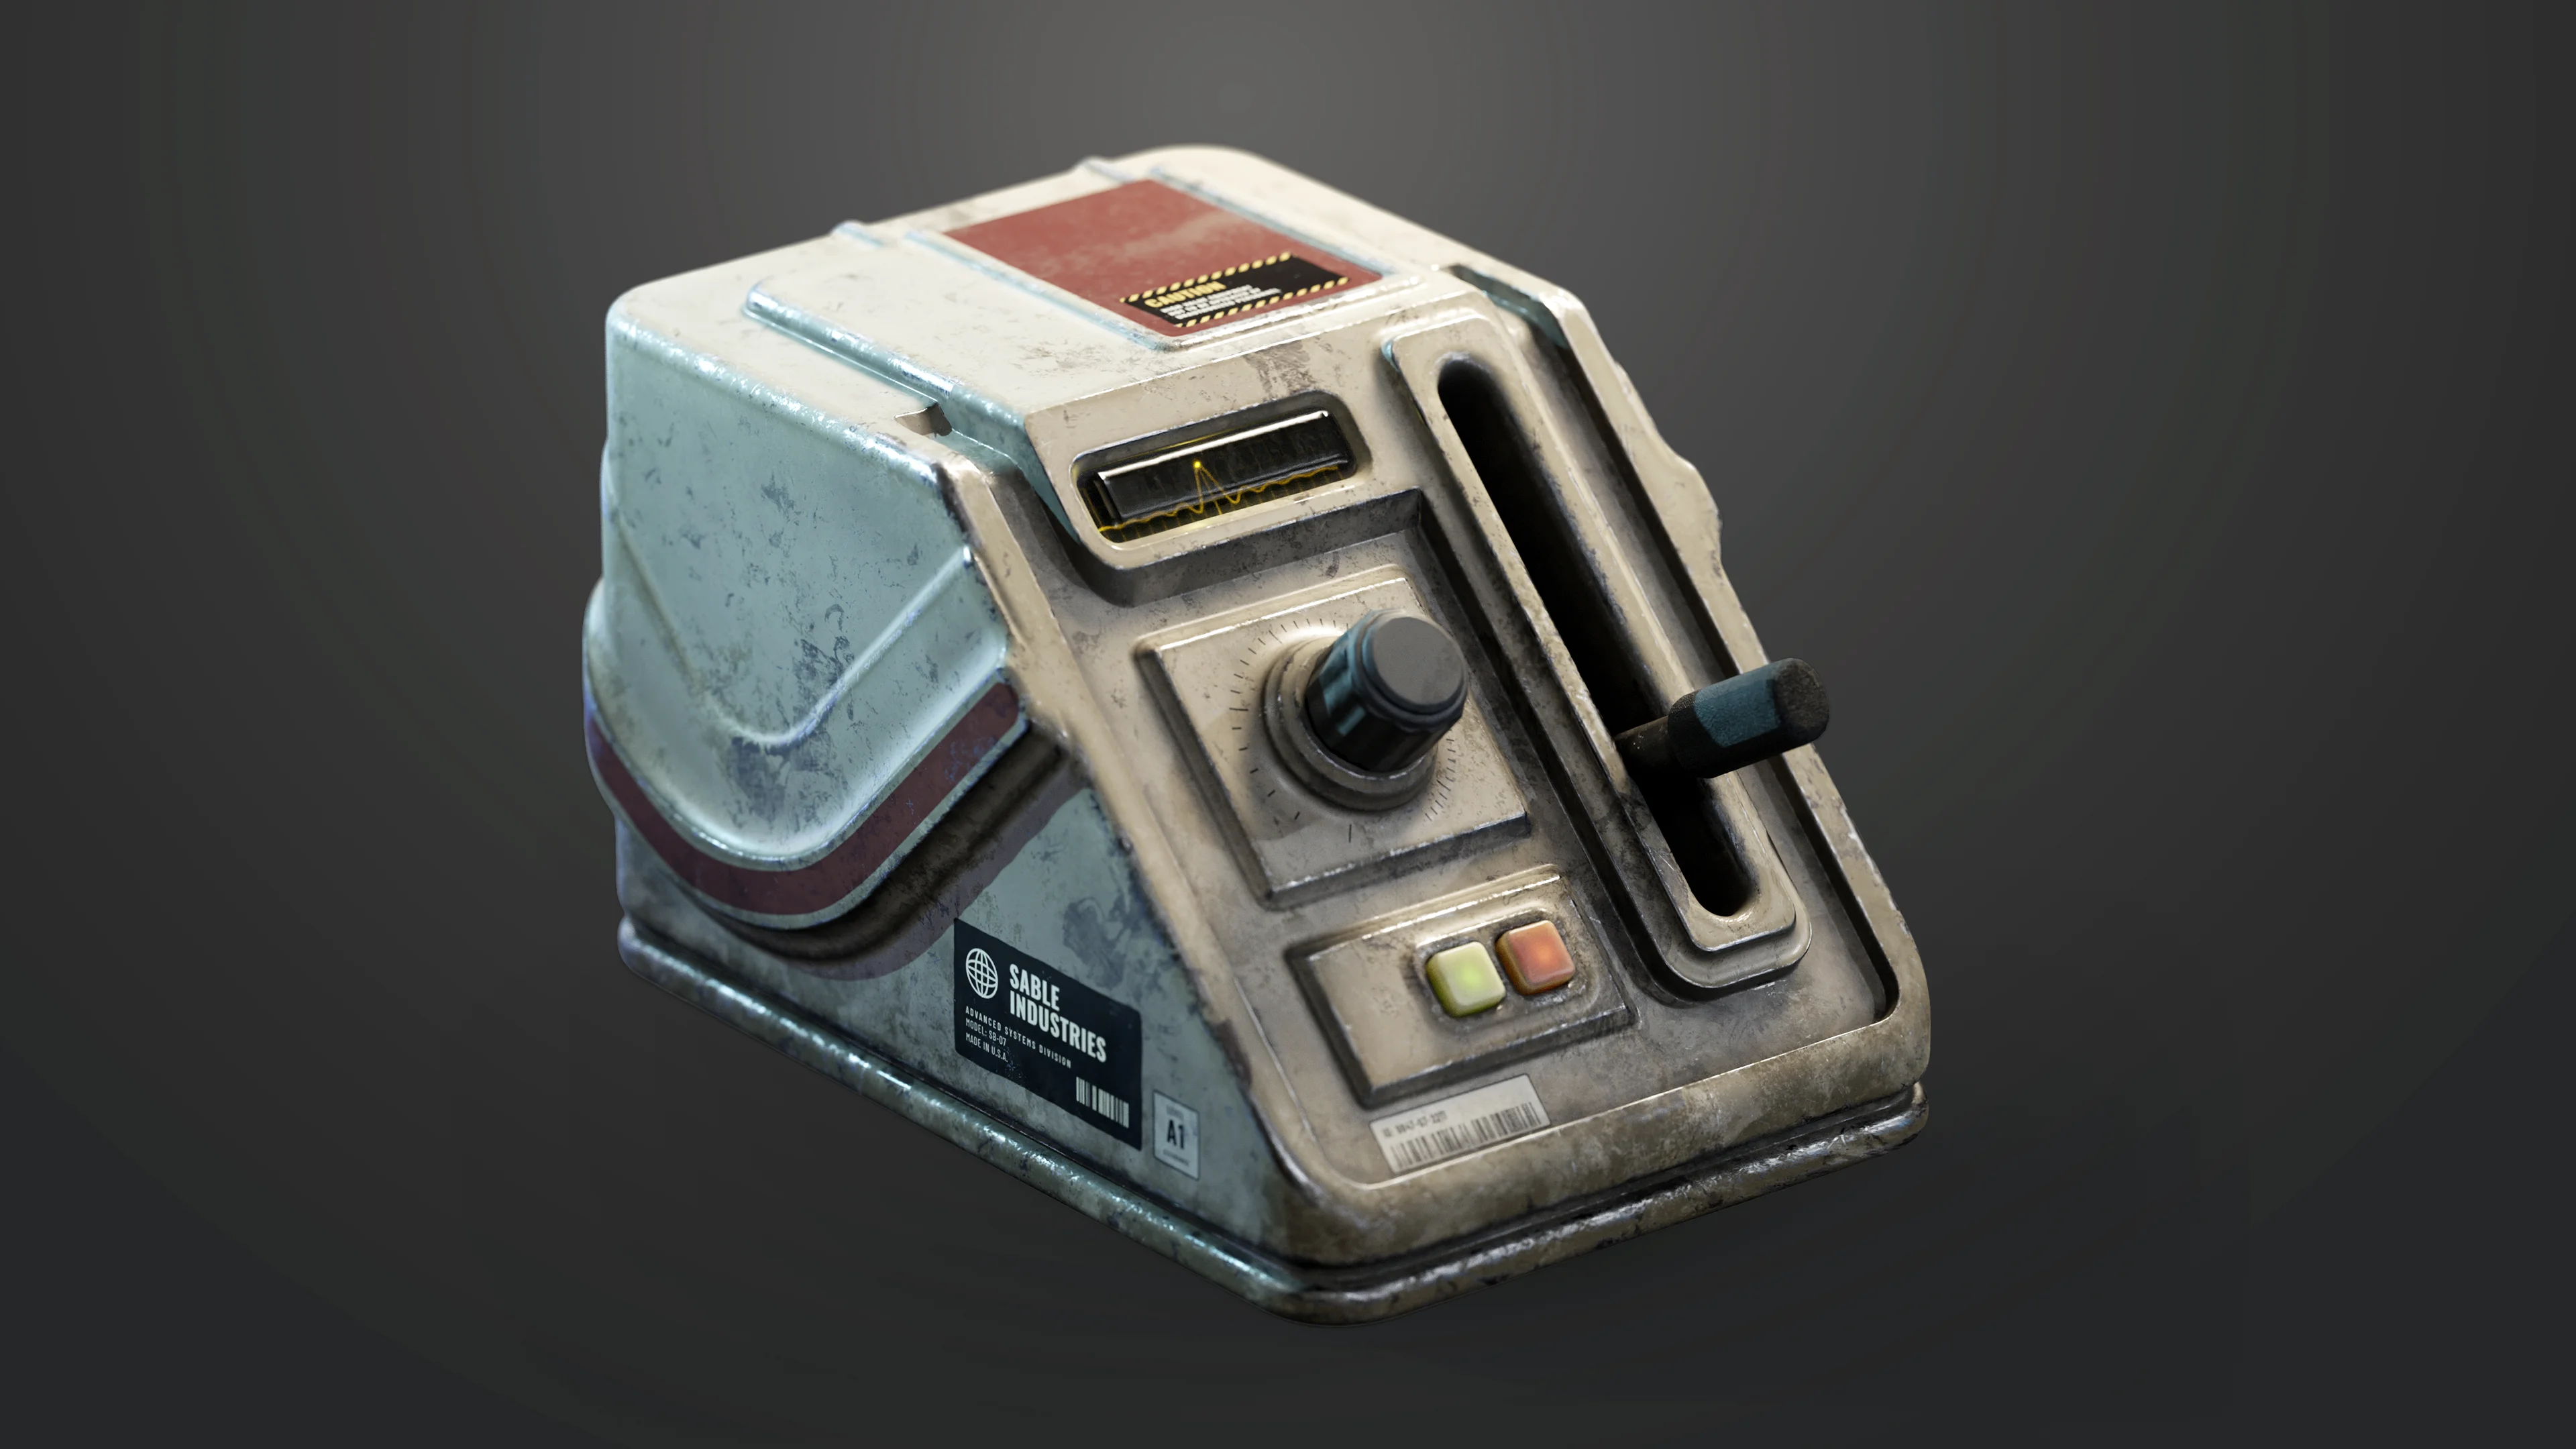








The real advantage is that the model remains editable for as long as possible. Instead of committing early to a shape, the artist can keep adjusting primitives, boolean operations, blends, and repeated details until the design feels right. Once the model is ready, generated UVs and a high-resolution bake make the transition into texturing straightforward.
What You’ll Need
- Substance 3D Modeler, a voxel based SDF (signed distance field) workflow for rapid ideation
- Substance 3D Painter for baking, materials, masks, and decals
- Marmoset Toolbag 5 for material setup, lighting, and rendering
- PNG decals or label graphics (optional)
- Access to Rotul8 for creating custom labels and stickers (optional)
Quick Overview: The Steps
- Block out the main silhouette from a primitive cube.
- Use duplicate primitives and boolean modes to add, subtract, and blend forms.
- Organize independent parts with primitive containers.
- Create repeated mechanical details with radial symmetry.
- Export a UV’d low-poly mesh and a high-poly mesh for baking.
- Build aged plastic and metal materials in Substance 3D Painter.
- Add labels, stickers, and interface graphics as decals.
- Set up PBR textures and shaders, and make final renders in Marmoset Toolbag 5.
Step 1: Block Out the Main Shape With a Primitive Cube
The workflow starts with a simple cube in Substance 3D Modeler. This is not just a temporary blockout object; it is the foundation of the entire prop. Because it remains a primitive, its proportions and surface characteristics can be adjusted at any point.
The small white handles on each axis control the dimensions of the cube. Holding Ctrl while scaling allows symmetrical adjustments on that axis, which is particularly useful when establishing a centered and balanced hard-surface form.
The primitive settings panel also provides direct control over properties such as roundness and fillet. Rather than manually beveling every edge, the artist can soften the shape by adjusting a slider. This makes it fast to explore the broad silhouette of a sci-fi device: a low wedge, a compact console, a control box, or a small industrial unit.
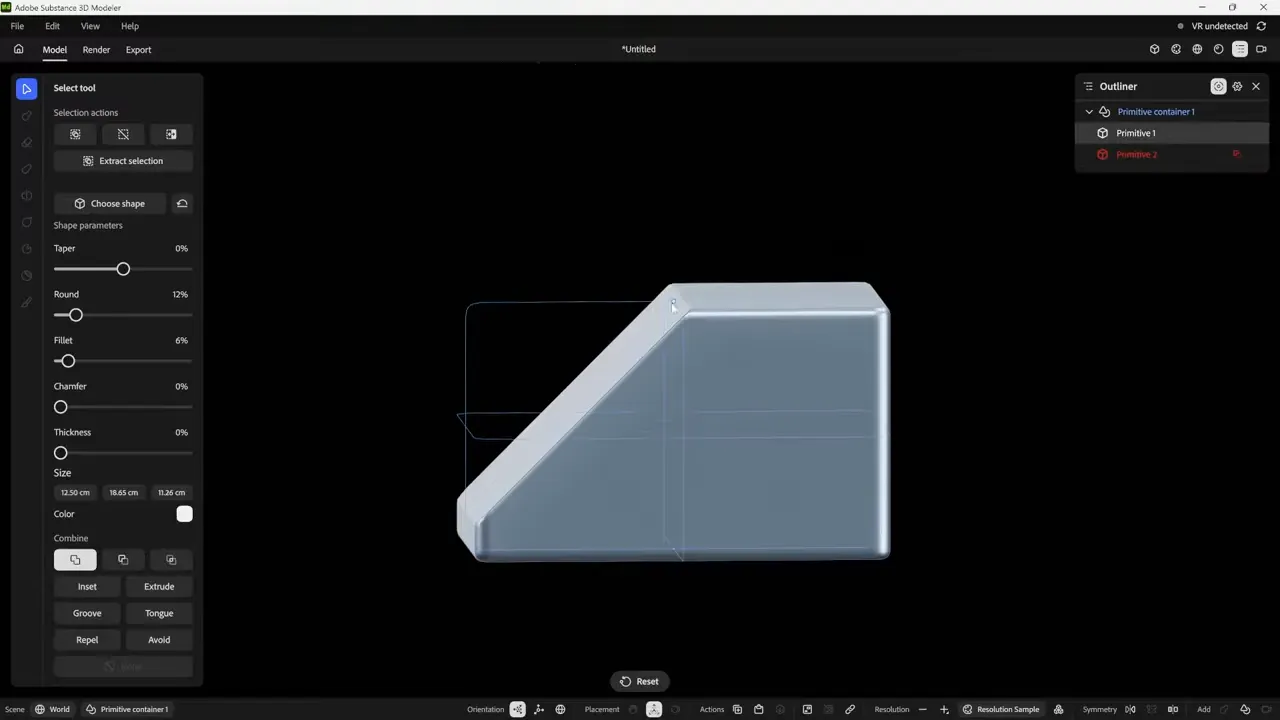
This is also where nondestructive modeling changes the design process. If the slope feels too steep, the base too tall, or a cutout too aggressive, the artist can simply return to that primitive and alter its settings. There is no need to rebuild the entire piece.
Step 3: Add Panels, Buttons, and Recesses With Parametric Primitives
With the main body established, the artist can begin adding the recognizable hard-surface elements: raised panels, screen housings, grooves, buttons, small cutouts, and control areas.
The working pattern stays consistent:
- Create or duplicate a primitive.
- Choose whether it combines with or subtracts from the current shape.
- Position, rotate, and scale the primitive.
- Adjust roundness, fillet, and blend settings.
- Return later to refine the volume if needed.
A cube can create a raised rectangular panel, a recessed compartment, or a button housing. A rounded cube works well for soft industrial buttons. A long narrow cube can become a channel, a slider track, or a display frame. The design is built from relationships between these simple volumes rather than from dense hand-modeled topology.
Different primitives can often achieve a similar result. For example, a cylindrical dial base can be made with a cylinder primitive, but a cube with its roundness pushed to 100 can also create a rounded shape. The best choice is simply the one that offers the most useful controls for the desired form.
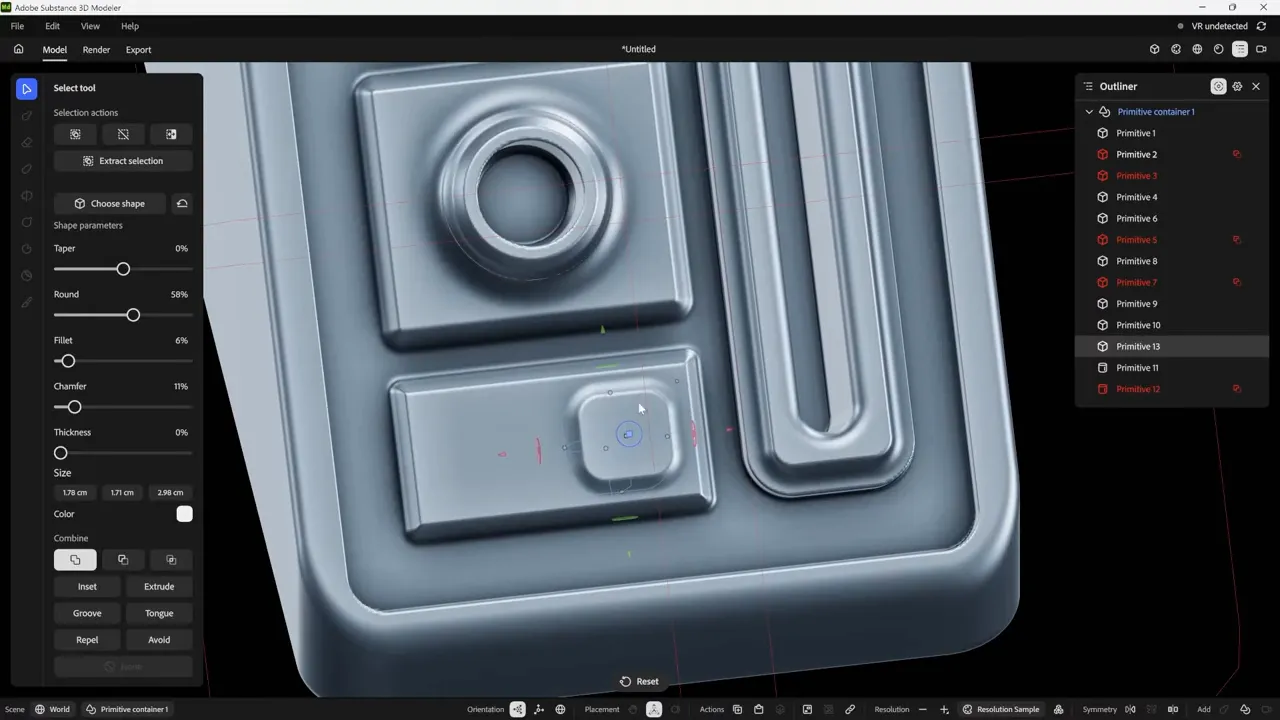
Small repeated controls are worth adding only after the main silhouette reads well. The broad forms establish the prop; the controls, grooves, and panels give it identity.
Step 4: Use Primitive Containers to Keep Parts Independent
Primitive containers determine which objects affect one another. This matters whenever an element should sit on the surface without blending into the main body.
For example, a pair of square buttons may need to remain separate from the base. If they are created in the same container as the main volume, they may blend or boolean against it in an unwanted way. By placing the buttons in their own container, they remain independent of the main body.
To create this separation, the artist can press Esc a couple of times to scope out of the current container. An object can then be created or pasted into a new container. Copying and pasting is especially useful here:
- Use Ctrl + C to copy selected primitive elements.
- Press Esc to move out (scope out) of the current container.
- Use Ctrl + V to paste the copied objects into the new container.
When only the active container appears bright and the rest of the scene is darker, it indicates that the artist is working inside that container. The objects in it can affect each other, while the rest of the model remains isolated.
Containers are also useful for organizing functional groups: a screen assembly, a button cluster, a dial, a lever, or a side-panel detail. Once grouped, the complete container can be moved, rotated, or scaled as one unit, while every primitive inside it retains its editing controls.
Step 5: Create Dials and Repeated Details With Radial Symmetry
Radial symmetry is ideal for circular mechanical components such as dials, knobs, vents, grips, bolts, and repeated cutouts. Instead of building each repeated feature individually, the artist creates one primitive and repeats it around a central axis.
The process begins by creating a new container and placing a cylinder on the intended axis. A duplicate cylinder can then be used as the repeating source shape. From the action pop-up menu, radial repetition enables the repeated instances and exposes the repetition count.
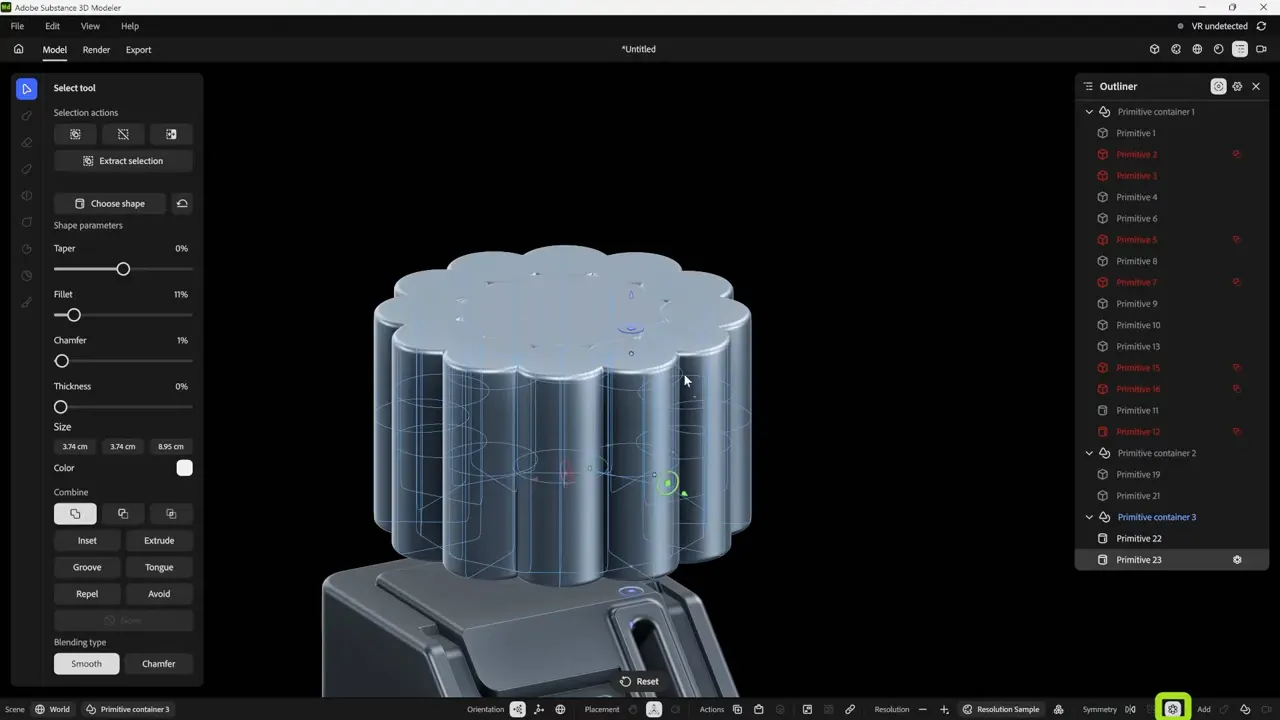
Once radial repetition is active, every scale, rotation, position, blend, or boolean adjustment made to the original cylinder affects all instances at once. This makes it particularly effective for the ridged sides of a knob.
The same boolean logic still applies inside radial symmetry. The repeated cylinders can combine with the dial body, blend smoothly into it, or subtract channels from it. A larger cylinder can also be used as a cutter to control the height or profile of the repeated forms.
After the dial is complete, pressing Esc scopes out of the radial group. The artist can then select and position the entire dial assembly on the control panel as a single editable unit.
Step 6: Export a Low-Poly Mesh and a High-Poly for Baking
Once the design is complete, the model moves into Substance 3D Painter. The export process creates two versions of the asset: a low-poly mesh with generated UVs, and a high-poly mesh for baking detail.
For the low-poly export, the artist chooses Export, selects the Substance 3D Painter preset, and enables Generate UVs under UV mapping. These generated UVs are not intended to be perfect for every production scenario, but they are more than sufficient for a compact prop like this one.
The low-poly mesh is the asset that receives textures in Painter. It should be exported first.
Then the artist repeats the export process, but changes the topology setting to Raw Triangles. This creates the high-poly mesh used as the baking source. Painter transfers the visual information from the high-poly design onto the low-poly with UV version.
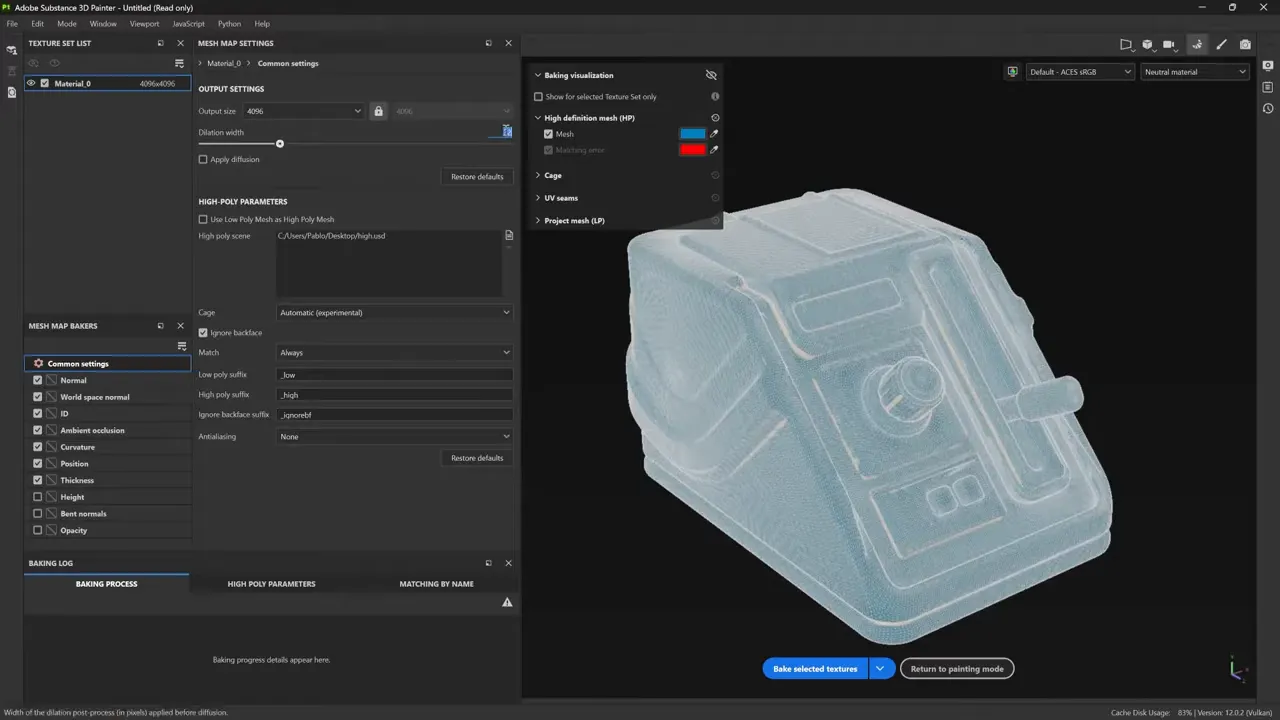
Inside Substance 3D Painter, the artist loads the low-poly mesh, then adds the high-poly mesh as the baking source. The automatic experimental cage option is used in this workflow, allowing Painter to calculate the projection setup before baking.
After baking is complete, the prop is ready for texture work. The sculpt-like detail created by all those primitive blends, grooves, and cutouts is now represented in the baked maps while the texture work happens on the lighter low-poly mesh.
Step 7: Build Aged Plastic and Metal Materials in Substance 3D Painter
The texturing process begins with a custom smart material designed to resemble rough plastic. Starting with a smart material gives the artist a usable base quickly, then layers, masks, grunge maps, and generators refine the surface.
To create the worn plastic look, the artist adds dark fill layers and uses grunge maps as masks. These black and white mask textures control where the dark material appears, creating dirt, staining, uneven coloration, and surface variation.
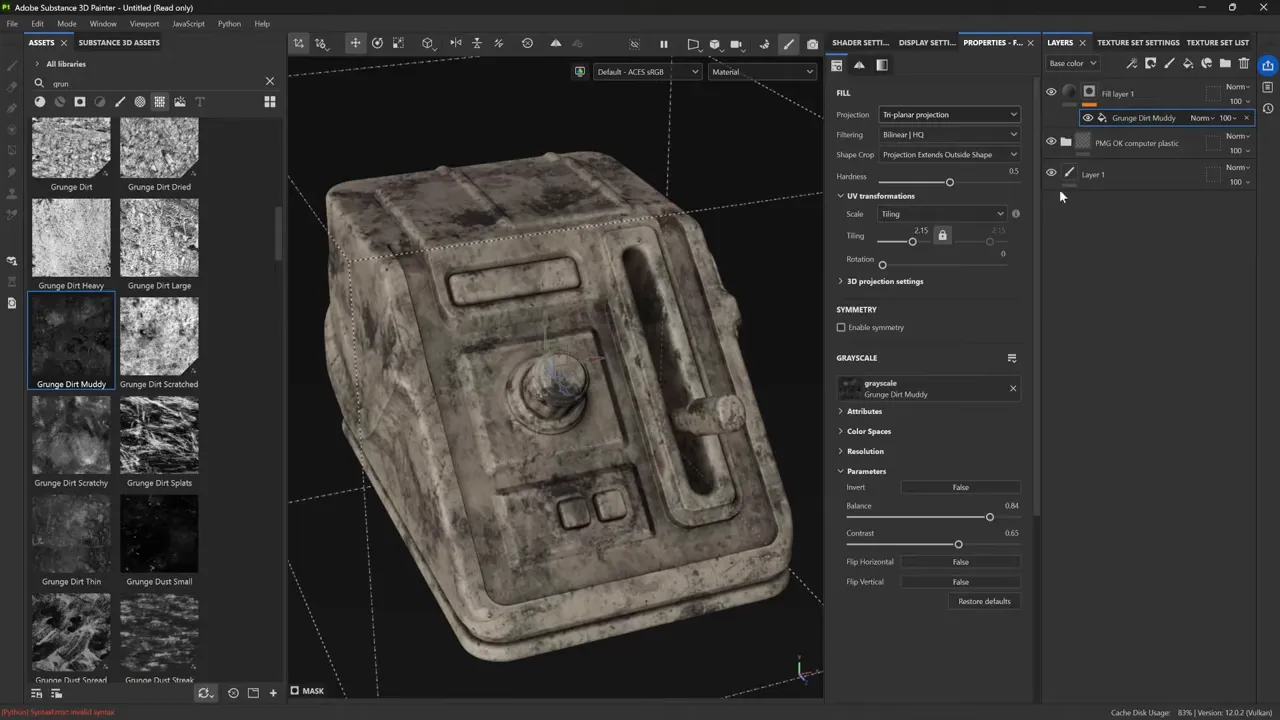
Curvature based generators are especially useful for pushing details toward edges and crevices. They can create the subtle accumulation and worn edge definition that makes the asset feel used rather than freshly manufactured.
Once the plastic base is working, the artist adds a metal layer and places a smart mask on it. The mask selectively reveals metal around exposed edges and worn areas. This gives the impression that the plastic surface is painted over metal, or that it is a primer layer gradually wearing away.
The material workflow can be organized with folders and masks to isolate different objects. Because primitive containers export as separate objects, Painter can use Polygon Fill tool in UV chunk feel mode to isolate an entire component quickly. A dial, screen frame, panel, lever, or button group can therefore receive its own material treatment without manually masking every part.
The most important principle is restraint. A few controlled layers of dirt, roughness variation, edge wear, and discoloration are enough to suggest history. Too much damage everywhere can flatten the design and make the material noisy.
Step 8: Add Storytelling With Labels, Stickers, and Decals
Decals are one of the fastest ways to make a prop feel specific. Warning labels, serial numbers, tiny interface graphics, barcodes, and industrial markings help turn a generic sci-fi box into an object with a purpose.
In Substance 3D Painter, PNG files can be dragged directly onto the mesh. The artist chooses to add them to the base color channel, then positions and scales them on the surface. Additional layers, masks, and anchor point driven effects can be used to damage or alter the decal after it has been placed.
The labels used in this workflow were made with Rotul8, a free label-generation tool available through the Pablander Academy tools page. It can generate different label and sticker layouts, customize their themes, and apply overlays such as paper textures.
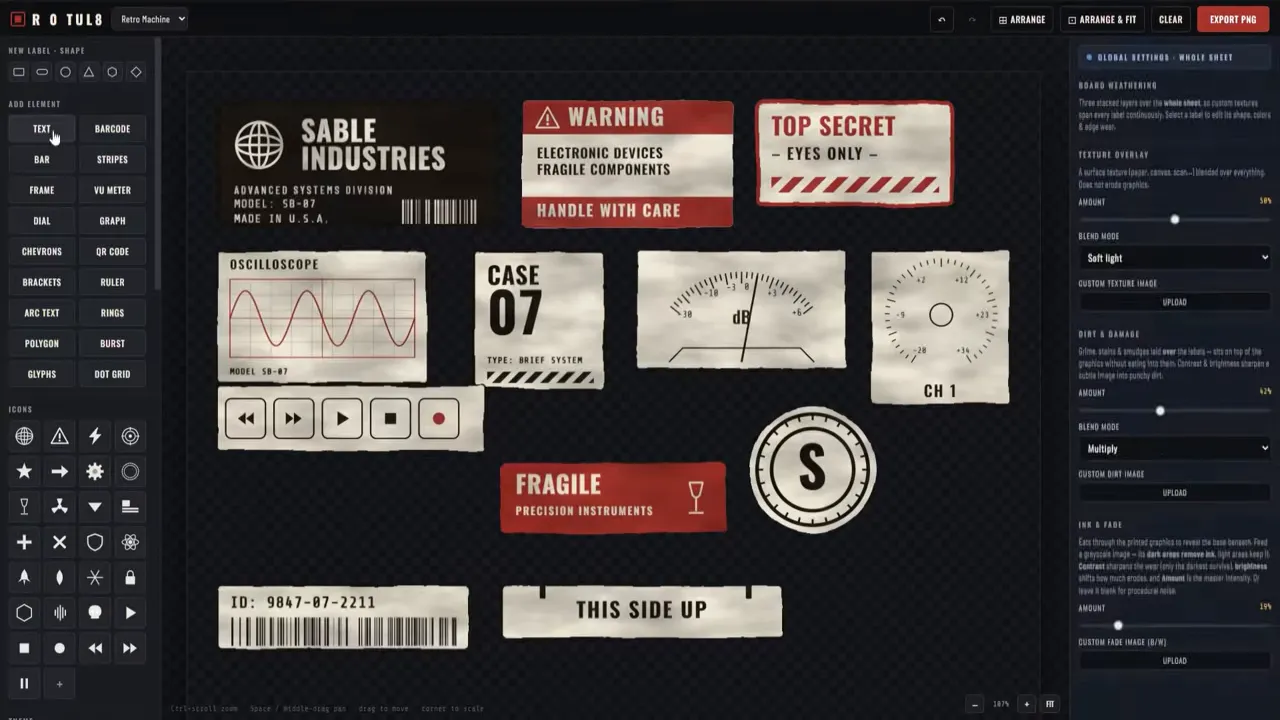
Rotul8 also supports black and white masks for wear and tear directly inside the label design. Some elements are parametric, meaning the artist can adjust them with sliders before export. The final designs can be exported as one high-resolution sheet or as individual transparent PNG files.
This is a useful production habit: rather than painting every tiny graphic by hand, build a small library of reusable labels. A single set of decals can be recolored, distressed, resized, and reused across many props.
Step 9: Set Up the Scene in Marmoset Toolbag 5
After the textures are complete, the low-poly asset and exported PBR texture maps move into Marmoset Toolbag 5. The setup is direct: the artist drags each texture into its corresponding material input.
- Normal maps go into the surface normal input.
- Base color maps go into albedo.
- Roughness maps go into roughness.
- Other PBR maps are assigned to their matching channels as needed.
Sometimes the same underlying material needs different physical behavior on different parts of the asset. In this case, the artist duplicates the material and assigns the duplicate specifically to the screen component.
That separate screen material can then use transmission set to Refraction. The result is a screen that can be seen through, adding a more convincing layered construction to the prop rather than treating the display as a flat opaque surface.
The final stage is presentation. The artist chooses a camera angle that clearly shows the silhouette, sloped control panel, dial, buttons, lever, screen, and material breakup. Lighting should support the surface detail without hiding the most important forms.
Once the camera, lights, resolution, and material settings are in place, the final image can be rendered from the Render tab.
Why This Workflow Works
This approach keeps the creative process flexible from beginning to end. The modeling phase is based on primitive combinations rather than destructive topology edits. The texturing phase uses smart materials, masks, generators, and decals rather than requiring every mark to be painted manually. The rendering phase relies on standard PBR map assignment with a few targeted shader adjustments.
Most importantly, the workflow encourages iteration. An artist can change the base silhouette, reshape a cutout, modify a dial, adjust the material wear, replace a label, or alter the screen behavior without rebuilding the prop from scratch.
Final Thought
A finished hard-surface prop does not need to begin with a complex mesh. A small collection of cubes, cylinders, booleans, containers, and repeated primitives can produce a detailed sci-fi asset with a strong silhouette and plenty of character.
Start with the large shape, use parametric primitives to establish functional details, bake the high-poly design onto a UV’d low-poly mesh, add controlled material variation, then finish with decals and thoughtful lighting. The result is a compact, reusable workflow for turning simple forms into polished props.
Plasticine Smart Materials
This is a small library of 20 smart materials for Adobe 3D Painter to recreate the look and feel of plasticine in 3D. The resources in this mini-pack are pretty simple but totally customizable so would be able to change the face of the plasticine types very easily when texturing.I have also put together a step-by-step video tutorial where I show you how to create a custom plasticine Smart Material in 3D Painter and you can check it out in the related tutorials.
Get resource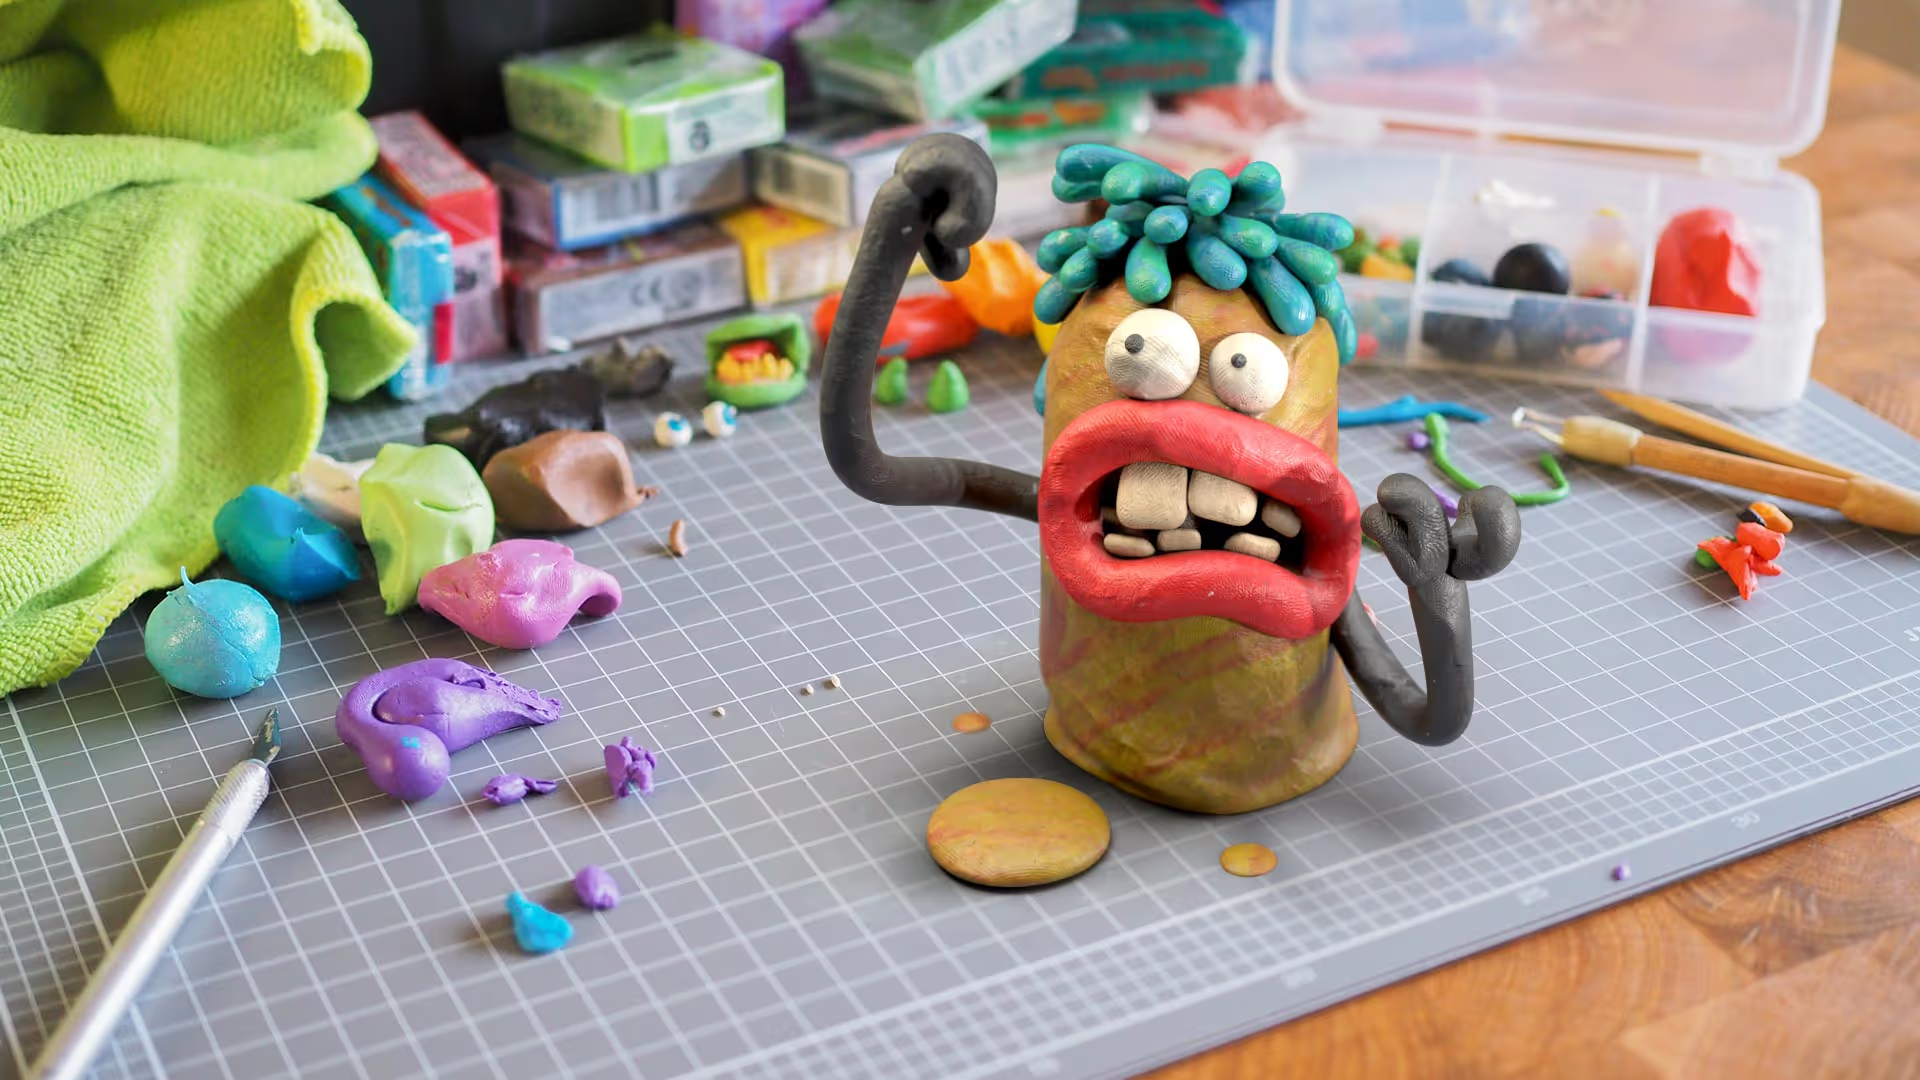
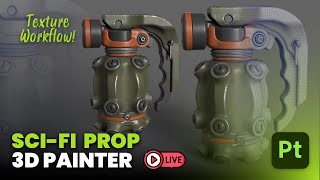
Sci-fi Prop with Substance 3D Modeler
In this casual recap of my latest livestream, we jump into Adobe Substance 3D Modeler to cook up a cool sci-fi grenade concept while chatting about workflows, design tips, AI in art, and answering your live questions. If you missed the stream or want a laid-back walkthrough of this powerful, nondestructive 3D tool, this post’s got you covered.
Check it out