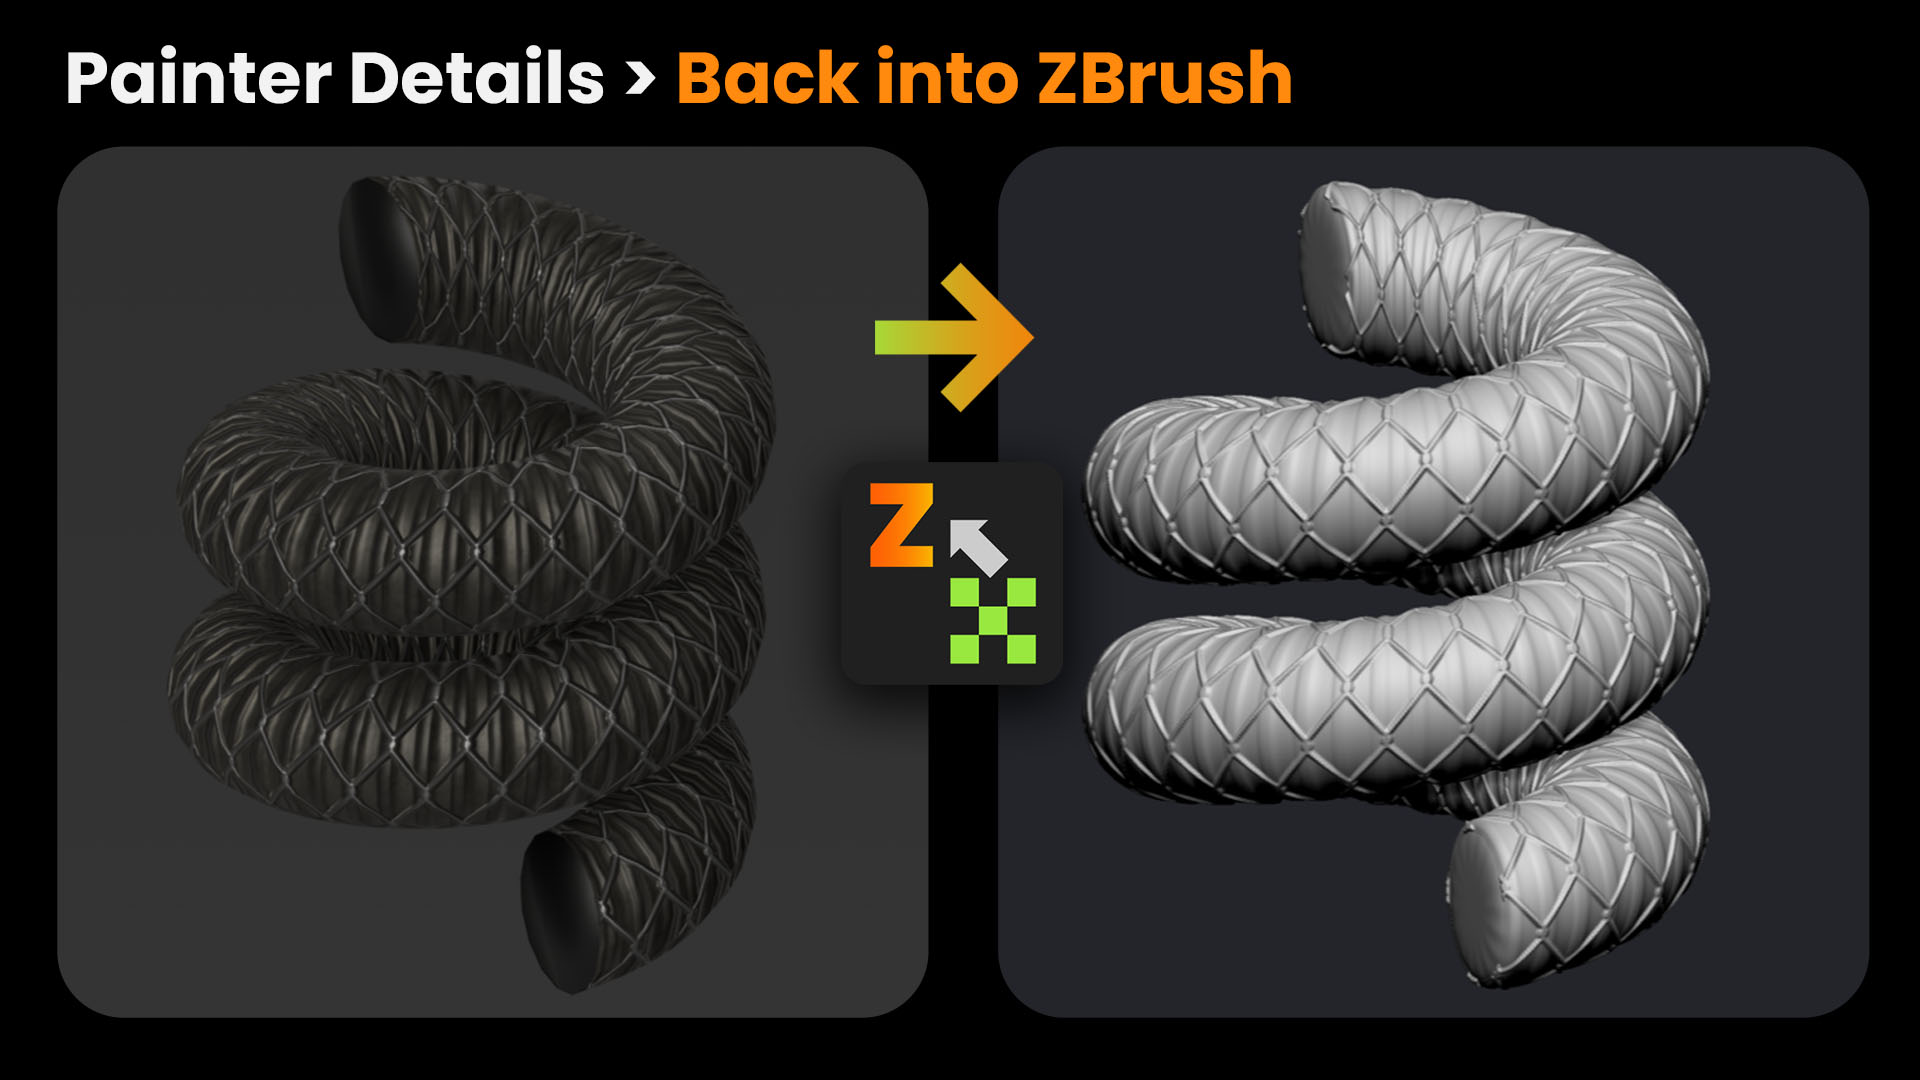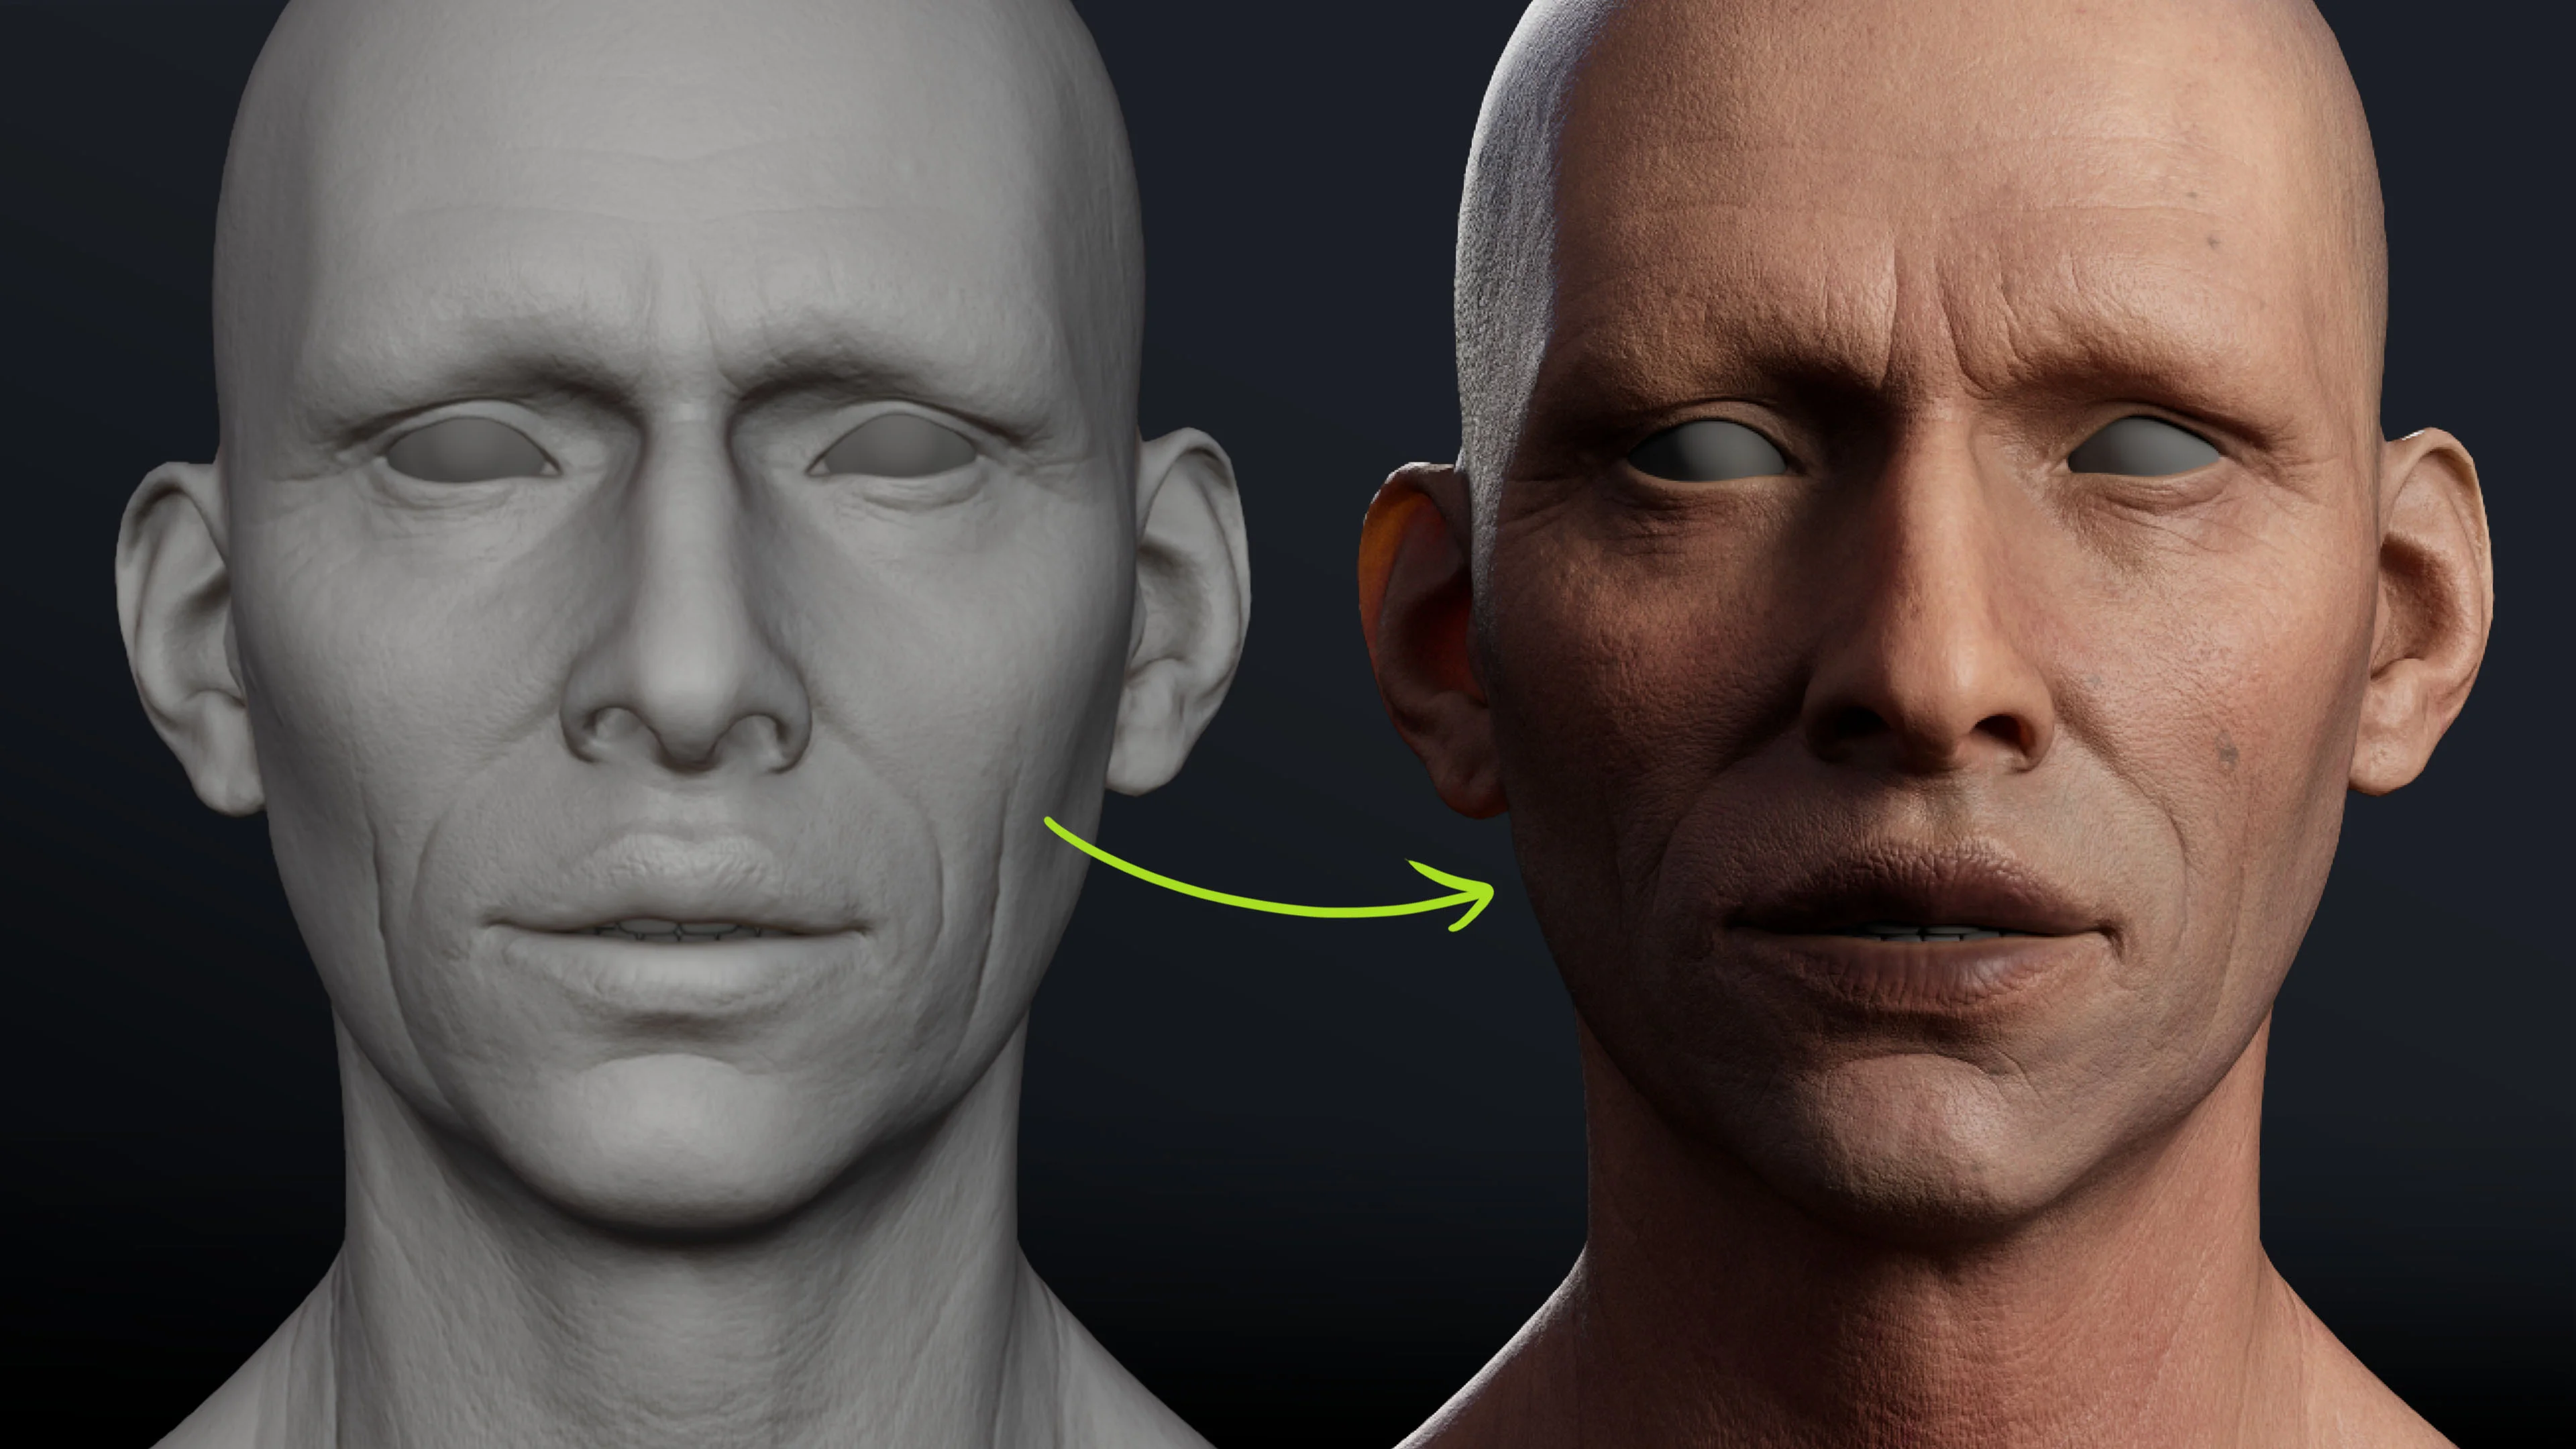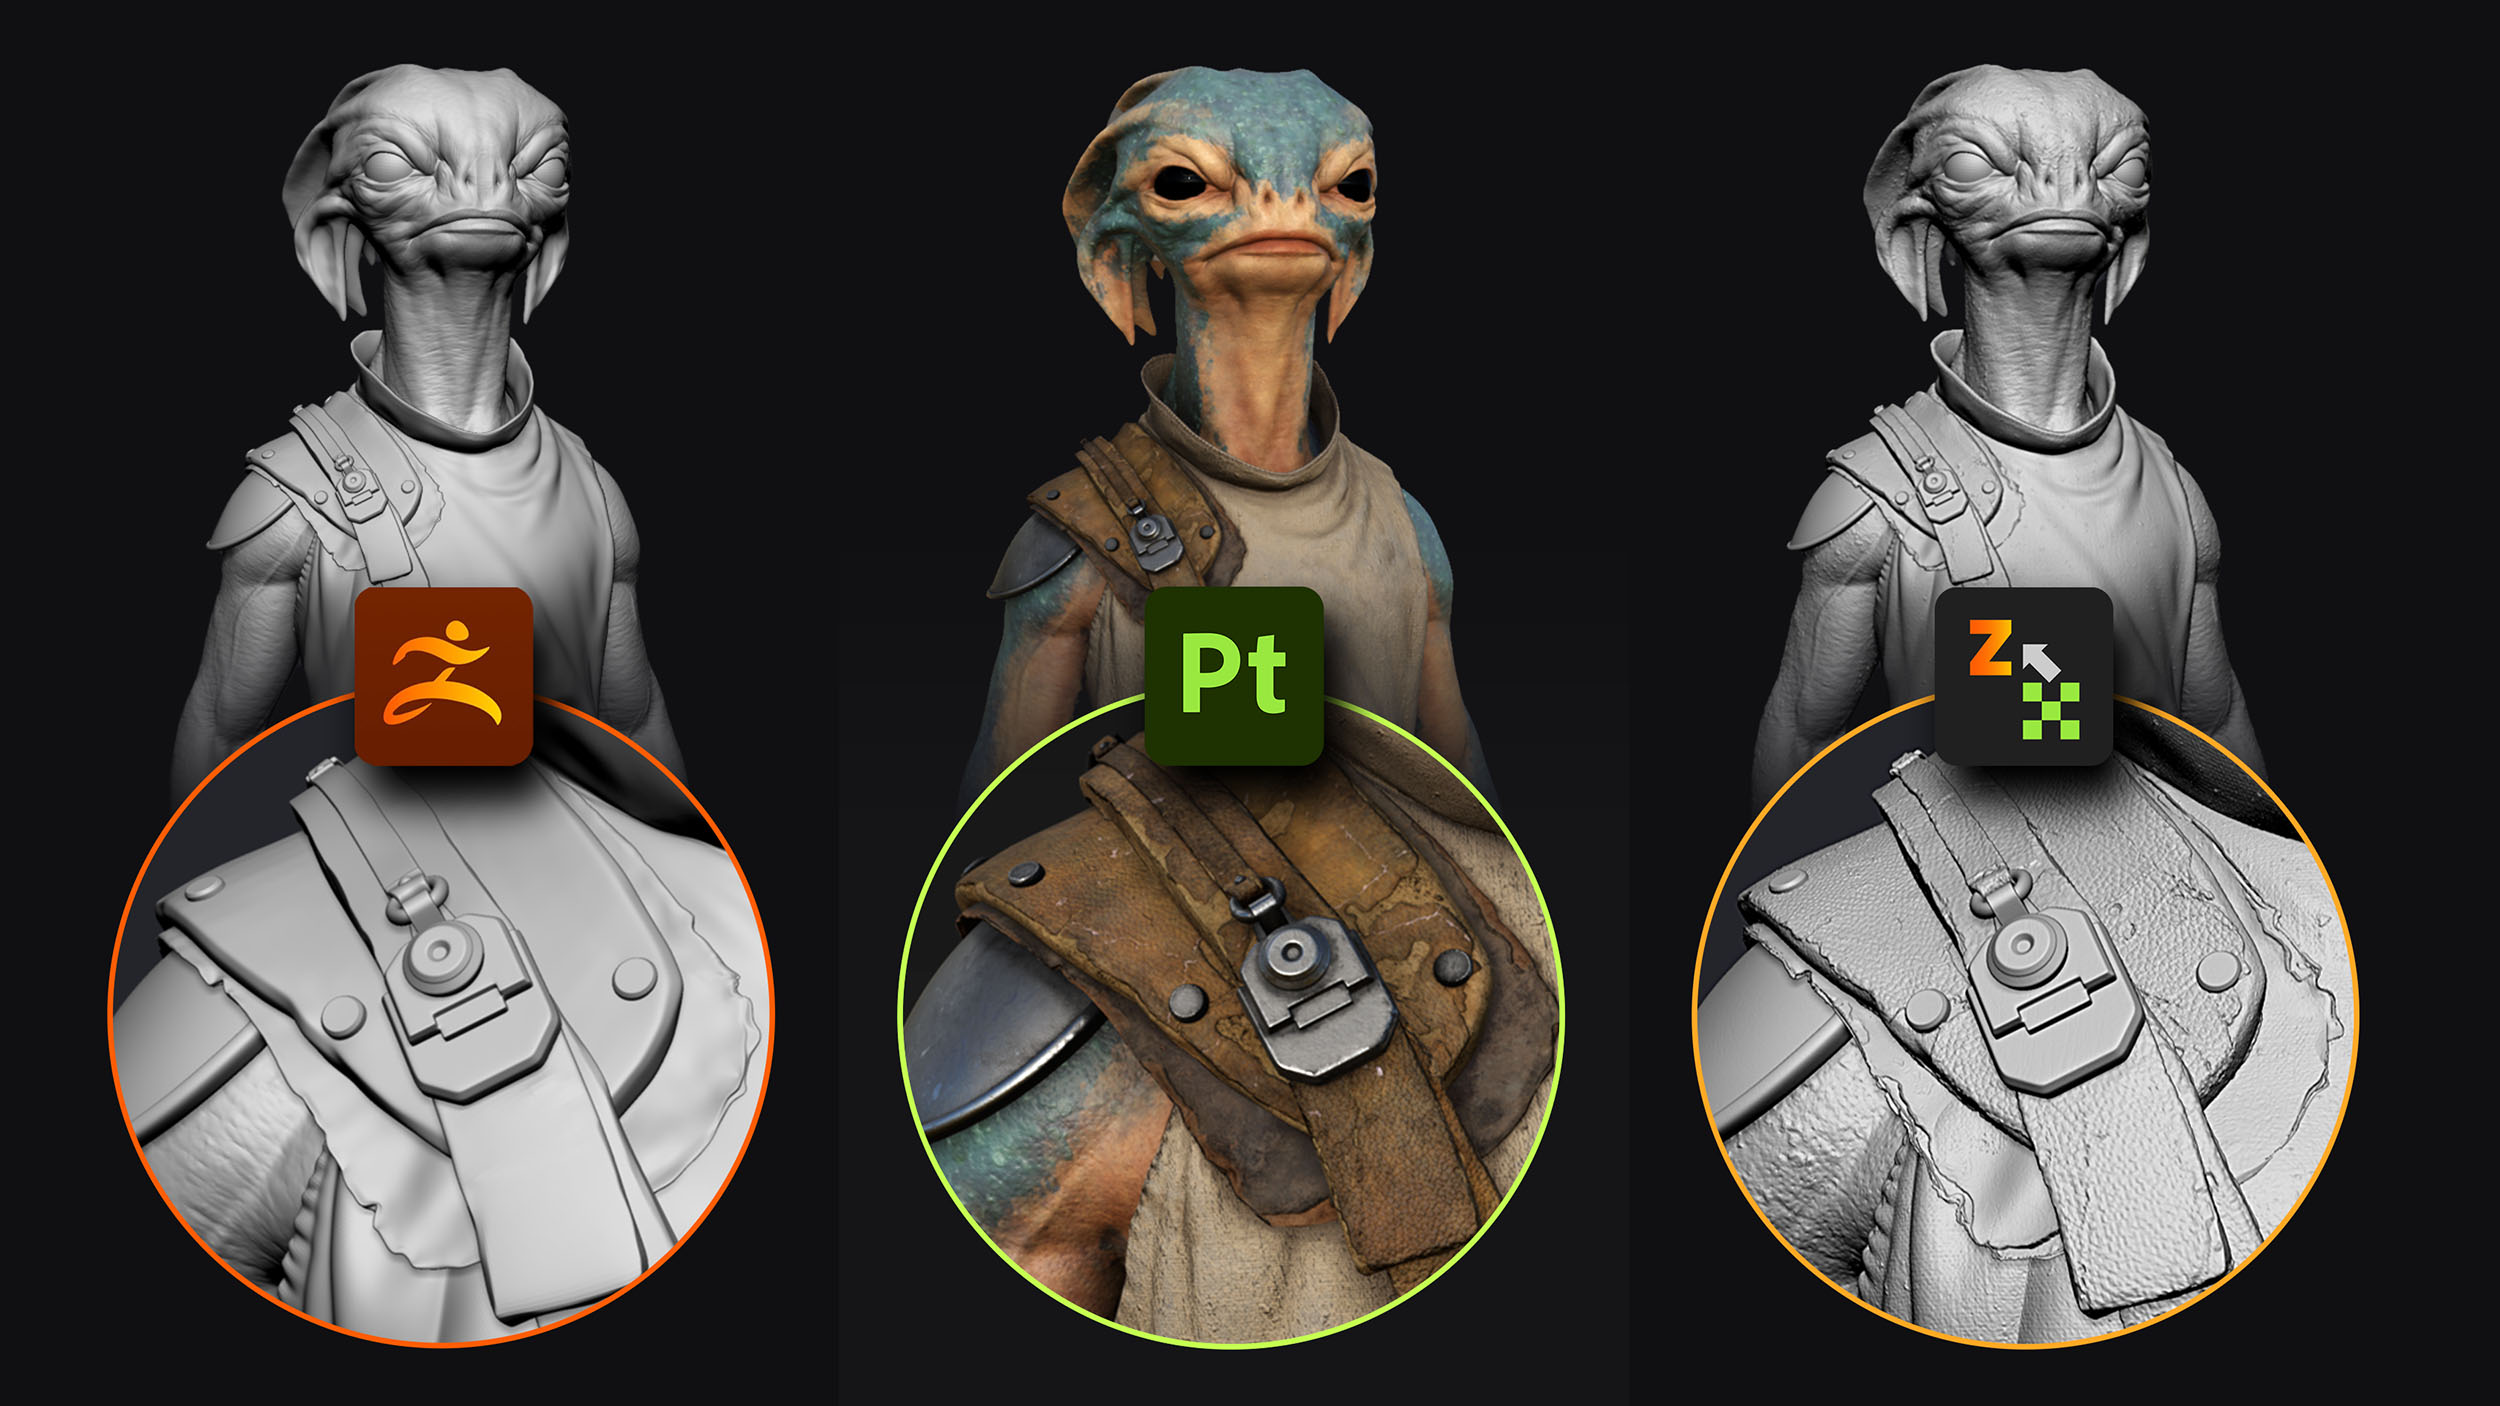





That’s why we built TextureDetails. The plugin automates the process of sending texture-based details from Painter into ZBrush, where you can turn them into real geometry. The transfer comes down to two clicks: Send to ZBrush in Painter, then Load from Painter in ZBrush.
In this tutorial, we’ll walk you through the complete workflow, including the important bits that make the difference: matching names, keeping height values consistent, choosing enough mesh resolution, and applying displacement on an editable layer.
Step 1: Decide Which Details Belong in ZBrush
Before we start transferring anything, there’s an important distinction to make. This workflow doesn’t replace manual sculpting of details in ZBrush. It just gives you another way to build certain types of detail.
For this character, we started in ZBrush with the primary and secondary forms established, along with some indications of smaller facial shapes. Things like the wrinkle direction and skin folds is still something that is done manually. Around an eyelid, for example, the folds should follow the way the skin falls and compresses. Over time, those repeated movements create more prominent creases.

Those decisions benefit from direct sculpting. You could use custom brushes for that work, like the brushes from the creature skin pack... The radial menu and pop-up brush library in my setup come from RadialZ, a separate plugin; they aren’t part of the TextureDetails transfer process.
Repeated surface patterns are a different story. You can certainly apply fabric alphas in ZBrush, use NoiseMaker, or work on sculpting layers. Sometimes that’s all you need. But if you want to explore different patterns or change their scale repeatedly, Painter makes that process much easier.
The idea is simple: sculpt the forms that need deliberate placement in ZBrush, and use Painter for patterns and surface details that benefit from nondestructive editing.
The original reason for building TextureDetails came from students in The Extra Mile who wanted to bring their Painter details into a sculpt for 3D printing. It also became a useful workflow for moving back into ZBrush and continuing the detailing process.
Step 2: Build Editable Patterns and Stitching in Painter
Let’s move into Painter. On this character, the shirt has a fine fabric pattern, the leather has its own surface detail, and the collar includes stitching. These are good examples of details that are useful to keep editable while you work out the final look.
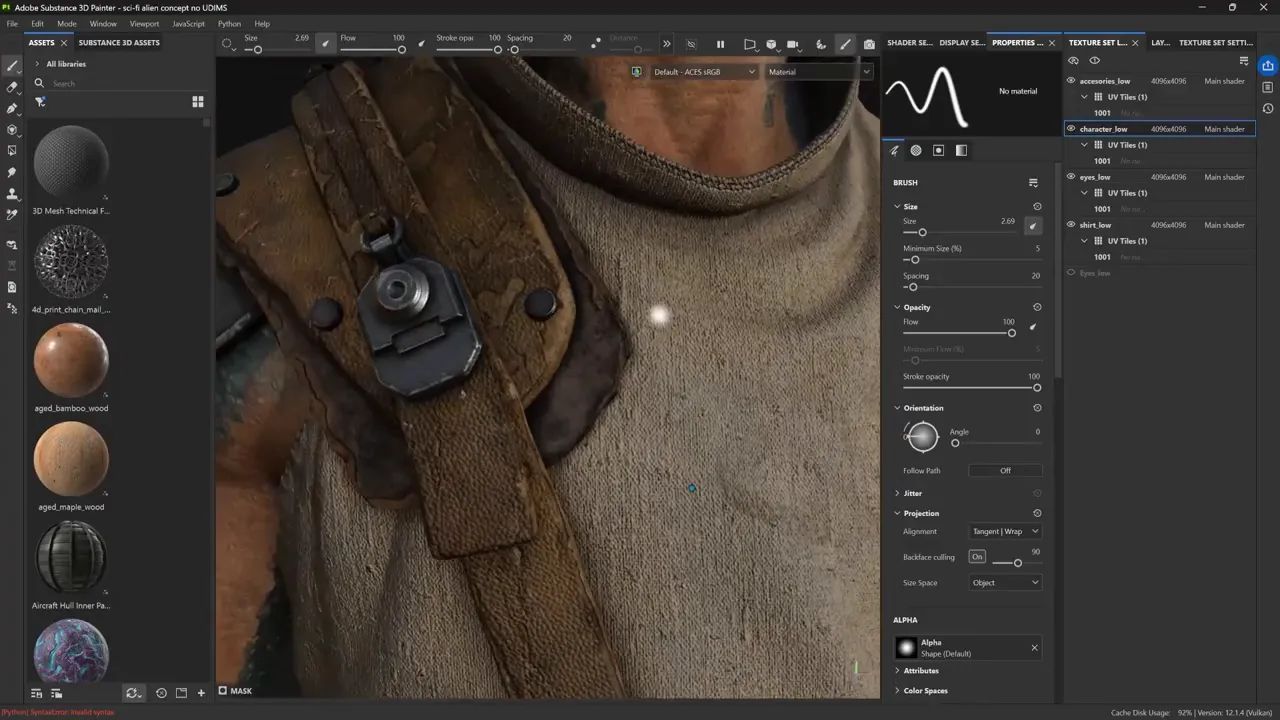
Take the stitching around the collar. It sits on a single layer, and you can select its path with the Path tool to change its placement. If you want another line of stitching, you can create another path. If it doesn’t work, you can extend it, reposition it, or delete it without rebuilding the rest of the material.
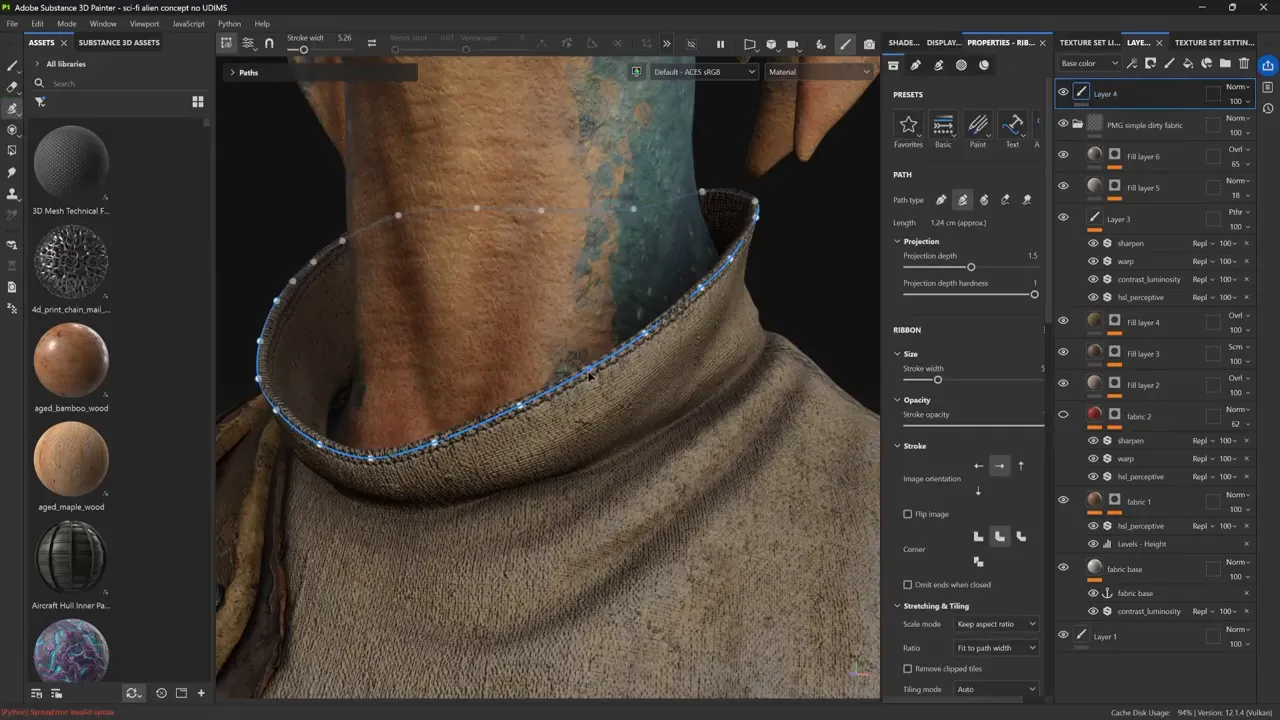
The fabric works in a similar way. One of the masks adds little irregularities and fluff to break up the pattern. By editing that mask and its grunge settings, you can change the amount of variation or adjust the tiling.
This is the part we find particularly useful: you’re not committing to the pattern every time you make an adjustment. You can keep experimenting with:
- The scale and repetition of the fabric pattern.
- The amount of surface irregularity.
- The placement and shape of stitching paths.
- The appearance of leather grain and other fine details.
Once the result feels right, you can send it into ZBrush. Until then, the Painter setup remains editable.
Keep in mind that the depth information we’re transferring comes from height and normal information. A material can look rich because of its color and roughness, but those properties aren’t the sculptural detail. TextureDetails exports the relevant depth information as displacement so ZBrush can use it.
Step 3: Choose Your TextureDetails Export Options
With TextureDetails enabled in Painter, you can find it through the Python menu and open its export window using the plugin icon. The installation process is covered in the README included with the plugin.
The demonstration uses ZBrush 2026, with support also described for ZBrush 2027 and older versions. There is a separate requirement to remember for normal conversion: you need Substance 3D Painter 12 or later to use that feature.
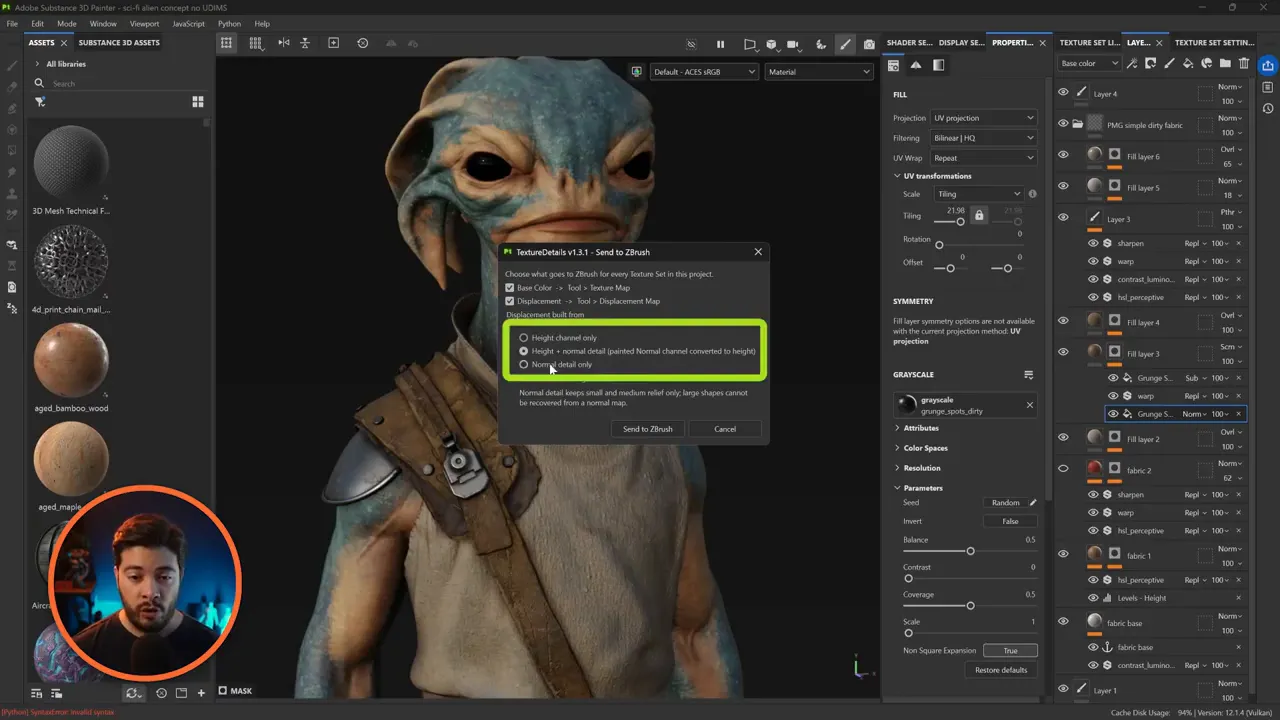
In the export window, choose what you want to send:
- Base color: Sends the base color so it can be used as a texture in ZBrush.
- Displacement: Sends the depth information as a displacement map.
- Normal conversion options: Control how normal detail contributes to the height information. For a material that contains both height and normals, the default option converts normal details into height.
- Normal detail strength: Adjusts the strength of the converted normal detail. We leave it at 1 for this example.
There’s an important limitation here: converting normal maps into sculptural detail is an approximation. It works better for small surface features, such as fine stitching, than for changes that significantly affect the volume of the model.
If a feature needs to push the shape noticeably, build it with height information rather than relying on normal conversion.
Once the options are set, click Send to ZBrush. Behind the scenes, the plugin exports the maps it needs and saves them in a temporary folder.
Wait for the completion message before switching over to load the maps. The export needs to finish so ZBrush has the complete set of files available.
Step 4: Load the Maps and Check Your SubTool Names
Back in ZBrush, open the ZPlugin palette, expand TextureDetails, and click Load from Painter. The plugin loads the exported information for the matching SubTools.
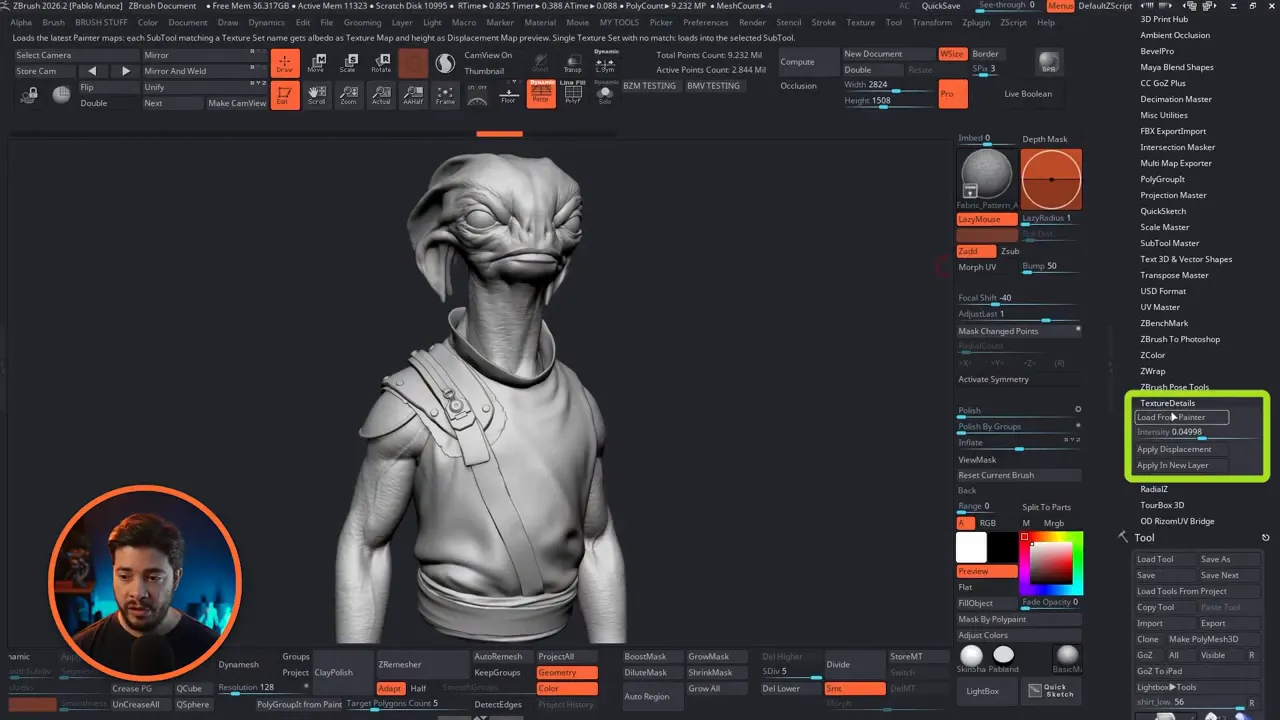
That’s the basic transfer: one click to send, another to load. But there’s one requirement that can make it look as though part of the process hasn’t worked.
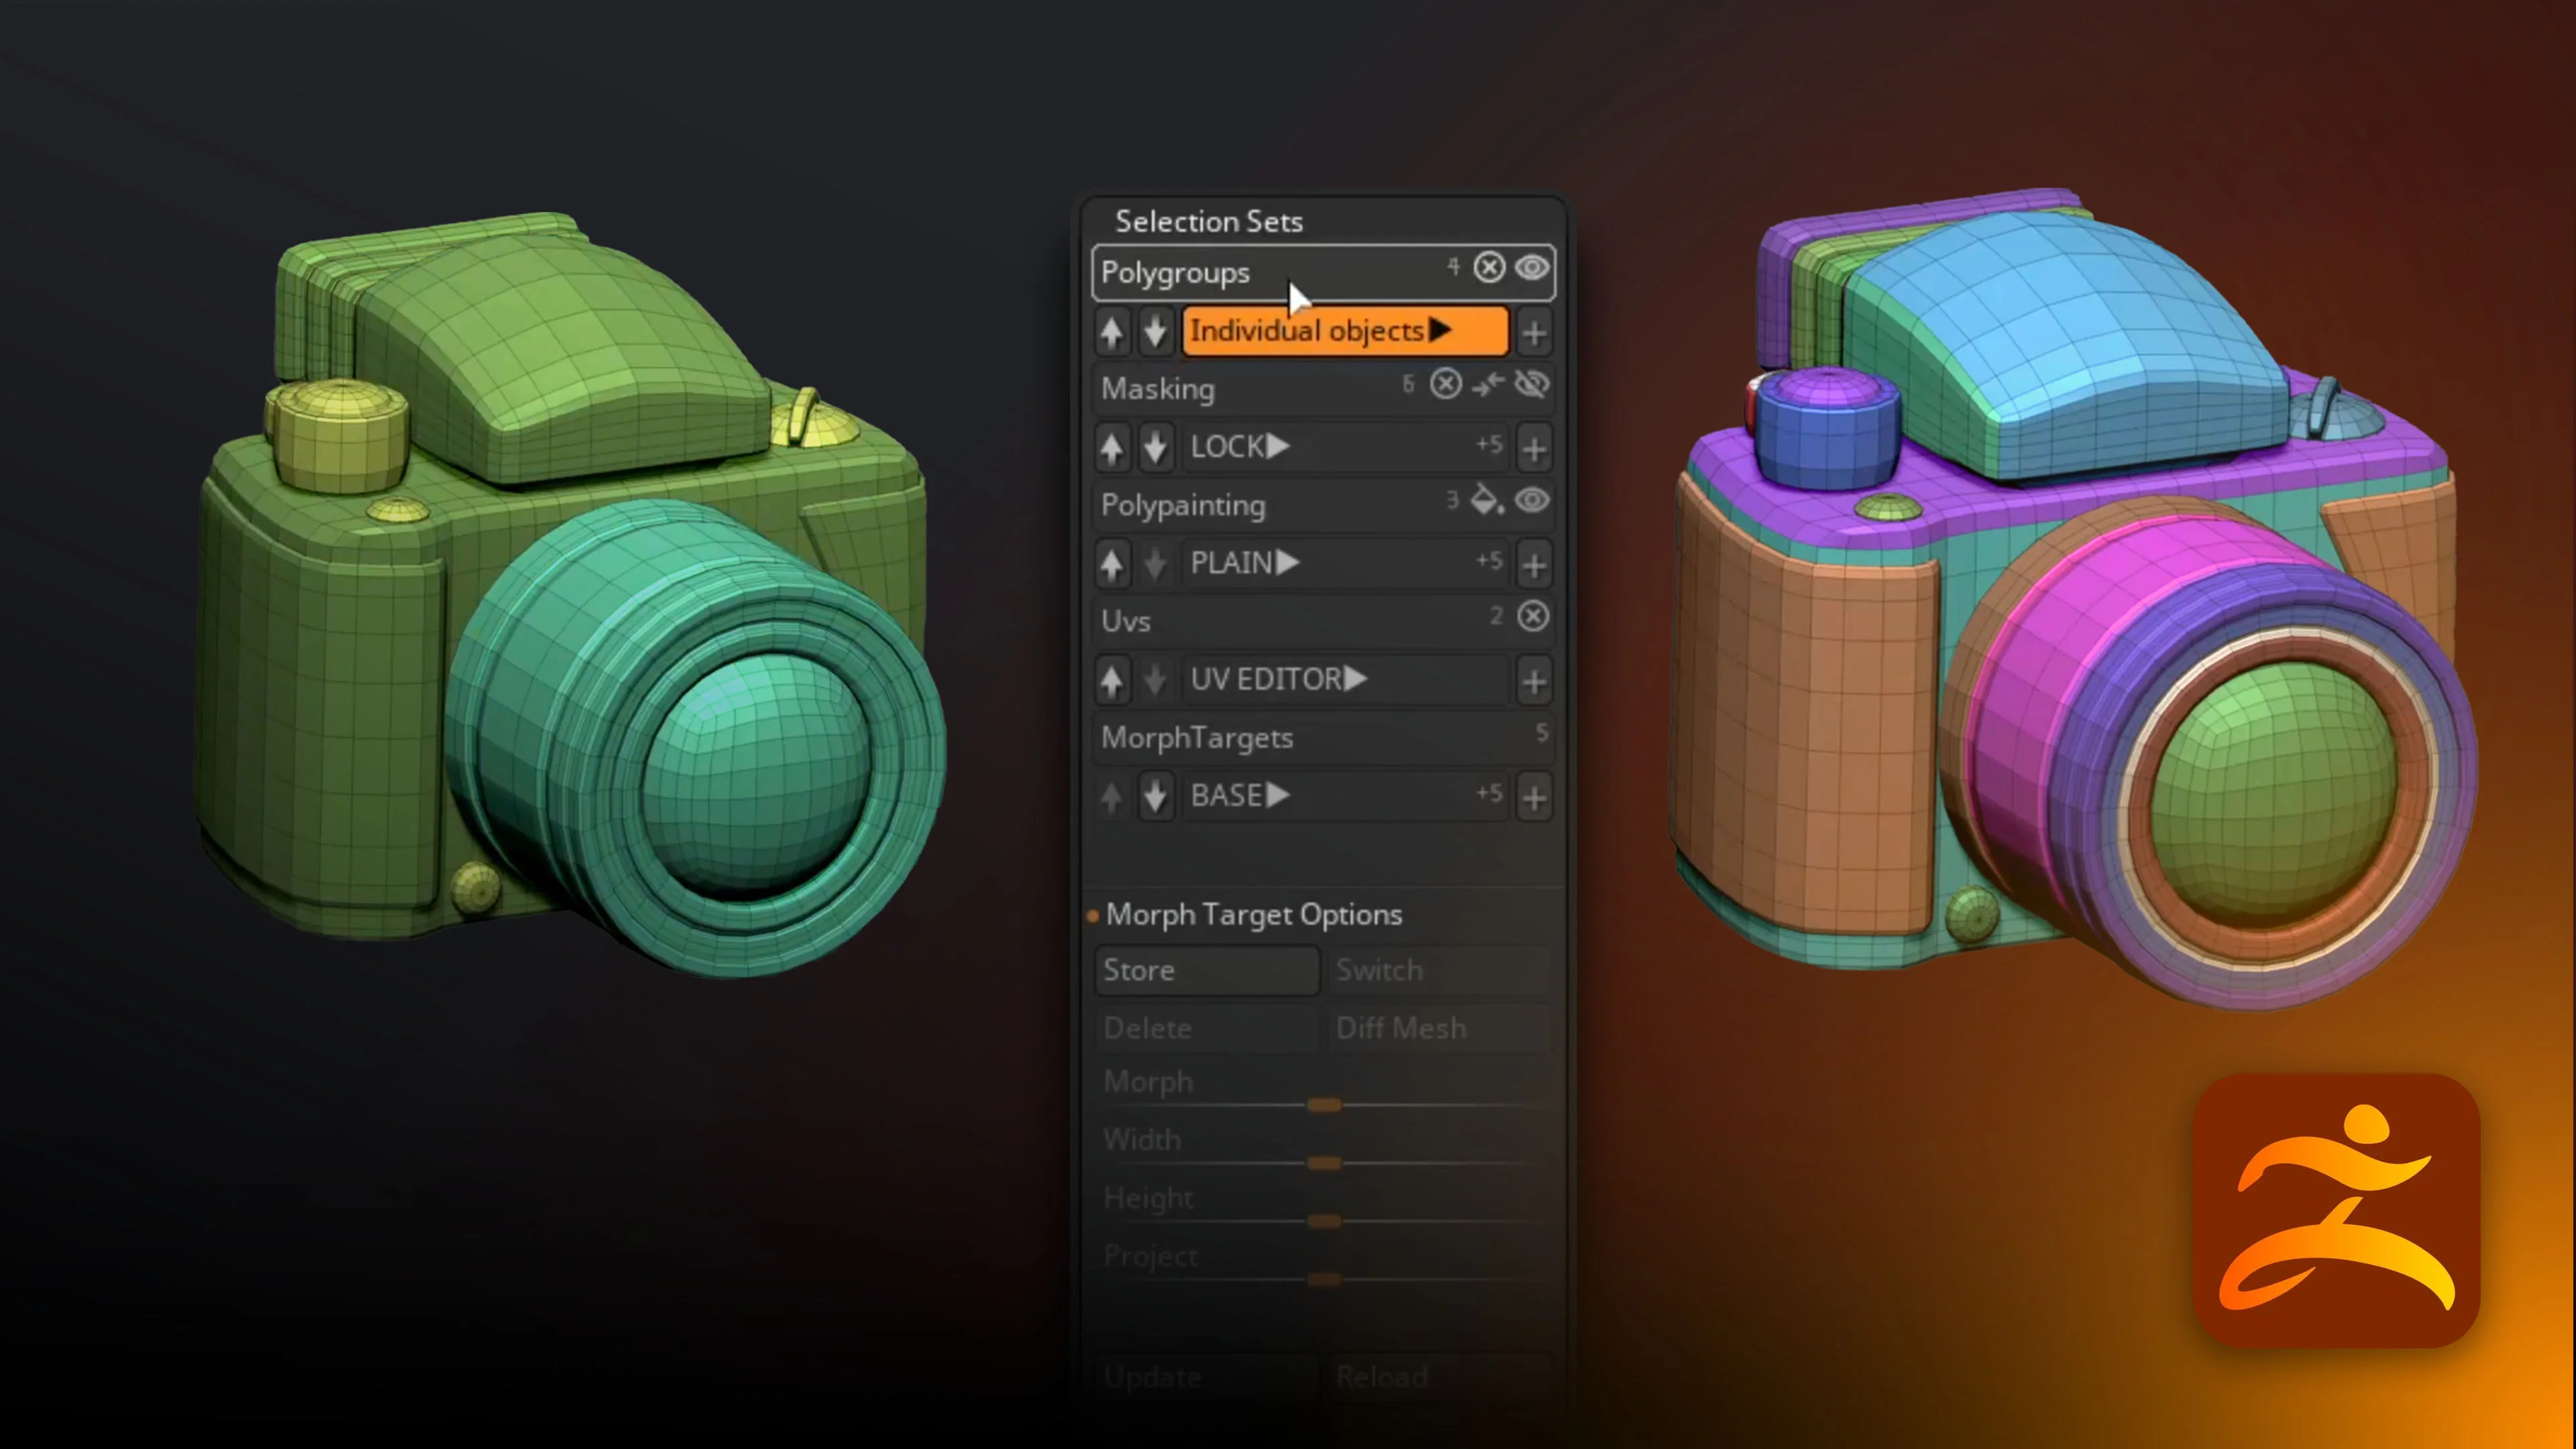
Your ZBrush SubTool names must exactly match the corresponding texture set names in Painter.
In this example, the skin and shirt load correctly, but the accessories remain plain. The problem isn’t the maps. The accessories SubTool has a different name from its Painter texture set, so the plugin can’t match them.
Here’s how to fix that:
- Open Painter’s Texture Set List.
- Copy the exact name of the texture set associated with the missing piece.
- Return to ZBrush and rename the corresponding SubTool using that name.
- Click Load from Painter again.
You don’t need to export everything again for a naming correction. The maps have already been saved; ZBrush simply needs a matching SubTool name to load them onto the right piece.
Once the names match, the accessories receive their texture and displacement information as expected.
Step 5: Fix Height Values That Cause Mesh Intersections
Now let’s deal with a different issue. The details may load correctly, but some pieces can push out too far and intersect neighboring geometry. In this example, that happens around the layered leather on the shoulder.
Before assuming it’s a ZBrush problem, check the source height information in Painter.
Switch the viewport from the material display to the Height channel. This makes it much easier to understand what you’re actually exporting.
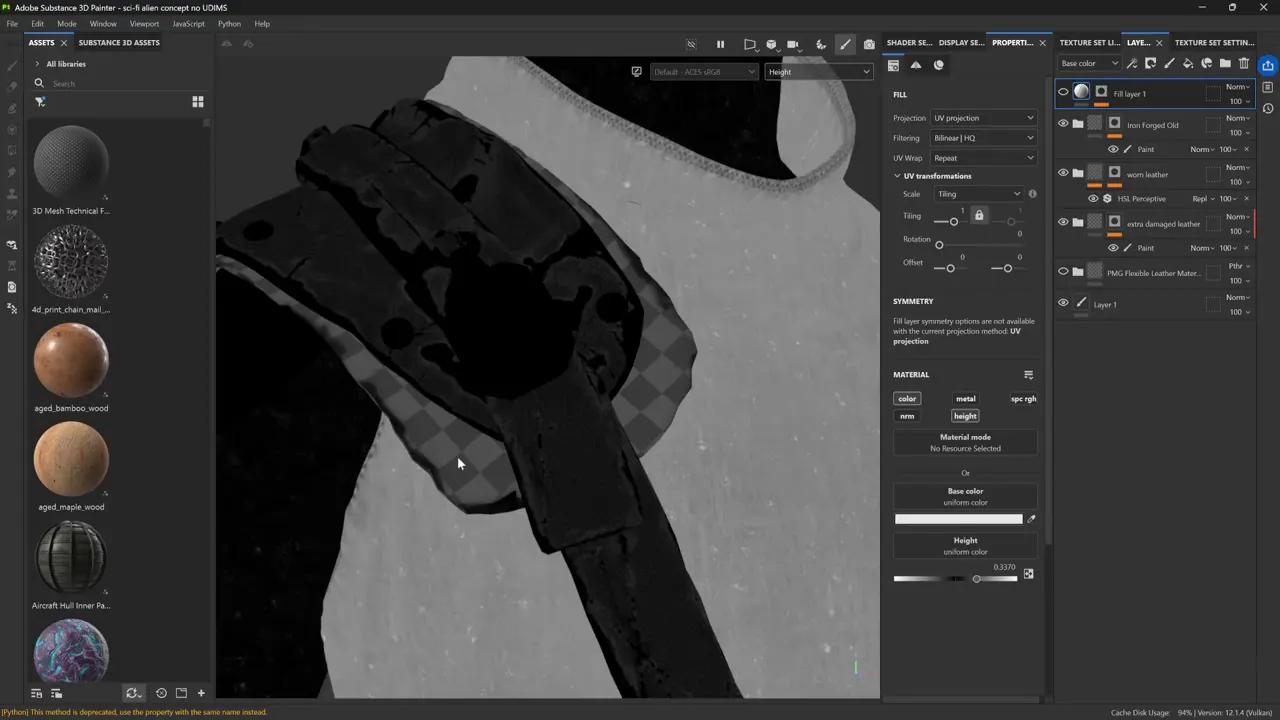
Some areas of the leather show a checker pattern, indicating that there isn’t height information defined there. There are local details, but no consistent baseline underneath them. That can produce an unexpected result when the information is used for displacement.
For this material, we enable a base layer that supplies that missing height baseline. The goal is to give the height channel consistent values rather than leaving gaps beneath the detail.
There’s another issue to look for: the shirt is much brighter in the Height display than the surrounding pieces. That means its displacement will push outward more strongly in this setup.
To demonstrate a correction, we add a fill layer with the height channel enabled and lower its height value. The height blending mode is Linear Dodge, so this adjustment offsets the existing values rather than simply replacing the detail underneath.
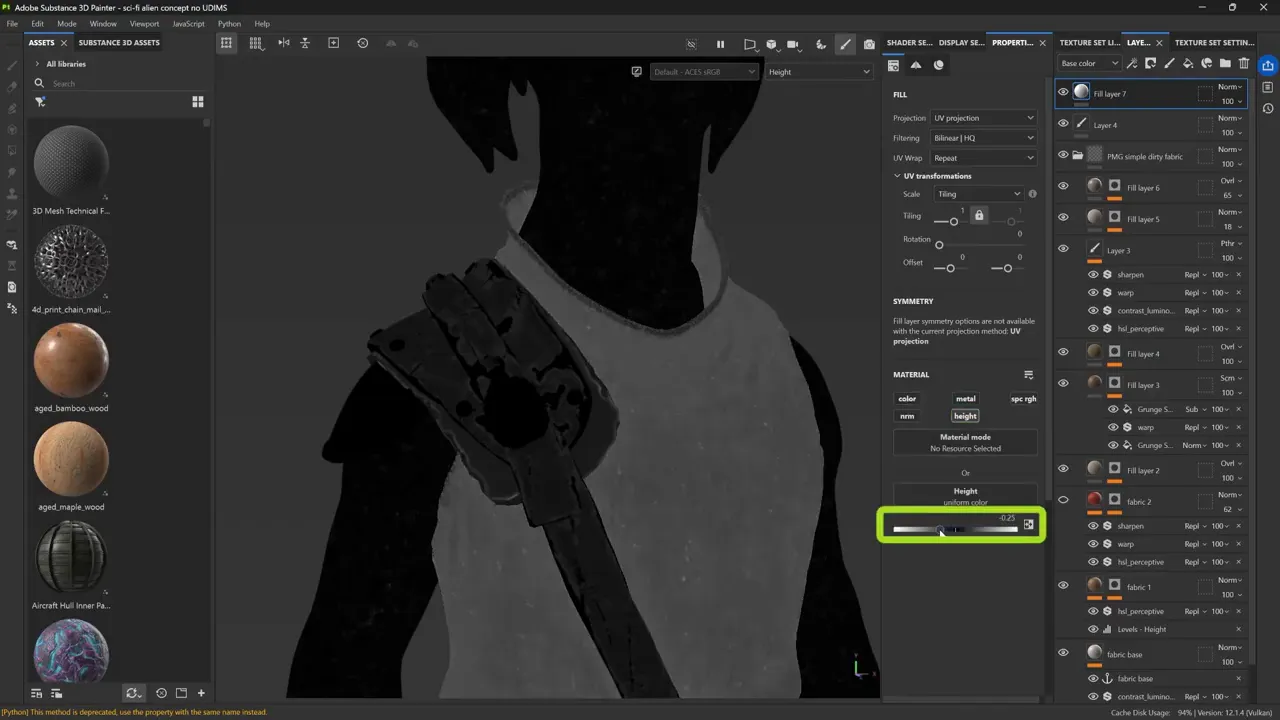
The surface details are still there; their overall height position has been brought down.
This is a quick example rather than the ideal way to organize every material. The important principle is to keep the height baseline consistent across the areas you’re transferring. A material that looks convincing in Painter can still need height adjustments before its details work well as geometry.
If you’re new to Painter, getting comfortable with layers, channels, and blending modes makes these problems much easier to diagnose. That’s the foundation we focus on in SP101, my course for absolute beginners.
Step 6: Resend the Corrected Maps and Inspect the Preview
After changing the height information, open TextureDetails in Painter and click Send to ZBrush again. This time, you are changing the maps themselves, so a fresh export is necessary.
- Wait for Painter’s export-complete message.
- Return to ZBrush.
- Click Load from Painter again.
- Inspect the areas where the meshes previously intersected.
With the height values more consistent, the shoulder pieces no longer intersect in the same way, and the result is much closer to the intended material.
At this stage, though, the displacement is still a preview. It hasn’t yet been applied as sculpted geometry.
You can check this by isolating a SubTool and toggling its displacement display in the Displacement Map section. With displacement off, you see the clean mesh. With it on, you see the transferred surface pattern.
That preview is useful for checking the result before committing the details to the mesh.
Step 7: Apply Displacement to a New Sculpting Layer
Once the preview looks right, you can apply the displacement directly or use TextureDetails to apply it into a new layer.
We prefer the layer option here because it keeps the transferred detail separate. Instead of treating the application as an all-or-nothing decision, you can toggle the layer and adjust its intensity afterward.
The process is straightforward:
- Select the SubTool you want to work on.
- Check its displacement preview.
- Use the TextureDetails option to apply the displacement into a new layer.
- Open the Layers controls to toggle or reduce the applied detail.
There is one more thing to check before applying: mesh resolution.
On the shirt, the fifth subdivision level contains roughly 2.8 million polygons, but a close inspection still reveals faceting. Fine fabric information needs enough geometry to describe it. We undo the application, subdivide once more, and reapply the displacement into a new layer.
The extra resolution allows the transferred pattern to come through more clearly. It is a heavy mesh for a single clothing item, so the point isn’t to subdivide everything indiscriminately. It’s to recognize when the detail is being limited by the geometry.
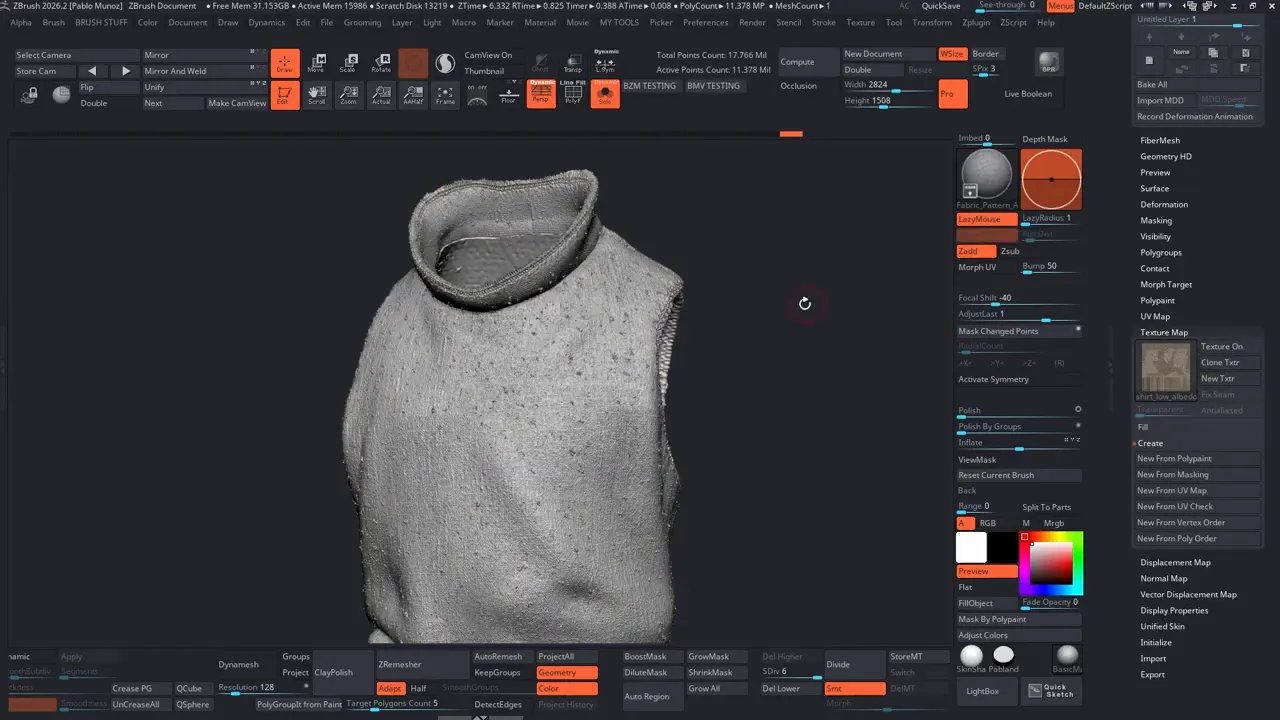
Finally, turn off the color texture. This is a useful check because you can see the surface relief without the material colors distracting from it. The pattern is now part of the sculpt, not just a colored texture on top.
Step 8: Fine-Tune Displacement Strength and Continue Sculpting
Different pieces may need different displacement strengths. On the accessories, applying the imported information too strongly produces an exaggerated, damaged-looking surface.
Because that result is on a layer, you can delete the layer and try again without keeping the unwanted deformation.
Return to the SubTool’s Displacement Map controls and adjust the intensity before applying it again. A value of 0.05 is a useful starting point in this workflow, but it isn’t a universal setting.
For these accessories, we test a lower value:
- 0.05: Pushes the surface too much.
- 0.01: Produces too little detail for the intended result.
- 0.02: Gives a better balance on this particular piece.
Treat those as example values, not a preset for every model. Check the result, undo an unsuitable application, and adjust until the detail sits naturally on the form.
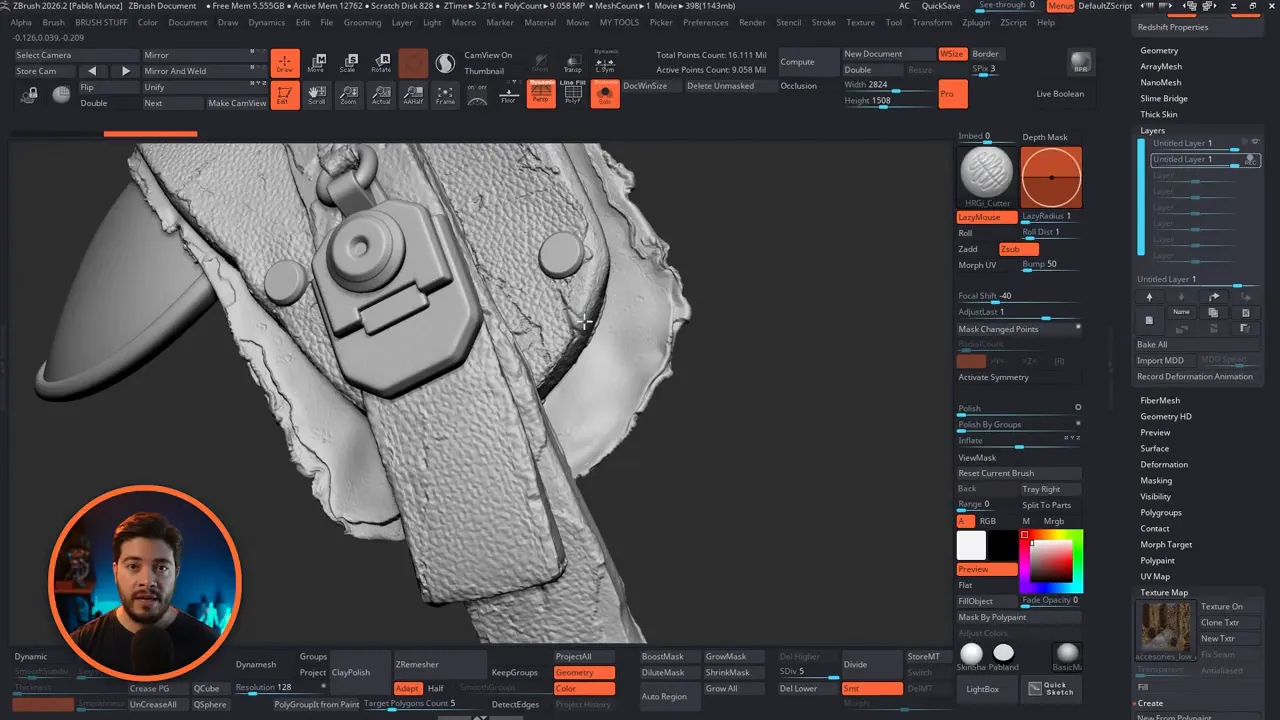
Once the details are applied, you can continue working with your ZBrush brushes, refine the transferred patterns, or move on to preparing the model for 3D printing.
That’s the real benefit of this workflow. Painter gives you the flexibility to explore patterns, masks, and paths without committing too early. ZBrush gives you direct control over the resulting sculptural surface. TextureDetails handles the transfer between them.
Keep the names matched, the height values consistent, and the mesh dense enough for the detail. With those pieces in place, you can take the patterns you built in Painter and make them part of the sculpt itself.
RadialZ - Radial Menus for ZBrush
RadialZ puts your whole ZBrush library one gesture away. Press a hotkey and your brushes, alphas, textures and materials appear at your cursor. Click, hover or flick to pick, and stay in the flow.
Get resource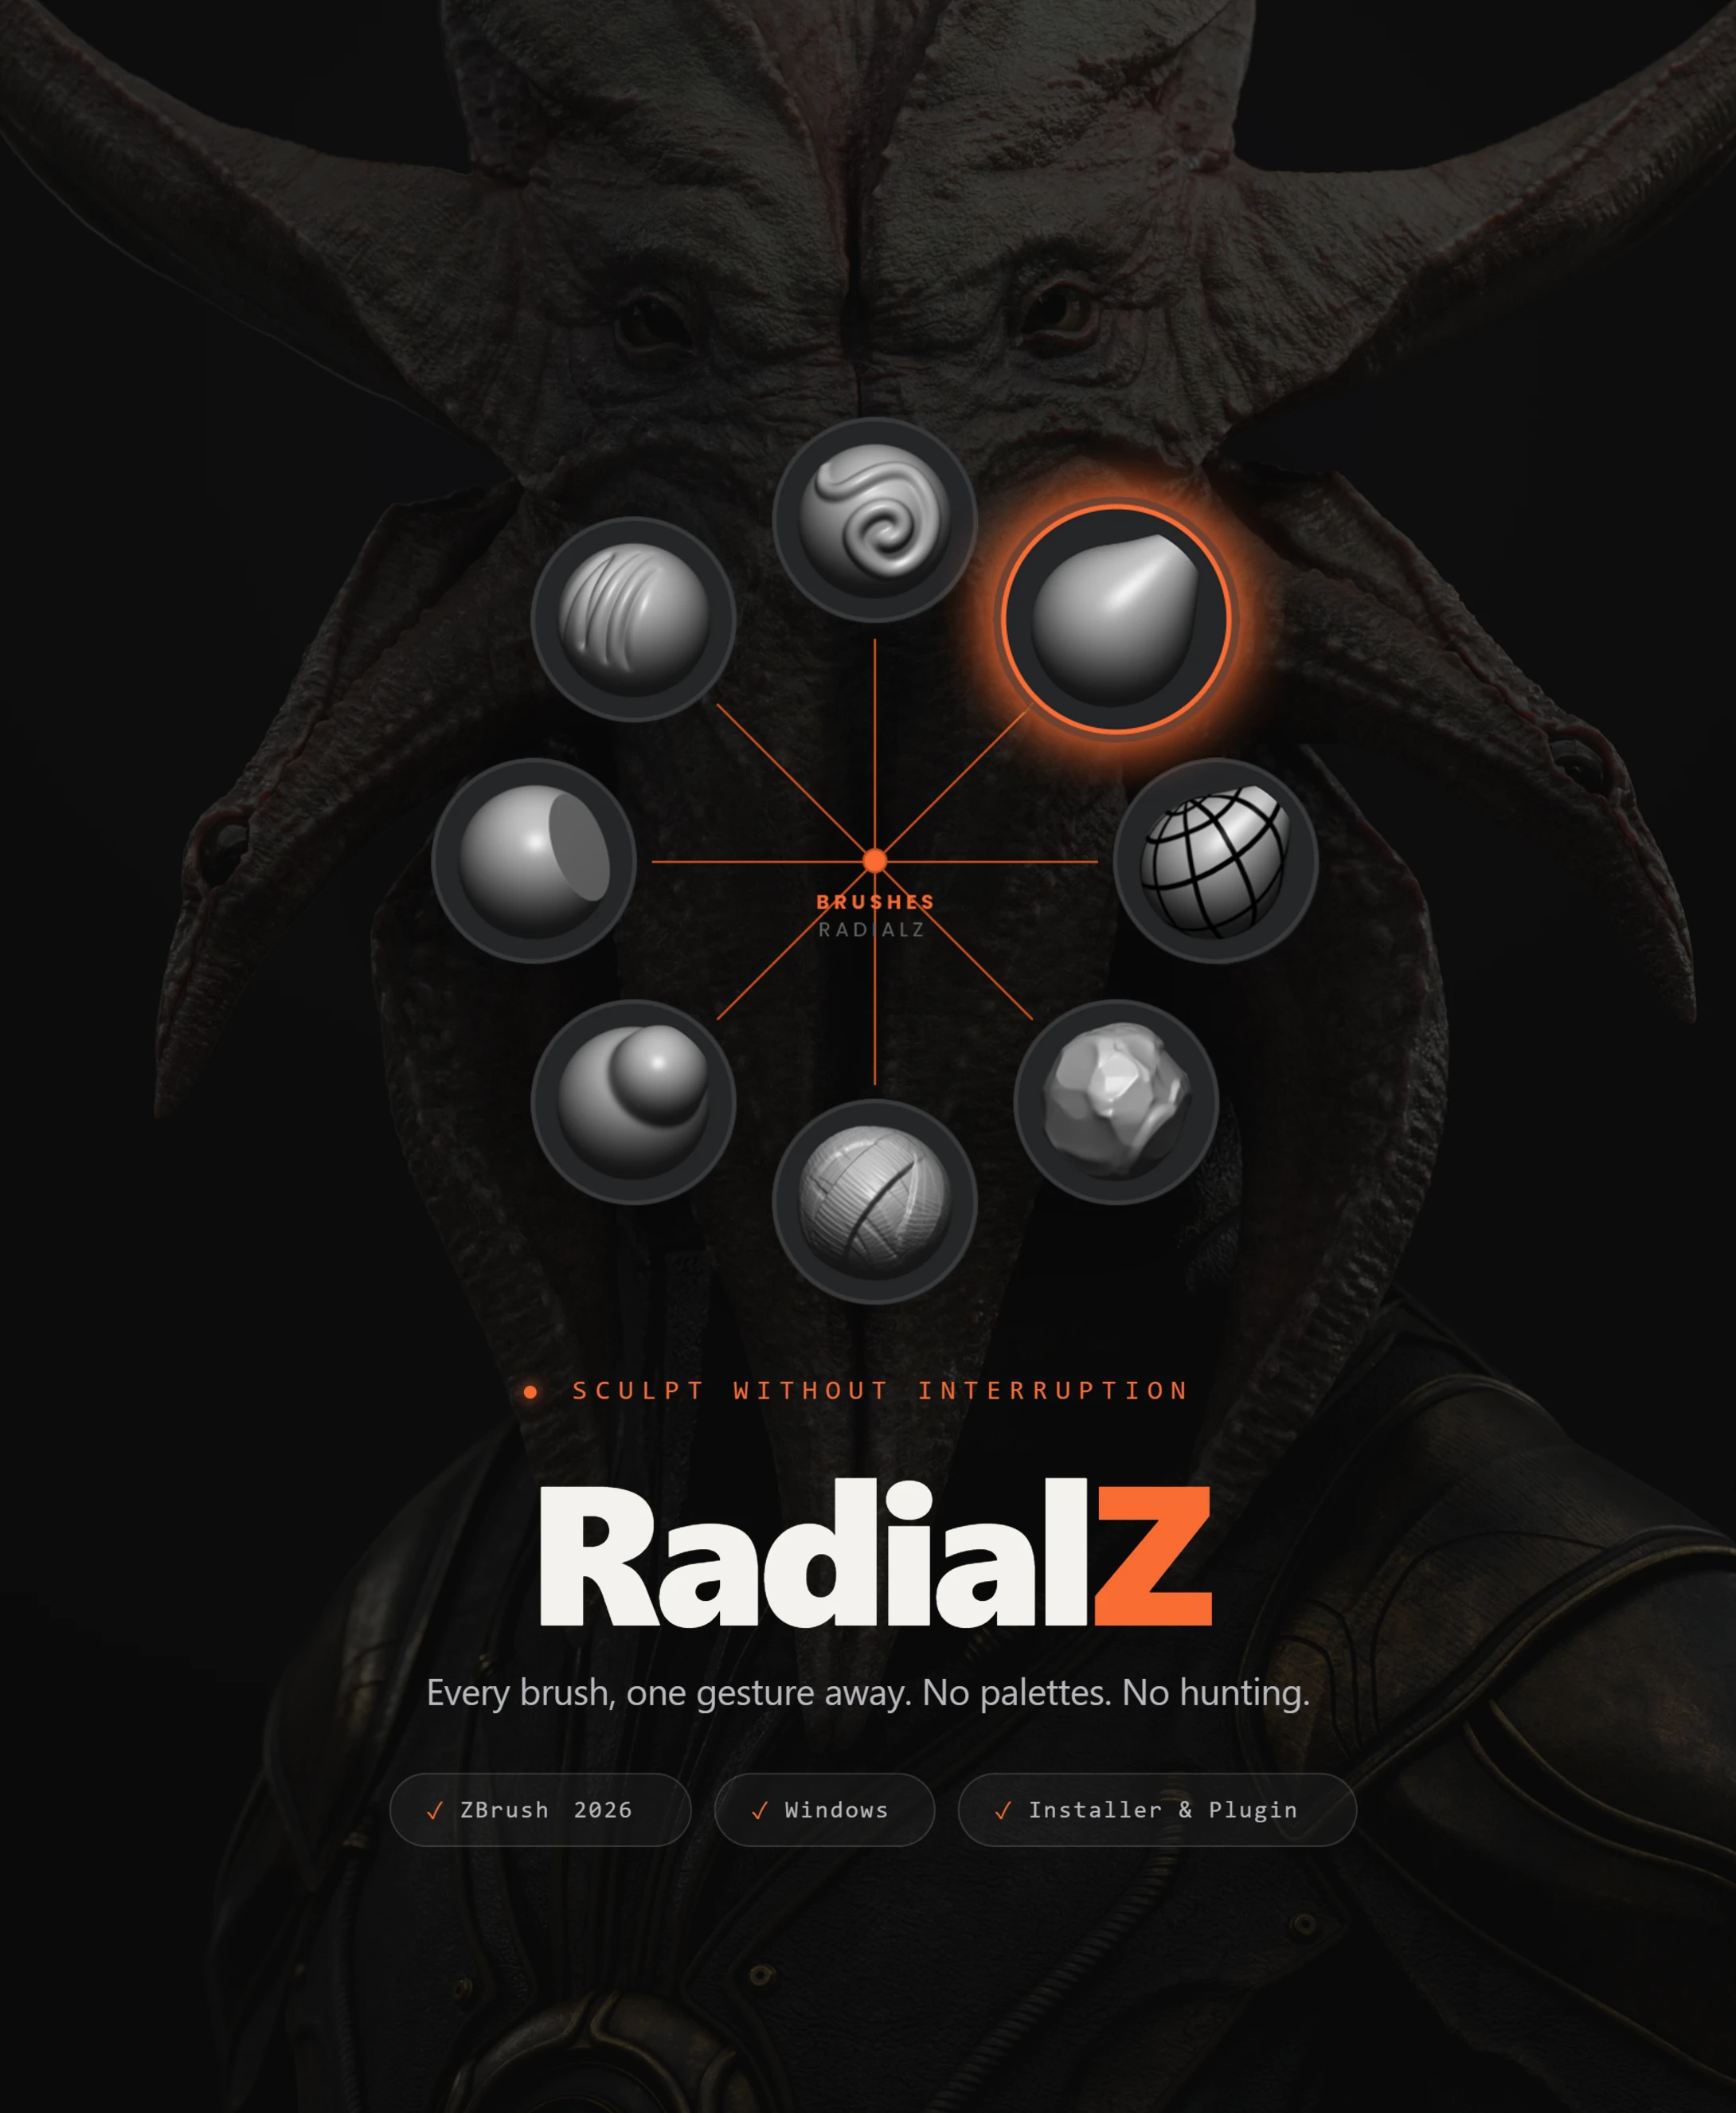
The TextureDetails Plugin
A free plugin for Substance 3D Painter and ZBrush. One click in Painter, one click in ZBrush, and your Base Color and painted details land on the right SubTools.
Check it out